Learning how to fix a pallet jack that won’t lift starts with understanding that lift loss is almost always a hydraulic pressure problem, not “weak muscles” or operator error. When the closed hydraulic circuit loses oil, traps air, or bypasses internally through worn seals and valves, handle strokes stop translating into fork height. This guide walks you through how manual pallet jack hydraulics work, the most common failure modes, a step‑by‑step troubleshooting and repair process, and how to decide between component rebuilds and full replacement. You will finish with a practical maintenance checklist that improves safety, reduces downtime, and keeps your jacks lifting at their rated 2,000–2,500 kg capacity.
Understanding Why A Pallet Jack Fails To Lift
Understanding why a pallet jack fails to lift means tracing how handle force should become hydraulic pressure and identifying where pressure is lost through air, low oil, worn seals, misadjusted valves, or mechanical damage. When you understand these failure points, knowing how to fix a pallet jack that won’t lift becomes a structured engineering exercise instead of guesswork.
A manual pallet jack is a compact hydraulic system: handle strokes drive a small pump, pump pressure moves oil into a lift cylinder, and that cylinder raises the forks. Any break in this chain—mechanical or hydraulic—shows up as “won’t lift,” “lifts but sinks,” or “lifts very slowly.” In this section we break down how the hydraulics work and the most common failure modes you will see on the shop floor.
How Manual Pallet Jack Hydraulics Work
Manual pallet jack hydraulics convert short handle strokes into high-pressure oil flow that extends a lift cylinder, and any air, low oil, or valve leakage in this closed circuit directly causes lifting failures.
At its core, a pallet jack is a closed hydraulic circuit that multiplies the operator’s effort. The handle drives a pump piston, which pulls oil from a small reservoir and pushes it through check valves into a lift cylinder. That cylinder translates hydraulic pressure into linear motion to raise the fork frame and load. A separate lowering valve meters oil back to the reservoir for controlled descent. Typical pump assemblies include a reservoir, pump piston, suction and discharge check valves, lift cylinder, and lowering valve. When you are working through how to fix a pallet jack that won’t lift, you simply trace faults along this chain: handle motion → pump piston travel → check valve sealing → cylinder integrity → return flow control.
| Hydraulic Component | Function In Lift | Typical Failure Effect | Field Impact On Operator |
|---|---|---|---|
| Handle & linkage | Transmit manual force to pump piston and control valve | Lost motion, limited stroke, wrong valve position | Handle moves “too easy,” little or no fork movement |
| Pump piston | Generate flow and pressure from each handle stroke | Internal leakage past seals, worn bore | Many strokes needed, weak or no lift under load |
| Suction check valve | Let oil enter pump from reservoir | Does not open or seal correctly | Pump “cavitates,” jerky or zero lifting |
| Discharge check valve | Direct pressurized oil to lift cylinder | Leak-back to pump or reservoir | Forks rise then sink, can’t hold load |
| Lift cylinder & piston seals | Convert pressure to upward fork motion | Seal wear, scoring, internal bypass | Forks drift down under static load |
| Lowering / release valve | Return oil for controlled lowering | Stuck partially open or misadjusted | Jack will not build or hold pressure |
| Reservoir & oil | Store and supply hydraulic fluid | Low level, contamination, aeration | Slow, noisy, or no lifting; erratic behavior |
Because the system is small, it is very sensitive to air and oil level. Trapped air compresses instead of transmitting pressure, so the handle feels “spongy” and the forks barely move. Low oil level—often more than 25% loss from external leaks—starves the pump and introduces more air, giving similar symptoms of slow or no lifting. Air ingress, fluid loss, or valve malfunction all reduce system pressure and can prevent lifting.
💡 Field Engineer’s Note: If the handle pumps with almost no resistance and the jack neither lifts nor makes “effort” noise, think air and low oil first; if resistance is high but nothing moves, think blocked or stuck valves.
How pressure creates lift (simple physics view)
Pressure (P) in the oil times piston area (A) equals lifting force (F): F = P × A. Manual pallet jacks run at relatively high pressure in a small cylinder area to get 2,000–2,500 kg capacity. Any internal leak drops effective pressure, so the same handle effort produces less fork force, which you see as slow lifting or a complete failure to raise rated loads. Typical rated capacities of 2,000–2,500 kg depend on maintaining this pressure.
Typical Hydraulic And Mechanical Failure Modes
Typical pallet jack failure modes fall into a short list—air in the system, low or contaminated oil, worn seals and valves, mis-set release valve, overloading damage, and linkage wear—and each produces distinct lifting symptoms.
When you are deciding how to fix a pallet jack that won’t lift, start by matching field symptoms to likely root causes. A jack that will not lift at all usually has severe air entrapment, very low oil, or a dead pump/valve. One that lifts but will not hold a load usually leaks internally past cylinder seals, check valves, or the lowering valve seat. Slow lifting under rated load points to partial restrictions, worn pump elements, or aerated fluid.
| Observed Symptom | Most Probable Technical Causes | Field Impact |
|---|---|---|
| No lift at all (empty or loaded) | Very low oil level; severe air in hydraulic circuit; stuck-open release valve; failed pump piston or check valves | Unit is unusable; high risk of unsafe “over-pumping” attempts by operators |
| Lifts but immediately sinks back down | Internal leakage past lift cylinder seals; leaking discharge check valve; lowering valve not fully closing | Cannot safely stage loads; fails basic static load-hold tests |
| Very slow lifting under rated load | Minor air ingress; partially blocked flow path; worn pump elements; contaminated or degraded oil | Lower pick rates, operator fatigue, and tendency to overload or abuse equipment |
| Pumps but will not lift rated load (only light loads) | Worn pump seals and check valve seats; pressure relief valve opening early from wear or contamination | Hidden capacity loss; high risk of overload attempts beyond safe working limit |
| Handle movement with little resistance | Air in system; low oil; misadjusted or stuck-open release valve; broken or loose linkage | Operators sense “spongy” feel; often first complaint before total failure |
| Jerky lifting, difficult pumping | Debris or blockages in moving parts; mechanical binding in linkages; contaminated oil with particles | Higher ergonomic risk, inconsistent control, accelerated wear |
| Oil visible on floor or frame | External leaks at fittings, seals, reservoir, or cylinder gland; worn pump seals | Slip hazard, environmental contamination, and progressive loss of lifting capacity |
| Forks or frame visibly bent or cracked | Chronic overloading beyond 2,000–2,500 kg rating; impact damage; structural fatigue | Permanent loss of capacity and stability; often not economical or safe to repair |
Many of these failures start with basic abuse and missed maintenance. Repeated overloading above the typical 2,000–2,500 kg capacity distorts valve springs, bends linkages, and accelerates seal wear, all of which show up later as internal leakage and poor lifting. Over time, micro-leakage and contaminated oil further reduce effective pressure. Neglected oil changes allow moisture and particles to attack seals and valve seats, gradually turning a “slow lift” complaint into a full “won’t lift” outage.
- Air and low oil: Common, quick to check, and often the root cause of spongy handles and weak lift.
- Seal and O-ring wear: Leads to internal bypass, sinking forks, and the need for rebuild kits.
- Release valve misbehavior: If stuck open or misadjusted, it permanently “bleeds” pressure away.
- Mechanical linkage wear: Lost motion in pins and rods reduces effective pump stroke length.
- Overload and impact damage: Bends forks, cracks welds, and can justify replacement over repair.
💡 Field Engineer’s Note: Before tearing into hydraulics, always confirm the load is within the nameplate rating and the release lever actually returns to the neutral position—misuse and misadjustment account for a surprising share of “bad jacks.”
Step‑By‑Step Troubleshooting And Repair
Step‑by‑step troubleshooting for how to fix a pallet jack that won’t lift means moving logically from safe lockout and visual checks, through bleeding and oil correction, to isolating mechanical versus hydraulic faults.
This section turns symptoms into a structured repair workflow. You start by making the truck safe and checking obvious damage, then restore hydraulic integrity, and finally isolate which component is actually failing to generate or hold pressure.
💡 Field Engineer’s Note: Never “chase the hydraulics” first. Around 30–40% of pallet jacks I’m called to inspect simply have low oil, air in the circuit, or a mis-set control linkage, all fixable in minutes.
Safety Lockout And Initial Visual Checks
Safety lockout and initial checks ensure the pallet jack is stable, unloaded, and structurally sound before you touch the hydraulics, preventing crush injuries and wasted time on a unit that should be scrapped.
- Remove all load: Lower the forks fully and make sure no pallet or partial load remains on the jack before any work, as trapped load can mask hydraulic symptoms and create crush hazards. Unloading before diagnosis
- Park on a flat, clean floor: Position the jack on level concrete or similar, clear of oil patches, to prevent rolling and slipping while you pump, tip, or work around the unit.
- Chock or block the wheels: Place wheel chocks at the steer wheels or block under the frame so the jack cannot move unexpectedly when you operate the handle or pull components.
- Wear basic PPE: Use safety footwear and gloves; avoid placing hands, feet, or any part of the body under the forks, even if they currently will not lift. Safety checks before troubleshooting
- Check load rating vs. usage: Confirm the nameplate capacity (typically 2,000–2,500 kg) against the loads your team applies; chronic overloading is a root cause of non‑lifting and structural damage. Typical 2000–2500 kg ratings
- Inspect forks and frame: Look for bent forks, cracked welds, or heavy corrosion; severe structural defects mean the jack should be removed from service, not repaired hydraulically.
- Scan for external leaks: Wipe around the pump block, reservoir plug, cylinder, and hose joints; fresh oil trails or wet areas indicate leaks that will drop the oil level and starve the pump. Initial safety and visual checks
- Cycle handle with no load: Pump the handle through full strokes in lift position; note resistance, smoothness, and whether the forks move at all, which helps distinguish air, bypass, or mechanical binding. Hydraulic failure symptoms
How handle feel guides your next step
Very low resistance usually means air in the system or internal bypass at valves or seals. Jerky, high‑effort strokes often indicate bent linkages, dry pivots, or debris jamming moving parts rather than a pure hydraulic problem.
Bleeding Air And Correcting Hydraulic Oil Level
Bleeding air and correcting oil level directly restores hydraulic pressure, because trapped air compresses instead of transmitting force and low oil volume starves the pump, both common reasons a pallet jack will not lift.
- Fully lower and unload forks: Set the control lever to the lower position and make sure the forks are fully down and unloaded; bleeding with a load can trap air and give misleading results. Unloaded bleeding procedure
- Bleed air via handle strokes: With the lever in the lower or release position, pump the handle 10–20 full strokes to push air back into the reservoir; on some units 15–20 strokes are recommended. 10–20 stroke bleeding guidance
- Use bleeder screw if fitted: If your pump block has a dedicated bleeder, open it slightly until a steady, bubble‑free stream of oil appears, then close it firmly to restore a sealed circuit. Bleeder screw method
- Locate reservoir fill plug: Identify the fill plug on the pump housing; clean around it to keep dirt out, then remove the plug with the forks still fully lowered.
- Check fluid level depth: Verify that oil sits roughly 20–40 mm below the top of the fill port; if it is significantly lower, the pump may be drawing air instead of solid oil. 20–30 mm level guidance 25–40 mm level range
- Top up with correct oil: Add clean, filtered hydraulic oil (commonly ISO VG 32 or 46) using a funnel, filling only to the recommended depth below the opening to allow for thermal expansion. Approx. 25 mm below opening
- Refit plug and re‑bleed: Reinstall the fill plug securely, then repeat 10–20 full handle strokes with forks lowered to purge any air introduced while filling.
- Test under moderate load: Place a known, within‑rating test load on the forks and pump; if lifting is now smooth and the load holds, you have effectively solved how to fix a pallet jack that won’t lift due to air or low oil. Post‑bleed load test
💡 Field Engineer’s Note: If you have to top up more than about 20–25% of the reservoir volume, assume there is an active leak. Fixing leaks first prevents repeated “mystery” loss of lift a few weeks later.
Why air and low oil kill lifting force
Hydraulic systems rely on near‑incompressible fluid. Air pockets compress under load, so handle effort is absorbed instead of moving the lift piston. Low oil pulls more air into the pump, accelerating seal wear and cavitation damage.
Isolating Handle Linkage, Pump, And Valve Faults
Isolating linkage, pump, and valve faults means mechanically separating the handle system from the hydraulic block so you can pinpoint whether lost lift comes from geometry, worn check valves, or internal bypass.
- Confirm oil and bleeding first: Only move to isolation once you know the reservoir is correctly filled and the system has been bled; otherwise you will misdiagnose a simple fluid issue as a component failure. Pre‑check before isolation
- Inspect handle and pins visually: Look for bent handles, elongated pin holes, missing circlips, or loose fasteners that could reduce pump stroke or prevent the control cam from fully selecting the lift position. Handle linkage issues
- Disconnect lift linkage: Remove the pin or fastener that connects the handle/control head to the pump lever so you can operate the pump input directly by hand or with a temporary lever. Linkage isolation method
- Manually hold valve in lift: Move the pump/control lever on the valve block to the lift position and hold it there, ensuring the lowering path is fully closed so all pump flow goes to the cylinder.
- Stroke pump and observe forks: Pump the handle or direct lever; if the forks now rise normally, the problem lies in the handle head, pins, or linkage geometry rather than the pump internals. Handle vs pump diagnosis
- Suspect internal pump/valve faults if no lift: If forks still do not rise with the pump lever driven directly, suspect internal leakage at suction/discharge check valves, worn pump elements, or a relief valve opening too early. Relief and check valve behavior
- Evaluate “pumps but won’t hold” symptom: If the jack lifts but then sinks, focus on cylinder seals, check valve seats, and the lowering valve, which may be leaking or stuck partially open. Internal leakage symptoms
- Plan seal and valve service if needed: For persistent non‑lifting with correct oil and intact linkage, schedule O‑ring, seal, and valve cartridge service, including inspection of check valve balls and seats for pitting or debris. Seal and valve service
💡 Field Engineer’s Note: When you disconnect the linkage, measure actual pump lever travel. If you are getting less than roughly 80–90% of its design stroke, even a perfect hydraulic block will feel “weak” in daily operation.
How the isolation test speeds up workshop decisions
By proving whether the pump and valve block can lift when driven directly, you avoid unnecessary hydraulic strip‑downs. Many shops waste hours rebuilding pumps when the real issue is a cheap handle pin or misadjusted control rod.
Component Repairs, Rebuild Decisions, And PM
Component-level repair focuses on restoring sealing, stopping leaks, and deciding when a pallet jack hydraulic unit is no longer economical to rebuild, which is central to how to fix a pallet jack that won’t lift reliably.
Once basic bleeding, oil level correction, and linkage checks are done, persistent lifting failures almost always live in three places: seals/O-rings, valve cartridges, or structural damage from overload and contamination. This section shows you how to repair those components, when to stop rebuilding and replace, and how to structure preventive maintenance (PM) so the jack keeps lifting at rated capacity instead of dying during peak shifts.
💡 Field Engineer’s Note: In real warehouses, 80% of “mystery” non‑lifting jacks are either running on filthy oil or have one cheap O‑ring hardened by age and contamination. Always fix cleanliness and seals before blaming “bad hydraulics.”
Seal, O‑Ring, And Valve Cartridge Replacement
Seal and valve cartridge replacement restores hydraulic tightness by eliminating internal bypass paths, which is often the decisive step in how to fix a pallet jack that won’t lift even after bleeding and topping up oil.
- When to suspect failed seals/O‑rings: Jack lifts slightly then sinks, requires many strokes to rise, or will not hold a static load despite correct oil level and no obvious external leaks. These symptoms indicate internal leakage past piston seals, O‑rings, or valve seats inside the hydraulic circuit.
- Why seals matter physically: Hydraulic systems rely on essentially incompressible oil; worn seals let high‑pressure oil leak back to low‑pressure areas, so pressure never reaches the level needed to raise 2,000–2,500 kg rated loads in typical manual pallet jacks.
- Preparation and oil management: Before opening the pump block, drain the hydraulic oil into a clean pan. Dark, milky, or particle‑laden oil indicates contamination and justifies a full flush and refill after repairs to restore fluid quality.
- Document configuration: Photograph the pump block, valve cartridge, springs, and linkage before disassembly so you can restore correct orientation and stack order during reassembly.
- Isolate and remove the valve cartridge: With the unit drained and forks fully lowered, disconnect the lower control lever, then unscrew the valve cartridge or valve block from the pump housing as recommended in technical guides for manual pallet jacks.
- Extract old O‑rings and seals: Use plastic or brass picks (not sharp steel) to remove each O‑ring, backup ring, and dust seal to avoid scratching the aluminum or steel sealing bores, which would create permanent bypass paths.
- Inspect valve internals: Check valve balls, poppets, and seats for pitting, debris, or corrosion that could prevent tight sealing and cause internal leakage or early relief‑valve opening under load inside the pump block.
- Clean bores and components: Flush the cartridge bores and mating surfaces with clean hydraulic oil or approved solvent, then blow dry with low‑pressure air. Any grit left behind becomes an abrasive that rapidly destroys new seals.
- Match and lubricate new seals: Compare each new O‑ring and seal from the kit to the original for diameter and cross‑section. Lightly coat with compatible hydraulic oil to prevent twisting or cutting as they slide into their grooves.
- Reassemble the valve cartridge: Re‑install springs, balls, and poppets in the original order. Incorrect spring orientation or missing components can leave the release valve partially open, causing a jack that pumps but will not lift or hold pressure after reassembly.
- Refill with clean oil: With the cartridge back in the pump, refill the reservoir so the fluid sits roughly 20–30 mm below the fill port, leaving headspace for thermal expansion as recommended in hydraulic service guidance for pallet jacks.
- Bleed air and test lift: With forks unloaded and lowered, pump the handle 15–20 full strokes to purge air, then perform staged load tests up to rated capacity to confirm the jack lifts and holds without sinking after seal replacement.
Why new seals often “fix” intermittent lifting problems
Intermittent lifting usually means seals are just worn enough to leak at higher pressures, especially when oil is hot and thin. At low loads, the jack lifts fine; near 2,000–2,500 kg, leakage increases and pressure collapses. Replacing O‑rings and seals tightens those internal clearances, so more of each pump stroke becomes lifting force instead of internal bypass.
Fixing External Leaks, Contamination, And Overload Damage
Fixing external leaks and contamination stops oil loss and abrasive wear at the source, while managing overload damage prevents repeat failures in pallet jacks that won’t lift because their hydraulic and structural limits have been exceeded.
| Issue Type | Typical Symptoms | Corrective Action | Field Impact |
|---|---|---|---|
| External hydraulic leaks | Oil on floor, wet pump housing or fittings, falling oil level | Tighten fittings, replace hoses, copper washers, and gland seals at leak points | Prevents reservoir running >25% low, which starves the pump and causes non‑lifting events. |
| Contaminated hydraulic oil | Dark, cloudy fluid; particles; grinding or whining noises | Drain, flush, and refill with clean oil; maintain level 20–25 mm below filler opening after cleaning | Reduces wear on seals, valves, and pump elements, extending lift performance life. |
| Chronic overloading | Jack won’t lift near rated load; forks bent; repeated seal failures | Verify loads within 2,000–2,500 kg rating, inspect forks and frame, rebuild or replace damaged hydraulic unit when overloaded | Prevents relief‑valve abuse, structural cracking, and recurring “won’t lift” complaints. |
| Relief valve seat wear | Handle pumps, but forks stall below expected height under heavy load | Inspect, clean, or rebuild relief valve; verify correct opening pressure vs. rated capacity to restore pressure | Ensures jack reaches design pressure without premature bypass, critical for full‑weight pallets. |
- Leak‑driven lifting failure: External leaks at the reservoir, cylinder glands, or fittings steadily lower oil volume; once volume drops by roughly 25% or more, the pump draws air and cannot build pressure, leading directly to a pallet jack that won’t lift or lifts only partially during operation.
- Contamination as a seal killer: Dirt and metal particles in the oil act like sandpaper on pump pistons, rods, and seals, accelerating internal leakage and shortening the interval between “fixes” for a jack that won’t lift reliably in high‑duty environments.
- Overload damage mechanisms: Regularly exceeding the 2,000–2,500 kg design window bends linkages, distorts valve springs, and forces the relief valve to open frequently, wearing its seat and causing chronic pressure loss even at legal loads over time.
- Locate and clean leak areas: Degrease the pump housing, cylinder, and fittings, then operate the jack to see fresh oil appear. This distinguishes active leaks from old residue.
- Repair or replace leaking components: Tighten fittings to spec and replace any damaged hoses, copper washers, and gland seals to stop visible oil loss and floor contamination at the source.
- Drain and flush contaminated systems: If oil is dark or gritty, drain reservoir and cylinder, flush with clean oil, then refill, keeping the level about 20–25 mm below the reservoir opening as recommended for thermal expansion and consistent performance in pallet jack maintenance.
- Check for overload history: Inspect forks for bending or cracked welds and compare typical loads in your operation to the 2,000–2,500 kg rating band; persistent overloads justify operator retraining and possibly upsizing equipment to match duty.
- Evaluate relief valve condition: If the jack pumps but stalls under heavy yet legal loads, inspect and clean the relief valve; seat wear or contamination can cause early opening and loss of lifting pressure in the pump block.
💡 Field Engineer’s Note: Any time you see oil on the floor under a jack, treat it as both a safety hazard and a ticking clock: by the time operators complain it “won’t lift,” the reservoir is often already far below the effective level. Fix leaks and restore oil volume in the same work order.
When to rebuild vs. replace the hydraulic unit
Hydraulic unit rebuilds consume bench time (strip, clean, reseal, test) plus parts like seal kits and possibly rechromed rods. Replacement is usually more economical when labor and parts approach or exceed the cost of a new unit, or when you see repeated leaks, bent forks, or structural cracks from overload and impact damage
Final Maintenance Recommendations And Key Takeaways
Fixing a pallet jack that will not lift is not guesswork. It is a pressure problem that you solve in a set order. Start with safety, unloading, and structural checks so you do not waste time on a jack that should be scrapped. Then restore the hydraulic basics: correct oil level, clean fluid, and full bleeding of air.
Once you confirm fluid and bleeding, isolate linkage, pump, and valves. This separates simple geometry and adjustment faults from real internal leakage. Replace seals, O‑rings, and worn valve parts before you blame the entire hydraulic unit. Always link symptoms back to physics: if pressure cannot build or hold, the jack will not lift or will sink.
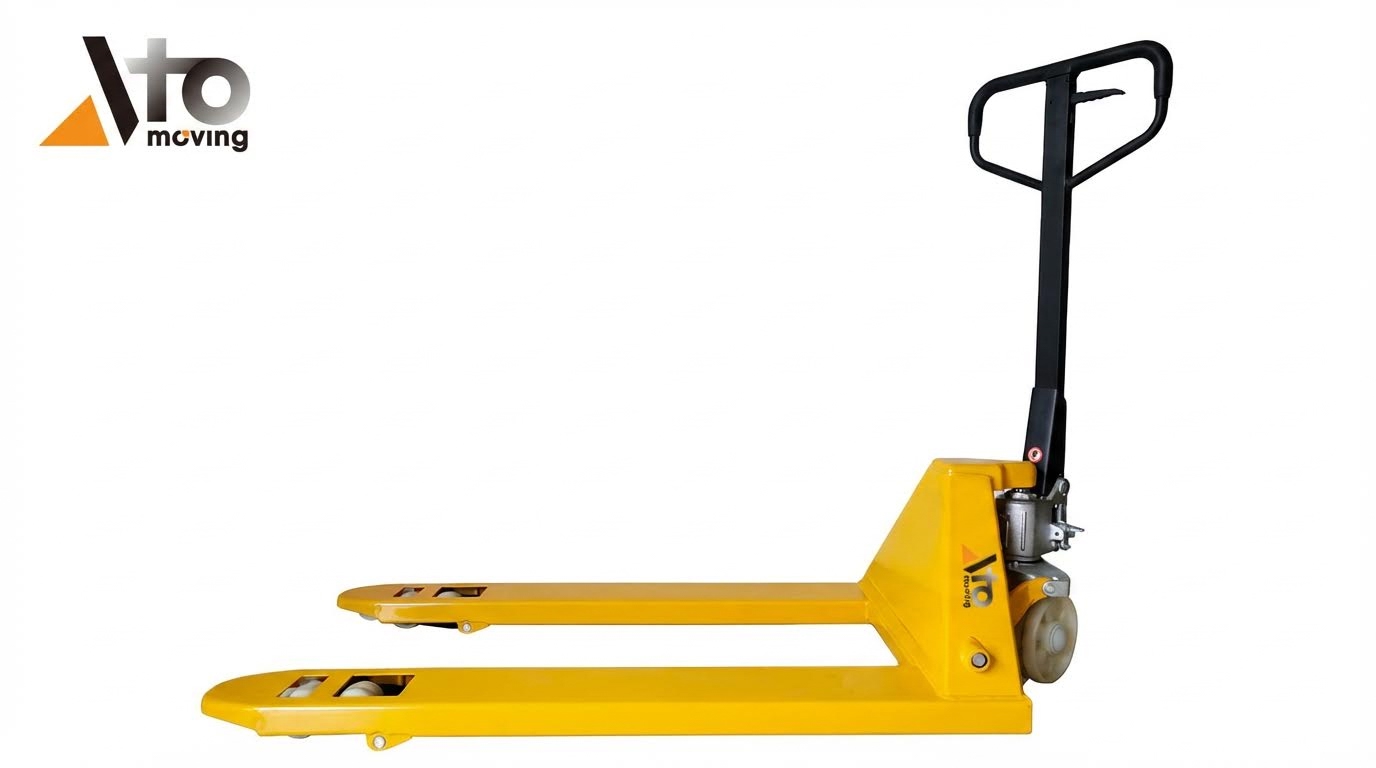
For operations teams, the best practice is clear. Keep loads within the 2,000–2,500 kg rating, fix leaks as soon as oil appears, and schedule oil changes and seal inspections as planned PM, not emergency work. Standardize this checklist across your fleet, including Atomoving pallet jacks. You will cut downtime, avoid repeat failures, and keep every unit lifting safely at its designed capacity.
Frequently Asked Questions
Why is my pallet jack not lifting?
If your pallet jack isn’t lifting, it could be due to low hydraulic fluid levels or air trapped in the system. Check and refill the hydraulic fluid if needed. You may also need to bleed the system to remove trapped air. Worn seals or valves are another common issue that might require professional repair. For more details, see Hydraulic Jack Troubleshooting.
How do I reset my pallet jack?
To reset an electric pallet jack, turn it off and unplug it from the power source. Press the emergency stop button to release hydraulic pressure, then wait 30 seconds before pressing it again to reset the system. Plug the jack back in and turn it on. For additional guidance, refer to Electric Pallet Jack Reset Guide.
What should I check if my hydraulic jack won’t lift?
If your hydraulic jack isn’t lifting, first ensure the hydraulic oil level is adequate. Low oil prevents the cylinders from extending properly. Refill the oil through the tank’s filler neck. Additionally, inspect for leaks or damaged components that could affect performance. Learn more about hydraulic faults at Hydraulic Fault Solutions.