This guide explains how to use an electric scissor lift safely, from daily checks to smart controls and maintenance. You will learn the critical inspections, operating limits, and technology upgrades that prevent tip‑overs, breakdowns, and falls on real jobsites.
Core Safety Principles And Pre‑Use Inspections
Core safety principles and pre‑use inspections define how to use an electric scissor lift without surprises: you prove the machine, the environment, and the load are safe before anyone leaves the ground.
- Goal: Confirm the lift is structurally sound – Prevents sudden failures at height.
- Goal: Verify all controls and safety devices work – Ensures you can stop or recover from a fault.
- Goal: Check ground, load, and stability – Reduces tip‑over and collapse risks.
💡 Field Engineer’s Note: Treat pre‑use checks like aircraft pre‑flight: most serious lift incidents I investigated started with “we skipped the inspection just this once.” Build the 5–10 minute check into job planning, not as an optional extra.
Daily walk‑around and structural checks
Daily walk‑around and structural checks are your first line of defense, catching visible damage and leaks before they turn into a platform collapse or uncontrolled movement.
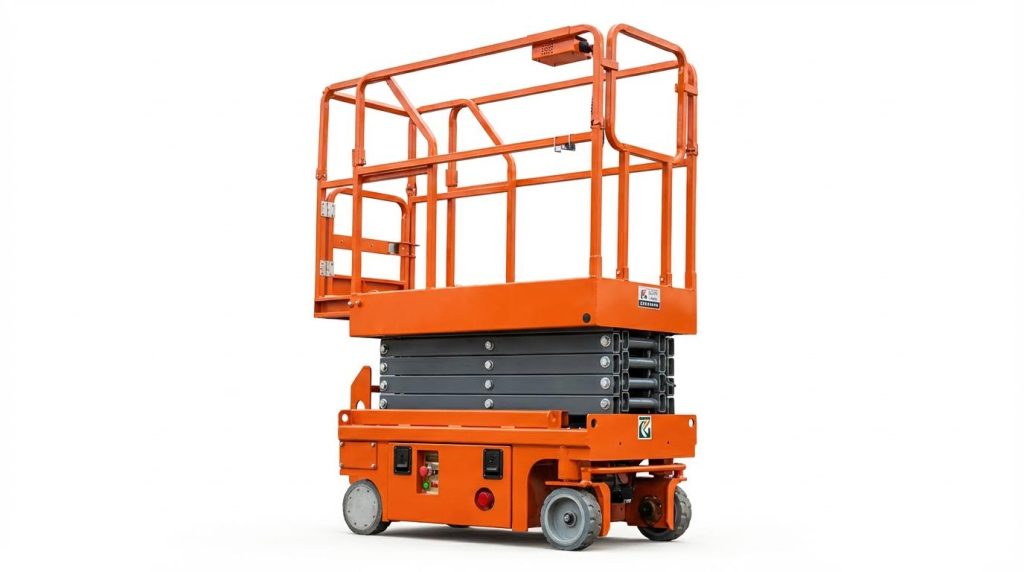
- Chassis and platform frame: Look for dents, bends, rust, or cracked welds on chassis, platform, and guardrails – Any deformation changes load paths and can trigger failure under load.
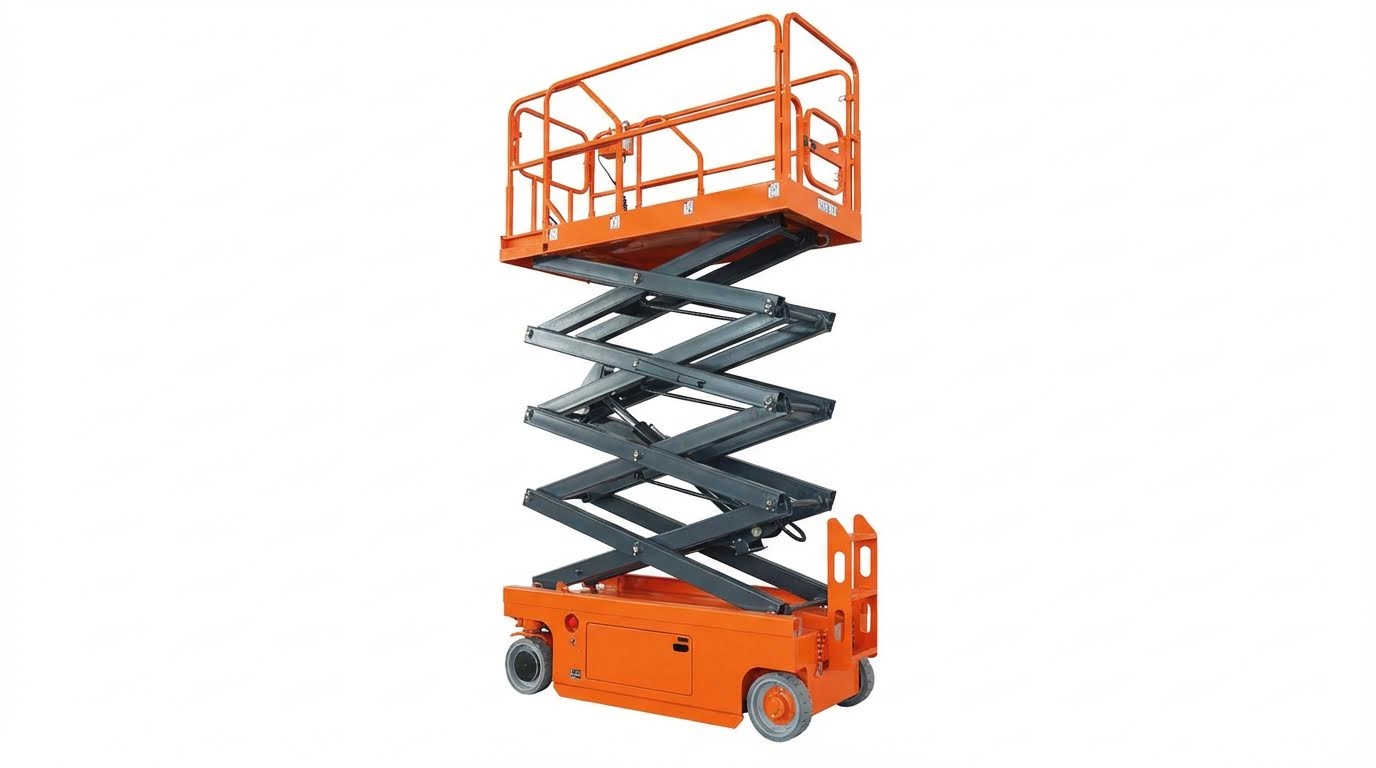
- Scissor arms and pivots: Inspect arms, hinges, pins, and bushings for cracks, elongation, or looseness – Loose pivots cause sway and uneven loading on cylinders.
- Guardrails and gates: Confirm rails, toe‑boards, and gates are straight, secure, and self‑closing – Maintains fall protection when the platform moves or jolts.
- Tyres and wheels: Check tread, sidewalls, and rims for cuts, bubbles, or damage – Weak tyres can collapse and instantly change the centre of gravity.
- Hydraulic and battery leaks: Scan under the lift for oil or electrolyte, and around hoses, fittings, and the battery tray – Leaks indicate imminent component failure and slip hazards.
- Decals and placards: Make sure capacity plates, warning labels, and control markings are clean and legible – Operators must see load ratings and emergency instructions at a glance.
- Loose or missing parts: Look for missing bolts, locking pins, covers, or access panels – Small parts often fail first and are early warning of deeper problems.
Quick visual pattern for the walk‑around
Walk the lift in a fixed pattern: start at the base left corner, move clockwise around the chassis and wheels, then inspect the scissor stack from ground level, and finish on the platform and controls. This reduces the chance of skipping an area.
Functional tests of controls and safety devices
Functional tests of controls and safety devices prove that the machine will respond correctly when you drive, lift, or hit an emergency stop.
- Emergency stop buttons: Press each E‑stop and verify motion and lift functions stop instantly – This is your last resort if a control sticks or a sensor fails.
- Platform and ground controls: Test lift up/down and drive from both stations where applicable – Confirms redundancy if one control station fails mid‑job.
- Direction and speed: Drive a short distance forward and reverse, steering lock‑to‑lock – Mismatched arrows or sluggish response can cause collisions in tight aisles.
- Braking and automatic parking brake: Release the drive control and confirm the lift stops promptly and holds on level ground – Prevents unintended rolling when elevated.
- Limit switches and interlocks: Raise and lower slowly to confirm smooth stops at full height and correct gate/rail interlock behavior – Protects against over‑travel and operation with open gates.
- Alarms and indicators: Check tilt alarms, overload alarms, and any fault lights – These are your early warning for stability or system issues.
- Battery and status display: Verify battery state‑of‑charge and any diagnostic messages before leaving ground – Reduces the risk of being stranded aloft with low power.
- Step 1: Park on flat, clear ground – Removes external variables so you test only the machine.
- Step 2: Test ground controls first – Lets you stand clear of moving parts while you confirm basic motion.
- Step 3: Move to platform controls and repeat – Confirms the primary operating station behaves identically.
- Step 4: Simulate an emergency by hitting E‑stop during motion – Verifies the stop circuit is fast and reliable.
💡 Field Engineer’s Note: If any motion feels jerky, delayed, or noisy during functional tests, tag the lift out. Intermittent faults at ground level often become total failures once the hydraulics and structure are fully loaded at 8–12 m height.
Work area, load rating, and stability verification
Work area, load rating, and stability verification ensure the ground, weather, and payload stay within what the scissor platform can safely handle.
- Ground condition: Confirm the surface is firm, level, and free from holes, covers, or soft spots – Local subsidence under one wheel is a classic cause of side‑tilt and tip‑over.
- Obstacles and overhead hazards: Walk the route and work zone for pipes, beams, cables, and shelves – Prevents trapping and crushing when raising or driving.
- Wind and weather: For outdoor or semi‑open work, check wind speed and gusts against the lift’s outdoor rating – Side wind at height creates a large overturning moment on the platform.
- Platform load rating: Read the capacity plate and plan people + tools + materials mass – Staying within rating preserves the designed safety factor on the scissor stack and tyres.
- Load distribution: Place heavy items low and near the platform centreline – Reduces off‑centre loading that twists the structure.
- Reach and work position: Position the lift so work is within arm’s length without climbing or leaning – Eliminates the temptation to overreach, which shifts the centre of gravity.
- Travel path: If you must travel at low height, verify clear, flat paths with no ramps beyond the manufacturer’s slope limit – Prevents sudden lateral tilt during movement.
| Check Item | Typical Safe Guideline | Operational Impact |
|---|---|---|
| Ground slope | As per manufacturer, often ≤3–5° | Beyond this, stability margin drops fast; avoid raising the platform. |
| Outdoor wind speed | Use only within the lift’s outdoor rating | High winds at 8–12 m height can overturn even a properly loaded lift. |
| Load vs. rating | Total mass ≤ nameplate capacity | Overloading increases scissor and cylinder stress and tyre compression. |
| Clear overhead distance | Maintain a visible gap to beams/cables | Prevents crush injuries when raising the platform. |
How this ties into how to use an electric scissor lift
If you want to understand how to use an electric scissor lift safely, start by making these three checks routine: a full walk‑around, a functional control test in a clear area, and a deliberate review of ground, load, and weather before every elevation.
💡 Field Engineer’s Note: Never “borrow” capacity by assuming a margin: if the plate says the platform is rated for a given mass, treat that as a hard limit. In the field, the real danger is not the static weight but dynamic effects when someone walks, drills, or moves materials at height.
Operating Controls, Maneuvers, And Risk Mitigation
This section explains how to use an electric scissor lift safely by coordinating platform and ground controls, managing motion limits, and controlling fall, electrical, and tip-over risks in real work sites.
When people search how to use an electric scissor lift, they really need three things: what each control does, when it is safe to move or lift, and how to avoid the main accident modes (falls, electrocution, and overturns).
Platform and ground controls: logic and sequencing
Platform and ground controls work in a defined priority sequence so the lift can be stopped quickly and kept safe if the operator becomes incapacitated.
On most electric scissor lifts, the platform control panel is primary, while the ground controls provide backup and emergency override. Before elevation, you must confirm all emergency stop buttons release correctly and all motions respond smoothly, without delay, during a ground-level function test. Pre-use electrical and safety device checks are essential to verify that buttons, connectors, and emergency stops are responsive and intact.
- Ground panel check: Confirm key switch, lift/lower, and emergency stop work – Ensures someone on the ground can recover the machine.
- Platform panel check: Test joystick, lift, drive, horn, and emergency stop – Confirms the operator can control and instantly stop motion.
- Emergency stop logic: Press each E‑stop and confirm all motion ceases – Verifies safety circuits interrupt power correctly.
- Direction and tilt alarms: Check alarms and lights trigger when expected – Warns of unsafe slopes or control errors before an incident.
Before handing the lift to a new operator, walk them through the full control sequence: power on, select control station, release emergency stop, test lift and drive, then return to safe stowed position.
Typical control sequence for new operators
- Step 1: Turn key to ground control and power on – Confirms base systems start correctly.
- Step 2: Test emergency stop at ground and reset – Verifies safety circuit integrity.
- Step 3: Raise platform 300–500 mm and lower again – Checks lift hydraulics and structure with minimal risk.
- Step 4: Switch to platform controls and repeat tests – Ensures the main operator station is fully functional.
- Step 5: Drive a short distance at low speed – Confirms steering, brakes, and traction.
💡 Field Engineer’s Note: When working indoors near racking, insist that ground personnel know how to use the base controls and emergency stop. In real incidents, ground overrides stopped lifts that were crushing cables, sprinkler pipe, or even the platform against a beam.
Managing motion: travel, elevation, and wind limits
Motion management on an electric scissor lift means separating “travel mode” from “elevated work mode” and respecting wind and slope limits to avoid instability.
Regulators and manufacturers state that scissor lifts must operate only on firm, level surfaces, free from drop‑offs, debris, or hidden voids under the wheels. Guidance on stability and wind limits specifies that outdoor‑rated units are limited to wind speeds below about 28 mph (≈12.5 m/s). You must not move the lift while elevated unless the manufacturer explicitly permits it, and even then only at very low speeds on level, unobstructed ground.
| Parameter | Typical Guidance | Operational Impact |
|---|---|---|
| Wind speed limit (outdoor) | ≤ 12.5 m/s (≈28 mph) | Above this, lower platform fully and stop work to prevent oscillation and tip‑over. |
| Surface condition | Firm, level, debris‑free | Avoids wheel sinkage and sudden tilting near pits, trenches, or dock edges. |
| Travel while elevated | Prohibited unless manufacturer‑approved | Normally, lower to ≤1.0 m before relocating to new work area. |
| Uneven ground use | Requires stabilizers/level sensors | Off‑road or tracked units may auto‑level but still must respect slope limits. |
- Travel mode: Keep platform fully lowered when driving more than a few meters – Maximizes stability and braking efficiency.
- Fine positioning: If allowed, creep slowly with minimal elevation – Reduces dynamic side loads on the scissor stack.
- Wind and weather: Stop for strong winds, heavy rain, or lightning – Prevents sway, loss of footing, and electrical hazards.
- Alarms: Never ignore tilt or overload alarms – These indicate conditions that precede many tip‑overs.
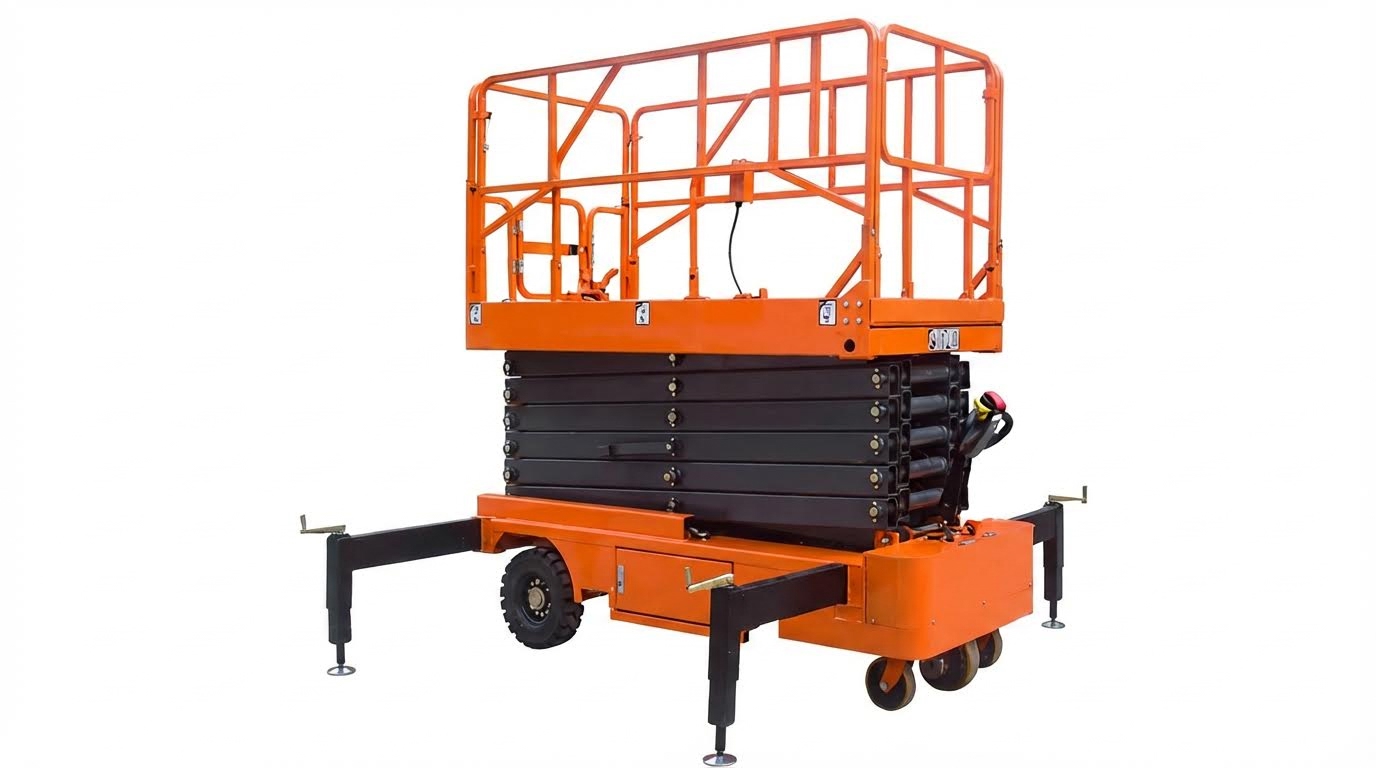
Where terrain is uneven, some models use off‑road tires, crawler tracks, or four‑point stabilizers with level sensors that automatically adjust balance up to working heights around 14 m. These features improve traction and load distribution on gravel or soft soil, but they do not remove the need to respect the machine’s rated slope and wind limits.
How to decide if conditions are too windy
- Check forecast: Look for gust speeds, not just average – Gusts create sudden side loads.
- Use on‑site cues: If small items or dust blow off the platform, conditions are marginal.
- Height factor: Wind speed increases with height – A safe ground breeze may be unsafe at 10–12 m.
💡 Field Engineer’s Note: Indoors, operators often ignore “wind” but create the same problem with large fans or open dock doors. At 8–10 m platform height, a constant lateral airflow can push a narrow‑aisle lift into racking if the wheels sit on a slightly sloped slab.
Fall protection, electrical clearance, and tip‑over risks
Managing fall, electrical, and tip‑over risks is the core of how to use an electric scissor lift without serious incidents.
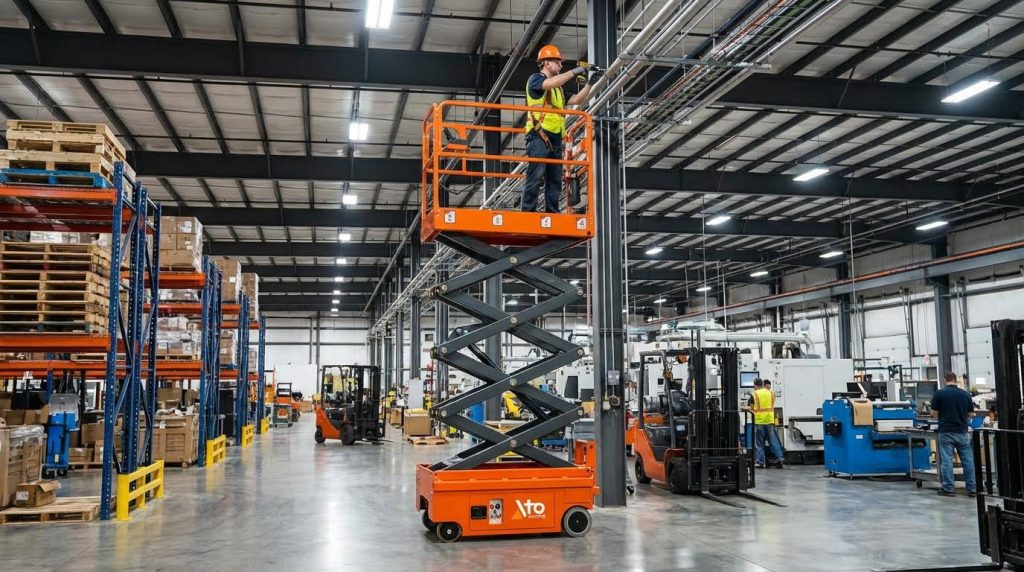
Guardrails are the primary fall protection on scissor lifts. Operators must verify that the full guardrail system is installed and intact before use, stay fully inside the platform, and avoid leaning over or climbing on rails. Regulators emphasize remaining on the work platform and using guardrails correctly. Additional harnesses and lanyards may be required by site policy, especially outdoors or near edges.
- Guardrails: Confirm rails, mid‑rails, and toe‑boards are secure – Prevents step‑through or slip‑under falls.
- Gates: Lock entry gates before lifting – Stops accidental opening at height.
- Harness (if required): Clip to approved anchor point – Adds protection if someone trips or leans too far.
- Tool control: Secure tools and materials – Prevents dropped‑object injuries to people below.
For electrical hazards, a minimum clearance of about 3.0 m (10 ft) is required from power lines and transformers. Only qualified workers with specific training may work closer to energized conductors. Remember that metal guardrails, tools, and even wet concrete can conduct electricity.
| Risk Type | Key Rule | Operational Impact |
|---|---|---|
| Fall from platform | Use intact guardrails; keep gates locked; no climbing or leaning out | Removes most common fall paths when working at 6–12 m. |
| Electrocution | Maintain ≥3.0 m clearance from live lines/transformers | Prevents arcing or inadvertent contact with energized parts. |
| Tip‑over from overload | Never exceed manufacturer’s load rating; keep heavy items centered | Maintains center of gravity within safe base area. |
| Tip‑over from motion | Do not drive elevated; avoid sudden starts, stops, or turns | Prevents lateral forces that can overcome stability margin. |
Tip‑over risk increases sharply when operators overload the platform, stack materials above guardrail height, or drive with the platform raised. Guidance requires staying within the rated load, centering heavy items, and avoiding elevated travel unless explicitly allowed. You must also respect alarms: if an overload or tilt alarm sounds, stop and correct the condition before continuing.
Quick checklist: safe setup before lifting
- Surface: Flat, firm, no pits, drains, or dock edges under wheels.
- Clearances: ≥3.0 m from power lines; no overhead beams directly above start point.
- Guardrails: Complete, undamaged, gates locked.
- Load: Within rated kg on data plate; materials below rail height.
- Weather: Wind below limit; no heavy rain or lightning.
💡 Field Engineer’s Note: Many “mystery” tip‑overs trace back to subtle overloads: a rated 230 kg platform quietly becomes 300+ kg once you add a dense tool trolley, cable reels, and a second person. Train crews to add up weights before they leave the ground.
Maintenance Practices And Emerging Technologies

Maintenance and new technologies directly affect how to use an electric scissor lift safely, by reducing breakdowns, leaks, and battery failures that cause sudden stops, tip-over risk, or mid-air power loss.
Maintenance for electric scissor lifts sits on three pillars: fluid and mechanical health, battery and charging quality, and the growing role of remote diagnostics and sensors. Treat these as part of normal operation, not “extra work.”
Fluid, hydraulic, and mechanical system checks
Fluid, hydraulic, and mechanical checks prevent sudden loss of lifting force, jerky motion, and structural failure while the platform is elevated.
When planning how to use an electric scissor lift day to day, build these checks into your pre-use and scheduled maintenance routines.
- Hydraulic oil level and cleanliness: Verify oil is within the marked range and not milky or dark – maintains smooth cylinder movement and reduces cavitation risk. Hydraulic system inspection guidance
- Leak checks (hoses, fittings, cylinders): Inspect for wet spots, drips, or oil on the chassis and floor – prevents slip hazards and loss of lifting capacity mid-job. General maintenance – operational
- Pipelines and pump condition: Check hydraulic lines for abrasion, kinks, or aging and listen for abnormal pump noise – avoids hose bursts and sudden platform drop. Hydraulic system inspection
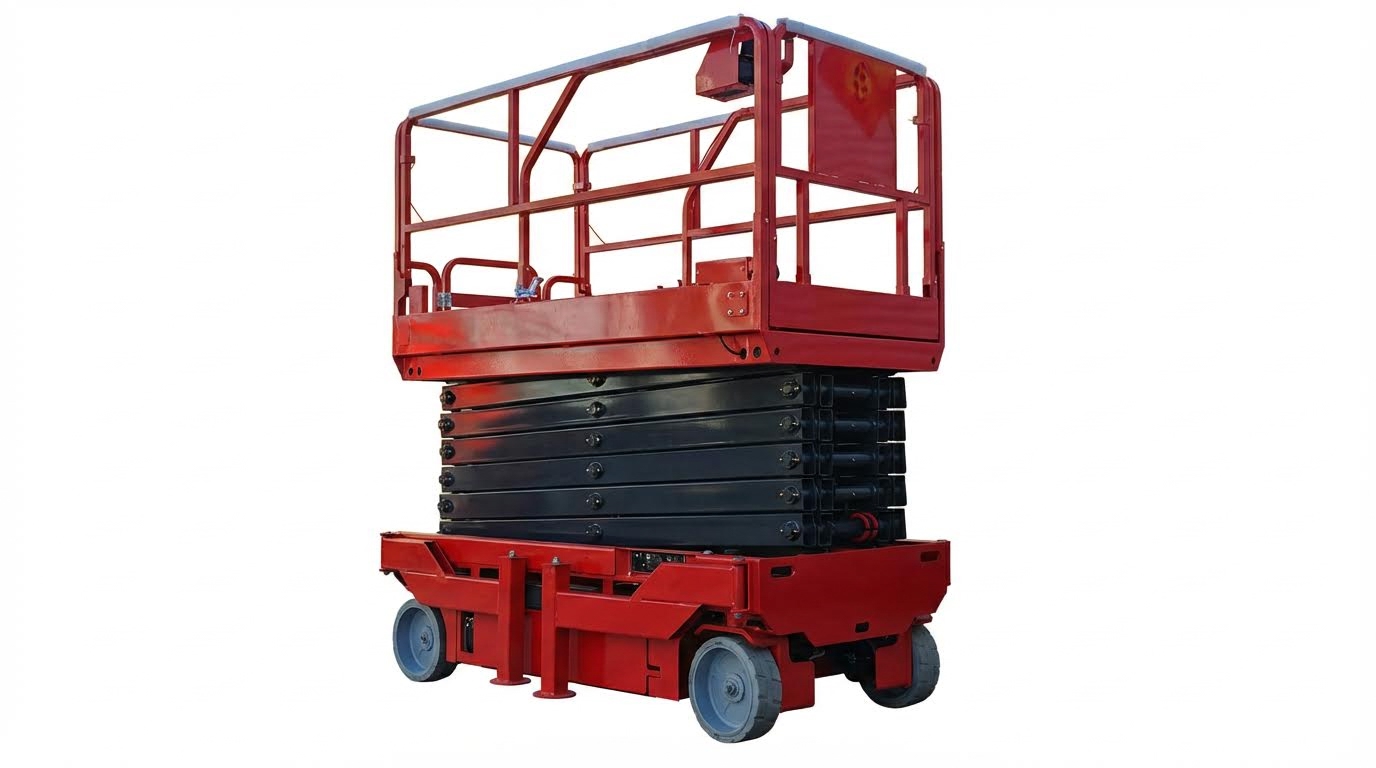
- Scissor arms and structural welds: Inspect for cracks, deformation, rust, and loose pins – protects against structural collapse under rated load. Mechanical component inspection
- Mechanical joints and hinges: Check for excessive play and lubricate moving parts – reduces jerky lifting that can throw workers off balance. Mechanical inspection and lubrication
- Wheels, tires, and brakes: Inspect treads, cracks, pressure, and test steering/braking – prevents roll-away and loss of control when travelling raised or lowered. General maintenance – operational
| Check Item | Typical Interval | What To Look For | Operational Impact |
|---|---|---|---|
| Hydraulic oil level | Daily pre-use | Level in sight gauge, no foaming | Prevents slow lifting and pump damage during a shift |
| Hoses and fittings | Daily visual, detailed monthly | Leaks, chafing, bulges | Avoids sudden loss of pressure and slippery floors |
| Scissor arms & welds | Daily glance, detailed monthly/annual | Cracks, bent members, corrosion | Maintains structural safety at full height (8–14 m typical) |
| Mechanical pins & bushings | Weekly–monthly | Wear, missing retainers | Reduces platform sway and vibration when elevated |
| Wheels, tires, brakes | Daily | Damage, low pressure, weak braking | Ensures controlled stopping within narrow 2–3 m aisles |
How these checks change with height and load
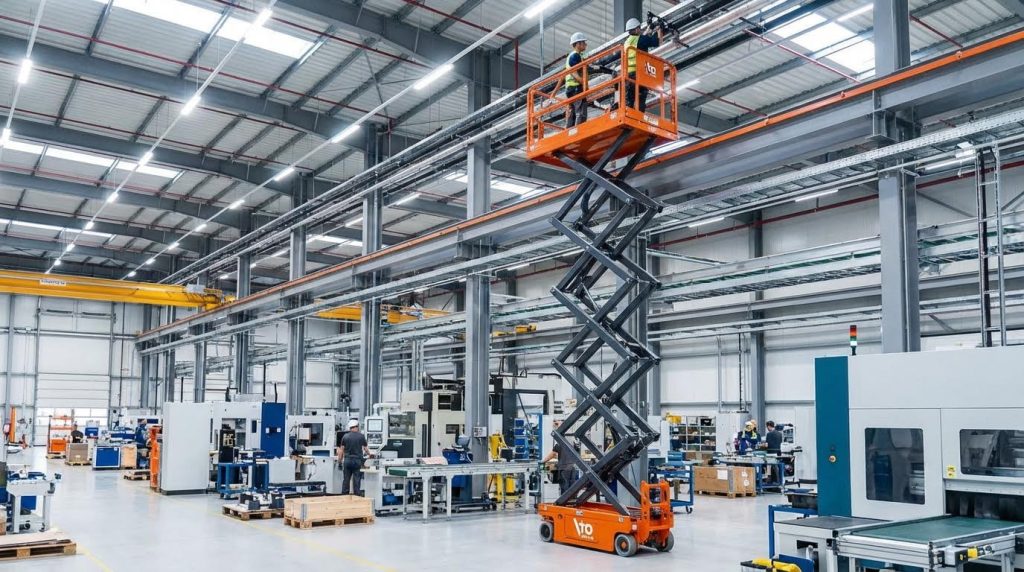
The closer you operate to maximum platform height (often 8–14 m) and rated load (several hundred kg), the less margin you have for hydraulic or structural defects. Even small leaks or cracks that seem “acceptable” at 3 m can become critical at full extension, where side loads and bending moments are highest.
💡 Field Engineer’s Note: In cold storage or winter outdoor work, hydraulic oil thickens and small leaks shrink, then expand again when warm. Use oil grade approved for low temperatures and do leak checks after the machine returns to ambient, not only while cold.
Battery care, Li‑ion options, and monitoring systems
Battery condition controls how long and how safely you can use an electric scissor lift before needing to stop, charge, or troubleshoot mid-task.
Poor battery maintenance shows up as sluggish lift speed, nuisance alarms, and stalls when elevated, all of which increase risk when working at height.
- Clean and dry battery tops: Remove dirt and moisture from battery surfaces – prevents surface discharge that shortens run time and causes unexpected shutdowns. Battery maintenance practices
- Charge level before work: Confirm state of charge is adequate for the planned shift – reduces risk of losing power while elevated. General maintenance – operational
- Amp‑draw and charge tests: Use proper testers to verify each battery meets spec and charges correctly – identifies weak cells before they fail on the job. Battery testing recommendations
- Battery life expectations: With proper care, typical batteries can last about 1–3 years – poor maintenance cuts this sharply and increases downtime. Battery life extension
- Monitoring systems: Advanced battery monitoring tracks state-of-charge, depletion, fluid level, and charge history – enables proactive replacement before failures. Advanced battery monitoring system
| Battery Technology | Typical Features | Maintenance Needs | Best For… |
|---|---|---|---|
| Conventional lead‑acid | Lower upfront cost, shorter life (≈1–3 years with care) | Regular cleaning, water checks, equalizing charges | Sites with short shifts and easy access to chargers |
| Lead‑acid + monitoring | Remote analysis of charge, usage, and fluid levels | Less guesswork; follow alerts rather than fixed intervals | Fleets where uptime and battery cost tracking matter |
| Lithium‑ion systems | Single pack, long life (reported 120+ months), fast charge (~3.5 h), energy recovery | Minimal routine service; rely on integrated BMS | High‑duty, multi‑shift operations needing opportunity charging |
Some all‑electric scissor lifts now use a single lithium‑ion battery that can last over 120 months, fully charge in about 3.5 hours, and support opportunity charging and energy recovery, cutting energy use by roughly 70%. All‑electric scissor lift advancements
How battery health changes daily operation
With weak or poorly maintained batteries, lift and drive speeds drop, and low‑voltage cutouts can trigger when the platform is raised. That means more time exposed at height and more temptation to “finish the job quickly” while alarms are sounding, which is exactly when accidents happen.
💡 Field Engineer’s Note: Many operators plug in the lift “when convenient,” which slowly kills lead‑acid batteries. Follow the manufacturer’s full‑charge guidance and use monitoring data to schedule charges; partial, repeated top‑ups without full charges can shorten battery life dramatically.
Remote diagnostics, sensors, and predictive maintenance
Remote diagnostics and sensors transform how to use an electric scissor lift from reactive fixing to predictive, data-driven maintenance.
These tools continuously watch the machine’s critical parameters and flag problems early, improving both uptime and safety.
- Real‑time battery and charger diagnostics: Advanced systems remotely analyze battery charge, depletion, fluid level, and charging history – enables early intervention before work-stopping failures. Advanced battery monitoring system
- Onboard self-diagnostics: Modern electric scissor lifts can run system tests via integrated interfaces or mobile devices – speeds troubleshooting and reduces guesswork for technicians. All‑electric scissor lift advancements
- Sensors for height, temperature, and current: Systems monitor lift height, component temperatures, and battery current – triggering alerts when values move outside safe bands. Remote monitoring and AI diagnostics overview
- Predictive maintenance and digital twins: Data models simulate stress and degradation to optimize inspection intervals and retrofit decisions – focuses effort on machines and components most at risk. Remote monitoring and AI diagnostics
| Technology | Key Function | What It Detects Early | Operational Impact |
|---|---|---|---|
| Battery monitoring | Tracks SOC, usage, fluid level, charge history | Under‑charging, over‑discharge, failing cells | Reduces mid‑shift power loss and extends battery life |
| Onboard self‑diagnostics | Runs system tests, displays error codes | Sensor faults, control issues, component failures | Speeds repair, keeps unsafe lifts out of service |
| Condition sensors | Monitor height, temperature, currents | Overheating, overload, abnormal duty cycles | Helps enforce safe duty limits and training |
| Predictive analytics | Analyzes trends across fleet | Patterns of wear, high‑risk units | Optimizes inspection schedules and part stocking |
Why this matters for everyday operators
From the operator’s point of view, remote diagnostics should simplify how to use an electric scissor lift: fewer unexplained faults, clearer messages on what is wrong, and less time waiting for technicians to “find the issue.” When the system says “battery nearing end of life” or “hydraulic duty too high,” you can schedule service before the next big job instead of breaking down midway.
💡 Field Engineer’s Note: Do not ignore “minor” diagnostic alerts because the lift still moves. Many tip‑over or failure incidents started with warnings that were bypassed for days. Treat persistent alarms as a lockout trigger until a qualified person investigates, in line with OSHA and manufacturer guidance.
Final Considerations For Safe Scissor Lift Use
Final considerations for safe scissor lift use focus on repeatable habits: disciplined inspections, conservative operating decisions, and planned maintenance that keep “how to use an scissor platform lift” safe over its full life.
By this stage, an operator should already know the controls and checklists; what matters now is consistency. The safest sites treat every lift cycle as a controlled procedure, not a routine shortcut.
- Lock in daily inspections: Treat pre-use checks as non‑negotiable – small leaks or cracks caught early prevent structural failures at height.
- Respect load and wind limits: Stay comfortably under rated capacity and weather thresholds – extra margin absorbs real‑world shocks and gusts.
- Never move carelessly while elevated: Only travel raised if the manufacturer allows it – this minimizes tip‑over risk on minor floor defects.
- Maintain clear electrical distances: Plan routes and work zones around power lines – pre‑planning is the only reliable way to avoid arc or contact.
- Standardize fall protection behavior: Harness on, gate closed, no climbing or leaning – this turns “good practice” into automatic habit.
- Keep the work area controlled: Mark exclusion zones and remove debris – this protects both the operator and people working below.
- Follow structured maintenance intervals: Use layered checks (daily, weekly, annual) – this keeps hydraulics, structure, and batteries within safe performance windows.
- Use data and diagnostics: Embrace onboard and remote monitoring – early fault alerts prevent in‑air failures and unplanned downtime.
- Train for abnormal situations: Drill emergency lowering, power loss, and alarm response – rehearsal cuts reaction time when something actually goes wrong.
- Document everything: Record inspections, defects, and repairs – paper trails prove compliance and highlight recurring problems to fix at the root.
How this ties back to “how to use an electric scissor lift” safely
Knowing how to use an electric scissor lift is not just about joystick skills. It is the combination of pre‑use checks, disciplined operation within limits, and timely maintenance that keeps every lift cycle predictable.
💡 Field Engineer’s Note: In real projects, most incidents did not come from “mystery failures” but from operators normalizing small faults: a minor oil stain, a soft tire, a sticky emergency stop. Treat any change in sound, speed, or feel as a reason to stop, inspect, and log the issue before the next elevation.

Final Considerations For Safe Scissor Lift Use
Safe electric scissor lift work depends on three linked elements: sound structure, controlled motion, and reliable power. Pre-use inspections protect structure and hydraulics before loads and height amplify every defect. Careful control of travel, elevation, wind, and load keeps the centre of gravity inside the wheelbase, so small shocks or floor defects do not turn into tip-overs. Battery care and planned maintenance stop mid-air stalls and erratic motion, which often push operators into rushed, unsafe decisions.
New sensors, diagnostics, and lithium systems increase uptime and give earlier warnings, but they do not replace discipline. Site leaders must lock in daily checks, strict respect for nameplate limits, and clear rules on elevated travel and electrical clearance. Operators must treat alarms and unusual noises as stop signals, not background noise. The best practice is simple: standardize one checklist, one control routine, and one maintenance plan across the fleet, and enforce them on every shift.
Teams that follow this approach with Atomoving scissor lifts gain stable, predictable performance over the full life of the machine, with fewer breakdowns and far lower risk of falls, electrocution, or tip-over.
Frequently Asked Questions
How to Operate an Electric Scissor Lift Step by Step?
To operate an electric scissor lift, follow these steps:
- Insert the key into the brake release switch and turn it to activate the machine. This allows you to move the lift into position manually if needed.
- Locate the control panel and flip the horizontal switch to the left to activate the hydraulic system. This enables the lift to move up and down safely.
- Use the controls to raise or lower the platform as required. Ensure the area is clear before moving the lift.
Always adhere to safety protocols when operating machinery. For more details, refer to this guide on Scissor Lift Operation.
How Do Electric Scissor Lifts Work?
An electric scissor lift operates using a hydraulic or pneumatic system. Here’s how it works:
- The power source activates and fills the cylinder with hydraulic fluid or compressed air.
- This pressure pushes the cylinder outward, causing the scissor legs to extend and the platform to rise.
- To lower the lift, the system releases the pressure, allowing the legs to retract smoothly.
Understanding the mechanics ensures safe operation. Learn more about the working principle of lifts from this resource: Scissor Lift Mechanics.