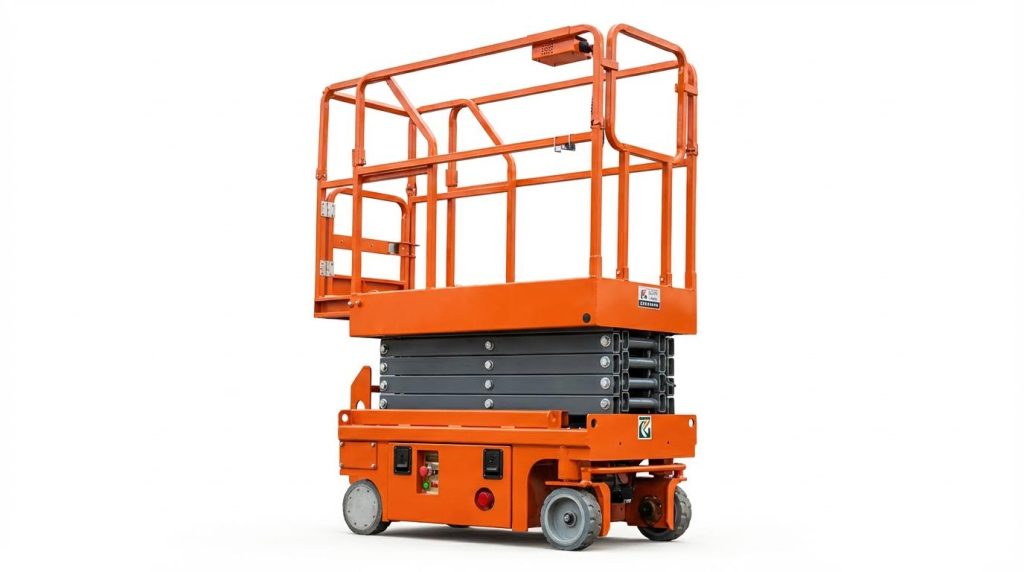
Maintenance teams that ask why won’t my aerial work platform lift need a clear, stepwise diagnostic method. This article follows a full workflow from first visual checks and error codes through electrical, hydraulic, and structural fault isolation. You will see how batteries, controllers, joysticks, hoses, pumps, seals, and stability systems each stop lift motion in different ways.
The outline then explains how to use schematics, multimeters, pressure gauges, and digital tools to separate electrical, hydraulic, and mechanical causes. It also covers how safety lockout and LOTO states can mimic faults, and when to involve the OEM or a specialist. The conclusion turns these points into a practical field checklist that technicians can apply directly on scissor lifts, boom lifts, and other aerial work platforms.
Systematic Approach To Aerial Lift No-Lift Problems
Technicians who ask why won’t my aerial work platform lift need a repeatable method, not guesswork. A structured approach cuts downtime, avoids unsafe trial moves, and protects expensive components. The process starts with simple checks, then progresses through electronic diagnostics, system separation, and finally OEM support when field options run out.
A clear workflow also improves documentation. It links operator reports, error codes, and measured values into one traceable record. This record supports root-cause analysis, warranty claims, and long-term reliability tracking across a fleet.
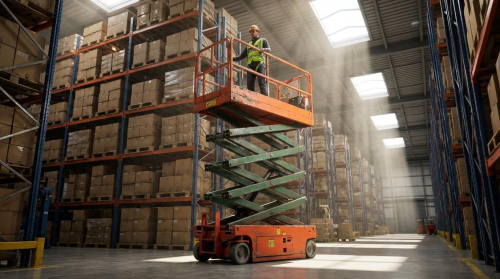
Initial Visual Checks And Operator Interviews
Begin with conditions that you can see or confirm in seconds. Ask the operator to describe exactly what happened and when the lift stopped working. Clarify if the platform ever started to rise, moved briefly, or never responded at all. Note alarms, warning lights, or unusual noises they observed.
Walk around the machine before you touch controls. Check for obvious damage to guardrails, scissor packs, booms, hoses, and harness anchor points. Verify that the platform is fully lowered, the chassis is level, and any outriggers or stabilizers are properly set. Confirm key position, emergency stop status, control selector position, and that the load is within rated capacity.
These quick checks often reveal simple causes. Examples include an engaged emergency stop, a tripped circuit breaker, or a visible hydraulic leak. Document all findings with photos and short notes. This data helps if you later ask the OEM why the aerial work platform will not lift.
Reading Error Codes And Using Diagnostic Tools
Modern aerial lifts store fault data in control modules. When the platform will not lift, read the error codes at both ground and platform stations. Capture the codes, timestamps, and operating mode in a service log. Many faults relate to overload, low battery voltage, or sensor disagreement.
Use the machine’s built-in display or service tool if available. Then confirm readings with external instruments. Typical tools include:
- Digital multimeter for voltage, continuity, and resistance checks
- Clamp meter for current draw on lift and drive circuits
- Handheld diagnostic interface where the OEM provides one
Compare values with the service manual and electrical diagrams. Look for patterns such as voltage sag under load or repeated overcurrent trips. A consistent code history narrows the search to specific subsystems, such as motor controllers, joysticks, or safety interlocks.
Differentiating Electrical, Hydraulic, And Mechanical Faults
When you ask why the aerial work platform will not lift, separate symptoms by system. Electrical faults usually show as no response, intermittent response, or alarms with no hydraulic sound. Measure supply voltage at the battery, main contactor, and lift control outputs. If control signals are missing or unstable, focus on wiring, switches, and electronic modules.
Hydraulic faults present differently. The motor or pump may run, but the platform does not move or moves very slowly. Check fluid level, filter condition, and visible hose damage. Use pressure gauges at test ports to compare actual system pressure with rated values. Low pressure with a running pump suggests internal leakage, cavitation, or a failed relief valve.
Mechanical issues tend to be local and visible. Examples include bent scissor arms, seized pins, or obstructions in the boom path. Inspect pivot points, structural welds, and sliding surfaces. Try manual emergency-lower functions to see if cylinders move freely. By classifying the dominant symptom, you avoid random part changes and shorten repair time.
When To Escalate Or Involve The OEM
Field technicians should escalate when standard tests do not match any known failure pattern. Escalation is also wise when repeated alarms return after each repair attempt. Collect core data before you call the OEM. This data should include serial number, hours, fault codes, voltage readings, hydraulic pressures, and photos of the setup.
Contact the OEM or authorized distributor when safety-related systems appear compromised. Examples are suspected structural damage, unexplained motion, or recurring control failures. OEM support teams often request specific checks using their schematics and procedures. Follow these steps carefully and record each result.
Involve the OEM before altering control logic, bypassing interlocks, or replacing major components with non-equivalent parts. This protects compliance with standards and preserves warranty coverage. A disciplined handover, supported by good documentation, helps answer the core question: why will this aerial work platform not lift, even after basic repairs.
Electrical Causes: Power, Controls, And Sensors
Technicians who ask “why won’t my aerial work platform lift” should treat electrical checks as a first structured step. Electrical faults often stop all lift motion even when hydraulics and structure are healthy. A disciplined method reduces guesswork and avoids unsafe trial and error. The following subsections organize the main electrical causes into power, controls, measurement, and modern digital tools.
Battery, Charger, And Power Distribution Checks
A weak or unbalanced battery pack was a common answer to “why won’t my aerial work platform lift”. The lift might drive slowly but refuse to elevate because the control system detected low voltage under load. Technicians should measure open‑circuit voltage and loaded voltage at the battery pack and compare with the machine manual.
Key checks usually include:
- Verify charger output voltage and current match the battery type and rating.
- Inspect cables, lugs, and main contactor studs for corrosion and heat marks.
- Check fuses and main disconnects for continuity, not just visual condition.
- Measure voltage at platform and ground controls to confirm distribution integrity.
Voltage drop between the battery and the power input of the motor controller often reveals loose joints or undersized repairs. Any burnt smell, melted insulation, or discolored busbars signals overheating and demands immediate correction before further testing.
Motor Controllers, Joysticks, And Wiring Faults
Modern aerial lifts used electronic motor controllers to manage both drive and lift. When operators reported that the platform would not rise and alarms appeared, fault codes from the controller often pointed to joystick, wiring, or overload issues. Typical symptoms of a failing controller included intermittent lift, sudden stops, or unusual buzzing from the controller housing.
For the search intent behind “why won’t my aerial work platform lift”, technicians should focus on three paths:
- Confirm the joystick sends a clean proportional signal or discrete lift command to the controller.
- Trace harnesses between upper controls, lower controls, and the controller for broken or pinched wires.
- Check contactors and relays that enable hydraulic power units when lift is requested.
Any sign of short circuits, such as blown low‑voltage fuses or scorched connectors, requires isolation before power is reapplied. Replacement may involve new joysticks, repaired harness sections, or complete controller units, depending on diagnostic results.
Using Schematics, Multimeters, And Leakage Tests
Effective fault finding relied on accurate electrical diagrams and basic test instruments. Technicians who understood the schematic could follow the lift enable circuit from the battery, through interlocks and switches, to the hydraulic power pack. This approach turned a vague “won’t lift” complaint into a specific failed node.
Common test steps included:
- Use a multimeter to confirm supply voltage at each stage of the control chain.
- Measure coil resistance of contactors and relays to detect open or shorted coils.
- Check for insulation leakage between conductors and chassis when unexplained faults or nuisance trips appeared.
Leakage or ground faults sometimes prevented motion even when basic voltages looked correct. Structured measurements, taken with the circuit de‑energized where possible, helped avoid accidental short circuits and protected sensitive electronics.
Integrating Predictive And Digital Diagnostics
Recent aerial work platforms used onboard diagnostics to speed up troubleshooting. Displays at the ground or platform controls showed error codes linked to lift interlocks, overloads, or sensor faults. When users searched “why won’t my aerial work platform lift”, these codes often gave the first precise clue.
Technicians could connect service tools or apps to read:
- Historical fault logs for low voltage, overcurrent, or over‑temperature events.
- Live data from angle sensors, load sensors, and limit switches that could inhibit lift.
- Status of safety circuits, such as emergency stop chains and tilt alarms.
Predictive maintenance used these data streams to spot trends like repeated low‑voltage alarms or rising leakage currents. Maintenance teams could then schedule battery service, harness replacement, or controller cooling checks before the platform reached a complete no‑lift condition.
Hydraulic And Structural Causes Of No-Lift
Technicians who ask why won’t my aerial work platform lift often face hydraulic or structural faults. Electrical checks may pass, yet the platform still will not rise or only creeps. This section focuses on fluid condition, components, and load limits that block lift motion. It helps separate true hydraulic problems from control issues and guides safe repair choices.
Fluid Level, Contamination, And Filter Blockage
Low hydraulic oil is a common reason an aerial lift will not leave the ground. The pump draws air, pressure collapses, and lift cylinders stall or chatter. A fast first check is the reservoir sight gauge or dipstick with the platform fully lowered. Oil must sit within the marked band for safe operation.
Contamination directly affects the question why won’t my aerial work platform lift. Dirt, metal fines, or water change viscosity and damage pumps and valves. Typical symptoms include slow lift, jerky motion, or a lift that stops under load. Clogged return or pressure filters starve the circuit and trigger relief valves.
Good practice includes:
- Inspect the oil color and smell for burn or milkiness.
- Check filter indicators or differential gauges where fitted.
- Replace filters and oil following the service schedule.
- Bleed trapped air after any major fluid work.
These steps restore stable pressure and protect expensive components.
Pump, Actuator, And Seal Failures
If fluid quality and level look correct, the next suspects are the pump and actuators. A worn gear or vane pump may spin but not build rated pressure. The platform might rise empty yet refuse to lift a rated load. Pressure testing at the main test port is the safest way to confirm pump health.
Cylinder problems also explain why an aerial work platform will not lift or drifts down. Internal bypass across piston seals returns oil to tank instead of holding the load. External seal failure shows as wet rods, oil on the chassis, or visible drips. Both conditions reduce usable force at the boom or scissor stack.
Field repair may involve cylinder reseal, pump replacement, or both, guided by pressure and leak checks.
Line Routing, Damage, And Pressure Issues
Hydraulic hoses and rigid lines must carry high pressure without rubbing or kinking. Poor routing or missing clamps lets lines vibrate and chafe on structure. Over time the cover wears through, the reinforcement weakens, and leaks develop. A pinhole leak can stop lift motion long before oil visibly pools on the floor.
Technicians who ask why won’t my aerial work platform lift should trace lines from pump to control valve to each cylinder. Look for flat spots, tight bends, and contact with sharp edges. Any crushed or kinked section can act like a valve and block flow. Excessive pressure from overload or wrong relief settings accelerates hose damage.
Useful checks include:
- Verify clamps and brackets hold hoses clear of moving parts.
- Inspect for frayed braid, blisters, or oil mist along the line.
- Measure operating pressure against the manufacturer limit.
- Confirm quick couplers are fully seated and not partially closed.
Correct routing and pressure control reduce both downtime and risk of sudden hose failure.
Thermal, Load, And Stability Constraints
Hydraulic systems lose efficiency when they run hot. Overheating increases internal leakage and lowers oil viscosity. In that state, the platform may raise slowly or stop mid stroke under rated load. Long duty cycles, blocked coolers, or high ambient temperature drive oil temperature beyond the design range.
Load and stability systems also decide whether the lift will move. Modern aerial platforms use load-sensing valves, tilt sensors, and stability algorithms. If these devices detect overload, side slope, or out-of-envelope reach, they block lift motion. Operators then see a no-lift condition even though hydraulic hardware is healthy.
This directly links to search queries like why won’t my aerial work platform lift even with the engine or motor running. The answer may be protective logic, not a failed pump. Best practice is to:
- Check platform load against the nameplate rating.
- Verify outriggers or stabilizers sit on solid, level ground.
- Inspect cooling fans, oil coolers, and airflow paths for blockage.
- Monitor oil temperature if gauges or diagnostics are available.
Balancing thermal control, correct loading, and stability systems keeps the lift responsive while preserving safety margins.
Safety Lockout, LOTO, And Practical Summary/Conclusion
When technicians ask why won’t my aerial work platform lift, they must first rule out safety lockout. Modern lifts used several interlocks and LOTO steps that intentionally blocked motion. Treat every no-lift complaint as a potential safety control doing its job, not only as a fault.
Effective lockout/tagout for aerial platforms followed a clear sequence. Technicians parked on firm ground, applied brakes, and fully lowered the platform. They engaged at least one emergency stop, turned key switches off, and removed keys. They opened battery disconnects where fitted and applied personal locks. They tagged both upper and lower controls with fault, date, and responsible person. These steps isolated all energy sources before any electrical or hydraulic work.
From an engineering view, LOTO interacted with common no-lift causes. An engaged e-stop, tripped interlock, or tagged-out machine produced the same symptom as a failed controller or low hydraulic pressure. A structured approach worked best: verify LOTO status and interlocks, read error codes, then separate electrical, hydraulic, and structural paths. This reduced blind parts replacement and downtime.
Industry trends moved toward clearer diagnostics and digital records. Service teams increasingly used electronic work orders that recorded LOTO steps, fault codes, and test results. Remote monitoring and predictive tools helped answer why won’t my aerial work platform lift before a site visit. However, these tools still relied on correct basic practice: trained operators, model-specific instruction, and disciplined inspections.
For practical implementation, sites should standardize aerial lift LOTO checklists, place them at charging or parking areas, and include them in operator refreshers. Supervisors should enforce tag visibility and weather-resistant tags for outdoor units. Maintenance planners should align inspection intervals with duty cycles and harsh environments. A balanced strategy combined conservative safety rules, robust electrical and hydraulic diagnostics, and continuous training. This kept platforms available for work while keeping technicians and operators protected.