Knowing how to release brakes on scissor platform equipment safely can be the difference between a controlled recovery and a serious incident. This guide walks you through when manual brake release is justified, step‑by‑step procedures, and the engineering controls that keep the machine stable. You will also see how to integrate brake release into daily inspections, maintenance intervals, and compliance with ANSI/OSHA requirements. Use this as a technical roadmap, and always pair it with the specific instructions in your lift’s operator and service manuals.
When And Why To Manually Release Scissor Lift Brakes
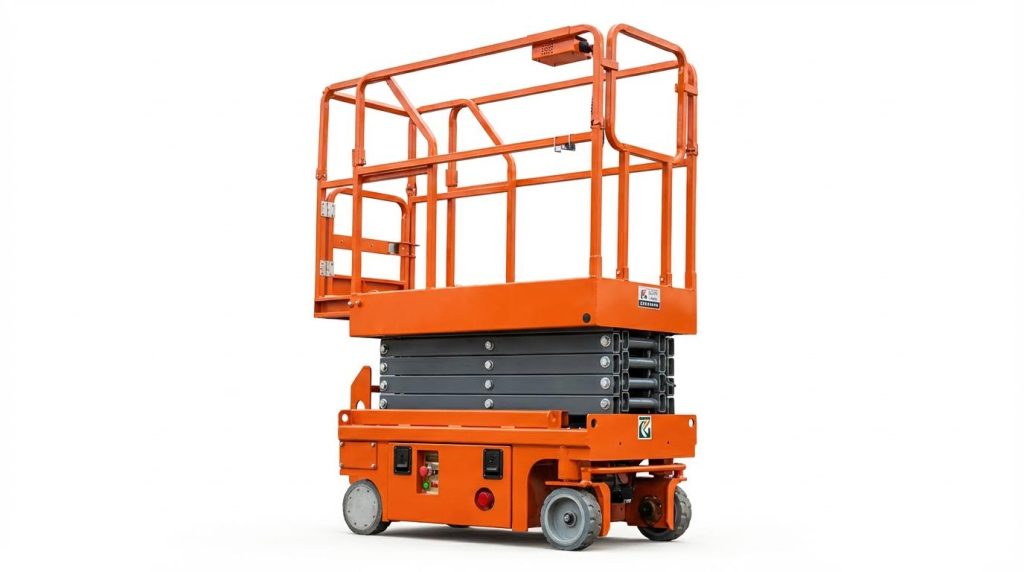
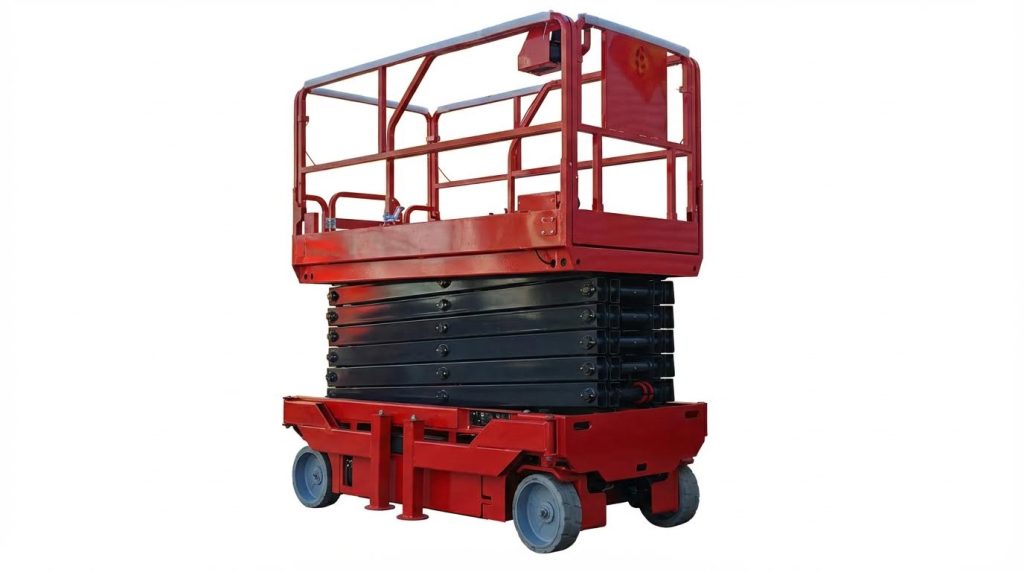
Typical brake designs on self‑propelled scissor lifts
Self‑propelled scissor lifts use fail‑safe brakes that default to the “on” position. To understand how to release brakes on scissor platform safely, you first need to know which brake system you are dealing with.
- Spring‑applied, electrically released brakes on drive motors
- Hydraulic drive motors with normally closed brake valves
- Integrated parking brake controlled through the traction controller
- Manual override valves or screws for emergency brake release
Most electric drive units use a spring‑applied brake mounted on the motor. When power is lost, the spring clamps the brake, locking the wheels. Hydraulic systems use check or counterbalance valves to trap pressure and prevent wheel rotation until a manual or powered release occurs.
How manual brake release mechanisms are built
Manual release is usually provided by:
- Hex/Allen screws in the motor body that mechanically back off the spring pack (example: removing G1/8 plugs and turning an inner plug to release the brake) Emergency brake release example
- Hydraulic hand pumps and selector valves (e.g., NV1/NV2) that bypass normal drive circuits and feed the brake release port Hydraulic brake release example
- Dedicated “tow” or “free‑wheel” levers that mechanically disconnect the drive
All of these systems are designed for short‑distance, low‑speed movement during breakdowns, not for normal travel.
Situations that justify manual brake release
Manual brake release is an emergency or controlled‑maintenance function. It is not a substitute for powered drive. Before deciding how to release brakes on scissor platform lift, confirm that manual release is truly justified and that the surface is firm, level, and free of slopes or holes. Stabilization practices
| Situation | Why manual release is used | Key engineering/safety conditions |
|---|---|---|
| Machine disabled in a work area (no drive function) | To tow or push the lift to a safe, level location for repair | Brakes only released after wheels are chocked and route is clear and level; no slopes allowed during release Do not release on a slope |
| Need to clear access ways, doors, or emergency routes | To move a failed lift that is blocking traffic or exits | Platform lowered, power isolated, spotters in place, travel distance minimized |
| Workshop maintenance and testing | To verify brake engagement, wear, or hydraulic function under controlled conditions | Lift on level workshop floor, test ramps within rated incline, brakes verified to hold after re‑engagement Brake verification on ramp |
| Recovery after hydraulic or electrical fault | To reposition the unit so that technicians can access components safely | Emergency lowering of platform completed first, then controlled manual movement at walking pace only |
| Relocation inside congested plant when drive power is unavailable | To winch or tow the lift a short distance to a service bay | Towing speed kept very low, tow equipment sized correctly, operators stay outside crush zones |
Situations that do not justify manual brake release include saving time on short moves, compensating for weak batteries, or moving on any incline. Brakes must never be released if the machine is on a slope, near drop‑offs, or on soft/uneven ground, because any uncontrolled roll‑away can exceed the brake system’s design assumptions for manual mode. Surface and slope requirements
- Only trained personnel should perform manual brake release.
- Follow the exact sequence in the manufacturer’s instructions for that model.
- Plan the path and final parking location before releasing the brake.
- Re‑engage and test the brakes immediately after movement is complete.
Step‑By‑Step Brake Release Procedures And Engineering Controls
Ground preparation, chocking, and slope limitations
Before you think about how to release brakes on scissor lift systems, you must make the machine immobile. Manual brake release removes the primary holding force, so surface condition and chocking become your “temporary parking brake.”
- Only work on hard, firm, and level ground to maintain stability and traction. Operating on firm, level surfaces is a core OSHA expectation.
- Never perform a manual brake release on a slope or near drop‑offs, holes, or soft ground.
- Lower the platform fully, stow all extensions, and retract any outriggers or stabilizers as specified for ground handling. Stability systems must be functional before any movement.
- Verify the tilt/level sensor is not in alarm; if the tilt alarm sounds, do not release the brakes. Tilt monitors disable drive and lift when inclination limits are exceeded.
Wheel chocking is the next critical barrier. Treat it as non‑negotiable whenever the drive brakes are disabled.
- Place heavy‑duty wheel chocks tight to the rear wheels on both sides before touching any brake release valve or plug. Manufacturer emergency brake release instructions start with chocking the rear wheels.
- On very smooth floors, add secondary blocks or cribbing in front of and behind at least one drive wheel.
- Remove loose debris, oil, ice, or mud under the wheels to maximize friction.
Engineering limits for manual movement
In engineering terms, manual brake release is only acceptable when the risk of unintended motion is extremely low. That means: no slope, no side‑load from towing, and no people or obstacles in the potential roll path. If the lift must be moved more than a short distance, towing or winching should follow the manufacturer’s transport procedure, not a prolonged “brakes off” condition.
Hydraulic and electric brake release methods
Scissor lifts mainly use spring‑applied, hydraulically or electrically released brakes on drive motors. Understanding which system you have is key to deciding how to release brakes on scissor lift drive axles safely.
Always follow the specific machine manual, but most designs fall into two practical patterns: plug‑type hydraulic releases and valve‑based brake release circuits.
| Method | Typical Components | Basic Action | Key Safety Points |
|---|---|---|---|
| Plug‑type hydraulic brake release | Motor body with G1/8 plugs, internal brake release screw | Remove outer plugs, turn inner plug/screw to mechanically release brake | Chock wheels; do not use on slopes; alternate turns to avoid binding |
| Valve‑based hydraulic brake release | Two brake valves (e.g., NV1, NV2), hand pump | Change valve states and pump to send pressure to brake release port | Drive at low speed only; restore valves after positioning; test on ramp |
| Electric brake release (conceptual) | Electric brake coil, manual override or powered release | Apply controlled power or mechanical override to release spring‑applied brake | Isolate power before work; avoid energizing with covers removed |
Below are generic, engineering‑style steps based on common manual instructions. They are not a substitute for the model‑specific manual.
Example: Plug‑type hydraulic brake release steps
Many wheel motors use removable plugs and an internal screw to back off the spring‑applied brake. A typical sequence, derived from manufacturer guidance, looks like this.
- Isolate and secure the lift
- Lower the platform and remove the key.
- Engage emergency stop at both ground and platform controls.
- Chock rear wheels on both sides. Chocking is the first step in the published emergency brake release procedure.
- Access the drive motor body
- Remove any covers needed to reach the brake end of the motor.
- Identify the G1/8 plugs used for brake release.
- Remove outer plugs correctly
- Use the specified hex/Allen key (for example, 5 mm) to remove the two G1/8 plugs by turning counter‑clockwise. Typical instructions call for a 5 mm Allen key and counter‑clockwise removal.
- Keep plugs and seals clean to prevent hydraulic contamination.
- Back off the brake evenly
- Turn the inner G1/8 plugs or screws clockwise to push against the brake stack.
- Alternate between the two sides in roughly 1/2‑turn increments to avoid cocking or binding the brake plate. Alternating 1/2 turns is recommended to prevent binding.
- Stop when resistance rises sharply; forcing further can damage the brake.
- Move the machine in a controlled way
- Use a tow vehicle or manual push at walking speed only.
- Keep personnel away from the front and rear of the lift.
- Do not perform this procedure if the lift is on any slope. Manuals explicitly warn not to release parking brakes on a slope.
- Re‑engage the brake after positioning
- Turn the inner screws counter‑clockwise to remove pressure from the brake stack.
- Refit and tighten the outer G1/8 plugs with their seals.
- Remove wheel chocks only after you have verified that the brake holds.
Example: Valve‑based hydraulic brake release steps
Some scissor lifts route brake release pressure through two valves and a hand pump. A typical sequence, based on published instructions, is as follows.
- Secure the lift
- Lower the platform, shut off power, and apply emergency stops.
- Chock wheels on both sides.
- Identify brake release valves and pump
- Locate valves often labeled similar to NV1 and NV2, plus a manual hand pump. Some manuals describe a brake release mechanism using valves NV1 and NV2 with a hand pump.
- Change valve positions to release brakes
- Screw valve NV1 (close or open depending on design) as specified by the manufacturer.
- Unscrew valve NV2 to connect the hand pump to the brake release circuit.
- Operate the hand pump
- Stroke the pump until you feel resistance increase and the brakes release.
- Confirm that the lift can now roll, but keep movement minimal and controlled.
- Move at low speed only
- If the machine can self‑propel with brakes released, use the lowest travel speed available. Manufacturers direct operators to drive at low speed after manual brake release.
- Avoid tight turns or sudden stops that could overload the driveline.
- Restore normal circuit after positioning
- Screw NV2 back to its normal position.
- Unscrew NV1 to return the brake circuit to standard operation. After movement, instructions call for returning NV1 and NV2 to their original states.
Electric brake releases are less commonly adjusted in the field without diagnostic tools. As a rule, you should not energize or mechanically alter an electric brake with guards removed unless the manufacturer explicitly describes a safe procedure.
Post‑release testing and restoring normal operation
Once the lift is in its new position, the brake system must be proven before you return the machine to service. This is the final, critical stage of any method for how to release brakes on scissor lift equipment.
- Visually confirm that all plugs, valves, and covers used during brake release are back in their normal positions and correctly tightened.
- Remove tools, drip trays, and blocking from the chassis area.
- Restore power by resetting emergency stops and reinserting the key.
Functional brake test sequence
A structured functional test reduces the chance of returning a lift to service with partially disabled brakes.
- Static holding test on level ground
- With the platform fully lowered, command a short forward and reverse movement, then release the drive control.
- Verify the lift stops promptly and does not creep.
- If there is any rolling, the brake release hardware may still be engaged or damaged.
- Controlled ramp test (within limits)
- Position the lift on a short test ramp not exceeding the manufacturer’s maximum permissible incline.
- Drive slowly up the ramp, stop, and release the control.
- Confirm that the brakes hold the lift on the ramp with no rollback. Some manuals specify verifying brake function on a ramp after manual braking.
- System and safety checks
- Check for hydraulic leaks at plugs, valves, and hoses disturbed during the procedure.
- Confirm that tilt sensors, emergency stop circuits, and travel speed controls behave normally. Travel speed is automatically limited when the platform is elevated.
- Verify that the platform cannot be elevated if the machine is on a slope beyond its rated inclination. Tilt monitors disable elevating and travel controls when limits are exceeded.
Finally, document the event. Any use of a manual brake release should be recorded, including the reason, the steps taken, and the outcome of brake tests. If there is any doubt about brake performance, remove the lift from service and have the braking system inspected and adjusted as part of a formal maintenance process. OSHA expects employers to ensure brakes hold the lift in position before operation.
Integrating Brake Release Into Maintenance And Safety Programs
Daily checks that prevent unintended brake release
Daily inspections are your first defense against unintended brake release or a scissor platform that will not hold after you manually move it. Build the “how to release brakes on scissor lift” steps into a simple pre‑use routine so operators never touch the brake circuit on a defective machine.
- Verify brakes hold: with platform stowed on level ground, attempt a low‑speed drive and stop; confirm the lift stops quickly and does not creep. Brakes must hold the lift in position before operation.
- Check for unintended movement: with drive controls neutral, confirm the lift does not roll when pushed lightly by hand.
- Inspect wheel chocks: ensure chocks are present and in good condition for any manual brake release or towing activity.
- Confirm tilt and interlock systems: test that tilt alarms and cut‑outs work; these prevent unsafe motion when the machine is out of level. Tilt monitors disable travel and elevation on excessive slope.
- Check hydraulic system basics: verify oil level, look for leaks at brake valves, hoses, and wheel motors. Daily checks include oil level and hose condition.
- Inspect electrical supply: confirm battery charge and cable condition so electric brake coils and control valves receive stable power. Daily checks cover batteries, cables, and connectors.
- Look at wheels and driveline: check tires, hubs, and reduction gearboxes for damage or leaks that could affect brake torque. Gearbox and hydraulic oil condition should be monitored.
- Confirm emergency lowering and stops: make sure emergency stop buttons and emergency lowering devices work; they are part of your overall risk control if a brake problem appears in the air. Pre‑use inspections include emergency systems.
How this links to manual brake release
Any failed daily check is a “no‑go.” If brakes do not hold, or if there are leaks or alarms, do not attempt to tow or manually release brakes on the scissor platform lift. Tag the unit out and escalate to maintenance. This prevents operators from using manual release as a workaround for a defective brake system.
Maintenance intervals, oil specs, and component life
Brake reliability after manual release depends on hydraulic cleanliness, correct oil viscosity, and timely replacement of wear parts. Use structured intervals so every time you decide how to release brakes on aerial platform systems, you know the underlying components are in spec.
| Task group | Typical interval | Key actions for brake reliability |
|---|---|---|
| Daily / pre‑use | Each shift | Check brake holding, oil level, batteries, hoses, tires, slideways, and filters for clogging. Daily inspection items include oil, batteries, hoses, and slideways. |
| Short‑interval service | 50–250 h | Change hydraulic filter cartridge (~50 h). Grease pivot pins and sliding friction parts (~250 h) to reduce drag loads on brakes. Filter and lubrication intervals are specified by hours. |
| Annual / 1000 h | ≈12 months or 1000 h | Drain and replace hydraulic oil; inspect brake valves and wheel motors while the system is open. Annual oil changes are common. |
| Multi‑year structural/electrical | 3000 h / 4 years | Inspect slideways, cables, hoses, and structural joints for wear that can change load paths into the brake system. Four‑year deep inspections are recommended. |
| Minor / intermediate / major overhauls | 1500 / 5000 / 10000 h | Plan minor, intermediate, and major repairs to mechanical and electrical systems, including brake cleaning, adjustment, and possible replacement. Staged overhauls by operating hours are common practice. |
Correct oil selection is critical for any hydraulic brake or release valve to behave predictably in hot and cold conditions. Use viscosity grades that match your climate so brake valves respond consistently when you operate a hand pump or release screw.
| Ambient temperature | Recommended hydraulic oil grade | Why it matters for brake release |
|---|---|---|
| Above 0 °C (typical) | ISO 32 | Balanced viscosity for normal climates; reliable valve response and consistent brake release feel. ISO 32 is recommended for normal conditions. |
| Very low, below −17 °C | ISO 15 | Thinner oil helps prevent sluggish valves and partial brake release in extreme cold. ISO 15 is advised in severe cold. |
| Hot summer operation | ISO 46 (some models) | Higher viscosity can maintain film strength at elevated temperatures, helping valves seal under high load. ISO 46 is sometimes used in summer. |
- Keep brake contact surfaces clean and dry; remove dirt or oil from discs and pads with suitable solvent. Brake surfaces should be kept free of dirt.
- Check for unusual noise from drive motors, gearboxes, or brakes; noise often signals misalignment or wear that can reduce holding torque. Noise monitoring is part of routine checks.
- Verify electrical wiring and connectors to brake coils are intact; repair or replace damaged conductors immediately. Regular wiring inspection is required.
Linking intervals to manual release decisions
When a lift is behind on oil changes or filter replacements, treat any need for manual brake release as higher risk. Contaminated oil and worn components increase the chance that brakes will not re‑apply fully after you tow or push the machine. In that case, restrict use to maintenance areas until the full service is completed.
Compliance with ANSI/OSHA and site safety policies
Manual brake release must sit inside a documented safety framework, not as an improvised field fix. Tie your “how to release brakes on scissor lift” instructions directly to standards, OEM manuals, and site rules.
- Write a site procedure: include when manual release is allowed (e.g., recovery, workshop movement), who can do it, and required PPE and tools.
- Require lockout/tagout: before accessing brake valves, motors, or wiring, de‑energize and tag the machine in line with your energy‑control program.
- Align with OSHA expectations: OSHA requires brakes that hold, firm level surfaces, and proper pre‑use inspections. OSHA guidance covers brakes, stability, and inspection.
- Reference ANSI/SAIA A92 principles: incorporate manufacturer instructions, rated slopes, and emergency procedures as part of your written program.
- Include training and sign‑off: operators and mechanics must be trained on the standard brake‑release method for each model, including hazards of releasing on slopes or with elevated platforms.
- Use checklists: add a “Manual Brake Release Completed / Brakes Re‑tested OK” section to maintenance work orders.
Post‑release verification should be mandatory. After any manual release, require a documented brake test on a safe ramp or level surface before the lift returns to normal service. This closes the loop between maintenance work, regulatory expectations, and real‑world risk control.
Final Thoughts On Safe Brake Release And Risk Control
Manual brake release turns a normally fail‑safe system into a conditional one, so engineering controls must replace lost protection. Ground conditions, chocking, and strict slope limits keep gravity from overpowering the reduced holding force. Correct use of hydraulic plugs, valves, and electric releases then allows short, controlled moves without damaging drive components.
Daily inspections and structured maintenance keep brakes predictable after each release. Clean oil, correct viscosity, sound wiring, and intact seals all reduce the chance of partial re‑engagement or delayed stopping. Functional tests on level ground and controlled ramps close the loop and prove that holding torque matches design intent before operators go back in the air.
Safety programs must treat brake release as an exception, not a workaround. Written procedures, lockout/tagout, and clear training stop people from using manual release to mask weak batteries, worn brakes, or slope misuse. Operations and maintenance teams should adopt one rule: only trained staff release brakes, only on firm level ground, only for short recovery or workshop moves, and only with documented post‑tests. Follow this rule, plus the model manual and Atomoving guidance, and you turn a high‑risk task into a controlled, repeatable process.
Frequently Asked Questions
How do you release the brakes on a scissor lift?
To release the brakes on a scissor lift, follow these steps:
- Ensure the wheels are chocked for safety.
- Locate the brake release mechanism, typically found at the rear of the machine.
- If the knob is round or dome-shaped, press it in. If it’s coin-shaped, turn it counterclockwise.
- Pump the red knob to release the brakes.
For additional guidance, refer to this brake release guide.
Why are my scissor lift brakes not releasing?
The most common reasons for scissor lift brakes not releasing include:
- A seized caliper or brake pad, often caused by rust or aging.
- Hydraulic system issues, such as fluid unable to return to the reservoir due to a jammed mechanism.
Inspect the calipers and hydraulic system to identify and resolve the issue. For more details, check this brake troubleshooting resource.