Understanding Scissor Lift Resets And Safety Basics
What “resetting” a scissor lift really means
When operators ask “how do I reset my scissor lift,” they usually mean clearing a fault so the machine will operate again. In most cases, a basic reset is a controlled power cycle: turn the machine off, wait around 10 seconds, then turn it back on while it is parked on a flat, stable surface to prevent further complications. However, a reset does not “fix” underlying problems such as low battery, hydraulic leaks, or overload; it only clears the control logic once the real fault is corrected using the fault codes as a guide. Think of a reset as the final step in troubleshooting, not the first thing you do when the platform will not move.
Core safety rules before any reset attempt
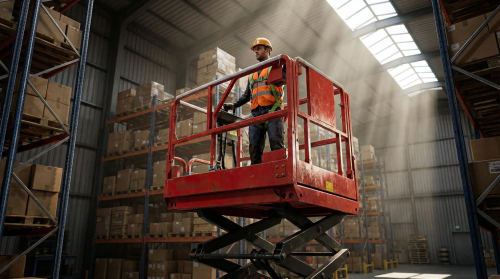
Before you even think about how do i reset my scissor lift, you must lock in some basic safety controls. Always lower the platform fully, park on firm, level ground, and set brakes or wheel chocks to prevent movement to avoid tipping or collisions. Keep all personnel off the platform while you reset, and make sure guardrails, E‑stop buttons, and ground controls are intact and functional as part of a pre-operation inspection. Wear appropriate PPE such as hard hat, eye protection, gloves, and sturdy footwear, and never bypass safety devices or error codes just to force the lift to run because overloads and misuse can lead to structural failure.
Diagnosing Common Faults Before Hitting Reset
Battery, charger, and electrical fault checks
Before asking “how do I reset my scissor lift,” confirm that basic power and electrical systems are healthy. Start with the batteries: check state of charge, clean any corrosion from terminals, and verify tight connections. Weak or dead batteries, blown fuses, or tripped breakers often stop the machine from powering up or moving due to low available voltage and open circuits. Use a multimeter to confirm battery and charger output, then inspect wiring looms for cuts, burns, or loose plugs before attempting any reset sequence.
Hydraulic faults, leaks, and low-pressure symptoms
If the lift powers on but will not raise, or moves in a jerky way, treat it as a hydraulic issue before you think about how do i reset my scissor lift. Inspect under and around the chassis for puddles, wet hoses, or oil on cylinders, which indicate leaks and pressure loss from worn hoses, fittings, or seals. Check the reservoir level with the sight glass or dipstick when the machine is cool and platform lowered, topping up only with the specified hydraulic fluid. Low fluid, air in the lines, or incorrect pressure relief valve settings can all limit lift height and speed and should be corrected before any reset.
Control panel errors, fault codes, and E‑stop issues
Modern scissor lifts log faults in the control panel, so reading the display is often more useful than repeatedly cycling power. Typical codes flag low battery, low hydraulic oil, drive or motor overheat, or platform overload and point you to the real cause of the shutdown. Confirm that all emergency stop buttons are pulled out, key switches are in the correct position, and that the platform and base controls both respond. Only after clearing obvious causes should you try a basic reset by switching the machine off, waiting about 10 seconds, and restarting on a flat, stable surface as many fault codes will not clear until the underlying issue is fixed.
Step‑By‑Step Reset Procedures And Technician Escalation

Pre‑reset inspections and stability verification
Before asking “how do I reset my scissor lift,” confirm the machine is safe and stable. Park on firm, level ground and deploy stabilizers or brakes as required to prevent movement during any reset site assessment and proper setup. Walk around the lift to check for hydraulic leaks, damaged hoses, bent structure, or loose wiring that could indicate a deeper fault rather than a simple control issue hydraulic and visual inspections. Verify guardrails, emergency stop buttons, and alarms are intact, and confirm the battery is adequately charged with no obvious corrosion at terminals. If any condition suggests instability or major damage, do not attempt to reset; isolate the unit and escalate to a qualified technician.
Control panel and power‑cycle reset sequences
For many minor electronic or control faults, a controlled power‑cycle is the first step. Turn the key switch off, wait at least 10 seconds, then turn the machine back on to reset the control panel and logic circuits control panel reset procedures. Ensure the lift is on a flat surface before any reset attempt to avoid compounding a stability problem. After power‑up, check the display for active fault codes and confirm the emergency stop buttons at both base and platform are released. Only then should you test basic functions (raise, lower, drive) in a clear area, stopping immediately if abnormal noises, jerky motion, or new error codes appear.
When to stop troubleshooting and call a technician
Knowing when to stop is as important as knowing how do I reset my scissor lift safely. If a fault code returns immediately after a proper reset, or if you see symptoms like major hydraulic leaks, erratic platform movement, or non‑responsive steering or drive, further DIY troubleshooting is unsafe common warning signs. Electrical issues involving repeated blown fuses, burnt wiring, or motor overheating also require a trained technician when to seek professional help. At that point, lock out the machine, record the exact fault codes and symptoms, and provide the model and serial number to service support so they can diagnose and repair the lift correctly.
Key Takeaways For Safe, Reliable Scissor Lift Operation
Safe scissor lift resets depend on three pillars: stability, fault diagnosis, and clear limits on DIY work. Geometry and support come first. Always park on firm, level ground, secure brakes or chocks, and keep the platform lowered and empty before any reset. This reduces tip‑over risk and keeps structural loads within design limits.
Next, treat the reset as the last step, not the first. Check batteries, fuses, wiring, hydraulic fluid level, and leaks before cycling power. Read fault codes and use the control panel as your guide. Clear the real cause of shutdown, then perform a short, controlled power‑cycle and test functions in an open area.
Finally, know when to stop. Major leaks, burnt wiring, repeated fault codes, or erratic movement signal deeper problems. At that point, isolate the lift and call a qualified technician. For operations teams, the best practice is simple: combine strict pre‑use checks, correct reset sequences, and timely escalation. For engineering and maintenance teams, back this up with training, clear procedures, and accurate fault logs so each reset improves long‑term reliability and keeps Atomoving scissor lifts working safely.
Frequently Asked Questions
How do I reset my scissor lift?
To reset your scissor lift, start by removing any weight from the platform. Next, push in and pull out the red Emergency Stop button to reset the system. If the platform is still overloaded, the warning light will continue to flash. Scissor Lift Reset Guide.
What should I do if the scissor lift doesn’t reset?
If the scissor lift does not reset after using the Emergency Stop button, ensure the platform is at its lowest point. On the control pad with up and down arrows, press and hold the down arrow until the lift reaches the lowest position. Continue holding the button for 10 seconds, then release to reinitialize the lift. Lift Maintenance Instructions.