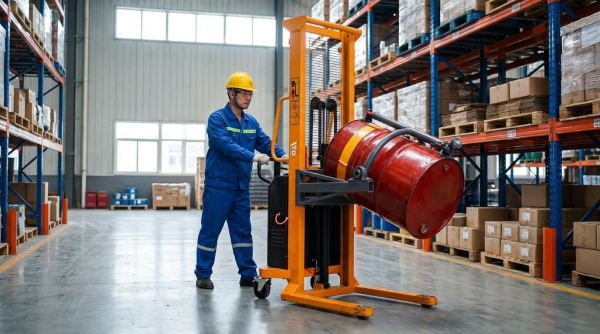
Safe and efficient drum stacker use means moving and stacking heavy 200 L drums with a mechanical stacker while controlling tip-over, spill, and chemical exposure risks. This article explains how to use a hydraulic drum stacker step-by-step, from pre-use checks and engagement technique to stacking limits and shutdown routines, so you reduce injuries, product loss, and equipment damage. You will also see how layout, aisles, pallets, and equipment choice affect stability and throughput. By the end, supervisors and operators will have a clear, practical framework to standardize drum stacker procedures and meet typical OSHA/NFPA expectations for drum handling areas.
Drum Stacker Basics And Core Safety Concepts
Core drum stacker safety concepts focus on matching the stacker type and components to the drum weight, contents, and environment so you prevent tip‑overs, dropped drums, and chemical exposure while learning how to use a drum stacker correctly.
Understanding the basics of drum stacker design and limits is the foundation of safe operation. Before you worry about advanced procedures, you must know what type of stacker you have, what each component does, and exactly how much it can lift and stack. This section builds that base so every later step in how to use a electric drum stacker stays inside safe, engineered limits.
💡 Field Engineer’s Note: Most drum incidents I investigate start with a wrong assumption about capacity or grip type, not a dramatic operator mistake—know your machine before you move your first drum.
Manual vs powered drum stacker types
Manual vs powered drum stackers differ mainly in how lifting and travel are powered, with manual units relying on operator effort and powered units using electric drives to reduce strain and increase throughput when you use a drum stacker frequently.
| Parameter | Manual Drum Stacker | Powered Drum Stacker (Walk‑behind) | Field Impact |
|---|---|---|---|
| Typical rated capacity | Up to ≈350 kg | Up to ≈360 kg | Determines maximum drum gross mass; overloading increases tip‑over and dropped‑drum risk. |
| Typical lift height range | ≈1,600–3,000 mm | ≥2,500 mm | Must exceed your highest pallet or rack level while keeping mast stable. |
| Power source | Operator push/pull and manual hydraulic pump | Battery or electric drive with electro‑hydraulic lift | Impacts operator fatigue, shift length, and required charging routines. |
| Best use case | Low‑throughput, short moves, occasional stacking | Medium‑to‑high throughput, frequent stacking and travel | Aligns equipment choice with daily drum move count. |
| Control interface | Push handle/tiller with mechanical brake, manual lift/lower lever | Tiller with travel controls, lift/lower buttons or levers, emergency stop | Defines training needs and emergency stop procedures. |
| Floor and aisle sensitivity | More sensitive to rough floors and slopes due to human push force | Slightly better over distance but still requires flat, hard floors | Poor floors increase rolling resistance and instability for both types. |
| Operator effort | High at upper capacity and on longer pushes | Lower; machine provides lift and often travel power | Directly affects musculoskeletal injury risk and sustainable pick rates. |
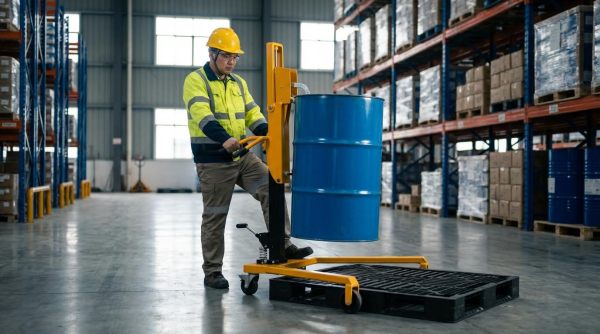
Manual drum stackers are best where you move limited numbers of 200 L drums per shift, on short, flat routes. Operators pump the hydraulic system by foot or hand and physically push or pull the unit, so the real‑world limit is often human strength long before the nameplate capacity.
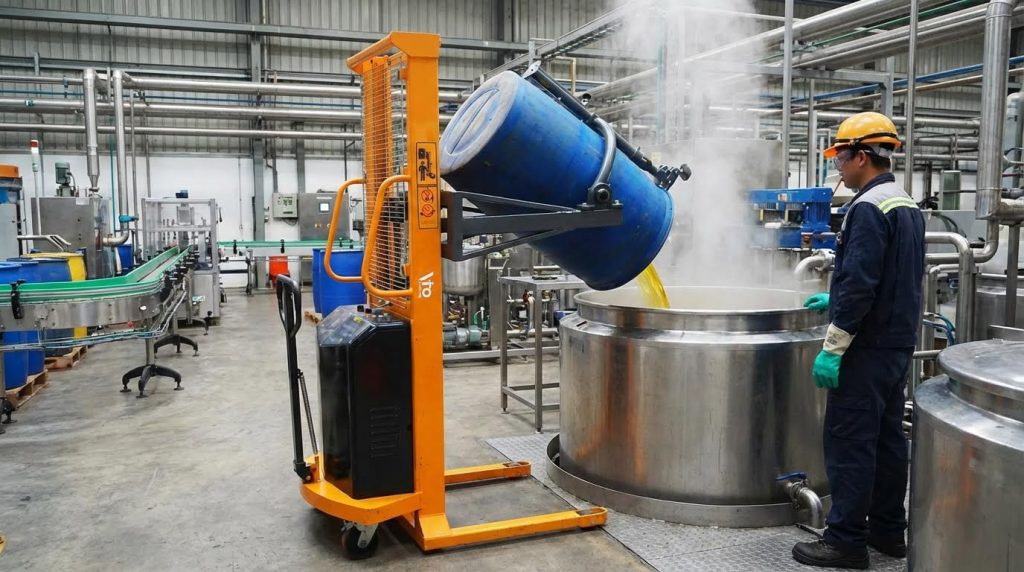
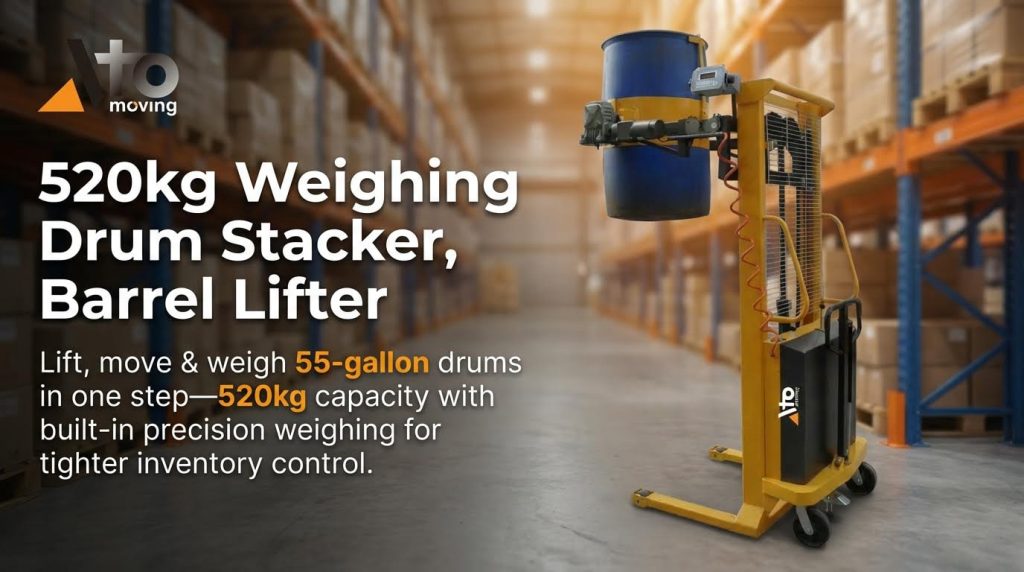
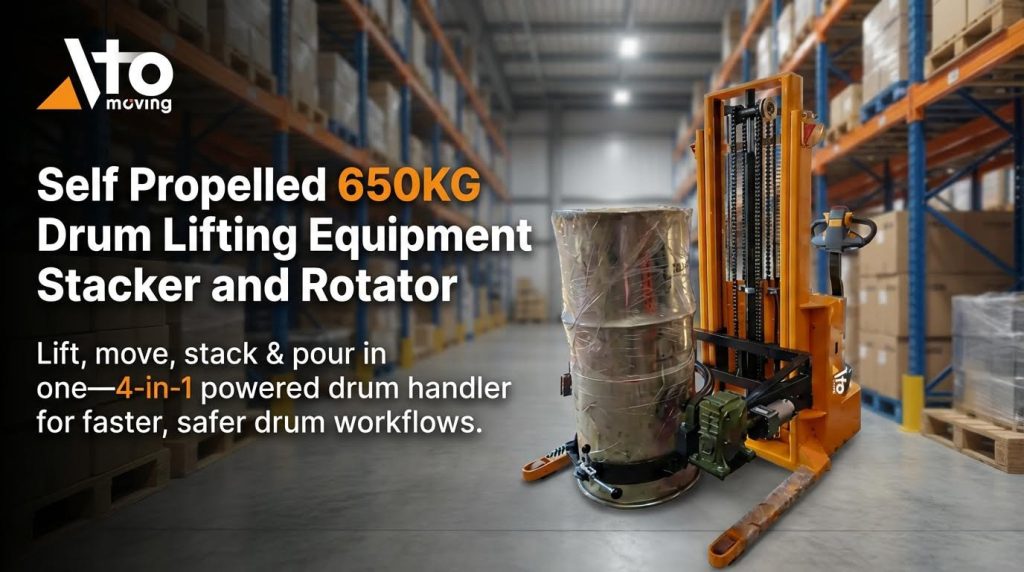
Powered drum stackers use an electric or battery system to drive the hydraulic lift, and often the travel wheels as well. This reduces operator fatigue, supports consistent speeds, and improves control when you learn how to use a electric drum stacker for higher‑throughput drum warehouses or chemical plants.
- Choose manual units: When you have low drum counts, short travel distances, and want minimal maintenance complexity.
- Choose powered units: When you handle many drums per hour, need higher lift heights, or must control travel speed precisely in shared pedestrian aisles.
- Respect capacity plates: Treat the lower of drum weight, floor rating, and stacker rating as your hard limit.
How manual vs powered affects training content
Manual units focus training on physical positioning, push forces, and hydraulic pumping technique. Powered units add travel controls, speed management, battery checks, and emergency stop drills to the core curriculum of how to use a drum stacker safely.
💡 Field Engineer’s Note: If operators “ride” the handle or push at an angle to overcome floor friction, you’ve probably specified a manual stacker where a powered unit is needed—expect rising back and shoulder injuries.
Key components and load ratings
Key drum stacker components and load ratings include the frame, mast, drum grip, hydraulics, and running gear, all sized to a specific kg and height rating that you must never exceed when using a drum stacker.
| Component / Rating | Typical Description | What To Check | Field Impact |
|---|---|---|---|
| Load frame & chassis | Welded steel structure with legs straddling the drum/pallet | Cracks, deformation, loose fasteners, corrosion | Structural failure under load can cause sudden collapse or loss of steering. |
| Mast | Vertical rails guiding the lifting carriage | Bent rails, damaged rollers, smooth travel | A twisted mast makes drums sway and increases tip‑over risk at height. |
| Drum gripping head | Rim clamp, cam jaw, chain, or similar device engaging drum chime | Jaw wear, alignment, full seating under rim | Poor engagement leads to dropped drums, especially with smooth plastic rims. |
| Hydraulic system | Cylinders, hoses, pump or power pack | Leaks, hose damage, unusual noises | Leak‑down can lower drums unexpectedly; bursts can spray hydraulic oil. |
| Controls | Handle/tiller, lift/lower levers, travel and emergency stop on powered units | Positive response, return to neutral, E‑stop function | Directly affects reaction time in near‑miss situations. |
| Running gear & brakes | Load wheels, steer wheels, casters, parking brake | Flat spots, free rotation, brake hold on slopes | Poor wheels increase push force and make the stacker wander or slide. |
| Rating plate (capacity) | States maximum kg at specific load center and lift height | Legibility, match to actual configuration | Your legal and practical limit; overloading voids compliance and insurance. |
| Typical manual rating | ≈350 kg up to ≈1,600–3,000 mm | Compare to drum gross weight (drum + contents) | Standard 200 L drums usually fit, but high SG liquids can exceed limits. |
| Typical powered rating | ≈360 kg to heights above ≈2,500 mm | Check derating at maximum height | Higher lifts reduce allowable capacity due to stability envelope. |
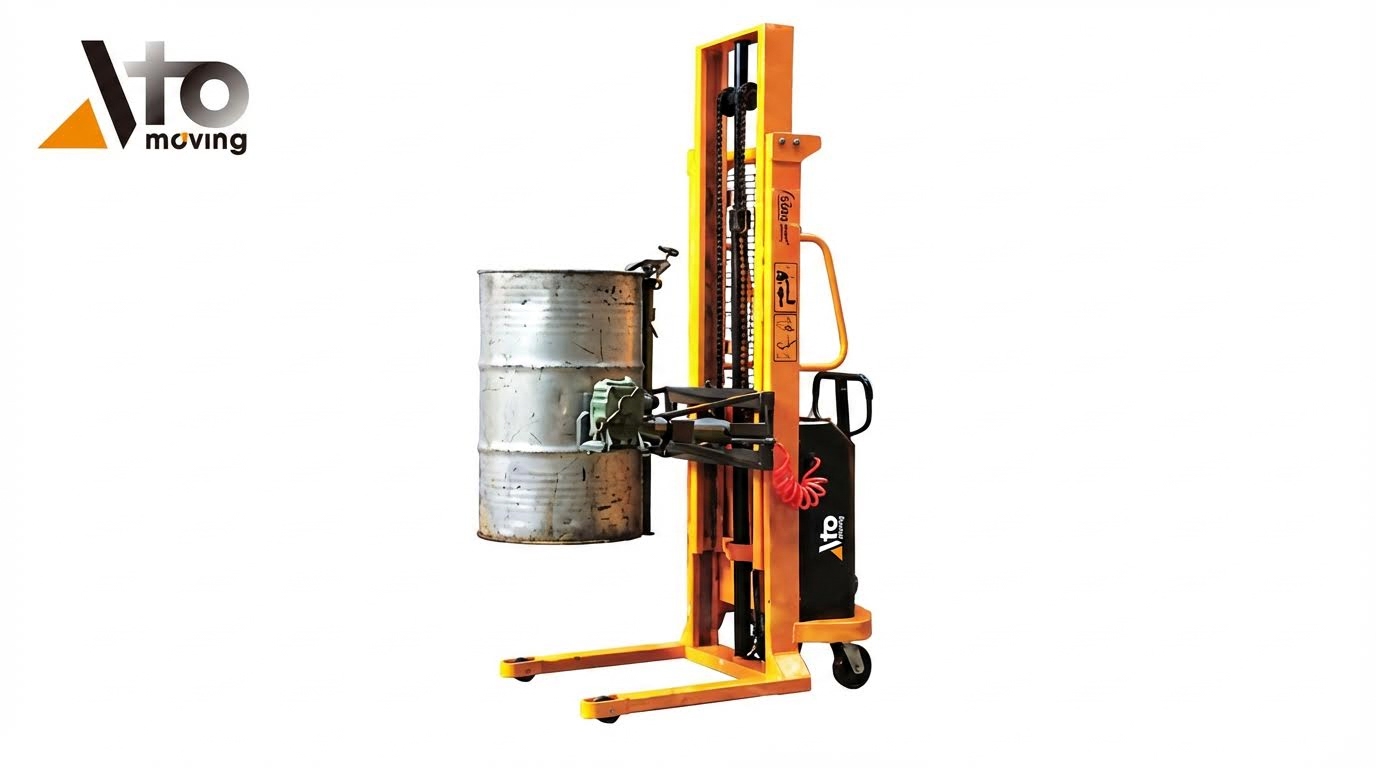
The load frame, mast, and drum gripping attachment form the structural “spine” of the stacker. The mast guides the vertical movement, while the gripping head must seat fully under the drum’s top rim (chime) before any lift. Hydraulic cylinders or electro‑hydraulic power packs provide the lifting force, and the wheels and brakes keep the whole system controllable on the floor.
Load ratings are not rough guidelines; they are engineered limits based on stability and material strength. Typical manual models rate around 350 kg, and powered units around 360 kg, but the real value is on your specific data plate. When planning how to use a drum stacker in your facility, you must calculate drum gross mass (drum + product, considering specific gravity) and ensure it stays below the rated capacity at the intended lift height.
- Always read the rating plate: It tells you maximum kg at a defined load center and sometimes reduced capacity at higher mast stages.
- Account for liquid density: A 200 L drum with contents above ≈1.5 specific gravity can approach or exceed common stacker limits.
- Respect stacking guidance: Under typical conditions, drums up to ≈1.5 specific gravity may stack four‑high; higher SG or temperatures above ≈30 °C often limit you to three‑high for stability.
How to relate drum weight to stacker capacity
1. Identify product density (specific gravity) from the Safety Data Sheet (SDS).
2. Multiply drum volume (0.2 m³ for a 200 L drum) by liquid density to estimate contents mass.
3. Add drum tare mass (usually 15–25 kg for steel) to get gross mass.
4. Compare this gross mass to the stacker’s rated capacity at the required lift height; if close to the limit, reduce stack height or use a higher‑rated unit.
💡 Field Engineer’s Note: If the rating plate is unreadable or missing, lock the stacker out—guessing at capacity is how tip‑overs and chemical releases start, especially with mixed‑weight drums in the same bay.
Step-By-Step Operating Procedures And Safety Checks
Step-by-step drum stacker procedures define exactly how to use a drum stacker safely by standardizing inspections, engagement, lifting, travel, and stacking limits to prevent tip-overs, leaks, and chemical exposure.
💡 Field Engineer’s Note: Most drum incidents I investigate start with someone “just skipping the checks this once.” Treat these steps like lockout/tagout—non‑negotiable, especially with mixed chemicals and hot drums.
Pre-use inspection and work area preparation
Pre-use inspection and area prep ensure the hydraulic drum stacker, drums, floor, and aisle are all safe before you move a single kilogram, dramatically reducing mechanical failures and spill incidents.
- Confirm rated capacity and task: Read the stacker data plate and compare its kg rating and maximum lift height with your heaviest drum and target stack height to avoid overload and instability.
- Inspect structural components: Check mast, frame, drum grab, chains, rollers, and pivot pins for cracks, corrosion, deformation, or missing fasteners; lock out the unit if any damage affects lifting or steering.
- Check hydraulics and leaks: Inspect cylinders, hoses, and fittings for oil seepage, wet spots, cuts, or kinks, and listen for abnormal noise during a short no‑load lift cycle.
- Verify wheels and brakes: Spin load wheels and casters to confirm free rotation, then test service and parking brakes to ensure they hold the stacker on a flat floor without creep.
- Test controls and safety devices: Operate lift/lower, travel (if powered), horn, and emergency stop in a clear area; any delayed response, sticking, or failure requires immediate removal from service.
- Check power source (powered units): Confirm battery charge level, inspect cables and connectors for damage or overheating signs, and ensure covers are present and secure.
- Inspect drum condition: Examine each drum for dents on chimes, bulging, corrosion, leaks, or missing/illegible labels; treat unlabelled drums as hazardous until contents are verified from SDS.
- Verify PPE and spill readiness: Put on safety footwear, appropriate gloves (impact and chemical‑resistant if needed), and eye/face protection; confirm spill kits and absorbents are available near the work zone.
- Prepare floor and aisles: Ensure the floor is hard, level, clean, and dry; remove debris, shrink wrap, and spill residues, and confirm there are no potholes, ramps, or slopes in the travel path.
- Organize traffic and segregation: Mark or respect pedestrian walkways, keep aisles clear to at least the stacker’s turning radius, and segregate incompatible chemicals into clearly labelled storage zones.
Optional daily checklist structure you can adopt
Combine visual checks (mast, hydraulics, wheels, drum grab, battery) with functional checks (brakes, steering, horn, emergency stop, lift/lower). Any failed item should trigger a documented work order and tag‑out.
Correct drum engagement, lifting, and travel
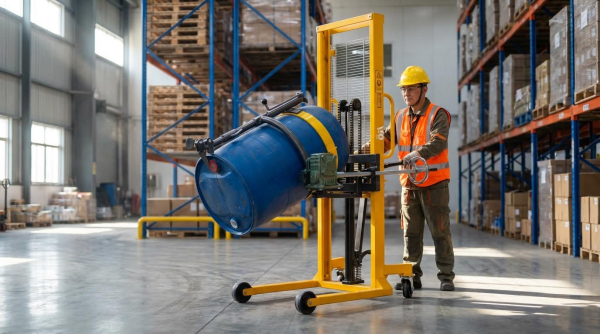
Correct drum engagement, lifting, and travel keep the drum’s center of gravity inside the stacker’s stability triangle so you avoid dropped drums, tip-overs, and uncontrolled sloshing during movement.
- Approach square and centered: Align the stacker straight to the drum so the mast is perpendicular to the floor and the drum sits centrally between the legs with its axis vertical.
- Position the grab mechanism: Roll the stacker forward until the rim or body is within the designed grip zone; lower the jaw, clamp, or chain so it contacts all intended points on the drum rim.
- Seat the grip under the chime: For rim‑grip systems, ensure the cam or jaw fully seats under the top chime, with no partial contact or misalignment that could let the drum slip when lifted.
- Perform a low test lift: Raise the drum only 50–100 mm off the floor or pallet, pause, and check for twisting, slipping, or tilting; if anything shifts, lower, re‑engage, and repeat the test.
- Keep the load low during travel: Once secure, travel with the drum below knee height, mast vertical, and the drum as close to the stacker body as possible to maximize stability.
- Control speed and steering: Move at walking pace, avoid sudden starts, stops, or direction changes, and never make sharp turns with the drum raised above travel height.
- Maintain clear visibility: Ensure you can see over or around the drum; if visibility is blocked, use a spotter and reduce speed further, especially near pedestrians and rack ends.
- Avoid slopes and poor surfaces: Do not travel on ramps, drains, or uneven joints with a raised drum; if unavoidable, keep height minimal and move straight up or down, never across the slope.
- Place the drum gently: At the destination, stop fully before raising to placement height, then lower the drum slowly onto the pallet or floor to avoid impact that could damage chimes or cause sloshing.
- Disengage and exit straight: Once the drum is stable and fully supported, release the grab, lower the attachment clear, and back straight out before turning to prevent side contact with the drum or pallet.
💡 Field Engineer’s Note: If you feel the stacker “pull” sideways when you start moving, stop immediately. That usually means the drum isn’t centered or the floor has more slope than it looks.
Why keeping the drum low matters
Keeping the drum 50–100 mm above the floor keeps the combined center of gravity low. A small sideways push or hole in the floor then produces far less tipping moment on the mast.
Stacking limits, hot drums, and chemical risks
Stacking limits, hot drums, and chemical risks define how high you can safely stack drums and under what temperature and chemical conditions, preventing structural collapse, leaks, and fire or toxic exposures.
- Confirm drum contents and density: Use labels and SDS to identify product and approximate specific gravity; treat unknown or high‑SG products as heavier and more critical for stacking and floor load calculations.
- Apply conservative stack heights: For typical steel drums with liquids up to about 1.5 specific gravity at normal ambient temperature, limit stacks to roughly four‑high; reduce to about three‑high for higher SG or hotter conditions.
- Assess pallet and floor quality: Use sound pallets around 1,168–1,200 mm square with full deck boards, and confirm floors are flat, solid concrete with known load ratings before building high stacks.
- Stabilize the stacking pattern: Place drums symmetrically with no overhang, keep tiers aligned vertically, and use dunnage (boards or sheets) between layers if needed to create a flat, non‑rocking surface.
- Control hot-filled drums: Allow hot drums to cool to near ambient before stacking more than two‑high; elevated temperature softens steel, increases bulging, and makes stacks much less tolerant of minor impacts.
- Limit partially filled, sloshing drums: Treat partially filled drums as less stable; avoid high stacking and keep them on lower tiers where center‑of‑gravity shifts from liquid movement are less critical.
- Separate incompatible chemicals: Store oxidizers, acids, bases, and flammables in segregated rows or zones, clearly labelled, so a single leak or spill does not mix incompatible products.
- Manage fire and explosion risk: For flammable contents, ensure compliant closures and pressure‑relieving bungs, maintain ignition‑free zones around stacks, and verify sprinkler coverage is not obstructed by over‑height stacking.
- Plan for inspection and access: Keep rows no more than two drums wide where possible so operators can visually inspect for leaks and corrosion without climbing or stretching over other drums.
- Document and train on limits: Write simple rules (e.g., “Product X: max 3‑high, Product Y: max 2‑high, no stacking when >30 °C”) and train operators so everyone understands how to use a drum stacker within safe limits.
💡 Field Engineer’s Note: In mixed-chemical warehouses, I recommend posting a one-page “stacking matrix” at the aisle entrance. Operators glance once and instantly know maximum tiers and any hot-drum restrictions.
Linking these rules to how to use a drum stacker
When you train operators on how to use a drum stacker, include not just the button-pushing steps, but also these stacking, temperature, and chemical‑segregation rules so their decisions stay within engineered safety margins.
Layout Design, Equipment Selection, And Maintenance

Layout, equipment choice, and maintenance determine how safely and efficiently you can use a drum stacker, controlling tip‑over risk, congestion, and unplanned downtime in real-world warehouse and chemical storage environments.
Aisle, floor, and pallet requirements
Aisle, floor, and pallet requirements define the physical envelope in which a drum stacker can operate safely, directly affecting turning clearance, ground stability, and whether stacked drums remain upright over time.
| Design Element | Typical/Recommended Requirement | Reason | Field Impact |
|---|---|---|---|
| Aisle width | Greater than stacker overall length + turning radius + drum overhang | Prevents side strikes when turning with a 200 L drum | Operator can rotate without clipping racks or drums, reducing impact and spill risk. |
| Floor type | Flat, hard, non-porous surface, usually concrete | Supports concentrated drum and wheel loads without rutting | Smooth rolling, predictable braking, and lower push/pull forces for manual units. |
| Floor condition | Clean, dry, free of debris and spill residues | Minimizes slip, skidding, and caster jamming | Reduces loss-of-control incidents and sideways drum movement during turns. |
| Floor load rating | Known kN/m² rating sufficient for stacked drum weight | Prevents slab cracking or settlement under four‑high stacks | Confidence that stacking plans won’t damage the building or create hidden instability. |
| Pallet size | Around 1,168–1,200 mm × 1,168–1,200 mm | Provides full deck contact for four 200 L drums | Drums sit fully supported; less rocking and rim damage when placing with a stacker. |
| Pallet condition | No broken/warped boards; full top deck | Maintains flat support surface between tiers | Reduces “wobble” when setting upper tiers and prevents punctures from broken boards. |
| Stacking height | Up to four‑high for SG ≤ 1.5 at normal temperature; three‑high for higher SG or >30 °C | Controls combined centre of gravity and drum bulging | Guides safe maximum lift height when planning how to use a drum stacker in hot or heavy-product areas. |
| Pedestrian routes | Clearly marked walkways separated from drum aisles | Reduces pedestrian–equipment conflicts | Operators can focus on drum control instead of constantly dodging foot traffic. |
Designing aisles for drum stackers is not just about width on paper; you must consider turning paths with a full drum, including any overhang beyond the pallet edge. Narrow aisles typically favor compact manual or walk‑behind powered units, while wide central aisles can support taller masts and higher stacking plans.
Floors must be verified for structural capacity where you plan dense drum storage. A four‑high stack of 200 L drums with liquids of specific gravity up to about 1.5 is commonly acceptable on good concrete, but higher densities or elevated temperatures often require limiting stacks to three‑high to control bulging and sway.
- Clean, dry surfaces: Wet or oily patches dramatically reduce wheel friction and increase the chance of sideways slip during turning with a raised drum.
- Spill management: Storage zones should include spill kits, drainage control, and ventilation so a dropped or leaking drum does not escalate into a major incident.
- Incompatible chemicals: Separate incompatible products into clearly marked zones so a single stacker impact cannot compromise multiple hazard classes.
- Pallet standardization: Using one or two standard pallet sizes simplifies operator judgment of drum placement, reducing edge overhang and misalignment.
💡 Field Engineer’s Note: Many tip‑overs I’ve investigated started with a bad pallet or a cracked floor joint under the first tier; always walk the route and swap out suspect pallets before teaching new staff how to use a drum stacker in that zone.
How to verify your aisle is wide enough
Measure your drum stacker’s overall length from handle to fork tips, then obtain (or estimate) its turning radius. Add the radius plus at least 150–200 mm clearance each side of the turning path and include drum overhang on pallets. If your measured aisle is narrower than this sum, restrict turning to aisle ends or redesign the layout.
Choosing manual vs powered units for your facility
Choosing between manual and powered drum stackers depends on travel distance, drum throughput, floor gradients, and operator ergonomics, all of which directly affect how to use a drum stacker safely over a full shift.
| Selection Factor | Manual Drum Stacker | Powered Drum Stacker | Field Impact |
|---|---|---|---|
| Typical capacity | Up to ~350 kg per drum | Up to ~360 kg per drum | Both handle standard 200 L drums; powered units keep effort low at upper capacity limits. |
| Lift height | Approx. 1.6–3.0 m | Above ~2.5 m and higher options | Manual suits low to medium racks; powered is better for frequent three‑ or four‑high stacking. |
| Operator effort | High push/pull and pumping effort | Low physical effort; electric lift and often powered travel | Powered units reduce fatigue, especially on longer runs or uneven floors. |
| Throughput | Best for low volume, intermittent moves | Optimized for medium to high daily drum counts | Choose powered when daily drum moves are high enough to cause fatigue or delays with manual. |
| Aisle suitability | Very maneuverable in tight aisles | Requires slightly more clearance for chassis and turning | Manual is often the only option in legacy narrow aisles; powered fits better in modern wide aisles. |
| Floor quality | More sensitive to rough joints and slopes (high push forces) | Handles minor imperfections better with powered drive | Poor floors favor powered units to keep operator forces within ergonomic limits. |
| Energy/charging | No battery; simple maintenance | Requires charging infrastructure and battery care | Manual avoids electrical maintenance; powered needs procedures for charging and inspections. |
| Training depth | Simpler controls but still requires formal instruction | More functions: travel controls, emergency stop, battery checks | Powered units need a structured training program and written procedures. |
| Purchase and life‑cycle cost | Lower upfront cost | Higher upfront, but lower labor cost per move | Evaluate ROI based on drum moves per day and injury/strain reduction. |
Manual drum stackers are most effective in small warehouses, maintenance shops, or low‑throughput chemical rooms where operators move only a few drums per shift over short distances. In these environments, the lower cost and high maneuverability outweigh the extra physical effort.
Powered drum stackers are better suited to production plants, bulk liquid warehouses, or distribution centers where drums move continuously and stacking heights are greater. Electric lift and travel reduce fatigue, help maintain consistent speeds, and support stricter traffic rules and standardized procedures for how to use a drum stacker across multiple shifts.
- Match to route length: If operators regularly push drums more than 15–20 m per move, powered travel quickly pays back in reduced strain and higher pick rates.
- Consider slopes and thresholds: Even slight ramps or dock plates increase push forces dramatically on manual units; powered units handle these with less risk of rollback.
- Account for drum hazards: Where contents are flammable, toxic, or reactive, reducing handling time and operator exertion with powered units also reduces exposure time and error rates.
- Plan maintenance from day one: Schedule daily checks of hydraulics, wheels, and controls, and implement preventive maintenance on cylinders, chains, and batteries to avoid in‑service failures.
💡 Field Engineer’s Note: When you standardize on one drum stacker type per zone and train everyone on a single, clear procedure, incident rates drop sharply because operators stop “guessing” how far they can safely push the equipment or the layout.
Quick decision checklist for your facility
- Count drum moves per day: If you exceed roughly 30–40 drum moves per shift, prioritize powered units.
- Measure aisle widths and turning points: If aisles are very narrow, trial a compact manual or walk‑behind powered unit before purchase.
- Check stacking height needs: If you routinely go three‑high or more, confirm mast height and stability margins.
- Assess floor and ramp conditions: Note any slopes, dock plates, or rough joints that will increase push forces.
- Evaluate chemical and fire risks: For flammable or corrosive products, integrate stacker choice with your fire protection and spill response plans.

Final Thoughts On Drum Stacker Safety And Compliance
Safe drum stacker use depends on one simple rule: never ask the equipment, floor, or operator to do more than they were designed for. Capacity plates, drum density, pallet strength, and floor ratings all link together. When you respect the weakest element, you keep the center of gravity inside a safe envelope and prevent tip‑overs and structural failures.
Standardized procedures turn these engineering limits into daily habits. Pre‑use inspections catch damaged masts, worn grabs, and leaking hydraulics before a lift fails. Correct engagement, low travel height, and conservative stacking rules then control dynamic forces from movement, heat, and liquid slosh.
Good layout and equipment selection close the loop. Adequate aisle width, sound pallets, and verified concrete capacity give the stacker a stable operating “box.” Matching manual or powered units to route length and throughput protects operators from over‑exertion and keeps handling predictable.
The best practice is clear. Treat drum handling as a designed system, not just a tool purchase. Define limits by calculation, document them in simple rules, train to those rules, and enforce daily checks. When you do that, Atomoving drum stackers deliver high throughput while staying inside OSHA, NFPA, and your own internal safety margins.
Frequently Asked Questions
How to Properly Use a Drum Stacker?
A drum stacker is a material handling tool designed to lift and stack steel drums safely. To use it properly, ensure the drums are aligned on pallets before stacking. For three-high stacks, the palletized stack height should not exceed 3 meters (10 feet). For four-high stacks, the maximum height is approximately 4.2 meters (13 feet, 9 inches). Always check the manufacturer’s guidelines for load capacity and stability. Drum Stacking Safety.
What Are the Safety Considerations When Stacking Drums?
When stacking drums, ensure they are evenly balanced on pallets to prevent tipping. Avoid exceeding recommended stack heights: 3 meters (10 feet) for three-high stacks and 4.2 meters (13 feet, 9 inches) for four-high stacks. Use a drum stacker that matches the weight and size of your drums. Inspect drums for damage before stacking to maintain stability and safety. Drum Stacking Guidelines.