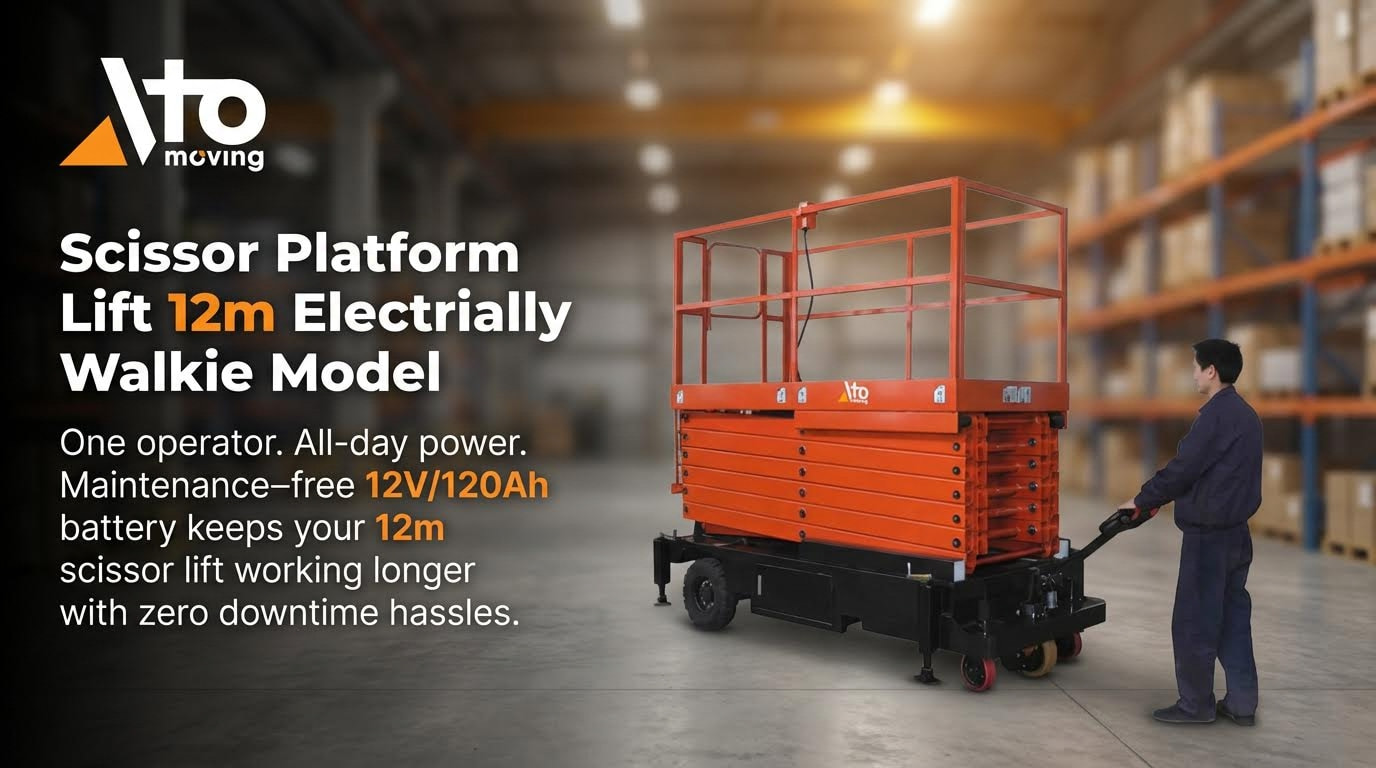
This guide explains how do you charge a scissor lift safely, from battery basics to daily charging routines and long-term care. You will learn correct charge times, setup, ventilation, and maintenance practices that protect operators, batteries, and your work schedule.
Using real-world charging times of roughly 6–16 hours and proven safety controls, we translate voltage, chemistry, and charger settings into simple steps your crew can follow. Whether you run one lift or a full fleet, this article helps you cut downtime, extend battery life, and stay compliant on site.

Fundamentals Of Scissor Lift Battery Charging
Fundamentals of scissor lift battery charging explain what is happening inside the battery every time you plug in, so you can answer “how do you charge a scissor platform” safely and extend battery life. This section focuses on battery chemistries and the three key charging stages that most smart chargers use.
Common battery types and chemistries
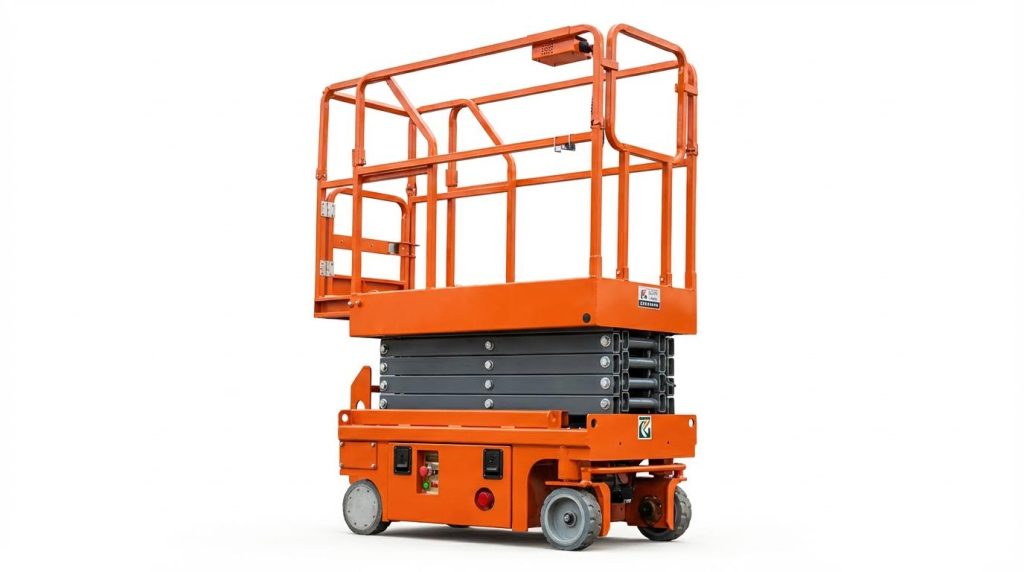
Common scissor lift batteries are deep‑cycle lead‑acid (flooded, AGM, gel) and, increasingly, lithium‑ion packs, and each chemistry needs a matching charger profile to avoid damage or fire risk. Understanding which type is on your machine is the first step before deciding how do you charge a scissor platform lift in your facility.
- Flooded lead‑acid (wet cell): Open caps, liquid electrolyte, needs watering – Low purchase cost, but higher maintenance and ventilation needs.
- Sealed AGM lead‑acid: Electrolyte absorbed in glass mat, non‑spillable – Less day‑to‑day maintenance, better for rough transport and moderate slopes.
- Sealed gel lead‑acid: Gelled electrolyte, very low gassing – Good where ventilation is limited, but sensitive to over‑voltage charging.
- Lithium‑ion (Li‑ion): Sealed pack with integrated electronics – Fast charging, high cycle life, but needs dedicated smart charger and controls.
| Chemistry | Typical Charge Time From Empty | Maintenance Needs | Operational Impact |
|---|---|---|---|
| Flooded lead‑acid | 8–10 h (within common 6–16 h range) charging duration reference | Regular watering, corrosion cleaning, ventilation | Best for single‑shift use with overnight charging and a fixed charging bay. |
| Sealed AGM / gel lead‑acid | Roughly similar to flooded (often 8–10 h) | No watering, external inspection only | Best where spills are unacceptable and operators are less experienced with battery care. |
| Lithium‑ion | About 2–4 h from low state of charge fast charge reference | No watering, electronic monitoring | Best for multi‑shift or rental fleets needing rapid turnaround and frequent partial charges. |
Lead‑acid batteries in scissor lifts usually require 6–12 hours for a full charge, with some models taking up to 16 hours depending on capacity and charger output. Lithium‑ion packs, by contrast, can reach full charge in about 2–4 hours under suitable conditions. Charging time comparison
How to identify your scissor lift battery type
Look for vent caps you can open and see liquid inside; that indicates flooded lead‑acid. A sealed, flat‑top block with no caps is usually AGM or gel. Lithium‑ion packs often have an information label mentioning “Li‑ion” and may integrate a visible battery management or communication connector.
💡 Field Engineer’s Note: In rental yards and mixed fleets, I have seen more charger damage from “chemistry mismatch” than from anything else. Always match the charger to the battery label (voltage and chemistry) before plugging in; the wrong profile can quietly cook sealed lead‑acid or trigger lithium protection faults long before anyone notices capacity loss.
How charging stages work (bulk, absorption, float)
Scissor lift battery chargers use three main stages—bulk, absorption, and float—to move energy into the battery quickly at first, then slow down to avoid overheating and overcharge. Knowing these stages helps you plan how do you charge a aerial platform overnight without cutting the cycle short or stressing the battery.
| Charging Stage | What The Charger Does | Typical State Of Charge Range | Operational Impact |
|---|---|---|---|
| Bulk | Delivers maximum current until voltage set‑point is reached bulk stage description | From deeply discharged up to about 70–80% state of charge | Fastest energy in; most of the “refuel” happens here, so early hours of charging recover the bulk of run time. |
| Absorption | Holds voltage constant and gradually tapers current to finish the charge absorption stage description | Roughly 80–100% state of charge | Slower; the last 20% can take several hours, so full overnight cycles are important for lead‑acid life. |
| Float | Reduces voltage to a safe “maintenance” level to hold full charge without overheating float stage description | Near 100% state of charge | Allows the lift to remain plugged in between shifts, stabilizing voltage and minimizing self‑discharge. |
During the bulk stage, the charger pushes as much current as it safely can until the battery reaches about 80% state of charge. The absorption stage then holds a constant voltage while current tapers off, which is why the final 20% of charge takes longer than the first 80%. Three‑stage charging profile
- Bulk stage and work planning: Most usable run‑time returns in the first few hours – Useful if you must recover a machine mid‑shift, but do not make partial charges a daily habit for lead‑acid.
- Absorption stage and battery health: Completing absorption reduces sulphation and balances cells – Essential for maximum cycle life on deep‑cycle lead‑acid packs.
- Float stage and storage: Float keeps a parked lift ready to go – Ideal for lifts that sit idle for days but must start the next job fully charged.
Why partial charging can shorten lead‑acid life
Lead‑acid batteries that are frequently unplugged before absorption finishes tend to build up sulphation on the plates. Over time this reduces capacity and increases internal resistance, so the lift runs for fewer hours and heats more during charging. Planning full overnight cycles, instead of repeated short “top‑ups,” mitigates this effect.
💡 Field Engineer’s Note: When operators complain that “the lift doesn’t hold a charge,” I often find they have been unplugging as soon as the charger’s bulk phase slows down. Make it policy that machines stay on charge until the charger indicates a completed cycle; that simple rule usually recovers a surprising amount of lost runtime over the next few weeks.
Step‑By‑Step Charging Procedure And Safety Controls

This section explains how do you charge a scissor lift in a safe, repeatable way, from parking and setup to charger connection, charge times, and post‑charge checks that protect batteries and operators.
Preparing the lift and charging location
To prepare a scissor lift for charging, you secure the machine, control the environment, and verify the battery area so nothing moves, overheats, or ignites during the charge.
- Park correctly: Position the lift on level, stable ground – prevents rolling and electrolyte sloshing in lead‑acid cells.
- Choose a safe bay: Use a well‑ventilated area away from flammable materials and trip hazards – limits hydrogen buildup and fire risk during charging.
- Power down the machine: Turn the key off and hit the emergency stop – removes drive and lift functions so the platform cannot move while plugged in.
- Open battery compartment (if required): Open covers where the manual specifies – improves ventilation around lead‑acid batteries that gas during charge.
- Inspect cables and connectors: Check for damaged insulation, loose plugs, or corrosion – avoids hot spots, arcing, and voltage drop before energizing.
- Control the environment: Keep the area dry, clean, and free from moisture – reduces short‑circuit and slip risks around the charger.
- Ban ignition sources: Prohibit smoking, grinding, or welding nearby – hydrogen from charging lead‑acid batteries can ignite explosively in confined zones.
Minimum safe space and ventilation tips
Keep at least 1,000 mm clear around the lift for access and heat dissipation. Use natural crossflow or mechanical ventilation in indoor bays so hydrogen cannot accumulate near ceilings or cable trays.
💡 Field Engineer’s Note: If your charging floor has even a small gradient or oil contamination, chock the wheels. Manual pushes or slight bumps can move a “parked” lift enough to strain charging cables or crack battery posts.
Connecting the charger and verifying compatibility
To connect a charger safely, you first match charger and battery specs, then make clean, secure connections so current flows correctly without overheating or electrical faults.
- Confirm battery type and voltage: Check the machine plate or battery labels – the charger must match system voltage and chemistry (e.g., 24 V flooded lead‑acid vs sealed) to avoid damage.
- Inspect the charger: Look for cracked housings, damaged leads, or exposed conductors – defects here are a common source of shocks and fires during long charges.
- Use a correct AC outlet: Plug the charger into a grounded, dedicated circuit with the right voltage – prevents nuisance trips and overheating from undervoltage or overload on shared lines.
- Connect DC side to the lift: Insert the charger plug fully into the lift’s charge port – a firm, clean connection avoids arcing and local melting at the connector.
- Check for correct polarity (if not keyed): Ensure positive to positive, negative to negative – reversed polarity can instantly destroy electronics and batteries.
- Verify indicator status: Confirm that charger LEDs or display show “charging” – tells you the system is live and correctly connected from the start.
- Generator use (if no mains): When using a generator, size it to the charger input and follow generator safety rules – avoids undervoltage, frequency drift, and exhaust hazards on site.
| Check Item | What to Verify | Operational Impact |
|---|---|---|
| Battery system voltage | Commonly 24 V or 48 V (label on lift) | Wrong‑voltage charger can overheat batteries or fail to charge fully. |
| Chemistry | Flooded, sealed AGM/gel, or lithium‑ion | Incorrect profile shortens life or triggers venting/thermal issues. |
| AC supply | Matches charger rating plate (e.g., 230 V) | Undervoltage extends charge time and increases heat in wiring. |
| Connector condition | No cracks, burns, or loose pins | Reduces risk of arcing when plugging/unplugging. |
Safe disconnection order after charging
When the charger shows full or float, first switch off the charger (if it has a switch), then unplug the AC side, and finally disconnect the DC plug from the lift. This sequence minimizes arcing at the battery connector.
💡 Field Engineer’s Note: Many “mystery” charging problems trace back to one loose series link between batteries. If the charger seems fine but charge time is abnormally short, physically check and torque each interconnect, not just the main terminals.
Managing charge times, cycles, and opportunity charging
To manage charging effectively, you plan full overnight charges, avoid habitual partial top‑ups, and watch indicators so batteries stay within healthy depth‑of‑discharge limits.
| Battery / Scenario | Typical Full Charge Time | Best For… |
|---|---|---|
| Standard lead‑acid in scissor lift | 6–12 hours, many models 8–10 hours | Overnight charging between daily shifts |
| Some heavy‑duty lead‑acid packs | Up to 12–16 hours | Planned long dwell times or weekend charges |
| Lithium‑ion packs | About 2–4 hours | High‑utilization fleets needing quick turnarounds |
| Partial charge to ~80% | About 4–5 hours | Occasional mid‑shift boost when unavoidable |
These times come from industry guidance on scissor lift charging durations and battery types. Some lifts charge in 6 hours, while others need 12–16 hours, and lithium systems can be much faster depending on chemistry.
- Plan full overnight charges: Start charging at end of shift and let the full algorithm finish – maximizes capacity and cycle life for lead‑acid batteries without interruptions.
- Avoid routine opportunity charging: Do not keep topping up for 30–60 minutes every break – short cycles increase sulphation and reduce long‑term capacity.
- Respect depth of discharge: Remove the lift from service before very low charge cut‑off – deep discharges below roughly 20% state of charge accelerate plate damage.
- Monitor charge indicators: Watch LED bars or displays and wait for “full” or “float” status – the last 20% takes longer due to the absorption stage of charging.
- Account for temperature: Expect 30–50% longer charge times in cold environments – batteries accept current more slowly at low temperatures and chargers may derate in heat.
- Handle non‑charging cases: If the lift will not start a charge, a low‑amperage “boost” charger at 2–5 A can raise system voltage enough for the onboard charger to take over – but any swollen or 0 V battery must be replaced for safety.
Simple work‑planning template for charging
For a single‑shift site, schedule: 1) Remove lifts from service when battery indicator reaches the manufacturer’s low threshold; 2) Plug in within 30 minutes of shift end; 3) Do not unplug until at least 8 hours have elapsed or the charger shows full/float; 4) Log any lifts that fail to reach full by start of next shift for inspection.
💡 Field Engineer’s Note: When people ask “how do you charge a scissor lift quickly,” the safest answer is still “overnight and uninterrupted.” Shaving an hour off today with partial charges usually costs you months of battery life and unexpected downtime later.
Battery Care, Troubleshooting, And Emerging Technologies
This section explains how to care for scissor platform batteries, manage heat and ventilation, and use new charging technologies so every charge is safe, efficient, and extends battery life.
When people ask “how do you charge a scissor lift” safely, the real answer goes beyond plugging in a charger. You must maintain lead-acid cells, control temperature and gas, and increasingly work with lithium-ion packs and smart fleet tools.
Lead‑acid maintenance, watering, and corrosion control
Lead-acid battery care focuses on correct watering, clean tight terminals, and disciplined charge patterns to avoid sulphation and overheating.
Flooded traction batteries in scissor lifts still dominate many fleets, and poor maintenance is a top cause of short runtime and charger “problems” that are actually battery issues. Good care directly improves how reliably you can charge a scissor lift overnight and get a full shift the next day.
- Electrolyte level checks (flooded cells): Check that electrolyte just covers the plates before charging, topping up only if plates are exposed – prevents plate damage while avoiding overflow during gassing. This aligns with guidance to avoid overfilling before charge because the electrolyte expands and may spill when gassing.
- Water quality: Use distilled or demineralized water only – minerals in tap water accelerate plate degradation and reduce service life.
- Post‑charge top‑up: After a full charge and cool‑down, recheck levels and fill only to the bottom of the fill tube where specified – keeps capacity without acid loss.
- Sealed lead‑acid (AGM/gel): Do not add water; instead, follow the exact charge profile in the manual – prevents valve damage and venting gas due to over‑voltage.
- Terminal and cable inspection: Inspect posts, lugs, and interconnects for corrosion, discoloration, or cracked insulation – poor connections waste energy as heat and can cause arcing.
- Cleaning corrosion: Clean deposits with approved brushes and a mild neutralizing solution, then rinse and dry – restores low resistance contact and protects against tracking faults.
- Correct torque on terminals: Tighten to the manufacturer’s torque spec, never “by feel” – under‑torque causes hot spots; over‑torque can crack posts.
- Charge cycle discipline: Allow full, uninterrupted charges whenever possible – reduces sulphation and stabilizes capacity over hundreds of cycles.
- Avoid deep discharge: Remove the lift from service before very low state of charge, typically around 20% – limits active material shedding and grid corrosion.
- Regular inspections: Align weekly or monthly checks with the operator’s manual – finds weak cells before they cause breakdowns mid‑shift.
| Lead‑Acid Type | Key Maintenance Task | What To Avoid | Operational Impact |
|---|---|---|---|
| Flooded (wet) | Check electrolyte covers plates; add distilled water after charge and cool‑down | Overfilling before charge or using tap water | Stable runtime for full 6–12 h charge windows; reduced acid spills in charging bays |
| Sealed (AGM/gel) | External inspection; keep terminals clean and tight | Using generic chargers or equalize modes not approved for sealed cells | Lower maintenance workload; avoids venting and early capacity loss |
How lead‑acid care ties into “how do you charge a scissor lift”
Even if you follow every step for how do you charge a scissor lift safely, ignored electrolyte levels or corroded terminals will cause slow charging, overheating, or chargers that trip out early. Good maintenance makes every charge predictable.
💡 Field Engineer’s Note: If you see one battery in the pack running hotter or losing water faster, isolate and test it. A single weak 6 V or 12 V unit drags down the whole string, causing “charger failures” and short runtimes that disappear once the bad unit is replaced as part of a matched set.
Temperature, ventilation, and fire risk management
Safe scissor lift charging requires controlling battery temperature, providing strong ventilation for gassing, and eliminating ignition sources around the charging area.
Lead-acid charging generates hydrogen and oxygen, especially in the later stages. Combined with high temperature or poor connections, this can create fire or explosion hazards if you do not manage the environment properly.
- Ventilated charging area: Park the lift on level ground in a well‑ventilated zone away from flammable materials and trip hazards – reduces hydrogen build‑up and improves evacuation routes as recommended for safe charging locations.
- Battery compartment open (where specified): Keep battery trays or doors open if the manual calls for it – lets heat and gas escape instead of concentrating around the cells.
- Temperature monitoring: Watch battery temperature during charge; significant rise indicates overcharge or internal issues – prevents thermal runaway and plate damage.
- Ambient temperature control: Avoid charging in extreme heat or cold; both conditions reduce charge acceptance and can extend charge times by 30–50% – keeps charge duration predictable for shift planning as outlined for temperature effects on charging.
- No ignition sources: Prohibit smoking, welding, and open flames in the charging zone – removes triggers for hydrogen explosions in line with safety precautions during charging.
- Personal protective equipment (PPE): Use safety goggles, acid‑resistant gloves, and protective clothing when working around batteries – protects eyes and skin from acid splashes.
- Remove metal jewelry: Rings, watches, and necklaces must be removed – prevents accidental short circuits and severe burns.
- Spill response: Neutralize acid spills with a mild alkali such as baking soda in water, then rinse and dry – limits corrosion of trays, floors, and tools.
- Post‑charge inspection: After charging, check for damage, corrosion, or leakage and do not operate the lift if issues appear – keeps a minor defect from turning into a field failure as advised for post‑charging checks.
| Risk Factor | What To Monitor | Control Measure | Operational Impact |
|---|---|---|---|
| Hydrogen accumulation | Confined spaces, no airflow | Ventilated bay, open battery compartments, no ignition sources | Makes overnight charging safer in dense fleets |
| Over‑temperature | Battery case hot to touch, charger derating | Stop charge, investigate connections and charge profile | Prevents permanent capacity loss and fire events |
| Acid exposure | Wet tops, stains, damaged cases | PPE, neutralization kits, prompt cleanup | Protects technicians and reduces corrosion repairs |
Where temperature fits into “how do you charge a scissor lift”
When planning how do you charge a scissor lift between shifts, assume longer times in cold areas and stricter ventilation in hot or enclosed spaces. This avoids surprise under‑charged batteries and reduces emergency call‑outs.
💡 Field Engineer’s Note: In cold warehouses, operators often complain that “the charger is slow.” The charger is fine; cold batteries accept current poorly. If you cannot warm the space, plan longer charge windows and avoid deep discharges late in the shift.
Lithium‑ion, smart chargers, and fleet analytics
Lithium-ion batteries, smart chargers, and telematics let fleets charge scissor lifts faster and manage health in real time, but they require strict adherence to the specified charger and software settings.
Compared to lead-acid, lithium packs charge faster, tolerate partial charges better, and integrate easily with cloud analytics. However, they rely heavily on correctly configured battery management systems (BMS) and matched chargers to stay safe.
- Faster charge windows: Lithium‑ion scissor lifts often charge fully in about 2–4 hours versus 8–10 hours typical for lead‑acid – supports multiple shifts per day with the same machine based on typical charging times.
- Reduced sensitivity to opportunity charging: Lithium batteries generally handle partial charges better than lead‑acid – lets you top up during breaks without the same sulphation penalty.
- Dedicated lithium chargers: Use only chargers approved for the specific lithium chemistry and voltage – prevents over‑voltage events that can trigger BMS shutdowns or safety faults.
- Integrated BMS protection: Lithium packs include BMS that monitor cell voltage, current, and temperature – automatically cut off charge or discharge to protect the pack.
- Smart charge algorithms: Modern chargers log charge duration, ampere‑hours, and fault codes – gives maintenance teams hard data instead of guesswork.
- Fleet analytics and telematics: When chargers connect to telematics, state‑of‑charge and fault data stream to the cloud – fleet managers can spot undercharging, overcharging, or abuse patterns across sites.
- Planning by data, not habit: Analytics show which lifts regularly return with very low SOC or get unplugged early – supports retraining operators and resizing the fleet instead of just buying more batteries.
- Consistent charger matching: Whether lead‑acid or lithium, always match charger voltage and chemistry to the battery – avoids overheating, gassing, and early failures as emphasized for charger compatibility.
| Battery Type | Typical Full Charge Time | Best Use Pattern | Operational Impact |
|---|---|---|---|
| Lead‑acid | Approx. 8–10 h (some models up to 16 h) | Full overnight charge, avoid frequent opportunity charging | Best for single‑shift operations with predictable downtime |
| Lithium‑ion | Approx. 2–4 h | Flexible top‑ups between tasks, within BMS limits | Supports multi‑shift use and high utilization fleets |
How lithium and smart chargers change “how do you charge a scissor lift”
With lithium packs and smart chargers, how do you charge a scissor lift becomes a software question as much as a hardware one. Correct settings, firmware updates, and telematics rules now drive safety and uptime.
💡 Field Engineer’s Note: When upgrading a site from lead‑acid to lithium, lock out old chargers physically, not just with labels. I have seen well‑meaning staff plug a lithium machine into a legacy lead‑acid charger, causing BMS faults and avoidable downtime.

Final Thoughts On Safe, Efficient Scissor Lift Charging
Safe, efficient scissor lift charging depends on matching the right charger to the right battery, then controlling heat, gas, and charge time. Lead‑acid packs need full, uninterrupted cycles and regular watering and corrosion checks. Lithium‑ion packs need dedicated chargers and respect for BMS limits. In both cases, correct profiles prevent gassing, overheating, and early failure.
Good site setup turns theory into uptime. Level parking, clean connectors, strong ventilation, and strict “no ignition sources” rules keep overnight charges predictable and low risk. Operators must follow a fixed sequence for connection and disconnection and wait for the charger to show a completed cycle, not just “charging.”
For most fleets, the best practice is clear. Standardize charger types and settings, write a simple charging SOP, and train every operator to follow it. Plan full overnight charges for lead‑acid machines and use lithium units where fast turnarounds or frequent top‑ups matter. Use smart chargers and, where available, Atomoving telematics or analytics to spot undercharging, deep discharges, and weak batteries early. When you treat charging as a controlled process, not an afterthought, you cut downtime, extend battery life, and keep people safe around every lift.
Frequently Asked Questions
How do you charge a scissor lift?
To charge a scissor lift, first ensure the equipment is turned off and the key is removed for safety. Locate the battery charger, which is typically found on the side or rear of the lift’s base. Connect the charger to an AC power source using an extension cord, then plug the cord into an electrical outlet. Scissor Lift Charging Guide.
- Always check the manufacturer’s guidelines for specific charging instructions.
- Avoid overcharging, as it can damage the battery or cause a fire risk.
Can you overcharge a scissor lift battery?
Yes, overcharging a scissor lift battery can lead to permanent damage or even cause a fire. It’s essential to monitor the charging process closely and disconnect the charger once the battery is fully charged. Overcharging generates excessive heat, which shortens the battery’s lifespan. Battery Charging Safety Tips.
Can you operate a scissor lift while it’s charging?
While it’s technically possible to use a scissor lift during charging, it’s not recommended unless absolutely necessary. If you must operate the lift, ensure the emergency shut-off button is pulled out and have someone guide the extension cord away from the wheels to prevent damage. Always prioritize safety and avoid unnecessary risks. Safe Charging Practices.