
This step-by-step guide explains how to operate a scissor lift safely, from pre-use inspections to shutdown, so you can control risk while staying productive at height. You will learn how to operate a scissor lift step by step using practical, standards-aligned checks, positioning methods, and load-handling habits that match real jobsite conditions.
Understanding Scissor Lift Design And Safety Basics
Scissor lift design and safety basics explain how the mechanism, guardrails, and operator envelope work together so you can apply any “how to operate a scissor platform step by step” guide without tipping, overload, or fall risks.
This section links the physics of the scissor mechanism with real-world safety rules. Once you understand where forces go and where people are allowed to stand, every later operating step becomes logical instead of memorized.
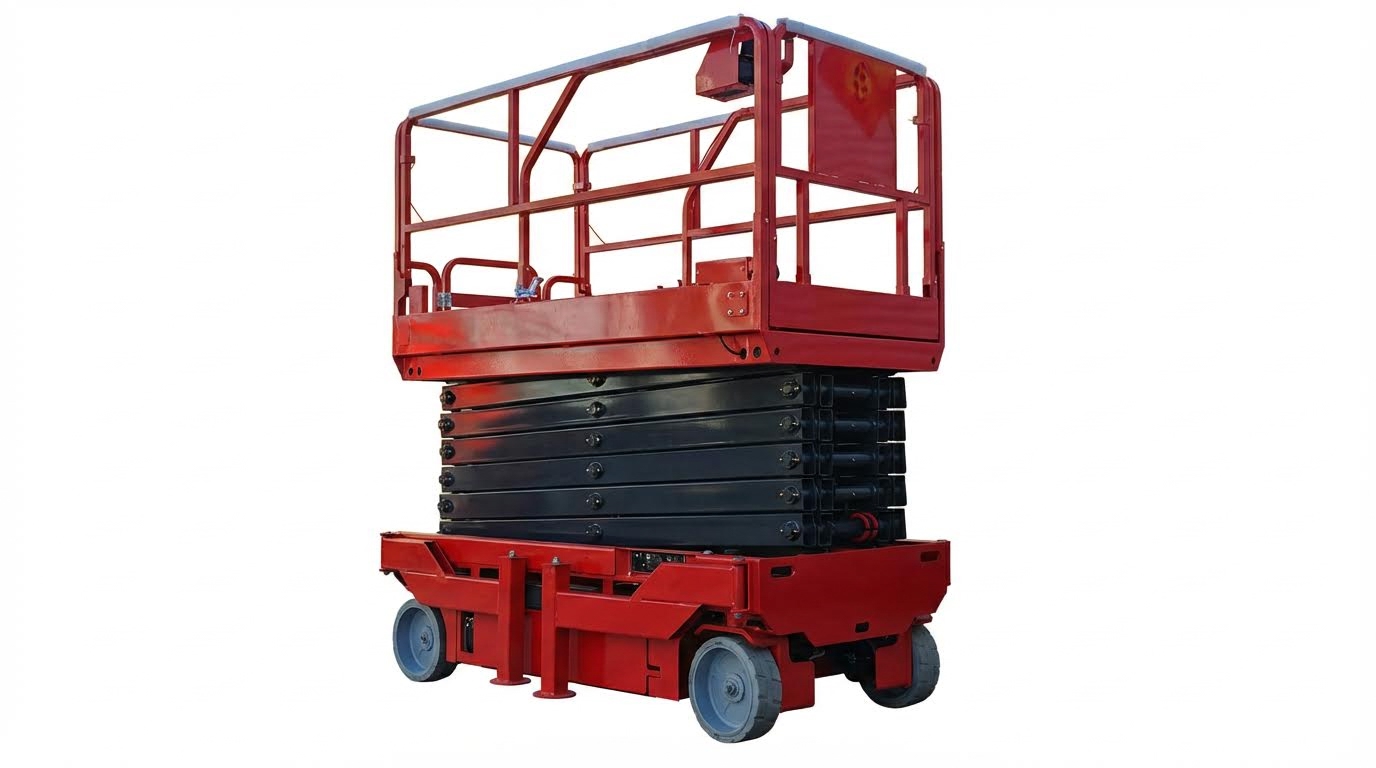
Core components and lifting mechanism
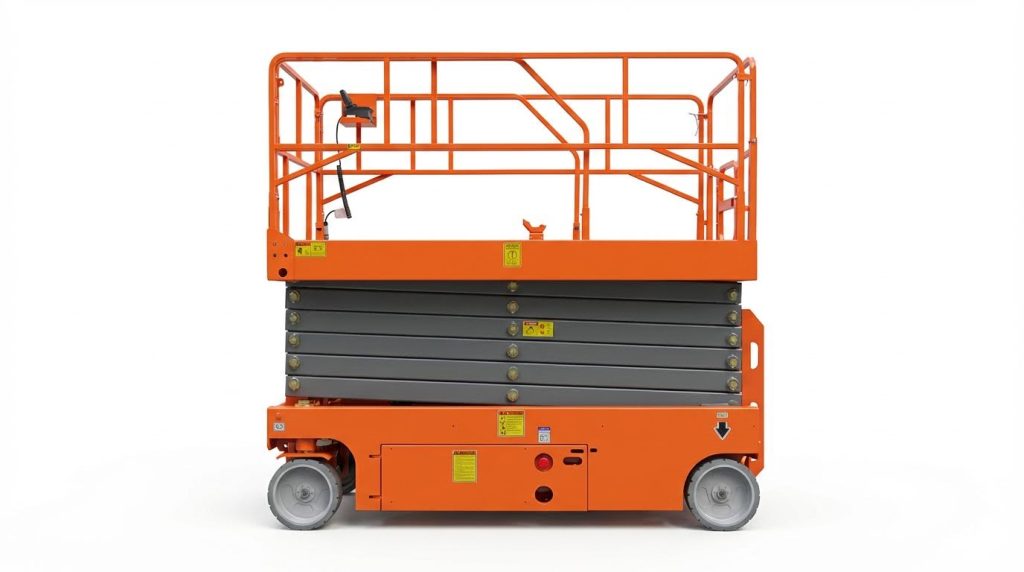
The core components and lifting mechanism of a scissor lift convert hydraulic or electric power into vertical motion while keeping the platform moving almost straight up and down for predictable, stable work positioning.
Most modern units use a hydraulic power pack that feeds one or more lift cylinders, which extend to open the scissor stack. Controls at the platform and ground station manage valves and pumps so the operator can raise, lower, and sometimes drive the machine. Typical manuals describe this as an intuitive joystick or toggle-based system.
| Core Component | Main Function | Typical Checks Before Use | Operational Impact |
|---|---|---|---|
| Scissor arms and pivots | Guide vertical motion and carry platform load | Look for cracks, deformation, corrosion, loose or worn pins | Damage here can cause sudden collapse or severe instability at height. |
| Hydraulic cylinders and hoses | Provide lifting force and control speed | Check for leaks, hose abrasion, damaged fittings, correct fluid level | Leaks reduce lifting capacity and can cause uncontrolled descent. |
| Platform structure and floor | Support personnel, tools, and materials | Inspect welds, floor plates, fixings, and entry gate | Weak floors or loose gates increase fall and overload risk. |
| Chassis, axles, tires, brakes | Provide base stability and mobility | Verify tire condition, inflation, brake holding capability | Soft tires or weak brakes compromise stability on slopes and during travel. |
| Control system (joystick, switches) | Command lift, lower, and drive functions | Test all motions and emergency stops | Faulty controls can cause unintended movement and crush hazards. |
| Emergency stop and lowering system | Stop motion and lower platform in emergencies | Test from platform and ground stations | Critical for rescuing operators during power or control failures. |
Hydraulic systems are central to the lifting mechanism. Operators must check for leaks, hose damage, and correct fluid levels as part of pre-use inspection so the platform raises and lowers smoothly and predictably. OSHA guidance emphasizes checking hydraulic components and safety systems before every shift, and industry manuals echo this requirement for safe operation.
- Scissor geometry: The crossed arms act as a linked lever system – small cylinder strokes create large vertical travel but also high pin loads.
- Load path: Platform load flows down through arms into the chassis – any cracked weld or bent arm directly weakens this path.
- Drive and steering modules: Mounted in the chassis – they must support rated loads while keeping the machine controllable in tight aisles.
- Control redundancy: Ground and platform controls with overrides – allow rescue if the person on the platform is incapacitated.
How the lifting speed is controlled
Lifting speed depends on pump flow rate, cylinder bore, and valve orifice sizes. Restrictive lowering valves and counterbalance valves ensure the platform cannot free-fall even if a hose fails, which is critical for operator safety.
💡 Field Engineer’s Note: In cold storage or winter work, hydraulic oil viscosity increases and scissor lifts can raise sluggishly or not reach full height. Always use the manufacturer-approved low-temperature hydraulic oil and let the machine idle at ground level for a few minutes to warm the fluid before elevation.
Guardrails, fall protection, and operator envelope
Guardrails, fall protection, and the operator envelope define the safe “box” you must stay inside so the platform and guardrail system, not your body, take all the loads and prevent falls during work at height.
Scissor lift platforms are surrounded by a guardrail system with top rails, mid-rails, and toe boards. OSHA requires that operators verify this guardrail system is complete, undamaged, and firmly attached, and that entry gates or chains are closed and latched before use. Workers must stand fully on the platform floor and keep both feet inside the guardrail envelope at all times.
| Guardrail / Envelope Element | Safety Role | Key Operator Rule | Operational Impact |
|---|---|---|---|
| Top rail | Primary fall barrier at upper body level | Never climb or sit on top rail | Climbing shifts your center of gravity outside the base and can cause a tip-over. |
| Mid-rail | Prevents falls under top rail | Check for straightness and secure fixings | Bent or missing mid-rails create large openings for falls. |
| Toe board | Stops tools and materials from sliding off | Do not stack materials higher than toe board unless restrained | Prevents dropped-object hazards to people working below. |
| Entry gate or chain | Closes the access point in the guardrail | Always close and latch before elevation | An open gate is a direct fall path when the platform moves or jolts. |
| Operator envelope | Volume where the operator’s body must remain | Keep both feet on floor, no leaning out or overreaching | Staying inside the envelope keeps your mass within the machine’s stability zone. |
Training material on how to operate a scissor lift step by step often states that a harness is not required if the guardrail system meets standards and is used correctly. If guardrails do not conform to standards, a personal fall arrest system becomes mandatory, and workers are prohibited from leaning against or standing on guardrails. This is because the rails are designed as barriers, not as climbing or anchoring structures.
- Stay off the rails: Never gain extra reach by standing on boxes or rails – this moves your center of gravity upwards and outwards, slashing stability margins.
- Keep tools inside: Use tool lanyards and keep materials away from rail edges – reduces dropped-object incidents.
- Respect platform capacity: Guardrails do not increase rated load – platform capacity (often 250–680 kg) still limits people plus tools plus materials.
- Maintain clear access: Do not block the entry gate with materials – you must be able to exit quickly in an emergency.
Understanding the “operator envelope” in practice
Think of an invisible 3D box defined by the guardrails and platform floor. Your body, including shoulders and hips, must stay inside this box. If you need to reach outside that box, reposition the lift instead of stretching or leaning out.
💡 Field Engineer’s Note: Many near-misses involved operators leaning out with one foot lifted or braced on the rail to “just reach that last bolt.” On narrow indoor slabs, that extra 200–300 mm of lean can be enough to trigger a tilt alarm or, worse, a slow side-tip if the floor is not perfectly level.
Step-By-Step Scissor Lift Operating Procedure
This section explains how to operate a scissor platform step by step, from inspection and site setup to safe elevation and driving, so operators can work efficiently while staying within safety and load limits.
- Scope: Pre-use checks, site assessment, positioning, loading, lifting, and driving – a complete field-ready procedure.
- Standard Focus: Aligns with OSHA and typical ANSI/CSA practices – supports compliance and safe work planning.
- Audience: Trained or in-training operators, supervisors, and safety officers – helps standardize procedures across crews.
Where this fits in your safety program
This operating procedure should sit between formal operator training and your site-specific work method statements. It does not replace manufacturer manuals or legal training requirements but helps translate them into a clear, repeatable routine.
Pre-use inspection and functional safety tests
Pre-use inspection and functional tests confirm the scissor platform lift is structurally sound and all safety systems work before anyone leaves the ground.
- Step 1: Verify operator authorization – Only trained and authorized personnel may operate the lift, as required by typical training and certification programs.
- Step 2: Walk-around structural check – Inspect scissor arms, pins, platform, and welds for cracks, deformation, or corrosion to prevent structural failure during elevation. OSHA guidance
- Step 3: Inspect hydraulic system – Check hoses, cylinders, and connections for leaks, abrasion, and correct fluid level to avoid sudden loss of lifting force or uncontrolled descent. OSHA inspection recommendations
- Step 4: Check electrical and control wiring – Look for damaged insulation, loose connectors, and moisture in control boxes to prevent erratic control behavior or short circuits. Typical manufacturer manual
- Step 5: Verify guardrails and entry gate – Confirm top-rails, mid-rails, toe-boards, and gates/chains are intact, rigid, and latched to maintain a safe operator envelope. OSHA fall protection guidance
- Step 6: Check decals and labels – Ensure capacity plates, warning labels, and control markings are legible so operators can follow correct limits and instructions. Manufacturer requirements
- Step 7: Inspect tires, wheels, and brakes – Confirm tire condition, inflation (for pneumatic), and brake function to ensure stability and stopping ability before elevation. OSHA stabilization guidance
- Step 8: Check batteries and power source – Inspect battery connections for corrosion and tightness, and verify charge level to avoid stalling aloft. Battery inspection checklist
- Step 9: Perform ground control function test – From the ground controls, test raise, lower, and emergency stop to confirm the override system works if the platform controls fail. Function test steps
- Step 10: Test platform controls and safety devices – On the platform, test lift, lower, drive, horn, lights, tilt alarm, pothole protection, and emergency lowering to ensure all safety systems respond correctly before work. Safety system checks
- Do not operate: If any structural damage, hydraulic leaks, or faulty safety devices are found – tag out and report immediately.
- Inspection frequency: At the start of every shift and after any incident – detects developing faults early.
💡 Field Engineer’s Note: Treat tilt alarms and pothole protection as “no-go” devices. If they do not activate during tests, the machine should not work near edges, ramps, or floor openings; a minor sensor fault can become a major tip-over risk.
Quick pre-use checklist (copy to a card)
1) Trained operator confirmed. 2) Structure and welds OK. 3) Hydraulics leak-free, level OK. 4) Tires, wheels, brakes OK. 5) Guardrails and gate secure. 6) Labels readable. 7) Batteries and cables OK. 8) Ground controls tested. 9) Platform controls tested. 10) Emergency stop and emergency lowering tested.
Site assessment, setup, and machine positioning
Site assessment and positioning ensure the aerial platform works on firm, level ground with safe clearances from overhead, electrical, and environmental hazards.
- Step 1: Inspect ground conditions – Confirm firm, level, compacted surfaces without voids, covers, or soft spots to prevent sinking or tilting. OSHA stabilization advice
- Step 2: Verify slope within limits – Check that the surface slope is within manufacturer tolerance (often under about 3° for indoor units) to maintain center-of-gravity within the wheelbase. Typical slope guidance
- Step 3: Clear debris and obstacles – Remove loose materials, cables, and offcuts from the travel path and work area to avoid wheel snagging or loss of traction. Workplace inspection protocols
- Step 4: Survey overhead and side obstructions – Identify beams, pipe racks, ductwork, and moving equipment to ensure the full height path is clear and to avoid crush hazards. Overhead hazard survey
- Step 5: Check electrical clearances – Maintain minimum approach distances to power lines and energized parts, commonly at least 3 m for low-voltage lines, with greater distances for higher voltages. Electrical clearance guidance
- Step 6: Assess weather and wind (outdoors) – Use an anemometer if needed and stop work if wind exceeds the manufacturer limit (often below 12.5 m/s), or during storms, heavy rain, ice, or poor visibility. Weather limit guidance
- Step 7: Plan travel path and exclusion zone – Mark a clear route for the lift and set barriers or cones to keep pedestrians and other vehicles out of the operating envelope. Safe operating practices
- Step 8: Position the chassis – Park so the platform can reach the work with minimal driving at height, keeping the machine square to the work face for better stability.
- Step 9: Deploy stabilizers or pothole protection – Where fitted, fully deploy outriggers or ensure automatic pothole protection devices extend correctly before lifting to maximize base width and resistance to tipping. Pothole guard checks
| Site Factor | What to Check | Typical Safe Range / Condition | Operational Impact |
|---|---|---|---|
| Ground level and firmness | No voids, covers, trenches, or soft soil | Firm, compacted, level surface | Prevents sinking or side-tilt during elevation. |
| Slope | Measure ramp or floor gradient | Within manufacturer limit (often <3° for indoor lifts) | Reduces risk of roll-away or tip-over. |
| Wind speed (outdoor) | Measure or estimate with anemometer | Below rated limit, often <12.5 m/s (≈28 mph) | Prevents swaying and loss of stability at height. |
| Electrical clearance | Distance to overhead lines or busbars | ≥3 m for low-voltage; more for higher voltages | Prevents arcing and electrocution risk. |
| Overhead obstructions | Beams, ducts, cranes, pipe racks | Clear along full planned height and path | Prevents crush and entrapment injuries. |
💡 Field Engineer’s Note: Many incidents happened not at full height but while “just nudging” the lift under beams. Always visualize the scissor stack footprint: as the platform rises, the stack leans slightly with floor unevenness, shrinking your real clearance margin.
How to quickly judge if the ground is too soft
Look for wheel ruts from other equipment, fresh backfill, or asphalt that deforms under your boot. If a boot heel sinks more than a few millimeters or water seeps when you step, treat the area as unsuitable without engineered mats or an alternative access solution.
Platform loading, elevation, and driving controls
Correct loading, elevation, and driving technique keep the aerial platform within its rated capacity and stability envelope while you move and work at height.
- Step 1: Confirm platform capacity and occupants – Read the capacity plate and ensure total weight of people, tools, and materials stays below the rated load, typically around 250–680 kg depending on model. Capacity information
- Step 2: Distribute load evenly – Place materials uniformly across the floor, avoiding heavy point loads at corners or against guardrails to keep the center of gravity near the geometric center. Load management guidance
- Step 3: Keep heavy items low and central – Store heavy tools or components as low as practical and toward mid-platform to reduce overturning moment, especially near full height. Inspection, Maintenance, And Battery Care Programs
Inspection, maintenance, and battery care programs turn “how to operate a scissor platform step by step” into a safe, repeatable system instead of guesswork. Structured daily-to-annual checks prevent failures, extend component life, and keep you compliant.
When you understand what to inspect, how often, and why, you reduce unplanned downtime and serious incidents. This section breaks that down into practical checklists and simple engineering logic.
Daily, weekly, and monthly inspection checklists
Daily, weekly, and monthly inspection checklists create a layered safety net: quick checks catch urgent issues, while deeper inspections find slow-developing faults before they become failures.
Use the following as a field-ready reference for planning your inspection program.
Interval Key Tasks Who Should Perform Operational Impact Daily (start of each shift) Visual walk‑around, leak checks, tire and brake check, guardrails and labels, basic function tests Trained operator Confirms lift is safe before use; prevents mid‑shift breakdowns Weekly Hydraulic level check, hose condition, lubrication of pivots, basic electrical and battery checks Competent mechanic or senior operator Reduces wear, picks up early hydraulic and electrical issues Monthly Wear pad measurement, deeper structural and hydraulic inspection, safety system verification Qualified maintenance technician Prevents structural failures and unsafe operation over time Annual (≤13 months) Full inspection, load test, safety calibration, documentation Qualified person per ANSI/CSA Confirms long‑term integrity and standards compliance - Daily walk‑around: Check tires for damage and inflation, look for hydraulic leaks, and verify guardrails and entry gates are secure – Prevents using a lift that is visibly unsafe. Daily inspection checklist
- Daily structural check: Inspect scissor arms, pins, welds, and platform for cracks, deformation, or corrosion – Catches fatigue damage before it propagates. OSHA pre-use inspection
- Daily function tests: Test raise/lower, drive, steering, horn, lights, emergency stop, and emergency descent – Verifies controls will respond when you need them most. Function test guidance
- Weekly hydraulics check: With platform fully lowered, confirm hydraulic oil level, inspect hoses for cracks or leaks, and check around cylinder seals for residue – Prevents gradual loss of lifting performance. Weekly hydraulic system check
- Weekly lubrication: Grease scissor pivots, platform hinges, steering joints, and drive bearings with specified lubricants – Reduces friction and wear at high‑load joints. Lubrication points
- Weekly electrical/battery check: Inspect battery water levels (for flooded types), charger leads, wiring damage, and moisture or corrosion in control boxes – Prevents intermittent faults and no‑start issues. Electrical system inspection
- Monthly structural inspection: Measure scissor wear pad thickness, inspect welds and platform floor, check for overload or impact damage – Ensures the structure can still support rated loads safely. Structural inspection
- Monthly safety system verification: Test pothole protection, tilt sensor calibration, overload protection, and all emergency stops – Confirms the machine will shut down correctly if something goes wrong. Safety system verification
- Annual professional inspection: Arrange a full inspection, including load testing and documentation, at least every 13 months – Keeps you aligned with ANSI/CSA and internal safety policies. Annual inspection requirements
How these inspections link to “how to operate a scissor lift step by step”
Every step of safe operation (from pre‑use checks to shutdown) depends on a machine that passes its inspection schedule. If the lift fails any critical item, you stop the step‑by‑step procedure and tag it out instead of operating it.
💡 Field Engineer’s Note: Treat “small” daily defects like minor oil spots or soft tires as red flags, not background noise. In the field, most serious failures started as something operators saw for days but never reported.
Hydraulic, electrical, and safety system maintenance
Hydraulic, electrical, and safety system maintenance focuses on the subsystems that actually move, power, and protect the lift, so the platform behaves predictably under load and in emergencies.
These tasks go beyond a checklist; they are about controlling pressure, current, and fail‑safe responses.
Subsystem Key Maintenance Tasks Typical Interval Operational Impact Hydraulic Check fluid level/cleanliness, inspect hoses and seals, change filters and fluid Weekly to annually, depending on use Prevents slow lifting, drift, and sudden loss of platform support Electrical Inspect wiring, connectors, controls, sensors, and charger Weekly to monthly Reduces unexpected shutdowns and control failures Safety systems Test E‑stops, emergency lowering, tilt and overload sensors, pothole guards Daily function tests, monthly calibration checks Ensures the machine fails safely, not dangerously - Hydraulic leak control: Identify leaks at hoses, fittings, and cylinder seals and replace components; do not just top off oil – Stops creeping platforms and contamination build‑up. Hydraulic leaks solution
- Slow platform troubleshooting: For slow lifting or lowering, check fluid level, filters, hose kinks, pump RPM, and valves for internal leakage – Restores normal cycle times and productivity. Slow platform movement solution
- Hydraulic fluid management: For heavy use, sample oil monthly for contamination and water; change fluid and filters around 1,000 hours or annually – Protects pumps and valves from abrasive wear. Fluid analysis and change intervals
- Electrical integrity checks: Inspect circuits, connectors, and controls for damage or corrosion; confirm emergency stop and ground controls work properly – Ensures commands at the joystick match what the machine actually does. Hydraulic and electrical system checks
- Safety device testing: Test overload protection, tilt alarms, pothole guards, and emergency descent monthly, with basic function checks daily – Makes sure the lift will stop or lower safely under fault conditions. Safety system verification
- Noise and vibration diagnosis: Investigate unusual sounds by checking lubrication, bearings, bushings, and loose parts – Prevents minor mechanical issues from turning into major failures. Unusual noises solution
- Scheduled service intervals: Plan hydraulic, electrical, and lubrication service about every 150 hours or 3 months, with annual inspection within 13 months – Keeps the machine inside its designed duty cycle. Scheduled maintenance intervals
Why this matters for step‑by‑step operation
When you follow any “how to operate a scissor platform lift step by step” guide, you rely on hydraulics to hold the platform, electrics to follow commands, and safety systems to react to overloads or tilt. Weak maintenance breaks that chain and invalidates even perfect operating technique.
💡 Field Engineer’s Note: In cold storage or winter work, hydraulic oil thickens and electrical resistance changes. If you do not adjust oil grade and check battery performance for low temperatures, lifts that worked fine in summer can become dangerously sluggish or unresponsive.
Battery technologies, charging, and lifecycle management
Battery technologies, charging, and lifecycle management determine how reliably an electric scissor lift will run through a shift and how many years you get from a battery pack.
Good battery practice is both a safety measure and a cost‑control lever.
Battery Care Task What To Do Recommended Frequency Operational Impact Terminal cleaning Clean corrosion, neutralize acid residue, and tighten connections Monthly or as needed Reduces voltage drop and heat; prevents no‑start issues Water level checks (flooded types) Top up with distilled water after charging to correct level Weekly Prevents plate exposure and capacity loss Equalize charging Run equalize charge to balance cell voltages Quarterly Extends pack life and maintains usable runtime Capacity/SG testing Check specific gravity or use testers to find weak cells Quarterly Identifies failing batteries before they strand a lift at height - Routine battery maintenance: Clean battery banks, remove corrosion, tighten lugs, and apply dielectric grease to terminals – Improves current flow and reduces fire risk from hot joints. Battery maintenance practices
- Water and specific gravity checks: For flooded lead‑acid, check water level and specific gravity of each cell; top up with distilled water only – Maintains capacity and reveals weak cells early. Battery water and SG checks
- Equalize charges: Perform equalization charges periodically to rebalance cells and reduce sulfation – Extends overall battery pack life and runtime per charge.
Final Thoughts On Safe Scissor Lift Operation
Safe scissor lift operation depends on how design, inspection, and maintenance work together in daily use. The scissor geometry, hydraulic system, and chassis define a limited stability envelope. Operators protect that envelope by staying within platform capacity, keeping loads low and central, and working only on firm, level ground with correct wind and electrical clearances.
Guardrails and the operator envelope turn the platform into a controlled workspace. When crews keep feet on the floor, stay inside the rails, and avoid overreaching, the structure—not the body—takes the load. Pre‑use inspections then confirm that this structure and all safety devices still match their design intent before anyone leaves the ground.
Planned maintenance and battery care close the loop. Clean hydraulics, sound electrics, tested sensors, and healthy batteries ensure that every command and every emergency function behaves as expected. That reliability lets teams follow a simple, repeatable procedure instead of improvising fixes at height.
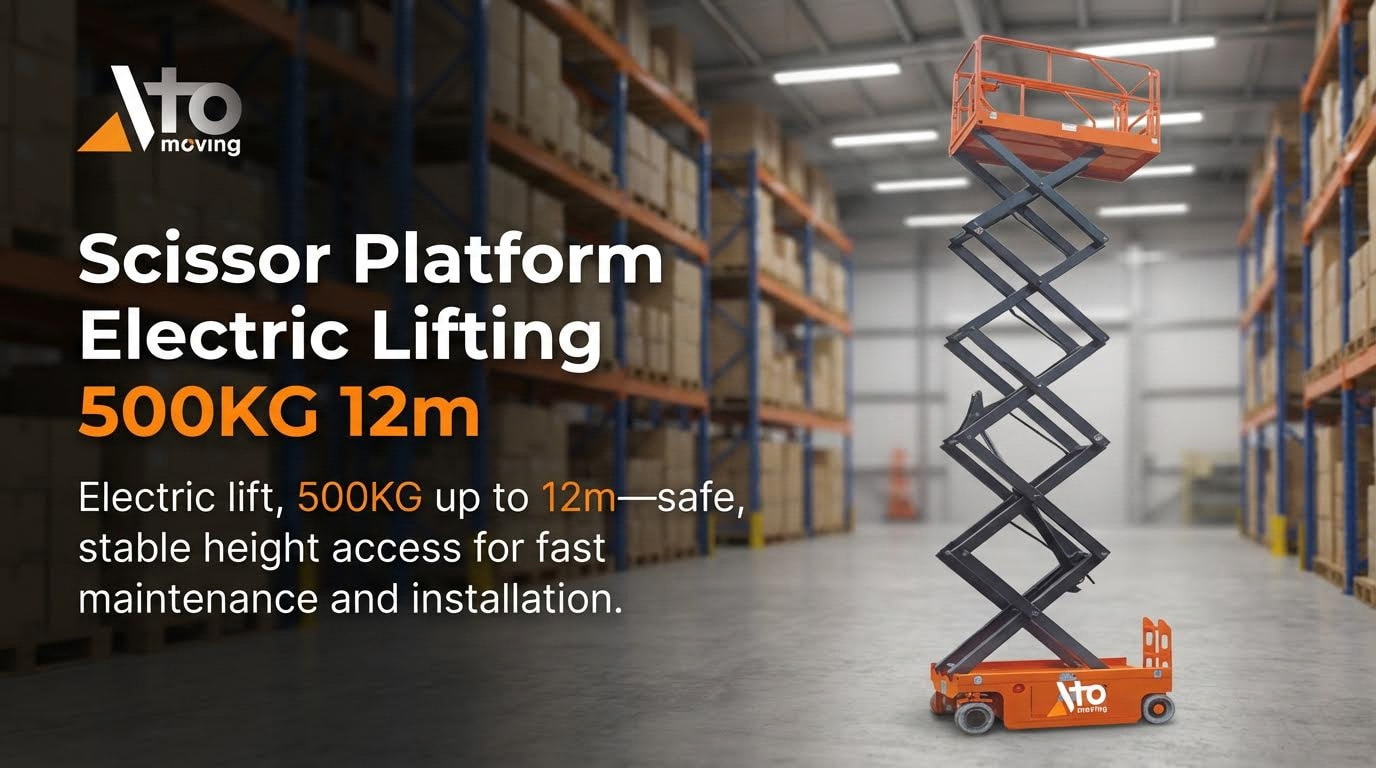
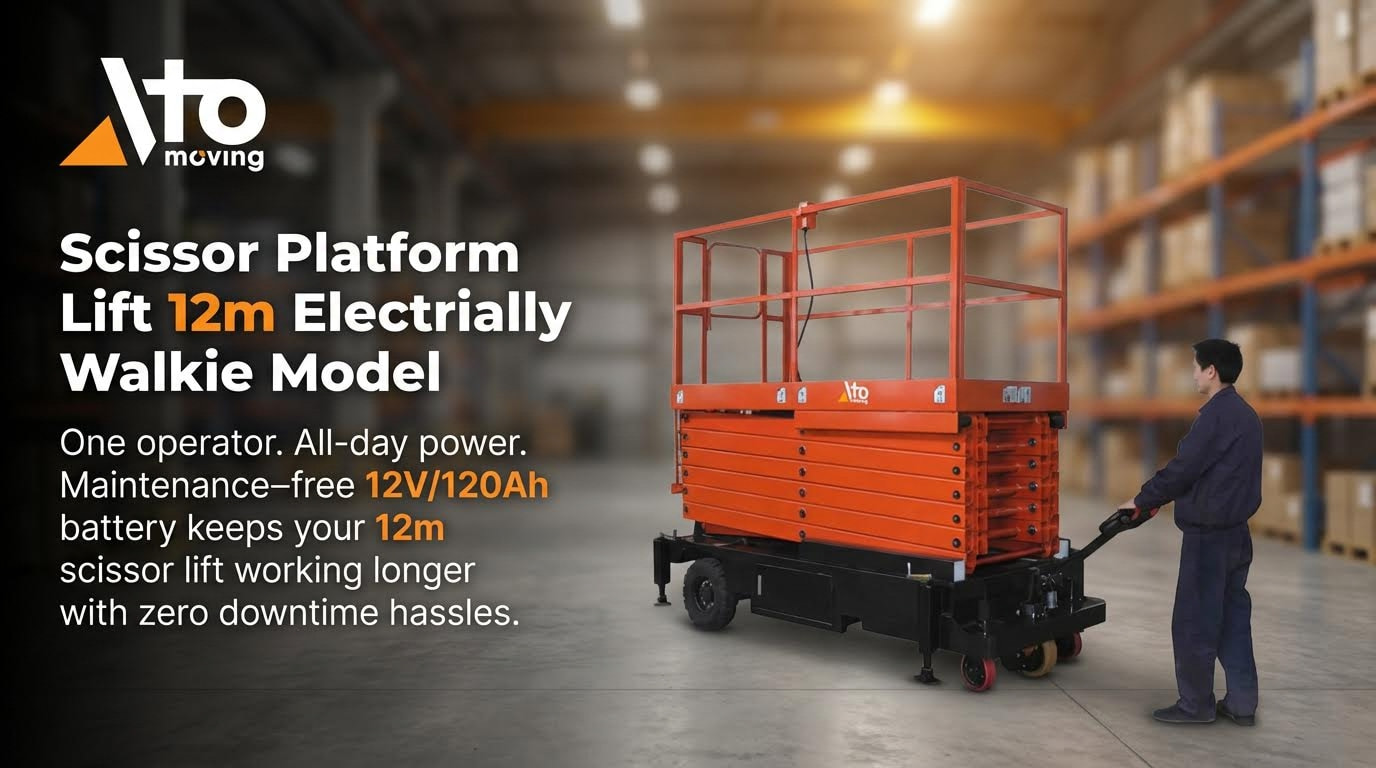
The best practice is clear: combine trained operators, strict pre‑shift checks, disciplined site setup, and a documented service program. Treat alarms and defects as stop signals, not suggestions. When you run your Atomoving lifts within their engineered limits every shift, you convert technical safety margins into real protection for people and projects.
Frequently Asked Questions
How to Operate a Scissor Lift Step by Step?
Operating a scissor lift involves several key steps to ensure safety and proper function. First, ensure the scissor lift is on a stable, level surface. Turn on the power source, which will activate the hydraulic system. Next, press the lift control button to raise the platform—this pushes hydraulic fluid into the cylinders, extending the legs and lifting the platform. Always check the lift’s load capacity before use and never exceed it. For emergency situations, familiarize yourself with the emergency stop button. Scissor Lift Guide.
How Does a Scissor Lift Work Step by Step?
A scissor lift works using a hydraulic or pneumatic system. Here’s how it operates step by step: First, the power source is activated, filling the cylinder with hydraulic fluid or compressed air. The fluid or air is then pushed into the cylinder, causing it to extend outward. This extension forces the scissor legs to push apart, raising the platform vertically. Lowering the platform reverses this process, retracting the cylinder and folding the legs. Always inspect the lift for leaks or damage before operation. Scissor Lift Mechanics.

