Facilities searching how to handle 55 gallon drums safely face a full lifecycle challenge. Risks start at receipt and labeling, continue through movement and storage, and end with disposal or reuse. This guide follows that lifecycle using the complete outline, from risk assessment and safe handling to storage integration and sustainable end-of-life options. Each section links practical shop-floor steps with OSHA and NFPA expectations so engineers, EHS staff, and supervisors can apply one consistent standard across their sites.
You will see how drum weight, ergonomics, PPE, and hazard data shape risk assessments. The article then explains engineered methods for moving, venting, and grounding drums without pressurization, including manual techniques and dedicated handling equipment such as Atomoving solutions. Storage design sections connect stacking limits, containment sizing, fire protection, and inspection access to real facility layouts and digital tools. The lifecycle closes with disposal, recycling, and reuse paths that reduce cost and support sustainability targets while staying within hazardous waste rules.
Risk Assessment And Safety Fundamentals
Safe work with 55-gallon drums starts with a clear risk picture. Teams that ask how to handle 55 gallon drums safely must first understand drum mass, chemical hazards, and human limits. This section builds that base. It links drum weights, labels, PPE, and OSHA or NFPA rules into one practical safety frame.
Drum Hazards, Weights, And Ergonomic Limits
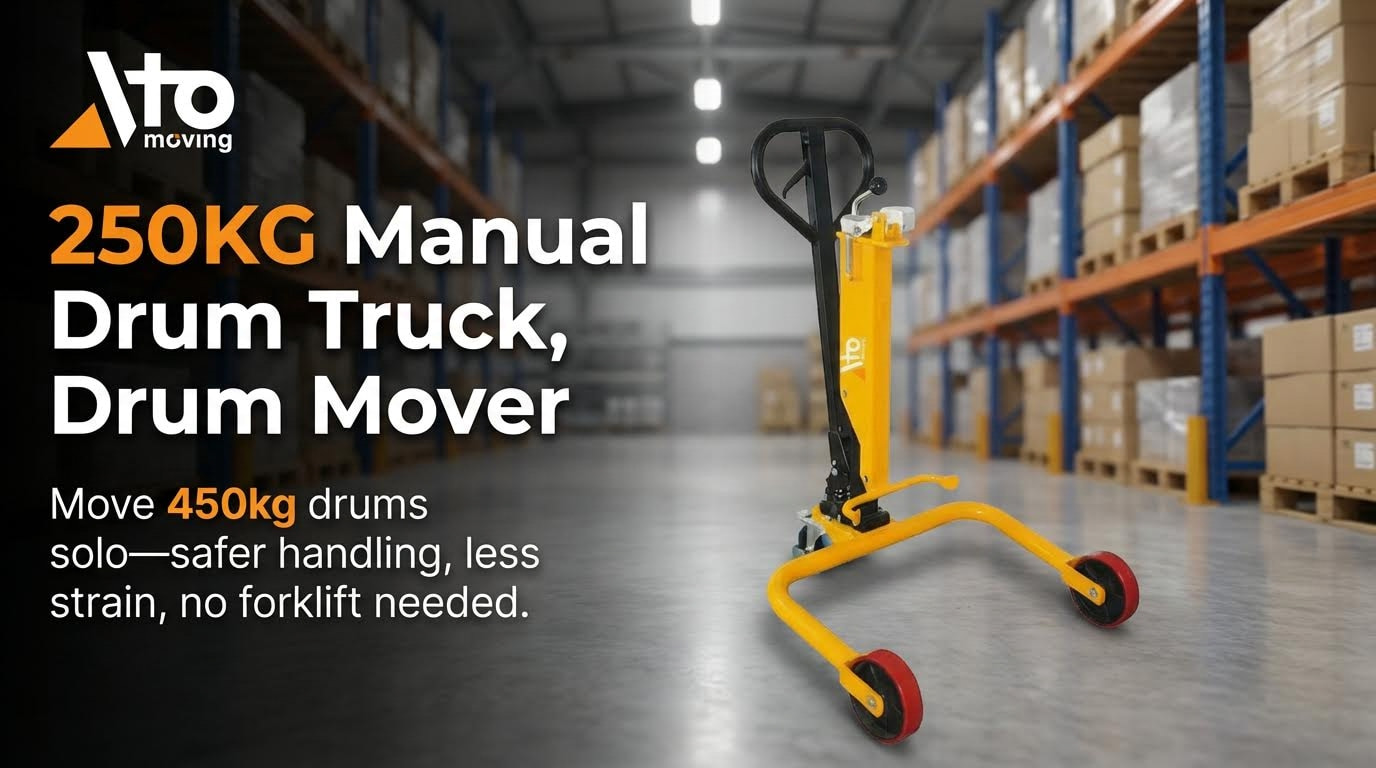
Most 55-gallon drums weigh between 180 kilograms and 360 kilograms when full. This load far exceeds safe manual lifting limits for a single worker. Strains, crushed toes, and finger injuries occurred often when operators tried to tip or roll drums without controls.
Risk assessment should map three hazard groups: mechanical, chemical, and environmental. A simple checklist works well:
- Mechanical: weight, center of gravity, rolling surfaces, pinch points.
- Chemical: flammable, toxic, corrosive, reactive, or unknown contents.
- Environmental: slope, wet floors, traffic, and lighting.
For ergonomic limits, use conservative rules. Treat any full drum as a team or equipment move. Plan push or pull forces, not lifts. Limit manual tilting or upending to short distances, stable floors, and trained staff. Include clear “no manual lift” rules in your written procedure for how to handle 55 gallon drums.
Labeling, SDS Review, And Hazard Identification
Before touching a drum, operators should read the label and match it with the Safety Data Sheet. If a drum is unlabeled, treat it as hazardous until you identify the contents. This approach reduces surprise exposure and supports correct PPE choice.
An effective identification routine usually includes:
- Check labeling: product name, hazard pictograms, and UN number.
- Confirm against inventory or manifest records.
- Review SDS sections on handling, storage, and first aid.
- Flag any special reactivity, pressure build-up, or temperature limits.
Supervisors should build this check into every “how to handle 55 gallon drums” work instruction. If labeling and SDS do not match, stop the job and quarantine the drum. Never vent, open, or move a suspect drum until a competent person resolves the mismatch.
Required PPE For Common Drum Contents
PPE selection must follow the hazard profile, not habit. For most drum handling tasks, a minimum kit includes safety footwear with toe protection, chemical-resistant gloves, and eye protection. When splashes or pressurized transfer are possible, add a face shield and chemical apron.
A simple matrix helps match PPE to contents:
| Drum contents | Typical PPE elements |
|---|---|
| Neutral non-hazardous liquids | Safety shoes, work gloves, safety glasses |
| Corrosive acids or bases | Chemical gloves, goggles, face shield, apron |
| Flammable solvents | Chemical gloves, goggles, anti-static clothing, face shield for transfer |
| Toxic liquids | Chemical gloves, sealed goggles, face shield, possible respirator per SDS |
When planning how to handle 55 gallon drums, include PPE checks in pre-task briefs. Verify compatibility between glove material and chemical type. Follow SDS and company industrial hygiene guidance for any respiratory protection.
OSHA And NFPA Compliance Overview
OSHA and NFPA standards give the legal floor for drum safety. OSHA 1910.106 covered storage and handling of flammable and combustible liquids in drums. OSHA 1915.173 addressed pressurization, guarding, containment, and fire protection for drums with flammable or toxic liquids.
Key points for 55-gallon drums include:
- Do not pressurize drums to remove contents.
- Provide guards or barriers for large drums in traffic areas.
- Surround containers of 55 gallons or more with dikes or pans sized for at least 35 percent of total volume.
- Keep drums away from open flames or hot surfaces.
- Place suitable fire extinguishers in the immediate area.
NFPA guidance for flammable liquids supported similar controls. It stressed bonding and grounding, ventilation, and separation distances. When writing site procedures on how to handle 55 gallon drums, reference these clauses directly. This link helps align operator training, engineering controls, and inspections with enforceable standards.
Safe Drum Handling, Movement, And Transfer
Safe movement is the highest risk phase in the 55-gallon drum lifecycle. Anyone asking how to handle 55 gallon drums must control weight, stability, and chemical exposure. This section explains how to plan each move, choose the right equipment, and control venting and grounding during fluid transfer. The goal is repeatable, low-risk handling that fits OSHA rules and plant standards.
Pre-Move Inspection, Sealing, And Leak Checks
Always inspect every drum before you move it. Treat unlabeled drums as hazardous until you confirm contents through records or testing. Read labels and Safety Data Sheets to identify flammable, corrosive, toxic, or reactive materials. Note required PPE, incompatibilities, and emergency actions.
Check the shell, chimes, and welds for dents, corrosion, or bulging. Look for staining, wet spots, or crystallization around bungs and seams. If you see leaks, stop the move, isolate the area, and follow the spill plan. Use only trained staff and approved absorbents for cleanup.
Confirm all bungs, plugs, and lids are present and tight. Replace missing or damaged closures before any movement. Estimate drum weight from contents and fill level. A 55-gallon drum often weighs 180–360 kilograms. Decide if you need team help or mechanical aid. Never guess if you can “just push it.”
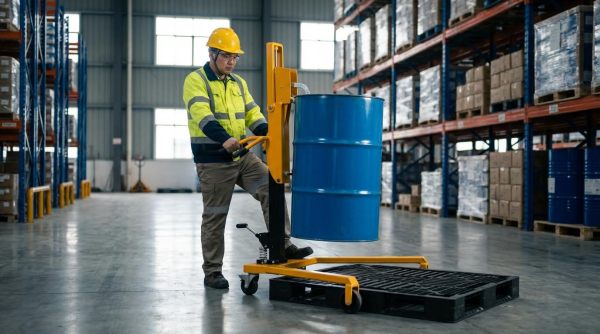
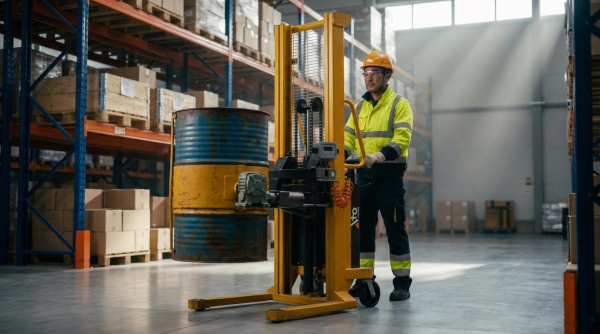
Selecting Appropriate Drum Handling Equipment
Choosing the right device is central to how to handle 55 gallon drums safely. Manual lifting is not acceptable for full drums at typical weights. Instead, match equipment to task, floor conditions, and traffic patterns.
Common options include:
- Drum trucks and dollies for short, level moves.
- Forklift drum clamps for bulk movement and stacking within limits.
- Drum carriers or rotators for controlled tipping and pouring.
- Overhead drum lifters for tight spaces or congested aisles.
Select equipment rated above the maximum drum mass, including any sludge or solids. Check gripping range for steel versus plastic drums and for open-head versus tight-head designs. Inspect wheels, clamps, and straps before each use. Train operators on correct approach angles, travel speeds, and stopping distances. Use Atomoving or similar engineered solutions when you need repeatable, high-throughput handling with reduced ergonomic risk.
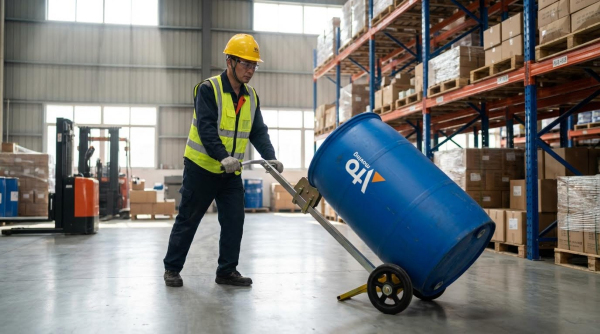
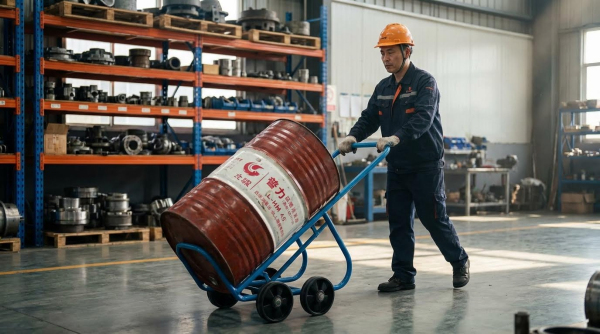
Manual Rolling, Tilting, And Upending Techniques
Manual methods still appear in small plants and field work. Use them only when risk is low and no better equipment is available. Focus on body position, hand placement, and controlled motion.
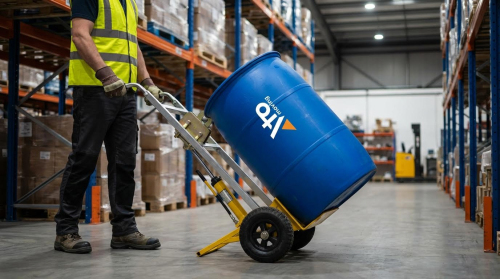
For rolling on the bottom chime, stand in front of the drum. Place both hands on the far side of the top chime and pull until the drum balances on the lower chime. Walk the drum forward. Do not cross your hands or use your feet as stops. Keep the path clear and dry.
To lower a drum from the chime, move your hands to the lower side of the chime. Keep your back straight. Bend your knees and use leg muscles to guide the drum down. Avoid sudden drops that can damage the container or trigger splashes.
For upending without tools, crouch with feet apart and close to the drum. Grip the chime on both sides. Lift with legs, not your back, and rock the drum onto the lower chime. Shift hands to the far edge and ease it into the vertical position. Whenever possible, use a drum lifter bar or dedicated handler instead of pure manual force.
Venting, Grounding, And Fluid Transfer Controls
Fluid transfer is where handling errors often become fires, ruptures, or chemical exposures. Plan every transfer step before you open a bung. Never pressurize a shipping drum to force product out. OSHA rules treated this as unsafe and required relief protection on any temporary pressurized systems.
Before opening, stand to the side of the bung, not over it. Slowly crack the closure to release built-up pressure. If you hear venting or see vapor, pause and let pressure equalize. For vacuum conditions, vent the drum or loosen the pump fitting to avoid implosion and splash-back.
When you handle flammable liquids, bond and ground all parts of the system. Connect a bonding cable between drum and receiving container. Attach a grounding lead to a verified earth point. This reduces static build-up and spark risk. Use safety vents with flame arresters where codes require them.
Use non-sparking tools, such as bronze-alloy drum wrenches, on flammable service drums. Fit self-closing faucets or valves so flow stops when the operator releases the handle. Keep absorbents and compatible fire extinguishers within reach of the transfer area. Document each transfer task in standard work instructions so every operator follows the same safe method.
Storage Design, Inspection, And Facility Integration
Storage design is a critical part of how to handle 55 gallon drums through their full lifecycle. Poor layouts increase risks from leaks, fire, and manual handling injuries. A good design supports fast inspection, safe stacking, and smooth links to conveyors, AGVs, and cobots. This section focuses on practical layouts, limits, and tools that keep drum storage safe and efficient.
Indoor And Outdoor Drum Storage Layout
Indoor and outdoor layouts must first separate incompatible chemicals. Keep oxidizers, flammables, corrosives, and toxics in distinct zones. Use clear floor markings and signage so operators see where each drum type belongs.
For indoor storage, place drums on pallets or racking above floor level. This protects containers from minor flooding and improves leak visibility. Maintain straight rows with aisles wide enough for drum trucks, forklifts, or Atomoving systems. Avoid deep stacks that hide rear drums from view.
Outdoor storage needs weather protection and spill control. Use graded pads that drain away from buildings and waterways. Install shelters or canopies to reduce corrosion and label fading. Place drums on compatible pallets or steel racks, never directly on bare soil. Keep security fencing and lighting adequate to deter tampering.
In both cases, plan emergency access. Firefighters and spill teams must reach any drum without moving large numbers of containers first. Layout drawings should be current and available in control rooms and at entry points.
Stacking Limits, Containment, And Fire Protection
Stacking rules are central to how to handle 55 gallon drums safely in storage. Typical guidance limited rows to two drums high and two drums wide. This limit supported stability, container strength variation, and easy leak checks.
When drums contain flammable or toxic liquids, bunding or pans must enclose at least 35% of total volume for containers of 55 litres or more. This followed OSHA 1915.173(e) for similar large containers. In practice, many sites used higher containment factors for critical chemicals.
| Aspect | Typical practice |
|---|---|
| Row height | Maximum two drums high for free-standing stacks |
| Row depth | Maximum two drums deep for clear inspection |
| Base support | Pallets or racking, no direct soil contact |
| Containment sizing | ≥35% of stored volume for flammable/toxic liquids |
| Fire protection | Suitable extinguishers placed in immediate area |
Fire protection design must follow flammable and combustible liquid rules. Keep drums away from open flames, hot metal, and high heat sources. Place suitable fire extinguishers in the immediate storage area. For flammable liquids, coordinate sprinkler design, foam systems, and separation distances with codes and insurers.
Inspection, Preventive Maintenance, And Digital Tools
Inspection routines close the loop on how to handle 55 gallon drums after placement. Frequent checks detect leaks, bulging, rust, or label damage before failure. Taller stacks than two drums made this harder because inspectors needed ladders and could not see rear drums without moving stock.
A robust program usually includes:
- Daily visual walk-throughs for obvious leaks or odors.
- Weekly checks of bungs, lids, and labeling legibility.
- Periodic corrosion and pallet condition reviews.
Preventive maintenance covers pallets, spill pallets, containment berms, and racking. Replace damaged pallets that could collapse under drum weight. Keep containment systems clean so small leaks remain visible.
Digital tools improved control. Barcodes or RFID tags linked each drum to its Safety Data Sheet and storage history. Mobile apps let inspectors log leaks, tilt, or corrosion with photos. Some facilities mapped drum locations in warehouse management systems, tying stack height and content hazards to each slot. These tools reduced human error and supported audits.
Integrating Drums With Conveyors, AGVs, And Cobots
Modern facilities looked at how to handle 55 gallon drums with automation while keeping risk low. Integration with conveyors, AGVs, and cobots required precise layout and interface design.
Conveyors that carried drums needed stable supports and guides. Roller spacing had to match drum chimes to prevent tipping. Transfer points between conveyors and storage zones used stops, kickers, or turntables so drums stayed under control.
AGVs moved palletized drums or single drums in cradles. Routes avoided steep slopes, tight turns, and uneven floors. Traffic rules separated AGV paths from pedestrian walkways. Sensors and interlocks stopped AGVs near people or obstacles.
Cobots assisted with labeling, scanning, or operating drum pumps. Engineers set safe zones and payload limits so cobots never exceeded ergonomic or equipment ratings. Any automated system still relied on clear procedures, training, and lockout rules. Automation reduced manual strain but did not remove the need for strong storage design and disciplined inspection programs.
Sustainable Drum Disposal, Reuse, And Conclusion
End-of-life planning is a core part of how to handle 55 gallon drums safely and responsibly. Poor disposal can shift risk from worker safety to environmental impact and regulatory breaches. A structured approach links segregation, decontamination, reuse, and recycling with clear documentation.
Facilities should first classify each drum by content history: hazardous, non-hazardous, or food-grade. Hazardous residues require licensed hazardous waste contractors and compliant manifests. Non-hazardous and food-grade drums often support cleaning, reconditioning, or resale. Typical options include certified reconditioning, scrap metal recycling for steel, and plastics recycling for HDPE drums into flakes or pellets.
Engineers should design drum workflows that minimize waste at source. Examples include choosing reusable containers, standardizing drum materials, and planning storage so empties do not accumulate and block space. Contracts with regional recyclers or reconditioners reduce landfill use and often cut hauling costs while supporting ESG reporting.
Future trends point to tighter traceability, with digital tracking of drum IDs, contents, and disposal paths. However, the fundamentals stay constant. Safe lifecycle management of 55-gallon drums still depends on correct hazard classification, conservative handling methods, compliant storage, and verifiable disposal or reuse channels. Teams that embed these steps into standard work instructions gain safer sites and lower lifetime drum costs.
Frequently Asked Questions
How to move a 55 gallon drum by hand?
To move a 55-gallon drum manually, place your hands near the chime at shoulder width. Keep your shoulders low and close to the drum. Push forward slowly with your legs until the drum reaches its balance point. This technique minimizes strain and ensures safer handling. Drum Handling Guide.
What to do with 55 gallon plastic drums?
If you need to dispose of 55-gallon plastic drums, contact local waste management authorities or recycling centers for proper disposal methods. They can guide you on whether the drums can be recycled, landfilled, or require specialized facilities. For hazardous waste, ensure drums are labeled and separated before contacting a certified disposal service. Plastic Drum Recycling.
How long will a 55 gallon drum last?
The lifespan of a 55-gallon drum depends on its material and usage. A well-maintained steel drum can last several years, while plastic drums are ideal in corrosive environments. Regular inspections and proper storage can extend their durability significantly. Drum Longevity Tips.