Choosing the right drum handling equipment starts with understanding your drum sizes, weights, and contents, then matching them to safe, efficient handling methods. This guide explains how to choose drum handler that fits your layout, duty cycle, and safety obligations while controlling long‑term operating and disposal costs.
Understanding Drum Handling Tasks And Risks
Understanding drum tasks and risks is the foundation of how to choose drum palletizer equipment that is safe, efficient, and compliant for your facility. This section maps drum types, handling motions, and regulations into clear engineering requirements.
Drum types, sizes, and contents
Drum type, size, and contents directly determine the safe capacity, grip style, and materials you need in electric drum stacker equipment. If you mis-match these, you create tip-over, spill, and contamination risks.
| Common Drum Type | Typical Size / Volume | Typical Mass Range (kg) | Key Handling Concern | Impact On Equipment Choice |
|---|---|---|---|---|
| Steel drum | 200 L (55-gallon) | 200–400 kg filled | High mass and rigid rim | Need ≥400 kg rated capacity and rim-compatible clamp |
| Plastic drum | 120–220 L | 150–350 kg filled | Flexible, can deform at rim | Use adjustable band or top-rim clamp to prevent slip-through |
| Fiber drum | 60–200 L | 50–250 kg filled | Weak sidewall and chime | Prefer wide band grip; avoid point loads on wall |
| Smaller lab / specialty drums | 20–80 L | 20–120 kg filled | Short height, high center-of-gravity variability | Use height-adjustable cradles and fine tilt control |
Contents matter as much as the drum shell. High-density liquids, slurries, or solids can push a 200 L drum toward 350–400 kg, while light chemicals may keep it under 200 kg. Corrosive or solvent-based contents may also demand stainless or coated contact surfaces and conductive wheels for static control.
- Mass and density: Always size equipment for the heaviest realistic fill – this sets your minimum safe capacity.
- Temperature: Hot drums soften plastic and fiber walls – you need more surface-area grip and slower handling speeds.
- Flammability: Flammable contents require bonding/grounding and non-sparking parts – this mitigates ignition risk during movement and pouring.
- Contamination sensitivity: Food or pharma contents push you toward cleanable finishes – this reduces cross-contamination risk.
How to measure drums before selecting equipment
Measure outer diameter at the widest point, overall height, and rim profile (chime width and shape). Record maximum gross mass (kg) from SDS or process data. These four numbers drive most mechanical fit decisions.
💡 Field Engineer’s Note: In real plants, plastic and fiber drums often arrive slightly out-of-round from transport. If your handler only grips at a narrow band, those deformed drums are the first to slip. A wider, adjustable band grip and a secondary top-rim restraint dramatically cut near-miss spill incidents.
Core handling functions: move, lift, tilt, dump
Core drum handling functions—moving, lifting, tilting, and dumping—define the mechanical features you must prioritize when deciding how to choose hydraulic drum stacker equipment. Each motion introduces different stability and ergonomic risks.
| Function | Typical Motion | Main Risk | Key Design Requirement | Operational Impact |
|---|---|---|---|---|
| Move | Horizontal travel over 5–30 m | Tip-over, foot injuries | Low center of gravity, correct wheel size, good handle height | Safe travel on joints, expansion gaps, and small ramps |
| Lift | Vertical 200–1,500 mm | Overload, hydraulic failure | Rated capacity ≥ drum mass, velocity fuse in cylinder | Prevents sudden drop if a hose or line fails |
| Tilt | 0–120° rotation | Uncontrolled pour, splash | Geared tilt with brake or positive lock | Operator can meter flow precisely into smaller vessels |
| Dump | Full inversion into hoppers | Impact on structure, shock loads | Rigid frame, secure drum clamping top and bottom | Reduces frame fatigue and clamp slippage in daily use |
Good drum palletizers and pourers use geared tilt control and optional tilt-brake systems to hold the drum angle automatically until the operator turns the crank again. This prevents the drum from creeping and keeps the pour angle stable during metering into smaller containers or reactors.
- Geared tilt: Mechanical advantage reduces operator effort – important for frequent small pours across a shift.
- Tilt brake / lock: Holds set angle without constant force – frees the operator to manage valves or sampling.
- Base geometry: V-shaped or corner-serving bases can approach pallets tightly – this allows you to lift drums from the corner without re-palletizing.
- Lift power source: Manual, battery, air, or AC power must match duty cycle – too small a power option leads to fatigue or slow cycles.
Matching power source to duty cycle
Manual hand pumps work for low volumes but can require dozens of strokes per lift. Battery or AC-powered lift is better when operators handle more than 10–15 drums per shift or need to reach higher stacking levels regularly.
💡 Field Engineer’s Note: When you add tilt and lift together, the worst incidents usually happen when an operator tries to “help” a slow manual lift by pushing on the drum. Always select a power option and gear ratio that let the machine do the work, so hands and feet stay clear of the drum path.
Regulatory and safety constraints
Regulatory and safety constraints convert your drum tasks into non-negotiable design requirements for any drum cart handling equipment you buy. Ignoring them leads to spills, injuries, and fines.
Waste and chemical drums often fall under environmental and hazardous waste rules. Mishandling, misclassification, or poor labeling dramatically increases disposal costs and exposes you to penalties. Mixing non-hazardous with hazardous contents can raise disposal costs by 200–300%, and poor labeling can add 15–25% to handling fees while also creating safety confusion for operators.
- Spill and leak control: Equipment must grip securely and control tilt – this reduces the chance of releases that trigger environmental reporting and cleanup.
- Label visibility: Clamps and bands should not cover critical labels – operators must always see hazard and content information.
- Static and ignition control: For flammable contents, use conductive wheels and bonding points – this mitigates spark risk during movement and pouring.
- Hydraulic safety: Cylinders with velocity fuses shut off flow if a line fails – this prevents sudden uncontrolled drops while a drum is elevated.
On the cost side, improper handling that leads to drum damage or leaks can turn a non-hazardous drum into a hazardous one, multiplying disposal costs three- to five-fold and exposing you to fines in the thousands of dollars range. Safe, controlled handling is therefore both a compliance and a cost-control measure.
Why safe handling and disposal planning go together
Every dropped, punctured, or mixed-content drum increases classification complexity and disposal cost. Robust handling equipment plus clear segregation and labeling procedures keeps drums in their intended waste or product category, which directly reduces disposal fees and legal exposure.
💡 Field Engineer’s Note: When we traced the most expensive “hazardous” drums at several plants, many started as ordinary product drums that were damaged during handling and then thrown into the hazardous stream “to be safe.” Better gripping, controlled tilt, and no-impact travel paid for themselves just in avoided disposal costs.
Key Design Features And Performance Criteria
This section explains how to choose drum palletizer by translating design features into real-world stability, throughput, and safety performance for your specific drums, pallets, and shift patterns.
- Base & stability: Check leg geometry, caster layout, and pallet access – prevents tip-over and “can’t reach the drum” problems.
- Lift system: Match manual or powered lift to drum weight and daily cycles – avoids operator fatigue and downtime.
- Gripping & tilt control: Choose positive drum restraints and controlled pouring – reduces spills and product loss.
💡 Field Engineer’s Note: When comparing models, sketch your tightest aisle and pallet layout with dimensions in mm. Any base or turning radius that is even 50–75 mm too large usually turns into daily “fight-the-equipment” frustration for operators.
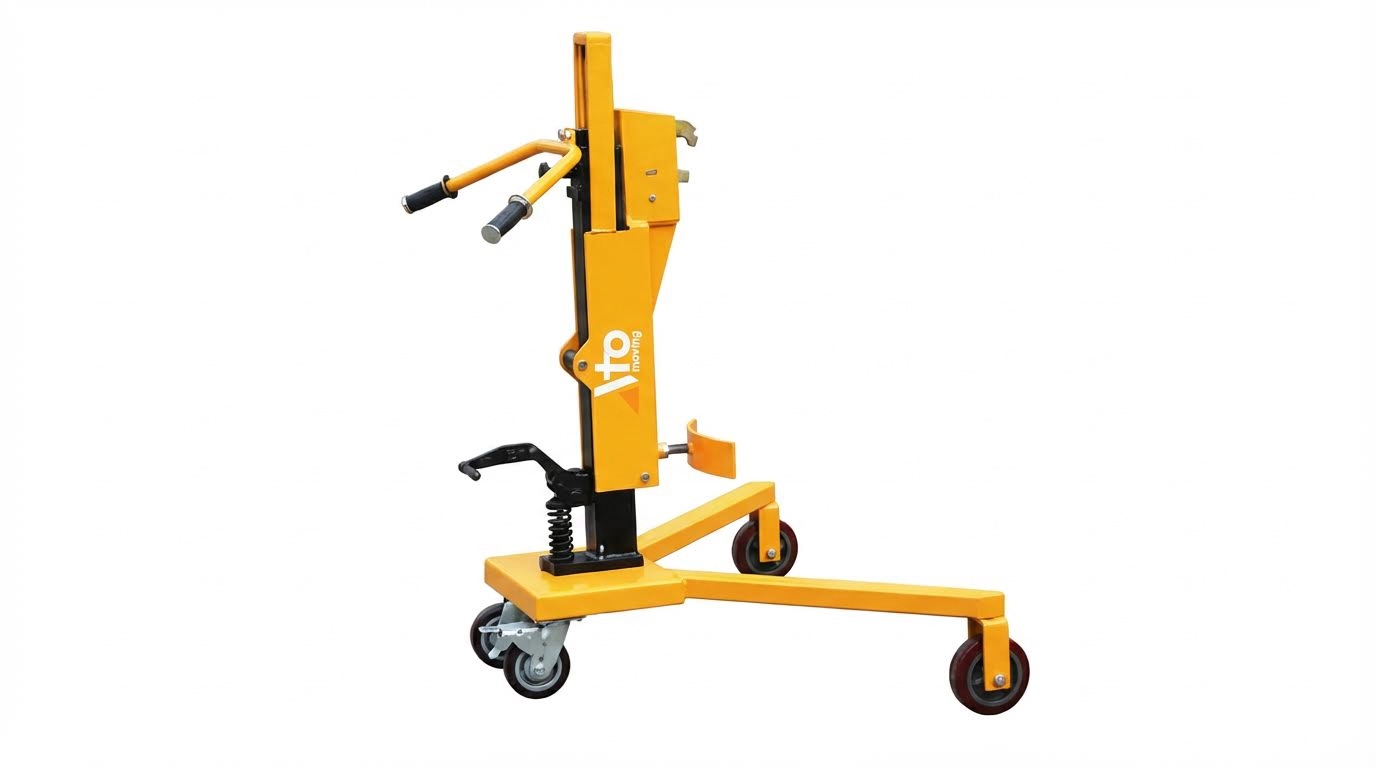
Base design, stability, and pallet access
Base design, wheel layout, and pallet access define how safely and easily the unit can approach, lift, and move drums in your real aisles.
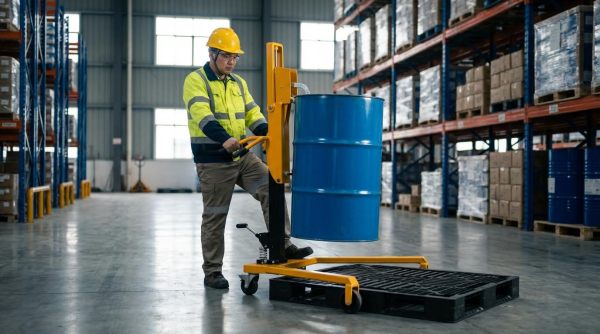
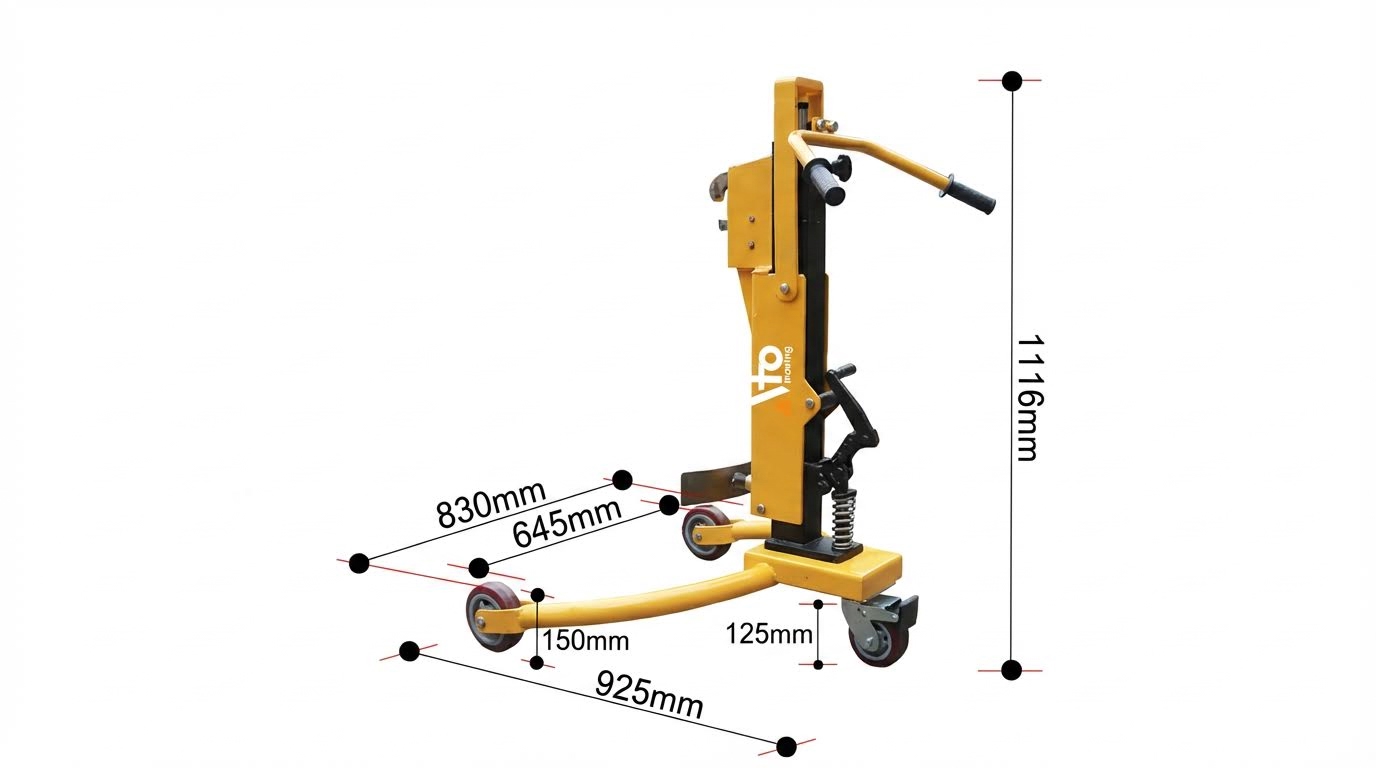
A typical drum palletizer uses a V-shaped counterweighted base that can “straddle” and serve the corner of a pallet for palletizing and depalletizing drums. This allows the handler to reach a drum positioned at the pallet corner without the base colliding with deck boards or adjacent drums. The counterweight in the base offsets the drum load during lifting and pouring, improving stability when the drum is raised and tilted. One documented design uses a V-shaped counterweighted base specifically to serve pallet corners and integrate geared tilt control for dispensing. This design also recommends a tilt-brake to automatically hold drum angle.
| Base / Mobility Feature | Typical Spec (from cited design) | Operational Impact |
|---|---|---|
| Overall width | ≈1230 mm (48.5 in) | Needs aisles wider than about 1.5 m to turn without shunting. |
| Overall length | ≈1090 mm (43 in) | Affects how close you can work to walls or tanks. |
| Turning radius | ≈1350 mm (53 in) | Determines minimum aisle width for a single smooth turn. |
| Leg height | ≈230 mm (9 in) | Must clear pallet bottom deck; check against your pallet type and floor ramps. |
| Leg reach in front of mast | ≈530 mm (20.75 in) | Controls how far under a pallet or vessel the unit can reach. |
| Rear casters | 2 × swivel, ≈100 mm (4 in) | Allow steering and side adjustment in tight spaces. |
| Front wheels | 2 × fixed, ≈150 mm (6 in) | Carry main load; larger diameter rolls easier over joints. |
- V-shaped base: Lets the legs fit around pallet corners – you can approach drums on pallet edges without re-palletizing.
- Counterweight in base: Balances overturning moment during tilt – reduces risk of tipping when the drum is high and offset.
- Leg height vs pallet clearance: Compare leg height to pallet deck height – avoids the common “legs hit pallet stringer” issue.
- Turning radius: Check against your narrowest aisle width – prevents multi-point turns that slow every move.
- Wheel size and type: Larger wheels handle joints and ramps better – important if you cross door thresholds or rough concrete.
How to check pallet access in your facility
Measure pallet overall width and length in mm, plus the overhang of drums beyond the pallet edge. Compare these to the handler’s leg spacing, leg height, and reach in front of the mast. If the leg tips would hit the pallet before the drum centerline is inside the gripping zone, you will struggle to pick drums at the back or center of the pallet.
💡 Field Engineer’s Note: For facilities with mixed pallets, design around the “worst-case” pallet (often CHEP-style or heavy-duty export pallets). If the base clears and reaches that pallet, it will usually work everywhere else and you avoid buying a second, “special” handler later.
Lift mechanisms and duty cycle matching
Lift mechanism choice (manual vs powered) must match drum weight and daily handling cycles to avoid fatigue, slow operations, and hydraulic overheating.
The referenced drum palletizer offers multiple lift options: manual hand pump, AC power, air power, and battery power. The manual hand pump requires about 27 strokes to raise a drum to maximum lift height. Battery-powered versions use a 12 V deep-cycle battery and charger for powered lifting. These options illustrate how the same frame can be configured for different duty cycles.
| Lift Mechanism | Key Characteristics | Best For… |
|---|---|---|
| Manual hand pump | ≈27 strokes to full height; simple hydraulics | Low-volume tasks (a few drums per shift) and areas without power. |
| AC-powered lift | Electric motor + hydraulic pump; needs power outlet | Fixed workstations with many lifts per hour and stable power supply. |
| Air-powered lift | Pneumatic motor; needs compressed air | Hazardous areas where electric motors are restricted. |
| Battery-powered lift | 12 V deep-cycle battery + charger | Mobile operations across multiple rooms or docks without cords. |
- Cycle count per shift: Estimate drums/day × lifts/drum – if operators pump all day, you need power.
- Lift height requirement: Check mm needed to clear pallets or pour into vessels – don’t assume “standard height” fits your tanks.
- Energy source availability: Map outlets and air drops – determines whether AC, air, or battery is practical.
- Maintenance skill level: Simpler manual systems are easier to maintain – important for remote or small sites.
Quick rule-of-thumb for choosing manual vs powered lift
If one operator will lift more than about 30–40 full 200 L drums per shift, a powered lift (AC or battery) is usually justified. The time and fatigue saved often outweigh the higher purchase price within the first year, especially when you factor in reduced injury risk and more consistent throughput.
💡 Field Engineer’s Note: In cold rooms or outdoor yards, battery and hydraulic performance can drop sharply below 0°C. If you must operate there, specify cold-rated hydraulic oil and consider oversizing the battery capacity to maintain lift speed through the entire shift.
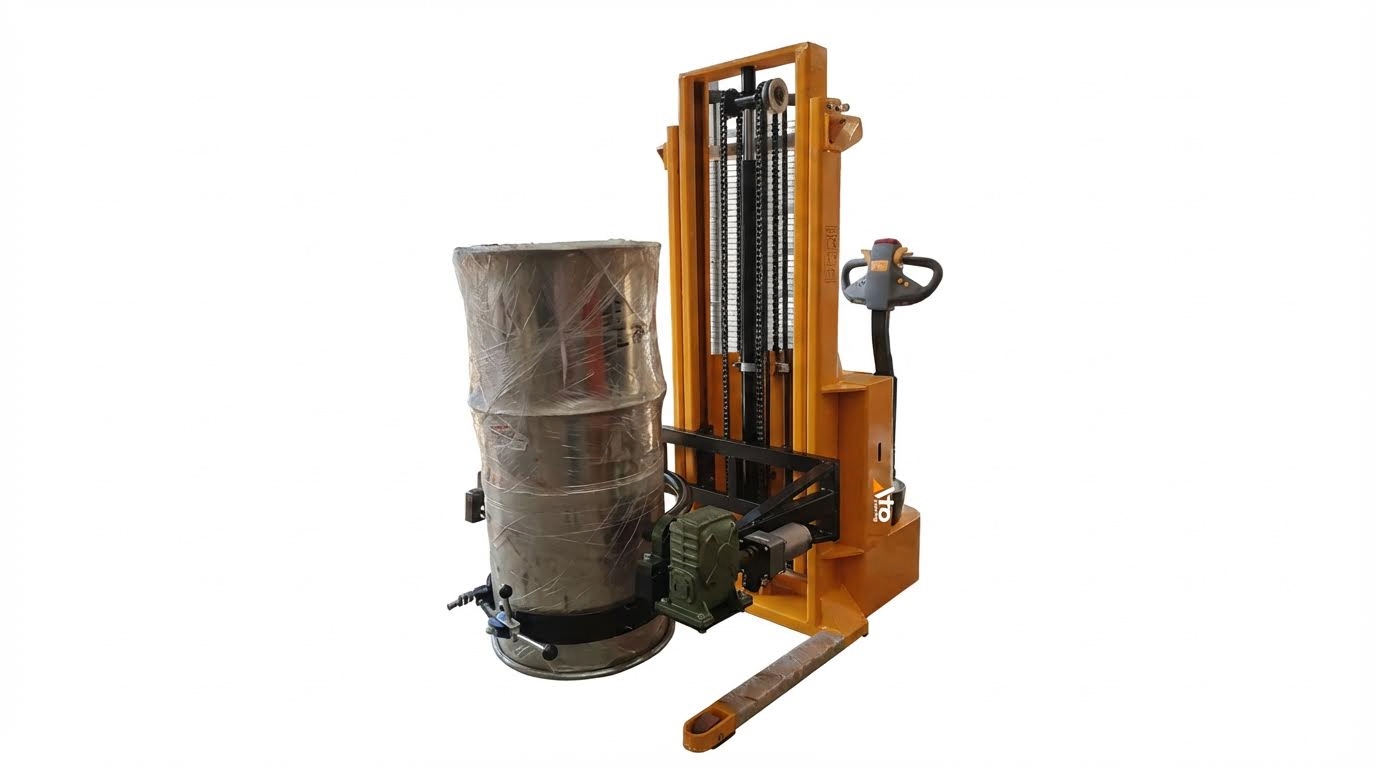
Drum gripping, tilt control, and spill prevention
Drum gripping hardware and tilt control systems directly control spill risk, product loss, and operator safety during pouring or horizontal transfers.
The cited drum handler uses a cinch chain around the drum to secure it before lifting, then a geared hand crank to rotate the drum into dispensing position and back upright. A recommended tilt-brake option automatically locks and holds the drum tilt angle until the operator turns the hand crank again. Optional top rim clamp and bracket kits prevent drums from slipping through the holder, especially with plastic or fiber drums. This combination provides positive retention and controlled pouring.
| Gripping / Tilt Feature | Function | Operational Impact |
|---|---|---|
| Cinch chain around drum | Wraps and tightens drum in holder | Secure grip on standard 200 L steel drums. |
| Top rim clamp (optional) | Clamps over drum top rim | Prevents vertical slip, crucial for plastic/fiber drums. |
| Bracket assembly (optional) | Supports non-standard drum shapes | Allows safe handling of more drum types. |
| Geared hand crank for tilt | Mechanical advantage for rotating drum | Fine control of pour rate with less effort. |
| Tilt-brake (e.g., MORStop) | Automatic angle holding | Drum stays at set angle; hands-free between pours. |
- Positive mechanical grip: Use chains, rim clamps, or brackets, not just friction – critical when drums are oily or deformed.
- Automatic tilt holding: A tilt-brake prevents unplanned rotation – reduces spills if someone bumps the drum.
- Compatibility with plastic/fiber drums: Add rim and support kits – prevents drums slipping through steel-sized cradles.
- Spill path and containment: Plan where liquid goes if a hose pops or valve leaks – design around floor drains and bunds.
Typical safe operating sequence for pouring
Roll the handler to the drum and secure it with the cinch chain and any rim clamp. Lift to the required height. Use the geared hand crank to rotate the drum slowly into pouring position, letting the tilt-brake hold intermediate angles. After dispensing, crank the drum back upright before lowering and releasing. This sequence minimizes sudden movements and keeps the operator clear of splash zones.
💡 Field Engineer’s Note: When deciding how to choose drum handling equipment for flammable or corrosive liquids, always look beyond the grip itself. Specify anti-slip drum restraints plus a tilt system that lets the operator stand upwind and out of the direct splash line, and verify that your secondary containment can handle a full 200 L release.
Matching Equipment Types To Your Operation
Matching drum handling equipment to your operation starts with space, flow, and drum profile, then layers in lift height, power source, and integration with existing material handling systems.
When you think about how to choose drum handling equipment, you should map every move a drum makes: from delivery, into storage, through processing, and out as waste or product. Each step may need a different tool, or a single versatile unit if your layout is tight and volumes are modest.
Mobile handlers, palletizers, and stackers
Mobile drum handlers, palletizers, and stackers each solve different layout and throughput problems, and choosing between them depends on aisle width, pallet style, lift height, and how often you tilt or pour.
At a high level, mobile handlers focus on point-to-point moves, palletizers on reaching into and over pallets, and stackers on vertical storage. For most facilities, the right mix is one pallet-capable unit plus simpler movers for low-risk transfers.
| Equipment Type | Typical Functions | Key Specs To Check | Operational Impact / Best For… |
|---|---|---|---|
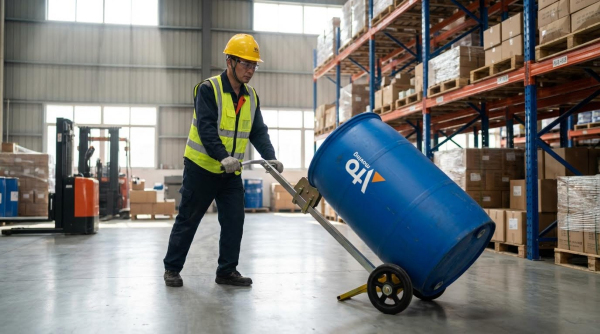
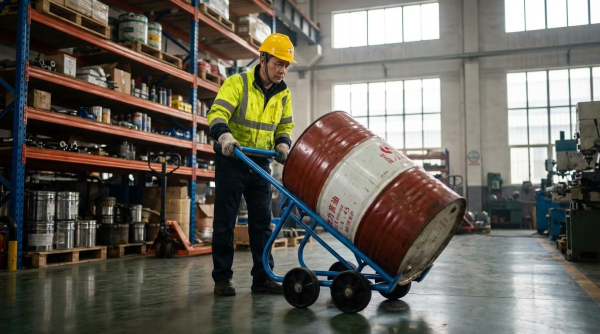
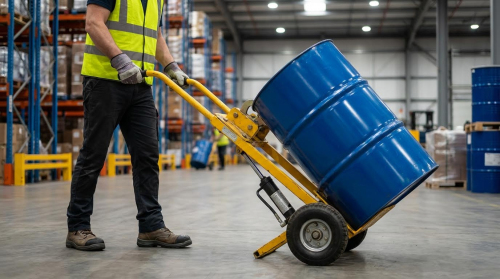
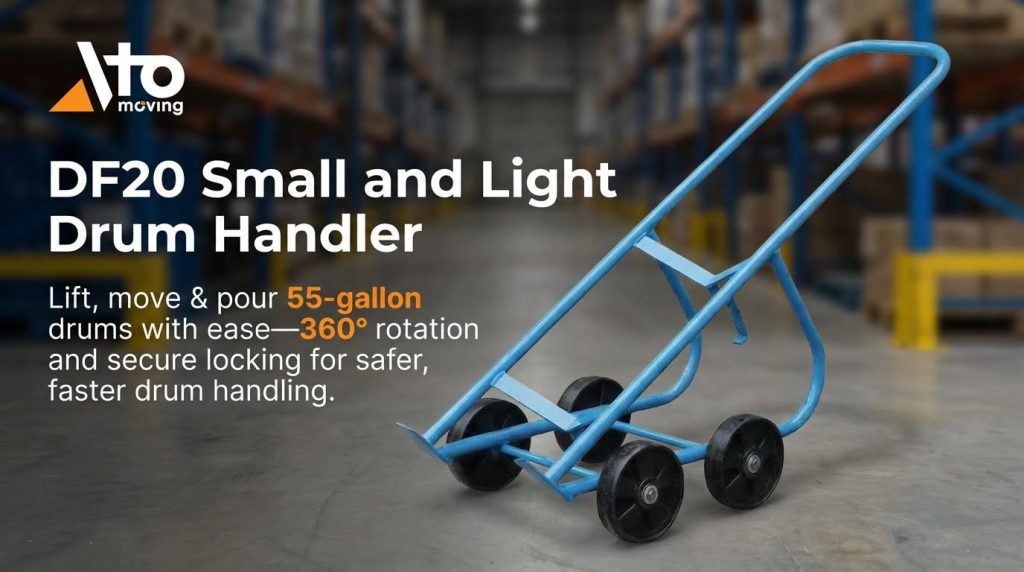
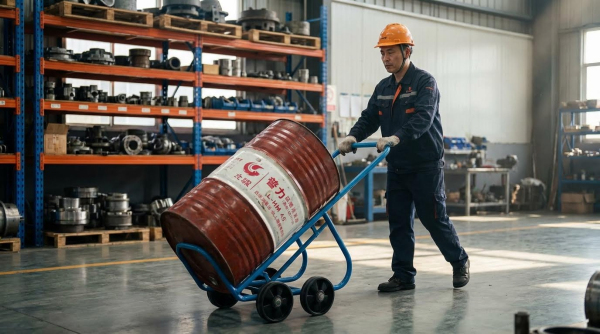
| Mobile drum handler (no pallet reach) | Clamp, lift slightly, move, occasional tilt | Capacity ≥ 300 kg, lift ~300–500 mm, turning radius vs aisle width | Best for short moves on open floors where drums are not on pallets or only need low lifts. |
| Drum palletizer / pourer | Reach into pallet corner, lift, tilt, controlled pouring | Capacity around 270 kg, lift ~500 mm, V-shaped base, geared tilt with brake | Best for loading/unloading drums from pallets and dispensing into process vessels or smaller containers. |
| Drum stacker | Stack drums vertically, place on racks | Lift height matched to rack beam (e.g. 1.5–3.0 m), wheelbase length, stability factor | Best for high-density storage where drums must be stacked two or three high or on racking. |
A typical drum palletizer / pourer uses a V-shaped, counterweighted base so one leg can enter the pallet corner while the other clears the pallet footprint. This lets you get close to a 200 L (55-gallon) drum sitting on a pallet, lift it, and then tilt for dispensing. One design example uses geared tilt control plus an optional tilt-brake that automatically locks and holds the drum angle during pouring for better spill control and operator safety. This style of unit is rated around 272 kg (600 lb) and can lift an upright drum roughly 510 mm from the floor, which is enough to clear most pallet decks and low process inlets.
- Capacity rating: Match to your heaviest full drum plus a 10–15% safety margin – avoids overloading and premature wear.
- Base geometry: V-shaped or offset legs for pallet work – lets you straddle or corner a pallet without hitting deck boards.
- Turning radius vs aisles: Compare turning radius (e.g. ~1.35 m) to your narrowest aisle – ensures you can rotate and approach pallets cleanly.
- Tilt control: Geared rotation with automatic brake – gives fine pour control and reduces spill risk, especially with viscous or hazardous liquids.
- Drum type compatibility: Steel, plus kits for plastic/fiber rims – keeps one handler usable across different drum constructions.
For lift power, many palletizers and stackers offer manual hand pump, AC, air, or battery power. A manual hand pump that needs about 27 strokes to reach full height suits low-throughput operations; for frequent lifts or multi-shift work, battery or mains-powered hydraulics reduce operator fatigue and cycle time. Battery-powered units often use a 12 V deep-cycle battery with an onboard charger, which you must integrate into your charging routines.
How to decide between manual and powered lift
If operators lift fewer than 10–15 drums per shift and lift heights are under 1 m, a manual pump is usually acceptable. Above that, or if drums are hazardous, powered lift improves control and reduces strain injuries. Always factor in your ambient temperature and duty cycle when sizing power options.
💡 Field Engineer’s Note: In tight production rooms, the V-shaped palletizer base often hits floor drains or shallow ramps first. Always walk the exact route with a tape measure, checking floor slopes and obstructions, before you commit to a wheelbase length and leg height.
Integrating with forklifts, AGVs, and storage layout
Integrating drum handling equipment with forklifts, AGVs, and your storage layout means aligning drum routes, clearances, and transfer points so drums move in short, safe hops instead of long, risky pushes.
When you plan how to choose drum handling equipment for an existing facility, start from your fixed assets: dock doors, main forklift aisles, AGV paths, racking, and compactor or disposal areas. Your drum gear should bridge the “last 10 m” from those main arteries to process points, not compete with them.
- With forklifts: Use drum palletizers or dedicated forklift attachments at transfer points – forks handle long hauls, specialized gear handles gripping and tilting.
- With AGVs: Keep AGV drop-off and pick-up zones clear and level – mobile drum handlers then move drums into tighter process cells.
- With storage racks: Size lift height to top beam plus 150–200 mm clearance – avoids “just short” lifts and unsafe tilting to gain height.
- With compactors/disposal: Provide a flat pad near compactors or crushing stations – lets mobile handlers position drums precisely without wrestling over thresholds.
Many facilities now use drum compactors or crushers near waste accumulation areas to cut disposal and transport costs. Industrial drum compactors can achieve 3:1 to 5:1 volume reduction, which can reduce disposal and transport fees by roughly 40–60%. These machines need features like explosion-proof electrics (e.g. NEMA 7) and liquid management when compacting residue-bearing or hazardous drums. Facilities generating 20 or more drums per month often recovered their investment in 12–24 months through reduced haulage and disposal fees.
| Interface Point | Layout / Spec Considerations | Recommended Drum Equipment | Operational Impact / Best For… |
|---|---|---|---|
| Dock to bulk storage | Forklift aisles ≥ 2.8–3.5 m, dock levelers, pallet positions | Forklifts with drum pallets or attachments; palletizer at dock | Fast unloading of 200 L drums on pallets, minimal manual handling at the dock. |
| Bulk storage to process line | Narrow aisles (1.5–2.0 m), low door headers, tight turns | Compact mobile palletizer / pourer with small turning radius | Controlled feeding of reactors, mixers, or day tanks where forklifts cannot enter. |
| Process line to waste / compactor | Wet floors, spill containment, ventilation, explosion-rated zones | Mobile handler plus drum compactor or crusher | Safe movement of residue drums and efficient volume reduction before off-site disposal. |
| AGV drop-off zones | Clearly marked buffer areas, flat floor, defined handoff positions | Manual or powered drum stacker/handler | Decouples AGV traffic from operators while keeping drums flowing into production. |
Planning the drum route through your facility
Sketch a simple map from receiving to final disposal or shipment. Mark every door width, aisle width, ramp, and threshold height in mm. Then overlay which segments are served by forklifts, which by AGVs, and which must rely on manual or walk-behind drum equipment. This quickly shows where you need pallet reach, extra lift height, or smaller turning radii.
💡 Field Engineer’s Note: When tying drum compactors into your layout, leave at least 1.5 times the compactor depth as clear maneuvering space in front. Anything less, and operators start making tight turns with heavy drums on wet floors, which is where most tip and strain incidents occur.
Final Considerations And Implementation Strategy
Final considerations for how to choose drum handling equipment focus on lifecycle cost, compliance, and how smoothly the gear fits into your daily material flow and waste strategy.
At this stage, you already know your drum types, handling tasks, and preferred equipment families. Now you turn that into a practical implementation plan that avoids surprises, injuries, and hidden costs over the next 5–10 years.
1. Turn Technical Specs Into A Shortlist
The first step in how to choose drum handling equipment is to convert generic “requirements” into a tight, measurable shortlist of models or configurations.
- Capacity and drum types: Confirm the safe working load in kg and compatible drum materials – prevents overloading when you switch from steel to plastic or fiber drums.
- Lift height and reach: Check maximum drum lift in mm and whether it clears your pallets, racks, or mixers – avoids buying units that stop 50 mm too low.
- Base geometry: Look for V-shaped or low-profile bases that can straddle or corner pallets – allows palletizing without re-staging drums.
- Tilt and pour control: Prefer geared tilt with a mechanical or friction brake – gives precise dosing and prevents sudden dumping.
- Power option: Match manual, AC, air, or battery power to your duty cycle – reduces operator fatigue and downtime.
| Key Spec | Typical Value (from sources) | What To Check On Site | Operational Impact |
|---|---|---|---|
| Capacity | ≈ 270 kg (600 lb) for single-drum palletizers for typical units | Heaviest full drum including contents and residues | Ensures structural safety margin for dense liquids (oils, slurries). |
| Lift Height | ≈ 510 mm from floor to drum bottom for some palletizers per sample spec | Pallet height + deckboard thickness + safety clearance (usually ≥ 50 mm) | Determines if you can place drums onto pallets without extra lifting gear. |
| Overall Width | ≈ 1,230 mm wide, ≈ 1,090 mm long for one design | Narrowest aisle, doorway, and ramp width in your route | Confirms the unit can turn and pass through existing aisles. |
| Turning Radius | ≈ 1,350 mm turning radius for some mobile palletizers per sample spec | Smallest intersection or working bay where you must turn 90° | Avoids three-point turns while carrying a full drum. |
| Drum Holding Method | Cinch chain with optional top rim clamp on some units | Presence of chimes, deformed rims, or plastic drums in your flow | Prevents drum slip-through during tilting or transport. |
💡 Field Engineer’s Note: Always walk the full intended route with a tape measure and note every pinch point, slope, and threshold. On real sites, a single 30 mm floor lip or 2% ramp can turn a “perfect on paper” drum handler into a daily headache.
How to quickly test fit before purchase
Mock up the footprint of the candidate drum handler on the floor with tape using its published width and length. Then push a pallet jack or cart of similar size through all intended routes. If it scrapes, binds, or needs three-point turns, you either need a narrower unit or a revised route.
2. Integrate Handling With Waste And Disposal Strategy
The second key consideration in how to choose drum handling equipment is to align it with your waste, disposal, and reuse strategy so you minimize lifetime cost per drum.
Disposal and handling costs often exceed the purchase price of the equipment over time. Your drum handling setup should support segregation, volume reduction, and safe reuse, not work against them.
- Support segregation: Use clearly designated handlers or attachments for hazardous vs non-hazardous drums – prevents cross-contamination that can make whole batches “hazardous.”
- Enable volume reduction: Ensure your handlers can safely stage drums for compactors or crushers – unlocks 3:1 to 5:1 volume reduction and 40–60% fee savings.
- Reuse-friendly handling: Avoid damaging chimes and shells if you plan to recondition or reuse drums – preserves resale value and reuse revenue.
- Label visibility: Choose gripping and tilt systems that do not cover critical labels – simplifies inspection and avoids misclassification.
| Cost Driver | Typical Range Per Drum | Impact Of Good Handling | Operational Benefit |
|---|---|---|---|
| Disposal Facility Fees | ≈ $60–$200 per drum for disposal charges | Segregation-friendly handling reduces hazardous tonnage | Lowers disposal class; reduces fees by up to 15% or more. |
| Transportation | ≈ $40–$140 per drum for transport | Volume reduction (compaction) cuts number of loads | 40–60% savings when compacted to 3:1–5:1 volume. |
| Labor & Handling | ≈ $15–$60 per drum for internal work | Efficient handlers cut touch points per drum | Fewer moves, fewer operators, lower ergonomic risk. |
| Reuse & Recycling Revenue | ≈ $5–$15 per reconditioned steel drum, $2–$8 per plastic drum for reuse/recycling | Gentle handling keeps drums in reconditionable condition | Offsets part of purchase cost of handling equipment. |
Why segregation and labeling matter for equipment choice
If your equipment makes it awkward to see and scan labels, operators tend to “guess and grab.” That leads to mixing non-hazardous with hazardous waste, which can increase disposal costs by 200–300% and trigger regulatory issues. Select gripping and clamp designs that leave label bands visible and allow easy rotation for inspection before moving.
💡 Field Engineer’s Note: When planning for compactors, allow a clear, level approach path for the drum handler and at least one drum-length of staging space. Many plants buy excellent compactors but then fight daily traffic jams because they forgot to engineer the approach and queuing area.
3. Build A Safe, Repeatable Operating Procedure
The final step in how to choose drum handling equipment is to make sure you can embed safe, repeatable procedures into training and supervision.
Good equipment still fails in the field if each operator “does it their own way.” You want a standard sequence that respects the physics of center of gravity, hydraulic behavior, and spill risk.
- Step 1: Define standard routes – Reduces unexpected slopes, tight turns, and pedestrian conflicts.
- Step 2: Lock in approach positions to pallets, racks, and mixers – Ensures consistent geometry and stable lifting.
- Step 3: Standardize drum securing checks (chain tension, rim clamp, bracket) – Prevents slip-through when tilting or traveling.
- Step 4: Control lift and tilt speeds via geared mechanisms – Limits dynamic loads and sloshing of liquids.
- Step 5: Establish spill response and parking rules – Ensures units are left stable and ready for the next shift.
Example: Standard sequence for a mobile palletizing and pouring unit
A typical sequence for a geared-tilt drum palletizer is: roll to the drum, secure with cinch chain and any top rim clamp, lift to required height, rotate into pour position using a hand crank, then return the drum upright and lower to the floor or pallet. A tilt-brake system that automatically holds the angle until the crank moves again significantly improves control and reduces operator strain. This mirrors the recommended operating method for geared tilt palletizers described in manufacturer literature.
💡 Field Engineer’s Note: During commissioning, film a “gold standard” operator doing a full cycle and use that video in every future training. It is far more effective than written SOPs alone and keeps techniques consistent across shifts and new hires.
4. Implementation Roadmap And Change Management
To successfully implement your chosen drum handling equipment, you need a simple roadmap covering trials, training, and post-install optimization.
This is where you convert a purchasing decision into sustained improvements in safety, throughput, and cost per drum.
- Step 1: Pilot in one high-impact area – Validates fit and productivity before full rollout.
- Step 2: Gather operator feedback in the first 2–4 weeks – Identifies ergonomic issues and layout tweaks early.
- Step 3: Adjust aisle markings, parking zones, and staging – Reduces congestion and collision risk.
- Step 4: Formalize SOPs and training modules – Locks in best practices and supports regulatory compliance.
- Step 5: Track KPIs: near misses, spills, handling time per drum, and disposal cost per drum – Shows whether the new equipment delivers the expected payback.
- Involve EHS early: Let safety and environmental teams review routes, guarding, and emergency procedures – prevents rework after inspections.
- Coordinate with maintenance: Ensure spare parts, battery chargers, and hydraulic oil are standardized – minimizes downtime.
- Align with contractors: Sync your handling practices with waste haulers and reconditioners – avoids rejected loads and extra fees.
💡 Field Engineer’s Note: Set a calendar reminder for a 6‑month “post-mortem” on the new equipment. By then, operators will be honest about what works and what doesn’t, and you can still make low-cost layout or accessory changes before bad habits harden.
When you treat how to choose drum handling equipment as an engineering and lifecycle cost decision—not just a catalog pick—you end up with safer operators, cleaner audits, and a lower cost per drum moved, filled, or disposed.

Final Considerations And Implementation Strategy
Effective drum handling starts with accurate data on drum size, weight, and contents, then connects that data to base geometry, lift capacity, and gripping method. When you match these correctly, you control center of gravity, avoid overload, and keep drums stable during moves, lifts, and pours.
Good design is only half of the answer. You must also fit equipment to your aisles, pallets, and transfer points. Checking turning radius against real aisle widths, leg height against pallet decks, and lift height against racks or mixers prevents daily workarounds that create risk.
Regulatory and waste rules turn poor handling into direct cost. Secure gripping, controlled tilt, and clean routes reduce leaks, misclassification, and disposal fees. Integrated compactors and segregation-friendly handling can cut lifetime cost per drum while improving audit performance.
The best practice is to treat drum handling as an engineered system. Map routes, select equipment with clear safety margins, pilot in one area, then lock in standard procedures and training. When in doubt, choose positive mechanical grips, geared and braked tilt, and power options that let the machine do the work. This approach gives your team safer handling, higher throughput, and predictable lifecycle cost, whether you buy from Atomoving or evaluate other solutions.
Frequently Asked Questions
How do you select material handling equipment?
Selecting the right material handling equipment involves several key steps. First, identify your specific needs, such as the type of materials you’ll be handling and the environment where the equipment will operate. Assess factors like size, weight, and space constraints in your facility. Focus on functionality and ease of use to ensure the equipment meets your operational requirements. Safety features should also be a priority to protect workers and prevent accidents. For more detailed guidance, refer to this equipment selection guide.
What are the factors to consider in selecting the equipment?
When choosing drum handling equipment, consider these critical factors: match the production output with the equipment’s capacity and efficiency. Evaluate the knowledge and training required for operation, as well as the long-term running costs versus initial price. Compare used versus new equipment options and weigh leasing against purchasing. Ensure replacement parts are readily available to minimize downtime. These considerations can help you make an informed decision. Learn more about these factors from this comprehensive article.
What are you supposed to consider before purchasing equipment?
Prior to purchasing drum handling equipment, reflect on qualities such as reliability, capacity, efficiency, and environmental impact. The quality of performance and maintenance requirements are also crucial factors. A reliable piece of equipment might have a higher upfront cost but could save money through reduced downtime and lower maintenance expenses. Consider all these aspects to ensure you select the best option for your business. For further insights, check out this key considerations article.
What is a good way to determine your equipment needs?
To determine your equipment needs, start by evaluating the size and weight of the drums you’ll handle. Ensure the equipment is large enough to manage the heaviest loads efficiently. Consider the job site conditions and whether your employees are trained to use the selected equipment safely. Overestimate rental costs to avoid unexpected expenses, and don’t hesitate to consult experts for advice. This approach will help you choose the most suitable equipment for your operations. Find additional tips in this helpful resource.