Essential safety rules for using drum hand trucks and dollies focus on controlling weight, stability, and spill risk every time a drum moves. This guide explains what to check, how to move, and how to design safer workflows so that when handling drums and drum hand trucks be sure to protect both people and product. You will learn how drum type, center of gravity, and equipment choice affect real-world handling. Use these rules to tighten compliance, cut injuries, and prevent costly leaks in any drum-handling area.
Understanding Drum Hand Trucks, Dollies, And Loads

Understanding drum types, weights, and equipment components is the first safety step when handling drums and drum hand trucks be sure to choose gear that matches load mass, drum geometry, and stability limits.
Drum hand trucks and dollies are simple leverage and rolling devices that let one person move a heavy drum that would otherwise require a team. They do this by shifting most of the drum’s mass onto wheels and keeping the center of gravity inside a stable wheelbase.
In real plants, the risk comes less from “lifting” and more from tipping, rolling, or losing control of a partially full or unstable drum. That is why you must treat drum type, weight, and center of gravity as core design inputs, not afterthoughts.
Drum types, weights, and center of gravity
Different drum types and fill levels change total weight and center of gravity, which directly affects how safely a hand truck or dolly will handle the load.
When handling drums and drum hand trucks be sure to think in terms of total system mass and how high and how far that mass sits from the wheel axle. A light but tall plastic drum can be more “tippy” than a shorter, heavier steel drum if its center of gravity is higher.
| Common Drum Type | Typical Nominal Volume | Empty Mass (Approx.) | Typical Filled Mass Range | Center of Gravity Behavior | Operational Impact |
|---|---|---|---|---|---|
| Closed-head steel drum | 200 L (55 gal) | 18–25 kg | 200–350 kg | CG near mid-height when fully filled with liquid; stable, predictable | Best for standard hand trucks and dollies on flat floors |
| Open-head steel drum | 200 L | 20–28 kg | 210–360 kg | CG may shift with sludges or solids that do not flow | Requires tighter strapping and slower travel speeds |
| Plastic (HDPE) drum | 120–220 L | 8–15 kg | 150–320 kg | Flexible wall can deform; CG can move if drum “breathes” under load | Needs cradles or shaped clamps to prevent slip and ovalization |
| Smaller drums / kegs | 60–120 L | 5–12 kg | 60–180 kg | Lower CG but smaller footprint; easier to tip sideways | Suited to compact dollies; avoid steep ramps |
Because exact weights vary by product density, you should base your capacity choice on the heaviest material likely to be in that drum plus a safety margin. Always treat label data and safety data sheets as your weight and hazard baseline.
How to estimate drum weight and CG in the field
As a quick rule, assume a full 200 L drum of water-like liquid is roughly 200–220 kg including the drum shell. More viscous or denser chemicals can exceed this. If a drum is only partially filled, sloshing can raise the effective center of gravity during movement, especially if the liquid can surge inside the shell. That surge increases tipping risk on ramps, turns, and when you stop suddenly.
- Drum material and construction: Steel vs plastic vs fiber – Changes wall stiffness and how securely clamps and straps can grip.
- Nominal volume (L): 60, 120, 200 L classes – Determines likely mass range and which hand truck frame geometry fits.
- Fill level and product density: Full, half-full, sludge – Directly affects total kg and how the center of gravity moves when you tilt.
- Drum diameter and height: Typical 200 L drums are about 570–610 mm diameter and 850–950 mm high – Controls leverage, tilt angle, and clearance through doors and under racks.
- Top fittings and closures: Bungs, lids, clamps – Impose no-go zones for straps and clamp jaws to avoid damage or leaks.
💡 Field Engineer’s Note: Treat half-full drums as more hazardous than full ones on slopes. The moving liquid inside can “push” the drum over just as you stop, so reduce gradient limits and walking speed whenever you hear or feel sloshing.
Key components of drum trucks and dollies
Drum hand trucks and dollies use a small set of structural and rolling components that work together to control heavy drums with minimal human force.
When handling drums and drum hand trucks be sure to understand which part is carrying the load and which part is controlling motion. Damage to a nose plate, wheel, or clamp is not cosmetic; it directly reduces your safety margin.
| Component | Where Used | Function | Typical Design Detail | Operational Impact |
|---|---|---|---|---|
| Frame | Hand trucks & dollies | Transfers drum load to wheels | Welded steel tube or channel, sized for 200–400 kg loads | Frame bending or cracks reduce capacity and can cause sudden failure |
| Nose plate / toe plate / cradle | Main contact with drum base or side | Supports drum weight at base or along shell | Flat plate, curved cradle, or V-shaped support | Correct shape improves stability and reduces local shell damage |
| Handles | Hand trucks | Provide leverage for tilting and steering | Single or twin handles, 900–1,300 mm high | Proper height reduces back bending and allows better control on ramps |
| Wheels / casters | All types | Carry load and allow rolling | Solid rubber, polyurethane, or pneumatic, often 150–300 mm diameter | Wheel size and material dictate floor compatibility and effort required |
| Straps / clamps / jaws | Drum trucks, dollies, lifters | Secure drum to prevent slip or roll-off | Webbing straps, ratchet clamps, or mechanical jaws | Correct adjustment prevents rotation and spill during sudden stops |
| Axle and bearings | Under main wheels | Allow smooth rotation under high load | Steel axle with bushings or ball bearings | Poor lubrication increases push force and heat, and can seize under load |
| Brakes / chocks (if fitted) | Some dollies | Hold position on slopes or during loading | Foot-operated brake or separate wheel chocks | Reduces risk of unplanned movement while tilting or parking |
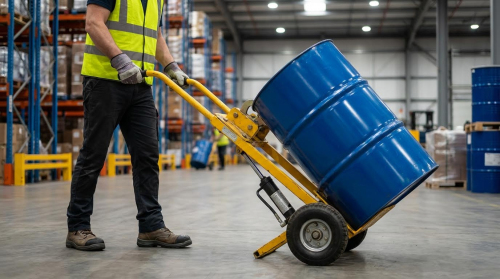
- Hand truck (upright type): Tall frame with two main wheels – Best for tilting drums from vertical and moving short distances.
- Drum dolly: Low platform or ring with 3–4 casters – Ideal for moving already vertical drums in flat, smooth areas.
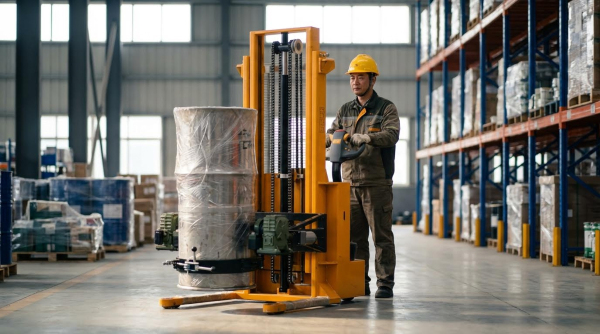
- Hydraulic drum lifter / stacker: Vertical mast with hydraulic lift – Used when you must raise drums to pallets, racks, or process inlets.
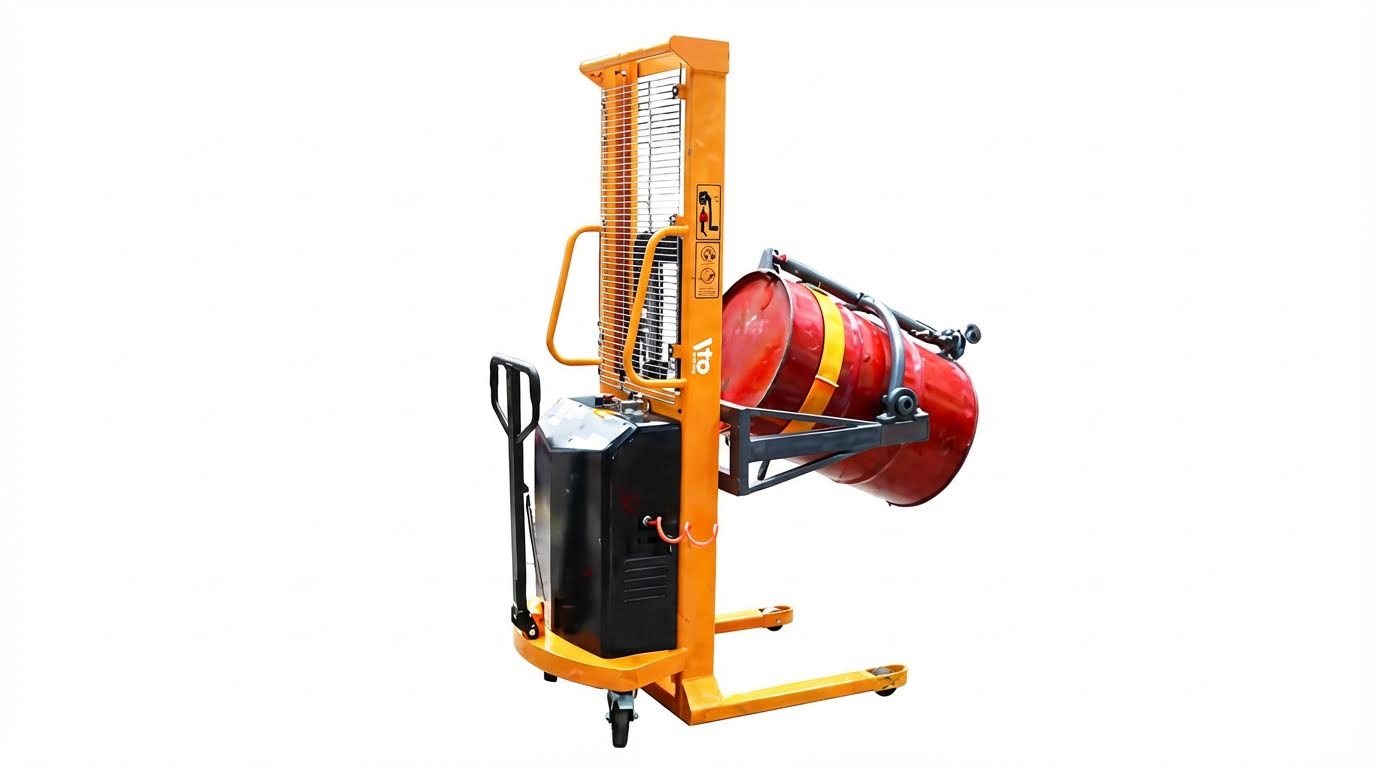
- Drum rotator / tipper: Rotating cradle or gear drive – Controls pouring, decanting, or inverting drums without manual lifting.
Why component condition matters more than age
A 10-year-old hand truck with straight frame rails, tight axle, and sound wheels is safer than a 1-year-old unit with bent frame or cracked welds. For drum handling, any deformation that changes how the drum sits on the nose plate or cradle will also change the center-of-gravity position. That small geometry change can be the difference between a stable tilt and a sudden tip.
💡 Field Engineer’s Note: On inspection rounds, stand a loaded drum truck safely parked and sight along the frame and wheel centers. If you see any twist or one wheel sitting higher, tag the unit out; misalignment under a 300 kg drum will show up as a sudden sideways roll when you hit a floor joint.
Safe Operating Practices For Drum Handling

Safe operating practices for drum handling focus on three things: equipment condition, correct drum securing, and controlled movement over different floor conditions and gradients. When handling drums and drum hand trucks be sure to combine all three to prevent crush injuries and spills.
Pre-use inspection and OSHA-compliant checks
Pre-use inspection means confirming the hand truck or dolly is structurally sound, moves freely, and is suitable for the specific drum and load before you touch a drum.
- Frame and welds: Inspect the frame, toe plate, and welds for cracks, bends, or corrosion – prevents sudden structural failure under load.
- Wheels and casters: Spin each wheel to check for free rotation, damage, or wobble – avoids steering loss and tip risk on uneven floors.
- Fasteners and axles: Verify axle nuts, bolts, and any clamps are tight – keeps wheels and restraints from loosening mid-move.
- Handles and grips: Check handles are rigid and grips not torn or slippery – improves control and reduces hand strain.
- Rated capacity label: Confirm the truck’s capacity is legible and exceeds the estimated drum mass – prevents overloading beyond design limits.
- Surface conditions: Walk the intended route for spills, debris, or potholes – reduces sudden jolts that can destabilize the drum.
- PPE and authorization: Make sure you have required PPE and are trained and authorized to operate the equipment – aligns with OSHA-style competency expectations.
Typical daily inspection checklist items
Daily checks usually include: visual frame and wheel inspection, verification of straps or clamps, route housekeeping, and confirmation that capacity labels and warning decals remain readable.
💡 Field Engineer’s Note: If a wheel shows even slight wobble when spun empty, lock the truck out and tag it. Under a 250–350 kg drum, that wobble can turn into a violent oscillation when crossing joints or thresholds, making a tip-over much more likely.
Correct loading, tilting, and securing of drums
Correct loading, tilting, and securing means controlling geometry and restraint so the drum’s center of gravity stays within the wheelbase throughout the move.
- Approach and alignment: Position the hand truck squarely to the drum, centered on its width – keeps the load balanced left-to-right.
- Foot placement: Place feet to the side, not directly in front of the drum – prevents foot crush if the drum shifts or rolls.
- Engage the nose plate: Slide the toe plate fully under the lower chime – maximizes support area and reduces risk of the drum slipping off.
- Use leg power to tilt: Keep your back straight, bend knees, and pull handles using legs and body weight – reduces musculoskeletal strain.
- Controlled tilt angle: Once the drum is on the wheels, maintain a modest rearward tilt, not vertical – keeps the combined center of gravity safely over the axle.
- Secure restraints: Tighten straps, chains, or clamps so the drum cannot rotate or slide – prevents rolling off when turning or stopping.
- Check before moving: Gently rock the truck to verify nothing shifts – final confirmation the drum is fully seated and restrained.
- Operator position: Walk behind or to the side with both hands on the handles – maintains leverage and a clear escape path.
Special care for damaged or deformed drums
For dented or out-of-round drums, use equipment with positive clamps or cradles rather than relying only on the chime on a flat toe plate. If clamps cannot achieve a firm, non-slip grip, the drum should be overpacked or handled with alternative lifting equipment.
💡 Field Engineer’s Note: When handling drums and drum hand trucks be sure to treat every partial drum as less stable than a full one. Partially filled drums slosh, shifting the center of gravity during starts and stops, so keep movements slower and tilt slightly more to keep the CG inside the wheelbase.
Moving on ramps, thresholds, and uneven floors
Moving on ramps, thresholds, and uneven floors is about controlling speed, orientation, and wheel contact so the drum stays upright and the operator never loses leverage.
- Plan the route: Choose the flattest, cleanest path with the fewest transitions – reduces the number of high-risk maneuvers.
- Small steps and joints: Approach thresholds squarely and slow – keeps both wheels hitting the obstacle at the same time for stability.
- Lifting over thresholds: Slightly increase rearward tilt and use legs to lift handles just enough for wheels to climb – avoids the toe plate catching and pitching the drum forward.
- Uneven or cracked floors: Cross defects at a diagonal only if the drum remains stable, otherwise re-route – prevents sudden side tipping.
- Up ramps: Keep the drum uphill and you below it, pushing with controlled effort – stops the drum from overrunning you if grip is lost.
- Down ramps: Keep the drum downhill and you above it, holding back with body weight – maintains braking control and prevents runaway loads.
- Speed control: Move at walking pace or slower, with no running starts – gives time to react to slippage or obstacles.
- Wet or oily surfaces: Avoid if possible; if unavoidable, reduce tilt slightly and move even slower – minimizes side slip of wheels.
When to stop and get help
If the gradient is too steep to hold the drum safely with your body weight, or the floor is severely broken, stop. Use powered drum handling equipment, add a second operator for guidance and braking assistance, or choose an alternate route.
💡 Field Engineer’s Note: Manual drum trucks struggle on long ramps or where floor slope changes suddenly at landings. Those transition points create a “see-saw” effect that can momentarily unload one wheel; slow down before every break in slope so you can correct if the drum starts to lean.
Selecting Equipment And Designing Safe Workflows
Selecting the right drum trucks, dollies, and lifters is about matching capacity, layout, and workflow so that when handling drums and drum hand trucks be sure to minimize manual strain, tip-over risk, and spill consequences.
This section links equipment choice to drum weights, lift heights, aisle geometry, and traffic patterns so your system stays stable, compliant, and efficient under real operating conditions.
💡 Field Engineer’s Note: Treat every layout or equipment change as a fresh risk assessment. A new pallet size, rack beam height, or floor repair can quietly remove your safety margin for turning, braking, or parking loaded drum trucks.
Matching capacity and configuration to drum tasks
Matching capacity and configuration to drum tasks means choosing drum hand trucks, dollies, and lifters that safely cover your heaviest, highest, and most frequent moves with a built‑in safety margin.
Think in terms of three variables: drum mass, handling function, and environment. Every time you plan a task, when handling drums and drum hand trucks be sure to confirm all three are within the equipment’s safe envelope.
| Selection Factor | Typical Options / Ranges | Engineering Guideline | Operational Impact |
|---|---|---|---|
| Drum mass (including contents) | Commonly 100–400 kg per drum | Choose equipment rated at least 25–50% above your heaviest realistic drum | Prevents overload, frame cracking, and loss of control on slopes |
| Handling function | Horizontal move, short lift (<300 mm), high lift (>1.5 m), tipping/decanting | Use basic drum trucks for rolling, lifters/stackers for vertical work, rotators for pouring | Avoids misusing simple trucks for stacking or controlled pouring |
| Drum material and shape | Steel, plastic, fiber; straight or tapered sides | Match clamp or cradle type to drum wall stiffness and rim profile | Reduces slip or crushing of thin‑wall plastic drums |
| Floor quality | Smooth concrete, rough concrete, outdoor yards | Specify wheel diameter and material for worst‑case floor and joint conditions | Improves push/pull force and prevents wheel jamming at cracks and thresholds |
| Lift height requirement | Ground‑level only to 3–4 m racking | Higher masts need wider bases and lower travel speeds | Maintains stability as drum center of gravity rises |
| Task frequency | Occasional, daily, or high‑throughput | High‑throughput work justifies hydraulic or powered solutions | Cuts fatigue and musculoskeletal injury rates on busy lines |
- Capacity rating: Always size to the heaviest drum plus realistic variation – this keeps you inside the elastic range of frames and axles.
- Horizontal vs vertical tasks: Use drum trucks and dollies strictly for rolling and short transfers – not for lifting to pallets or racks.
- Vertical handling: Use drum lifters or stackers where drums must clear pallets, bunds, or conveyors – this keeps the drum’s center of gravity aligned with a designed load axis.
- Decanting and rotation: Use dedicated drum rotators for controlled pouring – they provide mechanical advantage and positive retention during tipping.
- Clamp and cradle design: Select clamps that fully capture the drum body or rim – this prevents rocking and sudden slips during braking or turning.
- Wheel selection: Choose larger‑diameter wheels for uneven floors and thresholds – this lowers push forces and reduces sudden impacts into the drum.
How to build a simple capacity rule for your site
Start by listing all drum types, fill levels, and maximum densities used on site. Convert this into a conservative maximum mass per drum. Add 25–50% to that mass and make it your minimum rated capacity for new drum trucks, dollies, and lifters. Apply the same rule to any attachments or clamps, not just the base frame.
For hydraulic drum lifters and stackers, capacity and stability are tightly linked to how the drum’s center of gravity sits over the wheelbase and mast. Rated capacity normally assumes the drum axis is aligned with the equipment’s load center and fully secured in a clamp, cradle, or belt system that prevents rotation or drop during travel.
- Wide base frames: Prefer lifters with a wide wheelbase and low counterweight – this increases the tipping moment needed to overturn the unit.
- Controlled lift speed: Use units with smooth, predictable lift/lower – abrupt starts or stops can amplify drum sway.
- Positive locking: Ensure clamps or cradles have mechanical locks or holding valves – this protects against hydraulic pressure loss mid‑lift.
- No‑load testing: Perform a brief no‑load cycle before starting work – this reveals sticking valves or slow cylinders before you put a 300 kg drum in the air.
Aisle layout, traffic control, and spill-risk reduction
Aisle layout, traffic control, and spill‑risk reduction mean designing routes, clearances, and rules so that a loaded drum truck or lifter can move without surprise conflicts, tight turns, or uncontrolled spill paths.
When handling drums and drum hand trucks be sure to treat the route as seriously as the equipment: most incidents start with poor visibility, cramped aisles, or uncontrolled mixed traffic rather than equipment failure.
| Design Aspect | Good Practice | Operational Impact |
|---|---|---|
| Aisle width | Allow turning space for the longest drum truck or lifter plus at least 300–600 mm clearance each side | Prevents wheel strikes on racking and sideways drum impacts |
| Turning radii | Lay out corners so equipment can turn without multi‑point maneuvers | Reduces backing, jack‑knifing, and sudden steering corrections |
| Floor condition | Maintain clean, dry, level routes with repaired joints, potholes, and broken tiles | Minimizes sudden jolts that can unseat drums or cause slips |
| Traffic separation | Physically separate pedestrian and drum routes where possible | Lowers collision risk and allows operators to focus on load control |
| Speed control | Set low speed limits and enforce “no running, no sudden turns” rules | Reduces dynamic load shifts and tip‑over potential |
| Spill containment | Use bunds, sumps, and graded floors to direct spills away from walkways | Limits spread of hazardous liquids and simplifies cleanup |
- Dedicated drum corridors: Mark and sign specific routes for drum movements – this makes risk predictable and easier to supervise.
- Visibility at crossings: Keep crossings free of stacked goods above 1.2–1.5 m – operators need clear sightlines while tilted back behind a drum.
- Ramps and thresholds: Minimize gradients and install beveled plates at door sills – this reduces push forces and sudden load shifts at level changes.
- Parking and staging areas: Provide flat, protected zones for temporary drum parking – avoids drums being left on slopes or in circulation paths.
- Emergency access: Keep eye‑wash, spill kits, and exits clear of parked drums and equipment – this ensures you can respond quickly if a leak occurs.
Practical traffic control measures for drum routes
Use floor markings, one‑way systems, and simple give‑way rules at intersections. Limit powered vehicle access to key drum aisles or schedule time windows so that drum trucks and forklifts do not share the same narrow space at the same time. Install mirrors at blind corners and require operators to sound a bell or horn before entering shared crossings.
Spill‑risk reduction starts at the workflow design stage, not after the first leak. Place high‑risk operations such as decanting, sampling, and drum opening inside local containment (sumps, trays, or bunded bays) and keep travel distances between storage and these points as short and straight as possible.
- Shortest safe route: Design routes that minimize distance and the number of turns – each extra maneuver is another chance for impact or loss of control.
- Containment near storage: Use bunded pallets or racked bunds under drum storage – this captures leaks without spreading across walkways.
- Spill‑kit positioning: Place absorbents and neutralizers at route entrances and decanting points – operators can act immediately instead of searching for materials.
- Training on routes: Train operators on approved drum routes and prohibited shortcuts – this keeps practice aligned with your engineered layout.
Final Safety Considerations And Implementation Steps
This section gives a practical checklist so when handling drums and drum hand trucks be sure to control people, equipment, and environment together, not as separate items.
At this stage, you are no longer learning the basics; you are locking in habits that prevent one-off mistakes and repeat incidents. The goal is a simple, repeatable system that any trained operator can follow on any shift.
Non‑negotiable safety rules to apply every time
This subsection lists the “always/never” rules that should appear in site procedures, toolbox talks, and operator training.
- Always verify the drum and route before moving: Confirm drum contents, approximate mass, and destination – Prevents overloads and wrong‑area deliveries.
- Always match equipment to the drum and task: Use hand trucks for short horizontal moves, lifters/stackers for lifting or racking – Reduces tip‑over and strain injuries.
- Always keep the load under control: Walk, do not run; keep both hands on the handles and eyes on the path – Gives time to react to obstacles or leaks.
- Never exceed rated capacity: Compare estimated drum mass with the truck or dolly rating plate – Prevents structural failure and sudden loss of control.
- Never ride on drum trucks or dollies: No passengers, no standing on frames – Eliminates crush and fall hazards.
- Never leave a loaded unit unattended on slopes: Always chock wheels or park on level ground – Stops uncontrolled rolling.
- Always wear task‑appropriate PPE: Safety footwear and gloves as a minimum; add chemical PPE for hazardous drums – Mitigates impact, pinch, and splash risks.
- Always secure drums properly: Use straps, clamps, or cradles designed for drums – Prevents rolling, rotating, or sliding off the truck.
- Never use damaged equipment: Tag out trucks or dollies with bent frames, cracked wheels, or loose axles – Removes hidden failure points from service.
- Always communicate in shared areas: Use horns, verbal calls, or standard hand signals at blind corners – Reduces collision risk with pedestrians and forklifts.
💡 Field Engineer’s Note: When incident‑investigating drum handling, I often found “small” shortcuts: using a pallet jack as a drum pusher, or dragging drums by hand for “just a few metres.” Most injuries came from these improvised methods, not from the approved drum trucks and dollies.
Step‑by‑step implementation plan for your facility
This subsection turns the safety rules into a simple project plan you can roll out over a few weeks.
- Step 1: Map current drum flows and hotspots – Find real risks. Walk the site and sketch every route a drum takes: receiving, storage, production, waste, and shipping. Mark slopes, tight turns, narrow doors, and high‑traffic intersections where a drum truck or dolly is hard to control.
- Step 2: Classify drum types and hazards – Right controls for right product. Group drums by contents (non‑hazardous, flammable, corrosive, toxic) and by typical fill mass. Note which require extra PPE, bonding/grounding, or spill control.
- Step 3: Match equipment to each route – Eliminate improvised handling. For each route, choose the correct device: hand truck, cradle dolly, lifter, or stacker. Ensure rated capacity and geometry suit the heaviest, tallest, and widest drums in that stream.
- Step 4: Define “when handling drums and drum hand trucks be sure to” rules – Create simple operator prompts. Turn your critical behaviours into short, visible statements, for example: “When handling drums and drum hand trucks be sure to check wheels, secure the drum, and clear the route before moving.” Post these at storage and filling areas.
- Step 5: Standardise pre‑use inspections – Catch defects early. Create a one‑page checklist for wheels, frames, handles, and securing devices. Make operators sign off at the start of each shift. Any failure triggers lockout and maintenance.
- Step 6: Train and authorise operators – Control who can move drums. Run short, practical sessions covering equipment limits, correct tilting and travelling techniques, and emergency procedures. Maintain a list of authorised users and refresh training regularly.
- Step 7: Improve routes and housekeeping – Make the safe way the easy way. Widen aisles where possible, repair floor defects, add anti‑slip surfaces on ramps, and mark one‑way systems. Keep routes free of pallets, hoses, and loose materials.
- Step 8: Integrate spill and emergency response – Prepare for worst‑case events. Position spill kits, overpack drums, and absorbents along main drum routes. Train operators how to stop, secure the area, and raise the alarm if a drum leaks or falls.
- Step 9: Monitor performance and near misses – Keep learning. Record any drum‑related incidents, near misses, or equipment failures. Review monthly to spot patterns, then adjust routes, procedures, or equipment choices.
- Step 10: Audit and continuously improve – Stop drift back to old habits. Schedule periodic audits where supervisors walk the routes, observe handling, and talk to operators. Update signage, training, and equipment as production and drum types change.
Template: “When handling drums and drum hand trucks be sure to…” poster text
When handling drums and drum hand trucks be sure to:
1) Verify drum contents, weight, and route before moving.
2) Use only rated, undamaged drum trucks, dollies, or lifters.
3) Secure the drum with clamps or straps before travel.
4) Wear required PPE for the product handled.
5) Keep routes clear, move at walking speed, and never leave loaded equipment on a slope.

Final Safety Considerations And Implementation Steps
Effective drum handling safety comes from treating drums, equipment, and routes as one engineered system. Drum geometry, mass, and center of gravity drive how you choose and use hand trucks, dollies, and lifters. Frame design, wheel size, and clamps then control how that mass moves over real floors, ramps, and joints. If any link is weak, the risk of crush injuries and spills rises fast.
Pre‑use checks, correct tilting, and strict capacity limits turn this engineering into daily practice. Route design, clear traffic rules, and spill containment reduce the impact if a drum does slip or leak. The implementation steps in this guide give supervisors a clear path: map flows, match equipment, train operators, and audit behaviour.
For operations and engineering teams, the best approach is simple but strict. Standardise approved equipment for each drum task. Ban improvised methods. Lock in short, visible rules such as “When handling drums and drum hand trucks be sure to check weight, secure the drum, and clear the route.” Review incidents and near misses, then adjust layouts and equipment. With this cycle, sites can move heavy, hazardous drums with controlled, predictable risk and long‑term reliability from solutions such as Atomoving drum handling equipment.
Frequently Asked Questions
What is drum handling?
Drum handling refers to the safe and efficient process of moving and lifting drums in warehouses, manufacturing plants, and logistics outlets. This process often involves using specialized equipment like drum lifters, dollies, and dispensers. Proper drum handling ensures safety and efficiency while positioning or transporting heavy drums. Drum Handling Guide.
What are the best practices for safely moving drums?
To move drums safely, it’s important to use the right equipment and follow proper procedures:
- Use drum dollies for short-distance movement in warehouses.
- For longer distances, consider using drum trucks or hand trucks designed for heavy loads.
- Inspect tools and equipment regularly to ensure they are in good condition.
- Always wear appropriate personal protective equipment (PPE), such as gloves, when handling drums.
- Be mindful of your surroundings to avoid accidents during transport.
Drum Handling Equipment Types.
What safety rules should be followed when using hand tools for drum handling?
When handling drums with hand tools, always follow these safety rules:
- Inspect tools regularly to ensure they are in good working condition.
- Wear gloves to protect your hands from sharp edges or heavy loads.
- Carry tools and equipment carefully to avoid injury or damage.
- Avoid pocketing sharp objects that could cause harm.
- Use the correct tool for the task and follow manufacturer instructions.