This guide explains how to safely move a 55 gallon drum in real-world warehouse conditions using a practical, step-by-step safety checklist. You will learn how to assess drum hazards, choose the right barrel lifter, control routes, and set up compliant storage and containment systems. The focus is on reducing tip-overs, spills, and injuries while keeping throughput high and policies enforceable on the floor.
Core Hazards And Pre-Move Drum Assessment
Core hazards and pre-move assessment define how to safely move a 55 gallon drum by controlling weight, contents, and pressure risks before any equipment touches the drum. This section focuses on physics, labeling, and overpressure dangers.
💡 Field Engineer’s Note: In real warehouses, most drum incidents start before movement—misread labels, hidden damage, or unrecognized overpressure. A 60-second assessment at the origin point prevents hours of spill cleanup and injury investigations.
Drum weights, center of gravity, and stability
Drum weight, center of gravity, and stability determine whether a drum can be moved safely with chosen equipment and route. Misjudging any of these is the fastest way to tip a drum or overload a truck.
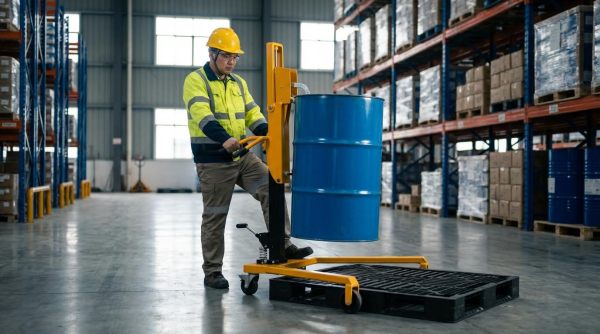
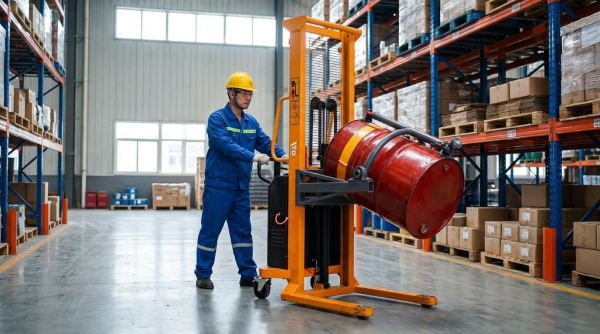
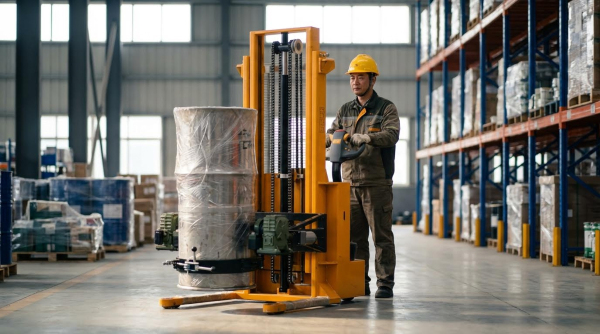
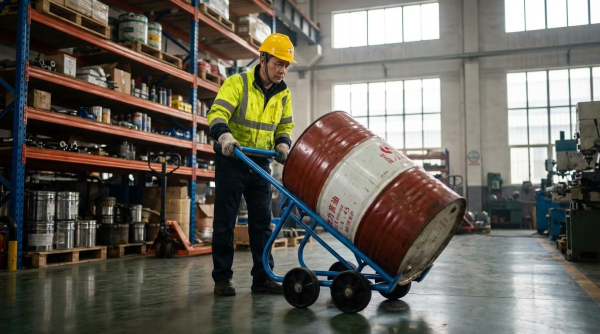
A typical 55-gallon (200 L) drum can weigh roughly 400–800 kg when filled, so manual lifting is never acceptable and you must use mechanical equipment such as drum carts, forklifts with drum attachments, hoists, or AGVs for any significant movement. Reference: safe handling of 55-gallon drums
To understand how to safely move a 55 gallon drum, you first estimate mass from fill level, density in the SDS, and tare weight, then compare that to the rated capacity of drum trucks, grabbers, or forklift attachments. Center of gravity shifts when drums are partially filled, tilted, or rolling, so operators must assume the drum can suddenly become unstable if accelerated or stopped abruptly.
| Drum Condition | Typical Mass Range | Stability Risk | Operational Impact |
|---|---|---|---|
| Empty 200 L drum (steel/plastic) | 20–30 kg | Low mass but easily kicked/rolled unintentionally | Move by hand truck; still chock to prevent rolling. |
| Half-full 200 L drum | 200–400 kg | Slosh causes shifting center of gravity | Use drum truck or forklift attachment; avoid sudden stops/turns. |
| Full 200 L drum | 400–800 kg | High kinetic energy, difficult to stop once moving | Only mechanical handling; verify floor load and equipment capacity. |
- Verify rated capacity: Compare estimated drum mass to truck, pallet jack, or forklift rating – Prevents structural overload and mast failure.
- Keep drum vertical when possible: Maintain the drum on its base with secure gripping – Maximizes stability and minimizes slosh-induced tipping.
- Control acceleration and deceleration: Move slowly, avoid abrupt starts/stops – Reduces inertial forces that can overcome drum friction and cause sliding.
- Avoid side impacts: Keep clear of posts, racking, and other drums – Side hits can instantly shift the center of gravity past the tipping line.
How to estimate drum weight from SDS
Use the SDS density (kg/L), multiply by estimated liquid volume (L), then add the drum tare mass (typically 20–30 kg). For example, 200 L of liquid at 1.1 kg/L weighs 220 kg; plus 25 kg drum gives about 245 kg total.
Labeling, SDS review, and visual drum inspection
Labeling, SDS review, and visual inspection are mandatory steps before moving any drum because you must know what is inside and whether the container is sound. Unknown or damaged drums are treated as hazardous until proven safe.
Before moving, you verify the drum identity by reading its label and the Safety Data Sheet (SDS), then inspect shell, chimes, welds, bungs, and lids for rust, dents, leaks, or deformation. Reference: pre-move inspection protocol
- Read the label first: Confirm product name, hazard class, UN number, and handling symbols – Determines PPE, compatible equipment, and storage destination.
- Check SDS sections: Review physical properties, density, reactivity, and spill response – Supports correct weight estimation and emergency planning.
- Inspect shell and chimes: Look for deep dents, creases, or corrosion at the rolling hoops – These are stress concentrators that can fail during lifting.
- Examine bungs and lids: Check for weeping, staining, or loose closures – Small leaks become large spills once the drum is tilted or lifted.
- Scan the floor area: Look for wet patches or residue below the drum – Indicates active leakage or past spills that reduce floor friction.
- Flag illegible or missing labels: Treat as unknown hazardous contents – Prevents accidental mixing or incompatible storage.
Treat unlabeled or illegible drums as hazardous until sampling confirms otherwise, and do not move them into general traffic areas. If you cannot positively match the drum to an SDS, route it to a controlled isolation zone for specialist evaluation instead of normal warehouse flow. Reference: handling unknown drums
💡 Field Engineer’s Note: Make “no label, no move” a hard rule. In mixed-chemical warehouses, most serious reactions happened when a “harmless-looking” unmarked drum got parked next to an incompatible chemical because someone skipped this basic check.
Quick visual checklist before you touch the drum
Ask: Is the label readable and matched to an SDS? Are there any leaks, rust blisters, or deep dents? Is the lid seated flat? Is the floor dry and non-slippery? If any answer is “no,” stop and escalate.
Pressure, bulging lids, and hazardous unknown drums
Pressure, bulging lids, and hazardous unknown drums represent high-consequence risks where the safest move is often not to move the drum at all. Overpressure can turn a 200 L drum into a fragmentation hazard.
Internal pressure in drums can rise due to temperature swings, gas evolution, or incompatible reactions, and a visibly bulging lid is a clear warning sign. Such drums should not be moved or opened until evaluated and depressurized by qualified personnel using approved pressure-relief devices or flame arresters. Reference: pressure management for volatile contents
| Visible Sign | Likely Internal Condition | Immediate Action | Operational Impact |
|---|---|---|---|
| Flat lid, sound shell | Normal internal pressure | Proceed with standard handling per SDS | Can enter normal warehouse flow. |
| Slight dome on lid | Elevated pressure or gas evolution | Stop, isolate, notify supervisor/safety | Requires technical evaluation before movement. |
| Strongly bulging lid | Dangerous overpressure, risk of rupture | Do not move or open; call specialist | Establish exclusion zone around drum. |
| Unlabeled, unknown contents | Unknown; treat as hazardous | Isolate, restrict access, arrange identification | Handled under special procedures only. |
- Never tighten bulging lids: Do not apply extra mechanical force to closures – Increases risk of sudden rupture and chemical release.
- Control ambient temperature: Keep suspect drums away from heat sources – Reduces further pressure buildup from thermal expansion.
- Use remote handling where possible: For overpressurized or reactive drums, rely on specialized tools – Increases distance between personnel and potential blast or spray.
- Define isolation zones: Mark a minimum radius around suspect drums – Prevents casual traffic from entering a potential hazard area.
💡 Field Engineer’s Note: If a lid is visibly bulging, treat the drum like a small pressure vessel, not a container. I have seen lids launch several meters when workers tried to “crack them open” manually to relieve pressure.
When in doubt, what is the safest default?
If you cannot confirm the drum’s contents, integrity, or internal pressure, the safest action is to stop, isolate the drum, keep people back, and call your safety or engineering team. Never improvise venting or movement procedures.
“”
Storage, Containment, And System-Level Safety
Storage, containment, and system-level controls are what keep a “safe move” from turning into a delayed spill or collapse hours later. If you want to know how to safely move a 55 gallon drum, you must design where it will sit, what will catch leaks, and how the whole system is monitored over time.
- Goal: Keep drums stable, segregated, and contained – so one bad drum never becomes a warehouse-wide incident.
- Scope: Sumps, pallets, racks, and monitoring – all engineered around real drum weights and worst-case leaks.
- Key Link To Movement: You only move drums into storage that can safely hold them – route and equipment choices must match the final storage design.
💡 Field Engineer’s Note: Many incidents occurred not during the move, but when a leaking drum sat overnight on a non-bunded pallet. Always assume at least one drum will leak and size your containment and inspection regime for that “bad actor.”
Spill containment sizing and sump selection
Spill containment for 55-gallon (≈200 L) drums must be sized using regulatory formulas and then checked against your real storage pattern and chemical mix. Undersized sumps give a false sense of security and usually fail during the first multi-drum leak or fire-water event.
Two key standards guided sump capacity rules for drum storage. The first was the United States Environmental Protection Agency (EPA), which required secondary containment capacity of at least 10% of the total stored volume or 100% of the largest single container, whichever was greater. This formula directly applied to 55-gallon drum storage. Factory Mutual (FM) guidance was more conservative, requiring 25% of total volume or the largest container, whichever was greater. This higher threshold better matched dense drum warehouses.
| Scenario (55-gal ≈ 200 L drums) | Total Stored Volume | EPA Minimum Sump Capacity | FM Minimum Sump Capacity | Operational Impact |
|---|---|---|---|---|
| 4 drums on one spill pallet | ≈800 L | ≥80 L or 200 L (largest drum) → 200 L | ≥200 L or 200 L (largest drum) → 200 L | Standard 4-drum spill pallet is usually enough; verify actual molded capacity. |
| 8 drums in a small storage bay | ≈1,600 L | ≥160 L or 200 L → 200 L | ≥400 L or 200 L → 400 L | EPA allows single 200 L sump; FM effectively pushes you to a larger bund or two pallets. |
| 24 drums in a row store | ≈4,800 L | ≥480 L or 200 L → 480 L | ≥1,200 L or 200 L → 1,200 L | Requires multi-pallet bunded area or a continuous floor sump; local fire codes often align with FM level. |
- Check real sump volume: Molded spill pallets often had “nominal” capacities – always confirm the actual liter rating against your worst-case drum.
- Allow for foam and fire water: Firefighting can add thousands of liters – design bunds so contaminated water stays inside your control zone, not in the storm drain.
- Segregate incompatible liquids: Acids, bases, oxidizers, and fuels must not share sumps – one leak must not create a violent reaction in the containment.
- Keep sumps accessible: Grating should lift safely with a drum truck or forklift clear – you must be able to clean sludge and inspect for hidden leaks.
How to size a sump for a mixed drum bay
List all drums in the bay, convert each to liters, and sum the total volume. Identify the largest single drum volume. Calculate 10% (EPA) and 25% (FM) of the total and compare each to the largest drum. Your design capacity must meet or exceed the higher requirement you choose to follow. For example, for 12 drums at 200 L each (2,400 L total), EPA requires ≥240 L or 200 L → 240 L; FM requires ≥600 L or 200 L → 600 L. In practice, that meant at least one 600 L bund or several pallets whose capacities add up to ≥600 L.
💡 Field Engineer’s Note: In cold rooms, leaked viscous liquids often bridge over sump grating instead of draining. Specify grating with smaller openings and train staff to lift and visually confirm that the sump cavity is not silently filling beneath a “dry-looking” deck.
Pallet integrity, stacking limits, and racking
Pallet condition, stacking height, and racking layout control whether heavy drums stay upright during day-to-day handling. Drums that were safe on the floor can become unstable once stacked, especially on damaged pallets or misaligned rack beams.
Industry guidance limited stacking to a maximum of two drums high and two drums wide to maintain stability and inspection access for typical warehouse operations. This conservative rule reduced toppling risk when moving pallets with forklifts. Other guidance allowed up to three or four drums high when following OSHA height limits of about 3,000–4,200 mm, but only when pallets and chocks were correctly used and drums were uniform. In all cases, the bottom tier needed chocking to prevent rolling.
| Storage Method | Typical Stack Height Guidance | Key Pallet / Rack Requirements | Operational Impact |
|---|---|---|---|
| Floor storage, no racking | 2-high, 2-wide preferred | Sound pallets, no broken deck boards or skewed stringers; drums chocked on bottom tier. | Easy inspection and quick access; lower collapse risk during manual rolling or truck movement. |
| Palletized 55-gal drums in racking | Up to 3–4-high within rack height and OSHA limits | Rack beams aligned, pallet fully supported, no overhang; use drum pallets or cradles where possible. | Higher density but requires better driver training and strict pallet inspection. |
| Single drums on spill pallets | 1-high (no stacking) | Spill pallet rated for drum mass; level floor; drum centered on grating. | Maximum individual safety and containment; used for high-hazard or unknown drums. |
- Inspect pallets before loading: Look for cracked deck boards, twisted stringers, and pulled nails – these defects create point loads that punch into drum chimes during travel.
- Avoid overhang: Drum edges should sit within pallet or rack footprint – overhanging drums are more likely to be struck by trucks or snagged by forks.
- Use chocks or wedges: Chock bottom-tier drums, especially on smooth floors – this stops slow rolling that can push outer drums off the pallet over time.
- Control aisle width: Match rack spacing to your forklifts and drum attachments – tight aisles force sharp turns that can destabilize tall drum stacks.
Link between stacking and “how to safely move a 55 gallon drum”
Every move into or out of a stacked position multiplies risk. To safely move a 55-gallon drum from a top tier, you must verify pallet integrity, chocking, and rack clearances before lifting. If any element looks marginal—damaged pallet, dented drum, or misaligned beams—bring the stack down to floor level first using mechanical aids rather than trying to “fish” a single drum out with forks.
💡 Field Engineer’s Note: On slightly sloped floors (even 1–2%), a pallet with wet boards and smooth steel drums can slowly “walk” sideways over weeks. Paint reference lines on the floor under high stacks and check monthly; any creep means you need better chocking or to re-level that bay.
AI-based monitoring and preventive maintenance
AI-based monitoring turns drum storage and handling from reactive cleanup to proactive risk control. By watching equipment and conditions in real time, it flags issues—like a leaking drum or failing drum truck—before they cause a spill or collapse.
AI systems monitored critical parameters on drum handling equipment such as vibration, hydraulic pressure, motor current, and structural strain. Machine learning models then analyzed these data streams to detect early signs of wear, misalignment, or overload. This allowed maintenance teams to schedule repairs before equipment failed under a live drum. The same approach extended to storage: vision systems and sensors checked for leaks, bulging lids, or mis-stacked drums.
| AI Monitoring Target | Typical Sensor / Data | What AI Detects Early | Best For… |
|---|---|---|---|
| Drum trucks, forklifts, AGVs | Vibration, motor current, hydraulic pressure | Worn bearings, weak hydraulics, overloaded lifts. | Preventing dropped drums and tip-overs during moves. |
| Storage aisles and racks | Cameras, depth sensors, rack strain gauges | Leaning stacks, missing chocks, beam deflection. | Keeping tall drum stacks within safe geometry limits. |
| Spill pallets and sumps | Level sensors, conductivity probes, thermal cameras | Slow leaks, accumulating liquids, temperature anomalies. | Early leak detection before secondary containment is overwhelmed. |
| Drum surfaces and lids | Vision analytics on bulging, corrosion, labeling | Bulging lids from pressure, rusted shells, unlabeled drums. | Flagging high-risk drums for isolation and specialist review. |
- Integrate with work orders: AI alerts must auto-generate maintenance tasks – no safety benefit if warnings sit in a dashboard nobody reads.
- Define alarm thresholds: Set clear limits for vibration, tilt, or sump level – this avoids alarm fatigue and ensures that when it beeps, people act.
- Use for training feedback: Analyze near-miss patterns (sudden braking, sharp turns) – then retrain operators on how to safely move a 55 gallon drum with smoother handling.
- Protect hazardous zones: Use AI to enforce geofences around incompatible storage – AGVs and forklifts should never auto-route through “no-go” chemical segregation lines.
How AI supports your drum safety checklist
AI does not replace your checklist; it feeds it. For example, if AI detects repeated high tilt angles in a certain aisle, you add “verify aisle width and turning radius” to your weekly inspection. If sump level trends show frequent minor leaks in one bay, you add “check bung torque and pallet condition” for that location. Over time, the system tunes your written procedures to the real behavior of your warehouse.
💡 Field Engineer’s Note: Start small: one high-risk bay, one fleet of drum trucks, a few cameras. Prove that AI can catch at least one real defect or leak in the first quarter. Once operators see it preventing mess and rework, they stop seeing it as surveillance and start using it as another safety tool.

Final Checklist And Policy Integration
Safe drum handling depends on linking physics, inspection, containment, and monitoring into one clear checklist that people actually follow. Weight, center of gravity, and pallet integrity set the mechanical limits. Labeling, SDS review, and pressure checks define what can move, with which tool, and where it may go. Containment design then assumes at least one drum will leak and sizes sumps, pallets, and segregation so that leak stays inside a controlled zone.
Stacking limits, chocking, and racking geometry keep those same drums stable over time, not just during a single move. AI-based monitoring closes the loop by watching for early warning signs: leaks, bulging lids, overloads, and creeping stacks that drift out of tolerance.
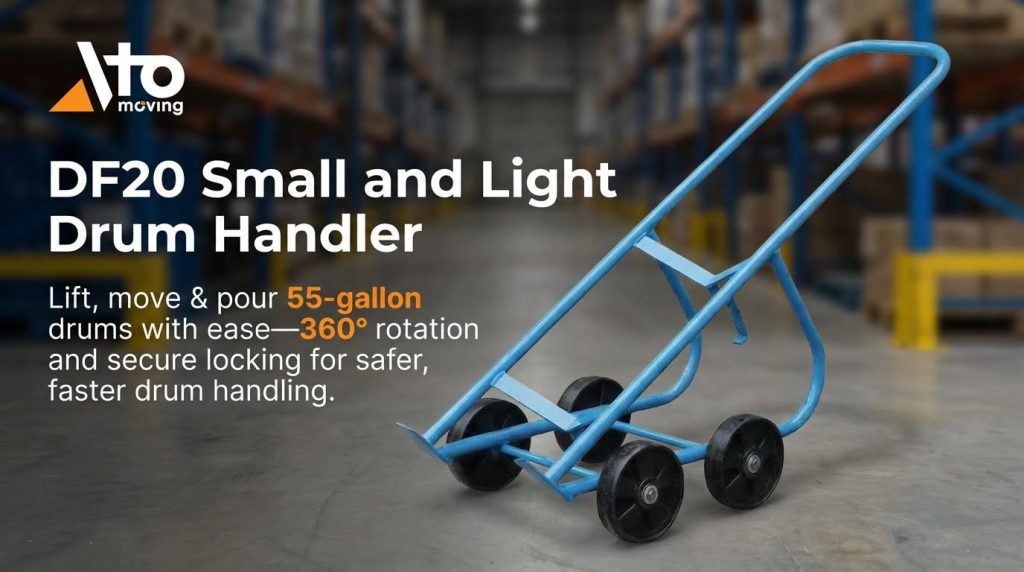
The best practice for operations and engineering teams is to convert these rules into a short, non-negotiable checklist at the point of work. “No label, no move,” verified capacity checks, clear isolation rules for suspect drums, and documented sump sizing must all sit in that one procedure. Use AI and inspections to update the checklist as your warehouse changes. When you design equipment, storage, and routes as one system, and support them with Atomoving drum handling solutions, you cut tip-overs, spills, and injuries while keeping throughput high.
Frequently Asked Questions
How to Safely Move a 55 Gallon Drum?
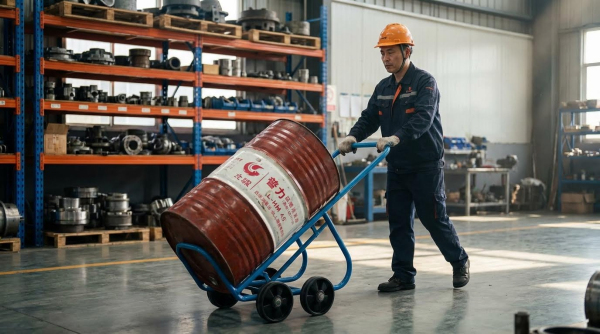
Moving a 55-gallon drum safely requires proper technique to avoid injury. You can use methods like pulling, pushing, or a combination of both. Pushing is safer when there’s enough space. To push, place your hands near the drum’s chime at shoulder width. Keep your shoulders low and close to the drum. Use your legs to push slowly until the drum reaches its balance point. USDA ARS Drum Moving Guide.
What Are the Dimensions and Weight of a 55 Gallon Drum?
A typical 55-gallon drum has an inside diameter of 572 mm and a height of 851 mm. When full of water, it can weigh approximately 250 kg (water density is 1 kg per liter). Always check the drum’s contents, as weight varies depending on what’s inside. For more details on drum sizes, refer to this 55-Gallon Drum Specifications.