This guide explains how to handle drums safely by combining engineering controls, correct equipment, and disciplined procedures. You will learn safe limits for manual work, when to use mechanical aids, and how to control spills, stacking risks, and flammable hazards. Throughout, the focus stays on practical, measurable steps that cut injuries, protect containment, and keep your site compliant.
Core Principles Of Safe Drum Handling
Core principles for how to handle drums focus on controlling mass, chemicals, and motion with engineered methods instead of muscle power. This means respecting drum weight, understanding contents, and applying structured risk assessment before any lift, move, or pour.
Drum hazards, weights, and ergonomic limits
Drum hazards, weights, and ergonomic limits define why manual lifting is unsafe and why mechanical aids are mandatory for full drums. A standard 200 L drum simply exceeds what the human body can move safely without assistance.
| Drum type / condition | Typical mass range (kg) | Manual handling guidance | Operational impact |
|---|---|---|---|
| 200 L steel or plastic drum – full | ≈180–360 kg | Do not manually lift or carry | Always use drum dolly, lifter, pallet jack, or forklift for any movement |
| 200 L drum – empty or residue only | ≈20–30 kg | Can be repositioned manually with correct technique | Use rolling, tilting, or two-person lift; avoid long carries |
| Smaller drums (20–60 L) – full | ≈20–70 kg | Often above safe single-person limit | Use small drum trolleys or team lifts; keep lifts close to body |
| Stacked drums on pallet | Up to several hundred kg per pallet | No manual intervention under or between drums | Only forklifts or pallet trucks; never reach under suspended or stacked drums |
A full 200 L drum can weigh 180–360 kg, which is far above typical ergonomic limits of 25–35 kg for a single worker under ideal conditions. This mass makes direct manual lifting unsafe and non-compliant with most manual handling guidance.
- Excessive mass: Full drums create crushing and overexertion risks – a dropped drum can cause severe foot and leg injuries.
- Instability when rolling: Round shells can suddenly accelerate or change direction – loss of control leads to impacts and leaks.
- Chemical exposure: Damaged or over-pressurized drums can leak or vent – contact, inhalation, or fire hazards arise instantly.
- Pinch and shear points: Chimes, pallet edges, and truck forks create traps – hands and feet are vulnerable when drums shift.
How to estimate drum risk before touching it
Check the label and SDS to understand contents and physical properties. Look for dents, bulging, corrosion, and leaks. Assume a 200 L drum is in the 180–360 kg range unless proven empty, and plan equipment accordingly.
For light, empty, or near-empty drums, workers may roll or tilt the drum using leg-dominant techniques and a neutral spine. Manual techniques must keep hands away from chimes and ends, avoid crossing arms, and eliminate any need to “catch” a falling drum.
- Pre-move check: Confirm bungs and closures are tight and there are no leaks – prevents spills when the drum is tipped or rolled.
- Body position: Keep back straight, bend hips and knees, and use leg power – reduces lumbar disc loading and long-term injury risk.
- Hand placement: Stay clear of under-edges, pallet gaps, and rolling paths – avoids crush and pinch injuries.
- Two-person moves: Mirror techniques on opposite sides – balances load and keeps both workers in stable postures.
💡 Field Engineer’s Note: Treat every drum as full until you have confirmed weight and contents; many injuries occurred when operators “assumed it was empty” and tried to catch or steady a moving drum that weighed over 200 kg.
Regulatory context and risk assessment steps
Regulatory context and risk assessment steps explain how to handle drums within OSHA-style safety rules, transport codes, and flammable-liquid standards, then translate those rules into task-by-task controls.
Drum handling sits under a mix of worker-safety, transport, and fire-protection regulations. Codes similar to 49 CFR define design and stacking tests for UN-rated drums, including simulated 3 m stack loads for 24 hours at ambient temperature for hazardous materials. Industry practice often limits steel drums with contents up to specific gravity ≈1.5 to about four pallet-high stacks under controlled conditions.
- Worker protection standards: Define manual handling limits, PPE, and training – reduce musculoskeletal and impact injuries.
- Packaging and transport codes: Specify drum design, closure torque, and stacking tests – ensure drums withstand handling and storage loads.
- Flammable liquid standards: Govern grounding, bonding, venting, and storage layout – mitigate ignition and explosion risks.
- Environmental rules: Require spill containment and proper disposal – limit soil and water contamination from leaks.
A structured risk assessment converts these regulatory requirements into practical steps for each operation. The assessment should cover routine tasks (receiving, storing, dispensing) and non-routine tasks (spill cleanup, re-drumming, damaged drum handling).
- Step 1: Define the task – separate lifting, moving, stacking, and dispensing into distinct activities.
- Step 2: Identify hazards – consider weight, contents, pressure, temperature, and location constraints.
- Step 3: Evaluate likelihood and severity – prioritize high-consequence events such as large spills or fires.
- Step 4: Select engineering controls – choose drum trucks, clamps, containment, and venting before relying on PPE.
- Step 5: Add procedures and training – standardize how to handle drums so every operator follows the same safe method.
- Step 6: Verify and review – inspect equipment, observe work, and update controls after incidents or near-misses.
Typical controls that come out of a drum-handling risk assessment
Common controls include: mandatory use of mechanical aids for drums above 50 kg; defined maximum stack heights per product; grounding and bonding for all flammable transfers; spill pallets sized for at least the largest drum; and restricted-access zones around dispensing points.
- PPE integration: Safety footwear with toe protection, gloves, and eye protection are baseline – chemical-specific PPE then follows SDS guidance.
- Layout planning: Aisle widths must suit drum trucks and forklifts – prevents side-swipes and impacts that can rupture drums.
- Emergency readiness: Spill kits and extinguishers must match stored liquids – allows rapid containment and fire control.
💡 Field Engineer’s Note: When you document “how to handle drums” in your risk assessment, always include abnormal scenarios like stuck bungs, bulging drums, or off-spec deliveries; most serious incidents happened during these exceptions, not during routine moves.
Engineering Controls For Lifting, Moving, And Stacking
Engineering controls for how to handle drums focus on replacing manual effort with rated mechanical equipment, controlling stability, and integrating with forklifts or AGVs so drums move safely through the entire workflow.
Mechanical aids and capacity ratings
Mechanical aids and correct capacity ratings let you move 200 L drums safely by keeping loads within engineered limits instead of human strength limits.
A full 200 L drum typically weighs 180–360 kg, so direct manual lifting is unsafe and usually outside ergonomic limits for a single worker. You control this risk by standardizing mechanical aids and matching each aid’s rated capacity to the heaviest drum plus a safety margin.
| Mechanical Aid Type | Typical Use Case | Typical Capacity Range (kg) | Key Selection Criteria | Operational Impact |
|---|---|---|---|---|
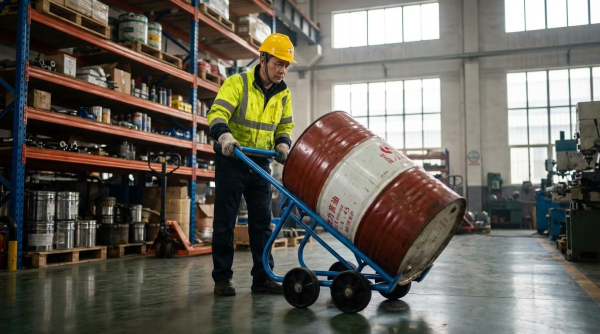
| Drum truck / trolley | Short moves on flat floors | 300–500 | Drum diameter fit, chime hook design, wheel type | One operator can move a full 200 L drum without lifting it |
| Drum dolly (ring or spider) | Repositioning upright drums in tight areas | 300–450 | Wheel material, ring diameter, tipping resistance | Allows rotation and small moves around process equipment |
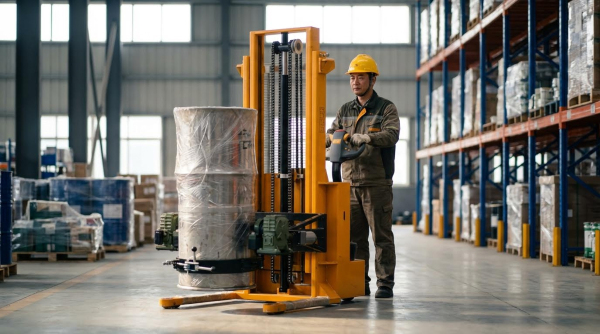
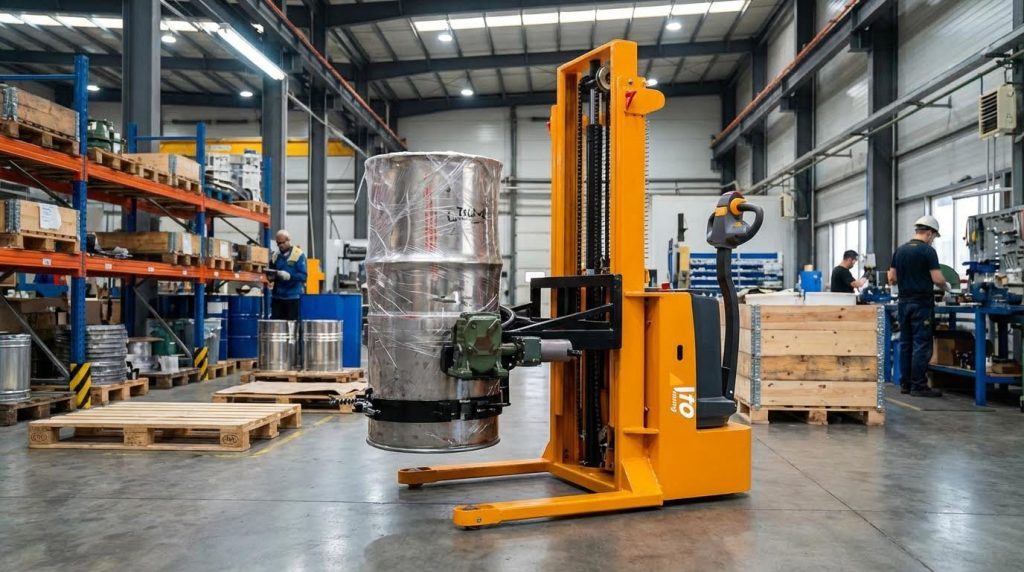
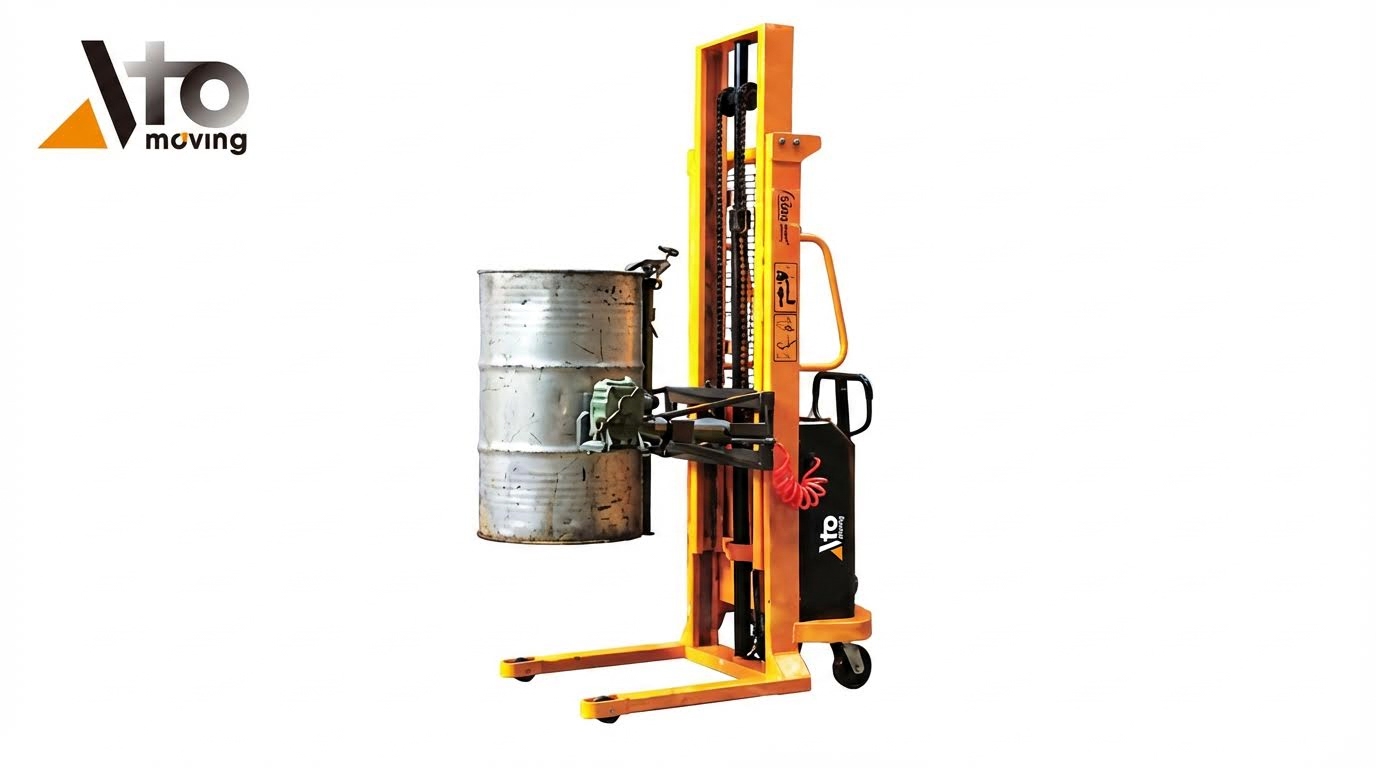
| Manual drum stacker / lifter | Raising drums onto pallets or low racks | 350–500 | Lift height, clamp range, wheelbase length | Removes need to “muscle” drums onto pallets by hand |
| Powered drum lifter / stacker | Frequent lifting and stacking in warehouses | 400–800 | Battery type, lift speed, duty cycle | Supports high-throughput operations with minimal strain |
| Forklift drum clamp attachment | Bulk movements and truck loading | 500–1,000+ | Forklift capacity, drum size range, clamp pad design | Loads and unloads multiple drums quickly while keeping them upright |
| Below‑hook drum lifter | Overhead cranes and hoists | 300–1,000 | Hook compatibility, drum profile, rotation capability | Serves pits, platforms, or congested areas unreachable by forklifts |
- Use mechanical aids by default: Any full 200 L drum should move on a truck, dolly, stacker, or similar – this keeps push/pull forces inside ergonomic limits.
- Match rated capacity to worst case: Size equipment for the heaviest drum (up to ~360 kg) plus margin – prevents overload when density or temperature changes.
- Verify drum fit, not just weight: Check diameter, height, and chime profile – correct geometry avoids slip-outs from clamps and cradles.
- Check closures before lifting: Confirm bungs and lids are tight and leak‑free – reduces spill risk if the drum tilts or bumps.
- Control travel speed: Move slowly with drums kept low – limits kinetic energy and tipping during sudden stops or turns.
How to choose capacity ratings for mixed drum types
When you handle both 60 L and 200 L drums, base capacity on the heaviest 200 L drum you reasonably expect, then verify that clamp or cradle adjustments still securely grip smaller drums without crushing them.
💡 Field Engineer’s Note: In real plants, capacity incidents often came from “unknown” heavy drums with higher specific gravity liquids. Treat any unlabelled or off‑spec drum as worst‑case mass when checking equipment ratings, or quarantine it until verified.
Stability, pallets, and stacking configurations
Stability, pallet quality, and controlled stacking patterns determine whether drums stay upright under vibration, bumps, and stacking loads.
Even when you use good lifting gear, poor pallet condition or aggressive stacking can still cause collapses and leaks. Engineering controls here focus on drum footprint support, stack geometry, and respecting realistic height limits instead of theoretical test values.
| Design Element | Typical Specification / Practice | Reason | Operational Impact |
|---|---|---|---|
| Pallet size for 4 × 200 L drums | ≈1,170–1,220 mm × 1,170–1,220 mm | Provides near‑full bearing under each drum | Reduces base deformation and rocking when moving pallets |
| Pallet condition | No broken boards, no protruding nails, minimal deflection | Maintains uniform support and avoids punctures | Prevents sudden drum tilt or base damage during handling |
| Routine warehouse stack height | Often 1–4 pallet levels, depending on drum design and contents | Limits load on lower drums and overall center of gravity | Balances storage density with stability and inspection access |
| Aisle width | Matched to pallet truck or forklift turning radius | Prevents contact between drums and racking or walls | Improves travel paths and reduces impact damage |
| Secondary containment | Sump or bund sized to largest drum volume plus margin | Captures leaks from stack failures | Reduces clean‑up time and environmental impact |
- Support the full drum base: Use pallets that keep the entire drum bottom on deck boards – this avoids local denting and wobble.
- Standardize drum patterns: Place four 200 L drums per pallet in a tight square with no overhang – gives predictable center of gravity for forklift moves.
- Control stack height by risk, not space: Consider drum design, liquid density, and temperature – reduce height if contents are heavy or storage is hot.
- Keep stacks plumb: Align pallets and avoid shims or wedges – prevents progressive lean that can fail during vibration.
- Inspect routinely: Check pallets, chimes, and sidewalls for damage – removes weak drums from stacks before they collapse.
Checking stability before moving a stacked pallet
Before lifting, push the palletized drums gently from two directions. If drums rock independently, re‑strap or re‑arrange. If the pallet twists or boards flex noticeably, re‑palletize to a sound unit load.
💡 Field Engineer’s Note: Many “mystery leaks” after transport traced back to cracked pallets that flexed under load. We cut incidents sharply just by adding a pallet inspection checkpoint before stacking and before every outbound shipment.
Forklift, AGV, and attachment integration
Integrating forklifts, AGVs, and drum attachments ensures that powered equipment moves drums within safe geometry and capacity limits throughout the site.
Once you rely on powered trucks or AGVs for how to handle drums, the truck–attachment–drum system must be engineered as one unit. That means verifying combined capacities, maintaining low centers of gravity, and programming routes that avoid sharp turns, slopes, and rough flooring.
| Equipment Combination | Key Engineering Checks | Main Risks Controlled | Best For… |
|---|---|---|---|
| Forklift + drum clamp | Derated forklift capacity, clamp weight, drum size range | Tipping, drum slip, sidewall damage | Loading/unloading trucks and moving pallets of upright drums |
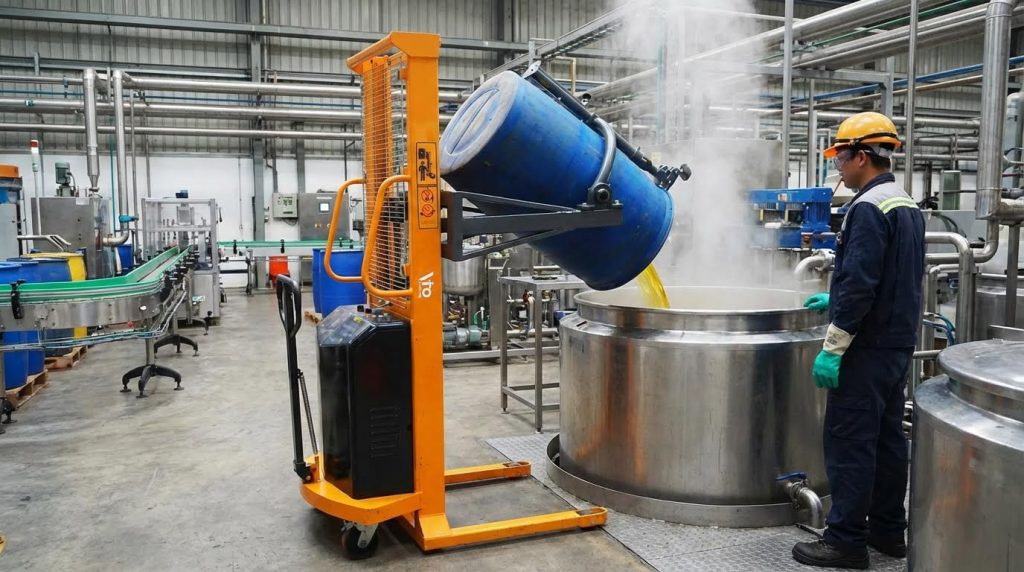
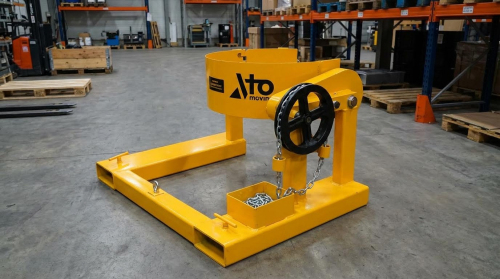
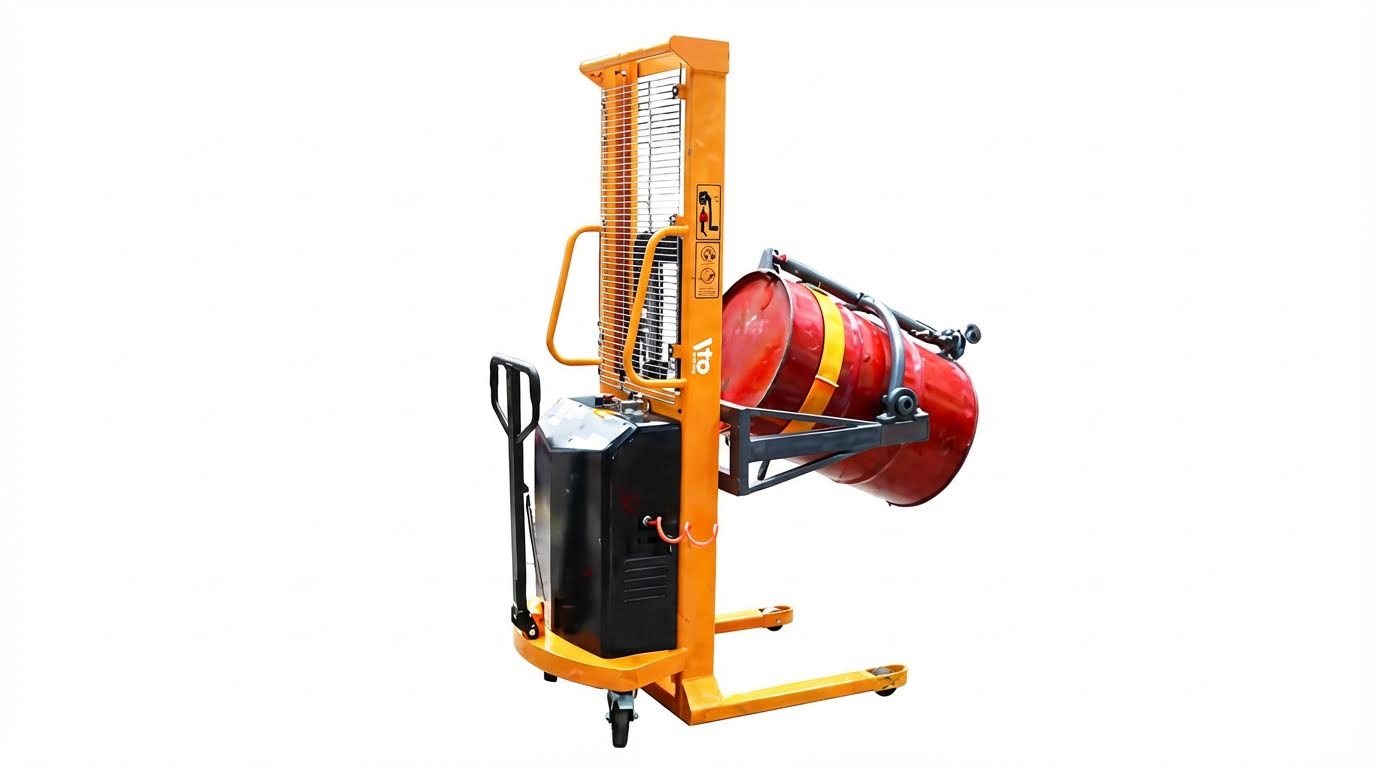
| Forklift + drum rotator | Rotation torque, locking mechanism, spill containment | Uncontrolled pouring, drum drop during rotation | Controlled emptying of drums into hoppers or tanks |
| AGV with drum cradle | Route mapping, speed limits, obstacle detection | Collisions, tip‑over on turns or slopes | Repetitive moves between fixed process points |
| Overhead hoist + below‑hook lifter | Hook rating, sling angle, drum grip verification | Drop from mis‑hooking or side loading | Serving pits, mezzanines, or congested areas |
- Account for attachment weight: Use the truck’s derated capacity chart with the drum attachment installed – prevents overloading the mast at extended load centers.
- Keep drums low and close: Travel with the drum just above floor level and mast tilted slightly back – this lowers the effective center of gravity.
- Set conservative speed limits: Limit speed in drum zones and especially when turning – reduces lateral forces that can unseat clamps or tip drums.
- Standardize fork spacing and entry: Train drivers to approach pallets square and at the correct fork spread – avoids striking drum chimes or sidewalls.
- Program AGV routes for stability: Avoid tight turns, steep ramps, and rough transitions – keeps dynamic loads within design assumptions.
Pre‑use checklist for forklifts with drum attachments
Check attachment pins and locks, inspect clamp pads, verify hydraulic hoses for leaks, confirm the correct hydraulic function labeling in the cab, and test clamp grip on an empty drum before handling full drums.
💡 Field Engineer’s Note: In automated systems, the biggest drum losses often came from rare “exception” moves, not routine routes. Any time an operator overrides an AGV or forklift rule to “just move one drum quickly,” insist they follow the same attachment and speed controls as normal cycles.
Safe Drum Dispensing, Venting, And Containment
Safe drum dispensing, venting, and containment means controlling liquid flow, vapour, static, and spills so that heavy 200 L drums can be used without fires, leaks, or ergonomic injuries when planning how to handle drums.
- Goal: Move and dispense product without loss of containment – Prevents slips, fires, and environmental releases.
- Focus Areas: Pump choice, venting, grounding, and spill capture – Turns a static drum into a controlled “mini tank.”
- Applies To: All 200 L (55-gallon) and smaller drums – Covers oils, solvents, acids, and water-based products.
| Risk Area | Typical Failure | Control Measure | Operational Impact |
|---|---|---|---|
| Dispensing | Glugging, overfill, splashing | Correct pump or faucet, flow control | Cleaner transfers, faster drum changeovers |
| Venting | Drum collapse or bulging | Pressure-vacuum vent sized for drum | Stable drum geometry and predictable flow |
| Static electricity | Ignition of flammable vapours | Grounding and bonding | Safe transfer of solvents and fuels |
| Spill containment | Leaks spreading across floor | Spill pallets, sumps, curbing | Incidents stay inside a defined capture zone |
💡 Field Engineer’s Note: Treat any fixed drum-dispensing station like a small bulk tank farm: design for worst-case hose failure, not “typical drips,” and size containment and venting accordingly.
Pump and dispensing method selection
Pump and dispensing method selection is about matching the pump type and drum orientation to the liquid’s chemistry, viscosity, and required flow so you can handle drums safely and avoid spills or equipment failures.
- Start with the liquid: Check viscosity, flammability, and corrosivity – This drives pump material and drive type.
- Then the task: Occasional decanting vs. continuous transfer – Determines whether a simple manual pump or powered system is justified.
- Then the layout: Vertical vs. horizontal drum, height difference – Impacts whether you can rely on gravity or need lift.
| Dispensing Method | Typical Use Case | Best For… | Key Safety Consideration |
|---|---|---|---|
| Manual lever or piston drum pump | Low-volume, intermittent transfer from vertical 200 L drums | Viscosity up to medium oils | Secure drum and pump; avoid over-stroking that causes splashing |
| Rotary hand pump | Steady manual transfer where metering is less critical | Diesel, light oils, non-aggressive chemicals | Confirm chemical compatibility of seals and housing |
| Electric drum pump | Higher-volume transfer or frequent operations | Medium-viscosity liquids where speed matters | Explosion-proof motor where flammable vapours are present |
| Pneumatic drum pump | Hazardous areas with compressed air available | Flammable solvents and where electrical equipment is restricted | Air supply must be clean and regulated; consider noise exposure |
| Gravity faucet on horizontal drum | Simple draw-off from drum on a cradle or rack | Non-flammable, low-viscosity liquids | Requires reliable bung seal and drip tray under faucet |
A typical 200 L drum can weigh 180–360 kg when full, so the drum must always sit on a flat, stable surface or dedicated cradle before any dispensing begins. Reference for weight and handling guidance.
- Secure the drum: Use stands, racks, or cradles rated for at least 360 kg – Prevents roll-away and tipping during pumping.
- Use proper pumps, not makeshift tools: Avoid siphon hoses, improvised funnels, or tilting full drums by hand – These are common causes of splashes and back injuries.
- Check closures before pumping: Confirm bungs and fittings are tight, with gaskets in place – Reduces weeping leaks around the pump thread.
- Control the outlet: Always dispense into stable containers on the floor or a stand – Never hold cans in the air under the nozzle.
How to choose a pump by viscosity and duty cycle
For water-like liquids (low viscosity), simple manual or light-duty electric pumps are usually adequate. For thicker oils, select pumps specifically rated for higher viscosity and check the manufacturer’s maximum viscosity in mPa·s. For continuous transfer, choose pumps with duty cycles that match run time, and consider cooling and motor class in flammable areas.
Regular maintenance of drum pumps is essential because worn seals and hoses often fail suddenly during transfer. Routine cleaning, inspection, and seal replacement keep discharge rates predictable and avoid surprise leaks at the worst possible moment. Reference for pump maintenance practices.
- Step 1: Confirm liquid and SDS – Ensures pump materials and seals will not degrade.
- Step 2: Select pump type and drive – Matches flow and duty cycle to operational needs.
- Step 3: Secure drum and mount pump – Prevents movement while applying manual or powered force.
- Step 4: Route hose and position receiving container – Minimizes trip hazards and splash zones.
- Step 5: Test at low flow and monitor – Allows early detection of leaks or static issues.
💡 Field Engineer’s Note: If operators complain about “glugging” or surging flow, you likely have poor venting or a faucet not suited to the liquid; fix the cause instead of telling workers to “be more careful.”
Grounding, bonding, and venting for flammables
Grounding, bonding, and venting for flammables prevent static sparks and pressure failures when transferring flammable liquids from drums, which is critical when planning how to handle drums containing solvents or fuels.
- Grounding: Connects drum to earth – Lets built-up charge dissipate safely.
- Bonding: Connects drum to receiving container and pump – Prevents voltage differences that create sparks.
- Venting: Controls internal pressure and vacuum – Prevents drum collapse or rupture during dispensing.
Grounding connects the drum to earth with a low-resistance path, and bonding connects the drum to any metallic receiving containers, pumps, or piping so no dangerous potential difference can develop. Reference for grounding and bonding concepts.
| Control | Function | Typical Hardware | Operational Impact |
|---|---|---|---|
| Grounding | Bleeds charge to earth | Cable from drum to earth bar or building ground | Makes every transfer step less likely to ignite vapours |
| Bonding | Equalizes potential between containers | Cable linking drum, pump, and receiving vessel | Prevents sparks at the actual pour point |
| Pressure-vacuum vent | Admits air and relieves excess pressure | Vent fitting in drum bung (typically set around 0.35 bar) | Keeps flow steady, protects drum shape |
- Use antistatic cables: Fit robust clamps to bare, unpainted metal – Paint or rust under clamps defeats the whole system.
- Verify continuity: Periodically test resistance of bonding and grounding paths – Broken wires and loose lugs are common hidden failures.
- Control ignition sources: Combine bonding with no-smoking rules and rated equipment – Static control is one layer, not the only defence.
Proper venting protects drums from deformation, rupture, and uncontrolled releases during storage and dispensing. Pressure-vacuum vents in bung openings admit air during outflow and relieve vapours when internal pressure exceeds set limits, typically around 0.35 bar. Reference for venting practices.
Checklist: Setting up a flammable drum dispensing station
- Location: Non-combustible floor, away from open flames, with spill containment sized for at least one full drum.
- Drum position: Secure vertical on pallet or horizontal on rated rack, chocked against movement.
- Pump: Compatible with solvent, with conductive hose where required.
- Grounding: Drum connected to verified earth point.
- Bonding: Cable between drum, pump, and receiving container.
- Vent: Pressure-vacuum vent installed and kept free of paint, dirt, and crusted product.
- PPE and signage: Flame-resistant clothing, goggles, gloves, and “No ignition sources” notices.
- Spill containment: Use spill pallets, sumps, or curbs able to capture at least the largest drum volume plus regulatory margin – Keeps any failure inside a defined basin.
- Floor condition: Maintain level, non-slip surfaces even when wet – Reduces slip and trip risk during normal work and cleanup.
- Inspection routine: Check vents, cables, and fittings on a fixed schedule – Prevents slow degradation into unsafe conditions.
💡 Field Engineer’s Note: In real plants, static events usually happen during the first seconds of flow; make bonding the very first step before you crack any valve or start any pump on a flammable drum.

Final Thoughts On Drum Handling Safety And Compliance
Safe drum handling depends on one core idea: treat every drum as a heavy, pressurised container that can hurt people and the plant if you lose control. Geometry, weight, and liquid behaviour all work against the operator, so engineering controls must carry the load, not human muscle. When teams respect ergonomic limits and use rated drum trucks, stackers, and clamps, they cut strains and crush injuries and keep drums upright and sealed.
Stable pallets, controlled stack heights, and well-matched forklift or AGV attachments then protect that containment through transport and storage. At the point of use, correct pumps, grounding, bonding, and venting turn a drum into a small, predictable tank instead of a source of glugging, vapour, and static sparks. Spill pallets and sumps catch the failures that still occur.
The best practice for operations and engineering teams is clear. Standardise mechanical aids for any drum above about 50 kg. Define maximum stack heights by product and drum type. Engineer every dispensing point for flammable control and full-drum spill capture. Finally, lock these rules into risk assessments, training, and pre-use checks so every operator, every shift, handles drums the Atomoving way: controlled, contained, and compliant.
Frequently Asked Questions
How do you handle hazardous material drums safely?
Handling hazardous material drums requires strict safety measures. Always start by carefully reading the labels on the drum to understand its contents. Wear appropriate personal protective equipment (PPE) such as gloves, goggles, and protective clothing to minimize exposure risks. Ensure proper training on safe handling procedures to prevent accidents. For more detailed guidance, refer to Hazardous Material Handling Tips.
What are common mistakes to avoid when handling drums in industrial settings?
When handling drums in industrial environments, improper techniques can lead to inefficiency or injury. Avoid these common mistakes: using incorrect lifting tools, failing to secure the drum during transport, and neglecting to inspect the drum for damage before handling. Proper training and adherence to safety protocols are essential. Always consult your company’s safety guidelines or industry standards like OSHA for best practices.