If your pallet jack is not lifting, you are dealing with either lost hydraulic pressure, a mechanical blockage, or an electrical fault on powered units. This guide explains how to fix pallet jack not lifting problems with clear root-cause diagnosis and practical, workshop-ready repair steps so you can restore safe, reliable lifting and avoid costly downtime.
How Pallet Jack Lift Systems Work

Pallet jack lift systems use simple hydraulics and mechanical linkages to convert handle or motor force into vertical fork movement. Understanding this basics-first physics is the fastest way to plan how to fix pallet jack not lifting safely and efficiently.
Manual vs. electric pallet jack lifting
Manual and electric pallet jacks both use hydraulic pressure to raise forks, but they differ in how they generate that pressure and how failures show up during lifting.
- Manual pallet jack lift: Handle-powered hydraulic pump – Each pump stroke pressurizes oil to raise the forks.
- Electric pallet jack lift: Motor-driven hydraulic pump – An electric motor spins a pump to build pressure automatically.
- Shared principle: Single-acting cylinder with check and lowering valves – Oil in, forks up; oil out, forks down.
- Core failure modes: No lift, weak lift, or forks that sink – All trace back to lost pressure, trapped air, or mechanical faults.
How a manual pallet jack creates lift
A manual pallet jack uses the operator’s arm force on the handle to drive a small hand pump. The pump sends hydraulic oil into a single-acting cylinder, which pushes the fork frame up. Check valves control oil direction, and a lowering valve lets oil flow back to the reservoir when you lower the load. Typical manual system layout describes this arrangement.
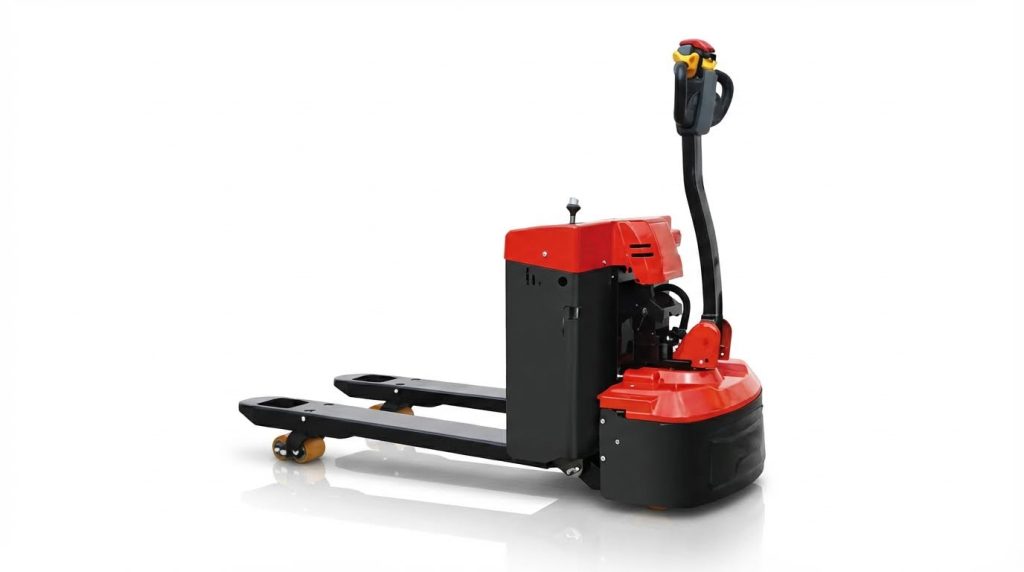
How an electric pallet jack creates lift
An electric pallet jack replaces the hand pump with an electric motor and hydraulic pump set. When the operator presses the lift control, the motor drives the pump, building pressure in the same kind of single-acting cylinder used on manual units. Battery voltage, motor windings, valves, and seals all affect whether the forks lift properly. Common electric lift faults include low battery voltage, pump failure, and wiring problems.
| Feature | Manual Pallet Jack | Electric Pallet Jack | Operational Impact |
|---|---|---|---|
| Power source | Human force via handle pump | Battery-powered electric motor | Electric units reduce operator fatigue on long shifts. |
| Hydraulic pump drive | Mechanical plunger linked to handle | Motor-driven gear or vane pump | Motor or wiring faults often cause sudden “no lift” failures. |
| Typical lift control | Handle positions (raise / neutral / lower) | Push buttons or control tiller | Misadjusted handle linkage vs. electrical switch faults change the repair path. |
| Common “no lift” causes | Low oil, air in system, worn seals, misadjusted release valve | Low battery, motor failure, clogged valves, hydraulic leaks | Guides where to start diagnosing how to fix pallet jack not lifting. |
| Best for… | Short moves, light-to-medium duty | High throughput, frequent lifting, longer travel distances | Picking the right type reduces overload and hydraulic failures. |
On electric pallet jacks, electrical health is as important as hydraulics. Low battery voltage or aged batteries reduce motor torque and can stop the pump from building pressure, so the forks will not rise even if the hydraulic side is intact. Battery and wiring checks are therefore a first-line step in electric “no lift” troubleshooting.
💡 Field Engineer’s Note: When operators report “pump feels normal but no lift” on a manual jack, the fault is rarely the handle itself. In most cases the hydraulic unit has air ingress or a bypassing valve, while an electric jack with a silent motor and no lift usually points to battery, fuse, or wiring issues long before you open the hydraulic block.
Key hydraulic components and oil specs
Pallet jack lifting depends on a compact hydraulic circuit built around a pump, valves, cylinder, seals, and correctly specified oil; any weakness here quickly shows up as no lift, weak lift, or sinking forks.
- Hydraulic pump: Creates oil pressure – Without pump output, the forks never rise.
- Check and control valves: Direct and hold flow – They keep pressure trapped under load.
- Lift cylinder: Converts pressure to vertical force – Rod movement raises the fork frame.
- Seals, O-rings, hoses: Keep oil in and air out – Integrity here defines whether pressure holds.
- Hydraulic oil (ISO VG 32 / 46 range): Transmits pressure and lubricates parts – Correct level and cleanliness are critical.
| Hydraulic Element | Function in Lift | Typical Failure Effect | Best For / Operational Impact |
|---|---|---|---|
| Hand or motor-driven pump | Pressurizes oil into cylinder | No or slow lift if worn or damaged | Healthy pump allows full lift within normal handle strokes or motor run time. |
| Check valves | Allow one-way flow into cylinder | Oil leaks back, forks will not hold | Good check valves prevent forks from creeping down under load. |
| Lowering (release) valve | Lets oil return to reservoir | Stuck open = no pressure build | Correct adjustment is a frequent fix for “pumps but won’t lift.” |
| Single-acting lift cylinder | Turns pressure into lifting force | Internal leakage = weak or sinking lift | Sound cylinder lets you hold rated load at full height safely. |
| Seals and O-rings | Seal pump, valves, and cylinder | External or internal oil leakage | Fresh seals restore pressure and extend jack life. |
| Hydraulic oil (ISO VG 32/46) | Pressure medium and lubricant | Low level, contamination, or wrong grade | Clean, correct oil stabilizes lift speed and reduces wear. |
A typical manual pallet jack uses a single-acting hydraulic cylinder, a small hand pump driven by the handle, check valves to control oil direction, and a lowering valve that returns oil to the reservoir when you want to lower the load. Detailed hydraulic component descriptions highlight that seals and O-rings at each joint are what keep the system tight enough to build pressure.
Oil condition is a major lever in how to fix pallet jack not lifting. Technicians check levels with forks fully lowered, typically aiming for oil about 25 mm below the reservoir top, and look for dark, milky, or particle-laden oil that signals contamination. Contaminated oil causes sticking valves and accelerates seal wear, while low oil level directly prevents adequate pressure buildup.
Why oil level and air matter for lift
Insufficient hydraulic oil means the pump draws air, so pressure collapses and the forks refuse to rise even though the handle feels normal. Multiple sources note that low oil is a primary cause of no lift and that topping up after checking for leaks is a basic repair step. Guidance on oil level and bleeding also explains that trapped air makes lifting spongy or weak, and that cycling the handle with the lowering lever open is a standard way to bleed air from the system.
Typical hydraulic failure modes you will see
Across both manual and electric pallet jacks, common hydraulic failures include no lift, partial lift, or forks that sink under load. Air ingress causes spongy lifting, contaminated oil leads to sticking valves, and worn seals create internal bypass that prevents pressure from building. Misadjusted lowering valves allow continuous leakage back to the tank and show up as immediate dropping after lifting. Documented failure modes form the backbone of systematic troubleshooting.
💡 Field Engineer’s Note: In cold rooms or unheated docks, oil that is too thick for the temperature behaves like a partial blockage. Even with a healthy pump and valves, lift can be very slow or stall under load until the oil warms. Matching oil viscosity (for example ISO VG 32 instead of 46 in colder environments) to ambient temperature often fixes “weak lift in the morning” complaints without touching any hardware.
Diagnosing Common “No Lift” And Weak Lift Problems
This section explains how to fix pallet jack not lifting by moving from simple safety and visual checks to deeper hydraulic and valve diagnostics so you avoid unnecessary teardown and quickly restore safe lifting performance.
- Goal: Find the first real fault – so you fix the cause, not just the symptom.
- Method: Work from outside in – safety, visual, oil, air, then valves and seals.
- Safety First: Always de‑load, chock, and lockout – hydraulics can move suddenly.
| Symptom | Most Likely Area | Typical Root Cause | Operational Impact |
|---|---|---|---|
| No lift at all | Safety / Handle / Oil level | Lockout, misadjusted release valve, very low oil | Forks stay on floor, load cannot move |
| Very weak lift | Hydraulic oil / Air | Low or contaminated oil, trapped air | Slow pumping, cannot reach full stroke |
| Lifts but then sinks | Valves / Seals / Cylinder | Internal leakage, worn seals, valve not sealing | Load slowly drops, serious safety risk |
💡 Field Engineer’s Note: In busy warehouses, 70–80% of “pallet jack not lifting” callouts end up being low oil, air in the circuit, or a misadjusted release valve, not a “dead” hydraulic unit. Always rule those out before ordering parts.
Safety lockout and initial visual checks
The first step in how to fix pallet jack not lifting is to secure the truck, remove the load, and perform a fast but disciplined visual inspection before touching the hydraulics.
- De‑load and stabilize: Remove all pallets and lower forks fully – prevents sudden movement while you work.
- Level ground and chocking: Park on flat floor and chock wheels – avoids creeping or rolling during tests.
- Electric lockout: On powered units, disconnect the battery and apply lockout/tagout – prevents unexpected motor starts documented in standard service procedures.
- Fork and frame check: Inspect for bent forks, cracked welds, or twisted frame – severe deformation can mechanically block lifting as noted for fork deformation issues.
- Wheels and rollers: Look for flat spots, broken bearings, or misaligned steer wheels – prevents misdiagnosing rolling resistance as “weak lift.”
- External oil leaks: Check pump body, cylinder, hoses, and around handle base for wet oil – points to seal or hose failure and pressure loss described in hydraulic inspection steps.
Quick handle function test
Move the control handle through RAISE–NEUTRAL–LOWER. You should feel distinct detents. A handle that feels “mushy” or fails to close the lowering valve can cause no lift or constant creeping down, even if the hydraulic core is healthy. This aligns with guidance that worn or misadjusted linkage affects lifting, holding, and lowering performance. See handle and valve operation description.
- Load check: Confirm the last used load was within rated capacity (typically 2,000–2,500 kg for standard jacks) – overloading is a common cause of “won’t lift” or partial lift as highlighted in troubleshooting guides.
Hydraulic oil level, air bleeding, and contamination
The next step in how to fix pallet jack not lifting is to verify hydraulic oil level, bleed trapped air, and assess oil condition, because most weak or no‑lift issues start with fluid problems, not broken metal.
- Why fluid checks matter: The jack’s single‑acting cylinder depends on clean oil at the right level to build pressure and move the forks. Low oil, air bubbles, or dirty fluid all reduce effective pressure and stroke.
| Check | What You Do | What You’re Looking For | Operational Impact |
|---|---|---|---|
| Oil level | Lower forks, open reservoir, use dip mark or indicator | Oil about 20–30 mm below filler opening | Too low = no lift or very short stroke |
| Air in system | Lever to LOWER, pump handle ~10 times | Spongy feel disappears, lift height returns | Air causes jerky or weak lifting |
| Oil condition | Inspect sample on clean metal or in clear cup | Should be clear, not dark, milky, or gritty | Dirty oil sticks valves and destroys seals |
Technicians typically check oil level with forks fully lowered and ensure the level sits roughly 25 mm below the reservoir top, while also inspecting for external leaks around the pump and cylinder. Dark, milky, or particle‑laden oil indicates contamination and justifies a full drain, flush, and refill with suitable ISO VG 32–46 hydraulic oil. This procedure is detailed in professional maintenance guides.
- Low hydraulic oil: If the handle pumps but forks do not move, check and refill to the correct level while also inspecting for leaks that may have caused depletion. This low‑oil symptom is widely documented.
- Air bleeding procedure: Place the control lever in the lowering position and pump the handle approximately ten times to purge trapped air from the hydraulic circuit. If lift height and stroke normalize, you have likely solved the issue without teardown. This is the standard bleeding method and is echoed in other troubleshooting resources. See further explanation on air removal.
- Contaminated fluid: Contaminated hydraulic oil reduces system efficiency and accelerates wear of valves and seals. Technicians measure fluid quality and replace it when it shows discoloration, emulsification, or debris. Hydraulic failure guides highlight contamination as a key cause.
💡 Field Engineer’s Note: If you top up oil without fixing the leak point, expect a repeat “no lift” call within days. Mark the reservoir level with a paint pen after filling; if it drops more than 5–10 mm in a week of normal use, you still have an active leak.
When to stop and fully change the oil
If the oil is dark, smells burnt, or looks milky, do not just top up. Drain completely, flush the reservoir and pump body, and refill with clean oil of the correct viscosity. This matches recommendations that contaminated fluid both reduces pressure and damages seals and valves over time. See hydraulic failure discussion.
Valves, seals, and cylinder leakage checks

If basic fluid checks do not restore lifting, the final step in how to fix pallet jack not lifting is to inspect control valves, seals, and the lift cylinder for internal leakage and poor sealing.
Typical failure modes at this stage include no lift, partial lift, or forks sinking under load due to air ingress, contaminated oil, worn seals, or misadjusted lowering valves that allow continuous bypass. These modes are well described in professional troubleshooting guides.
| Component Area | Typical Fault | Observable Symptom | Operational Impact |
|---|---|---|---|
| Release / lowering valve | Stuck open or misadjusted | No lift, or forks rise then immediately drop | Pressure cannot build or hold under load |
| Check / control valves | Blocked, worn, or contaminated | Weak lift, jerky motion, inconsistent behavior | Oil bypasses or flow is restricted |
| Pump and cylinder seals | Cracked, hardened, or worn | External leaks, or slow sinking under load | Loss of thrust, safety risk for stored loads |
- Release valve malfunction: A stuck or improperly adjusted release valve can prevent pressure buildup, causing forks to fail to lift or to drop immediately after lifting. The valve should be inspected and adjusted so it is not effectively held in the “open” position. This behavior is a known root cause of no‑lift issues.
- Clogged or damaged valves: Blockages in hydraulic valves from impurities or wear on spools and springs disrupt fluid flow and prevent proper pressure buildup or release. These typically require disassembly for cleaning and wear assessment. Valve contamination is a documented fault mode, and other maintenance resources also stress cleaning or replacing blocked control valves. See control valve guidance.
- Valve and linkage adjustment: Technicians verify free movement of the control handle and adjust valve screws in small increments with the jack in neutral, cycling between raise and lower. Incorrect adjustment can cause no lift or creeping lowering, and proper tuning ensures smooth raising, holding, and lowering. Adjustment methods are outlined in service procedures.
- Cylinder leakage and seals: Aged or damaged seals on the lifting cylinder cause hydraulic oil leakage and reduce thrust capability. Evidence includes oil stains or drops on the cylinder surface and loads that slowly decline even under minimal weight. Cylinder leakage is a classic cause of weak or sinking lift. Worn or cracked seals and hoses elsewhere in the system also lead to leaks and require replacement to restore integrity. Hydraulic failure guides emphasize seal and hose checks.
Isolating pump vs. handle problems
When correct oil level and air bleeding do not restore lift, technicians often disconnect the lifting linkage and manually actuate the pump. If the jack then lifts, the fault lies in the handle or linkage geometry; if not, attention shifts to the
Step‑By‑Step Repair For Mechanical And Electrical Faults
This section explains how to fix pallet jack not lifting by methodically repairing mechanical linkages, load paths, and electric drive components before committing to a full hydraulic rebuild.
Once you have confirmed correct oil level, bled air, and ruled out overload, remaining “no lift” or weak lift problems usually trace back to handle linkage, valves, chains, forks, or electric drive components. The steps below are structured so you can isolate faults quickly and avoid unnecessary parts replacement.
Handle linkage, release valve, and overload issues
This subsection focuses on the control handle, release valve, and overload conditions that frequently cause a pallet jack to pump but not lift.
- Step 1: Secure the jack and remove the load – Prevents sudden fork drop while you test the mechanism.
- Step 2: Check load vs. capacity plate – Rules out overload as the cause of no lift or partial lift.
- Step 3: Inspect handle linkage joints and pins – Finds looseness or breakage that stops the pump from stroking fully.
- Step 4: Verify handle positions (raise/neutral/lower) – Ensures the control lever actually moves the pump and lowering valve.
- Step 5: Test for stuck-open release valve – Explains “pumps but will not lift” or forks that drop immediately.
- Step 6: Adjust release valve and linkage travel – Restores correct sealing in neutral and raise positions.
- Step 7: Clean debris from the pump block and moving parts – Removes obstructions that prevent valve closure.
- Step 8: Replace worn seals or damaged valve parts – Stops internal bypass that bleeds off pressure.
Start with a quick capacity and overload check. Forks that will not rise or only rise a few millimetres under a heavy pallet may simply exceed the rated capacity, so confirm the load mass against the nameplate before disassembling anything. Overload is a documented cause of lifting failure and partial lift, and operators must keep within the pallet jack’s specified limits to avoid damage and safety risks. Reference
If the load is within limits, focus on the handle linkage. The handle performs steering, pumping, and valve actuation; in the lift position it drives the pump plunger while keeping the lowering valve closed, in neutral both are isolated, and in the lower position the valve opens to return oil to the reservoir. Correctly adjusted pins, clevis joints, and return springs are critical; wear or misalignment in these joints directly affects lifting, holding, and lowering performance. Reference
- Visual check: Look for bent rods, missing clips, or elongated holes at the handle base – These reduce valve stroke and pump travel.
- Free movement: Cycle the handle through raise, neutral, and lower – It should move smoothly without sticking or excessive play.
- Linkage feel: A “dead” handle with little resistance often indicates a disconnected or broken linkage between the handle and pump.
Handle linkage issues such as loose, misaligned, or broken connections make the handle feel unresponsive and prevent the pump plunger from building pressure. In this case, tighten hardware to manufacturer torque ranges, replace bent pins or worn bushings, and confirm the control lever returns positively to neutral. Reference
How to isolate handle vs. pump faults
Technicians often disconnect the lifting linkage from the pump and manually operate the pump input. If the jack lifts when the pump is actuated directly, the fault lies in the handle or linkage geometry. If it still does not lift, the issue is inside the pump block or valves, not the handle. Reference
Next, inspect the release (lowering) valve. A stuck or incorrectly adjusted release valve is a classic cause of forks that refuse to rise or that drop immediately after lifting because hydraulic pressure cannot build. If the valve is stuck in a partially open position, the pump simply circulates oil back to the reservoir. The recommended repair is to inspect the release valve for sticking, clean away any contamination, and adjust it so it fully closes in the raise position and seals correctly in neutral. Reference
- Step 9: Place handle in neutral and observe fork drift – Slow sinking suggests valve leakage or internal bypass.
- Step 10: Loosen locknut on the lowering valve adjustment screw – Prepares for fine-tuning valve travel.
- Step 11: Turn screw in small increments while cycling the jack – Finds the point where forks lift cleanly and hold without creeping.
- Step 12: Lock the adjustment and re-check all three positions – Confirms smooth raising, holding, and lowering.
Technicians use this incremental approach to valve and linkage adjustment to correct symptoms such as no lift or creeping lowering. Proper adjustment ensures the pump and lowering valve operate in the correct sequence and that handle movement is translated into reliable fork motion. Reference
During disassembly, check the pump seals and internal valve seats. Worn or cracked hydraulic pump seals can cause external oil leakage and internal bypass, preventing lifting even when the oil level appears correct. In these cases, seal replacement is necessary, and extensive damage may require professional repair or a new hydraulic unit. Reference
- Seal inspection: Look for wet areas around the pump body and handle base – Indicates leaking O-rings or rod seals.
- Valve seat condition: Inspect for scoring or debris on check and lowering valves – Contamination can stop them sealing properly.
- System cleanliness: Dark, milky, or dirty oil shows contamination – Often linked to sticking valves and accelerated wear.
Contaminated hydraulic fluid reduces system efficiency and damages components. When contamination is evident, technicians perform a full drain, flush, and refill with clean oil of suitable viscosity, similar to ISO VG 32 or 46, to restore stable lifting performance. Reference
💡 Field Engineer’s Note: When you adjust the lowering valve to fix a pallet jack not lifting, always re-test with a rated load after a few minutes. Warm oil thins, and a valve that seems tight on an empty test can start bypassing once the fluid heats, causing the forks to creep down in real-world use.
Chains, forks, and transmission component repairs
This subsection covers the load path: lift chains, fork structure, and transmission components that physically convert hydraulic stroke or motor torque into fork elevation.
- Step 1: Lower forks fully and chock wheels – Removes stored energy before you work near chains or under forks.
- Step 2: Visually inspect forks for bending or twisting – Quickly reveals structural deformation that can jam moving parts.
- Step 3: Check lift chains for tension, straightness, and damage – Identifies slack, elongation, or broken links.
- Step 4: Inspect chain sprockets and pivot points – Looks for tooth wear or misalignment that interrupts power transmission.
- Step 5: Manually raise and lower the fork frame (if possible) – Helps detect binding or interference along the stroke.
- Step 6: For electric jacks, test motor output and drive train – Confirms the lifting motor and transmission actually deliver torque.
Mechanical components such as forks and chains are the final link between hydraulic or electric power and the load. Deformed forks can interfere with other parts during lifting, preventing proper function even when the hydraulic system generates pressure. Visual checks for bending or deformation, followed by manual movement tests, are standard practice to identify these issues. Reference
- Fork tips: Compare fork tips side by side – Unequal height suggests one fork is bent or the carriage is twisted.
- Ground clearance: Check that both forks sit level when lowered – Prevents one fork dragging and loading the mechanism unevenly.
- Interference: Look for scrape marks on wheels, brackets, or chassis – Indicates where a bent fork or frame is rubbing.
Where deformation is severe, straightening may not restore original capacity or safety. In such cases, replacing the fork assembly is often more economical and safer than attempting heavy rework, especially in high-throughput warehouses where repeated overloads are common.
When to retire a damaged fork
If the fork thickness is visibly reduced, cracks appear near the heel, or twist prevents pallets from seating flat, continued use risks sudden failure under load. Many operators choose replacement rather than repair once deformation exceeds a few millimetres across the fork length, to maintain safety margins.
Lift chains and associated transmission components are another frequent cause of pallet jack not lifting properly. Chains that are broken, excessively slack, or paired with worn sprockets disrupt power transmission, leading to symptoms such as forks that only rise partway, jerk during lifting, or fail to rise at all despite pump or motor effort. Standard checks include assessing chain tension, looking for elongation from wear, and inspecting for teeth jumping or slippage at the sprockets. Reference
| Component | Typical Fault | Observable Symptom | Repair Action | Operational Impact |
|---|---|---|---|---|
| Lift chain | Slack or elongation | Forks lag or stop mid‑stroke | Adjust tension or replace chain | Restores full lift height for standard 1.2 m pallets |
| Chain link | Cracked or broken link | Uneven lifting or sudden drop of one side | Replace chain; never weld links | Prevents asymmetric loading of pallets |
| Sprocket | Worn or hooked teeth | Teeth jumping under load | Replace sprocket and inspect chain | Ensures smooth lifting in tight 2.5 m aisles |
| Fork frame rollers | Flat spots or seized bearings | Jerky movement or binding | Replace rollers and check alignment | Reduces push force and improves manoeuvrability |
Transmission faults extend beyond chains. Debris or foreign objects can obstruct moving parts, causing the pump to feel stiff or the forks to resist motion. Cleaning the hydraulic unit area, removing obstructions, and lubricating moving joints are simple but effective steps to restore free movement. Reference
- Step 7: Clean around the mast, chains, and fork pivots – Dust and pallet fragments often pack into tight clearances.
- Step 8: Apply suitable lubricant to chains and pivot pins – Reduces friction and wear without attracting excess dirt.
- Step 9: Replace damaged rollers or wheels – Eliminates binding that feels like a hydraulic fault.
On electric pallet jacks, you must also confirm that the electrical drive for lifting is healthy. Low battery power can impede the lifting motor, while faults such as burnt windings, short circuits, or wiring damage can prevent the motor from turning even though the control handle commands a lift. Voltage checks against the specified range, resistance tests on motor windings, and inspection of wiring for breakage or oxidised joints are standard diagnostic steps. Reference
- Battery: Measure voltage under load – Abnormally low values mean you must recharge or replace the battery.
- Motor: Use a multimeter to check winding resistance – Open or shorted windings indicate a failed lifting motor.
- Wiring: Inspect for burnt insulation, loose lugs, or corroded terminals – High resistance joints starve the motor of current.</ “”

Final Thoughts On Reliable Pallet Jack Lifting
Reliable pallet jack lifting comes from treating the truck as a complete system, not just a hydraulic block. Geometry, hydraulics, structure, and electrics must all work together if the forks are to rise, hold, and lower safely under rated load.
The article shows that most “no lift” faults start with basic issues. Low or dirty oil, trapped air, or a misadjusted release valve often cause weak or zero lift long before the pump or cylinder truly fail. Simple, repeatable checks for fluid level, contamination, and air bleeding therefore give the fastest wins and prevent needless teardown.
Where fluid and adjustments are correct, attention must shift to seals, cylinders, chains, forks, and, on electric units, the battery and motor. Worn seals and bent forks are not just maintenance items; they directly reduce safety margins and can let loads sink without warning.
The best practice for operations and maintenance teams is clear. Use a structured, outside‑in diagnostic routine, keep hydraulic oil clean and matched to temperature, respect capacity plates, and retire damaged structural parts early. When in doubt, involve Atomoving or a qualified service partner so your pallet jacks lift at full rating, every shift, without surprises.
Frequently Asked Questions
Why is my pallet jack not lifting?
If your pallet jack isn’t lifting, it could be due to low hydraulic fluid levels, air trapped in the system, or worn seals and valves. Check the hydraulic fluid and refill if necessary. Hydraulic Jack Troubleshooting Guide.
- Inspect for low hydraulic fluid and refill as needed.
- Bleed the system to remove any trapped air.
- Check for worn seals or valves and replace them.
How do I reset my pallet jack?
To reset your pallet jack, turn it off and unplug it. Press the emergency stop button to release hydraulic pressure, wait 30 seconds, then press it again to reset. Plug it back in and turn it on. Pallet Jack Reset Instructions.