This guide explains how to load a scissor lift safely using the right ramps, tie-downs, and transport procedures. You will learn the standards, slopes, and securement methods that prevent roll-offs, tip-overs, and damage in real-world jobsites and road transport.
Core Principles Of Safe Scissor Lift Transport
Core principles for safe scissor lift transport focus on obeying standards, following the manual, and preparing the machine so it cannot move, leak, or activate unexpectedly during loading, travel, or unloading.
Standards, manuals, and legal obligations
Understanding the rules that govern how to load a scissor platform is the first control against roll‑aways, tip‑overs, and legal penalties.
- Follow the operator’s manual: Always use the manufacturer’s instructions for transport, including rated weight, tie‑down points, and battery procedures – this is the only model‑specific “truth source.” Manufacturer guidance on weight and tie-down points
- Respect vehicle capacity: Match lift mass to truck or trailer rating and deck size – overloading can cause structural failure or loss of braking control. Guidance on choosing a vehicle with adequate capacity
- Comply with road and load regulations: Check local rules for oversize width, lighting, flags, and escort needs – non‑compliance can stop your load at the roadside. Example of permit and warning requirements
- Use rated securing equipment: Only use chains, binders, and ratchet straps with known Working Load Limits (WLL) – this lets you prove your tie‑down capacity exceeds the lift weight. Recommendation to use certified tie-down equipment
- Apply general equipment transport standards: Align your procedure with common powered‑industrial‑truck and ramp rules, such as controlled speed on grades and no turning on ramps – these rules exist because most serious incidents happen on inclines. OSHA guidance on traveling on ramps and grades
How this ties into “how to load a scissor lift” procedures
When you document how to load a scissor platform lift for your site, reference the operator’s manual, your country’s road‑transport code, and internal safety rules. This creates a defensible, auditable procedure that supervisors can train and enforce.
💡 Field Engineer’s Note: When you transport several different lift models, keep a laminated “transport card” for each one on the truck. List weight, wheelbase, tie‑down points, and minimum deck length. It prevents guesswork when loading at remote sites in poor light or bad weather.
Pre-transport inspection and preparation
Pre‑transport inspection and preparation make the scissor lift a compact, stable, non‑leaking block before it ever touches the ramp.
- Inspect structure and hydraulics: Check for loose parts, leaks, damaged hoses, cracked welds, and worn tyres – defects can worsen under vibration and cause failures in transit. Pre-transport inspection of hydraulic components, platform, and wheels
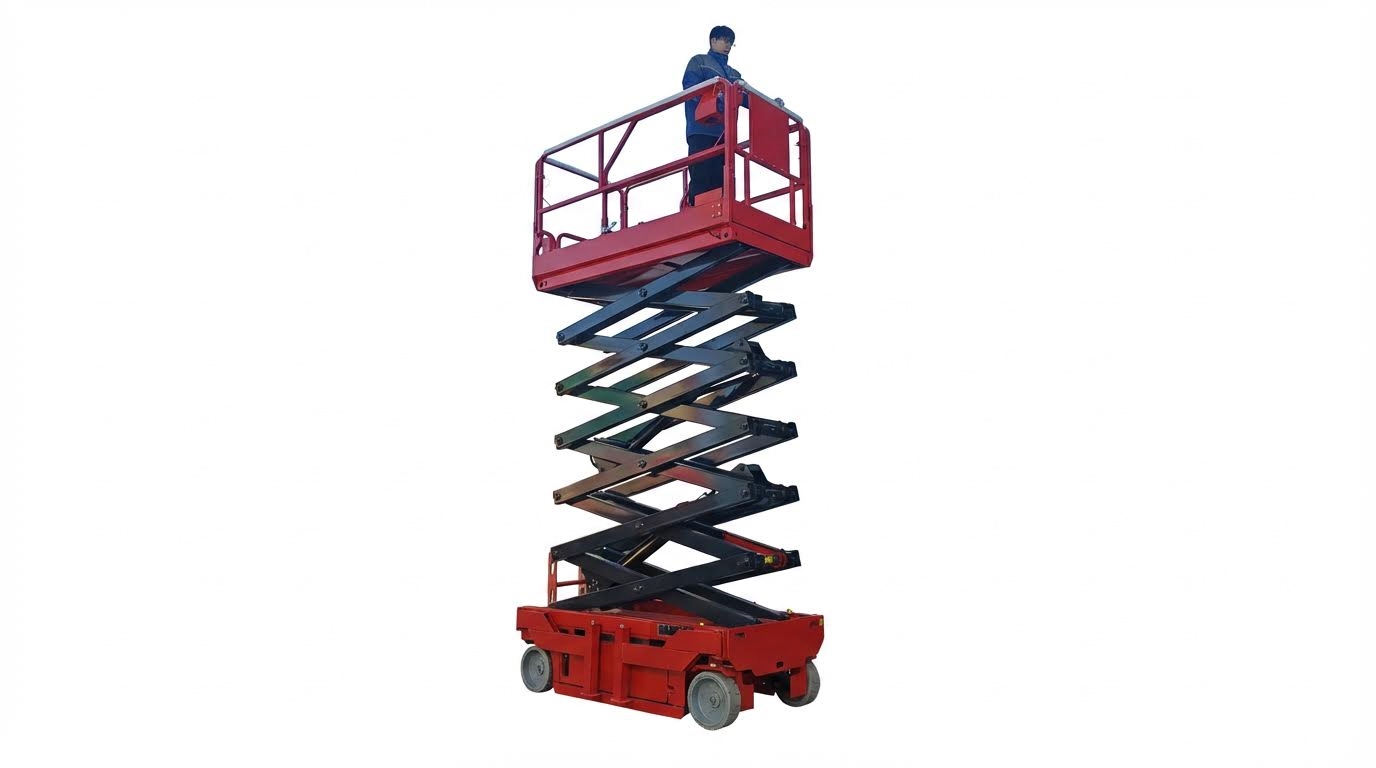
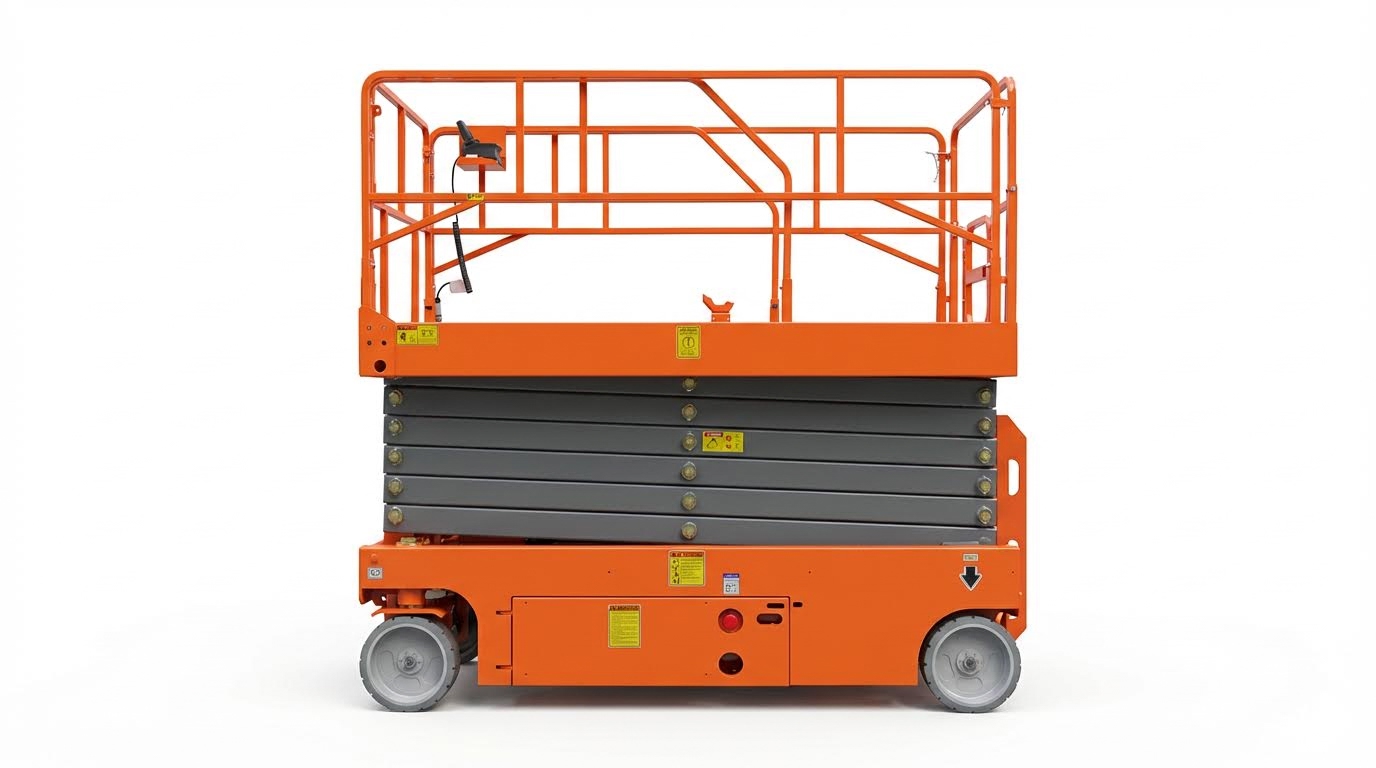
- Lower and lock the platform: Fully retract the scissor pack and lock it in the lowest transport position – this reduces height and drops the centre of gravity for better stability. Guidance on retracting and locking lift arms
- Secure gates and deck extensions: Close and latch entry gates, retract any deck extensions, and remove loose items – this prevents parts from sliding, swinging, or catching on obstacles.
- Isolate power on electric units: Switch off the machine and disconnect or isolate batteries as the manufacturer recommends – this eliminates accidental joystick bumps starting movement in transit. Recommendation to disconnect power or battery
- Confirm weight and dimensions: Verify the lift’s operating weight and overall stowed height and length – this ensures your chosen vehicle, ramp, and route can safely accommodate the machine. Guidance on matching lift size to vehicle capacity
- Prepare the work area: Park the truck or trailer on a level, firm surface with clear space around it – a flat approach reduces the risk of the lift rolling or twisting as it transitions onto the ramp. Recommendation to park on level ground for unloading
Quick pre-load checklist for operators
Before you start any how to load a aerial platform procedure, confirm: 1) no leaks, 2) platform fully lowered and locked, 3) power isolated (electric units), 4) gates closed, 5) truck and ramp on level, stable ground, 6) all PPE worn (helmet, gloves, safety footwear).
💡 Field Engineer’s Note: Treat “lower, lock, isolate” as a spoken three‑step routine before every move. Saying it out loud in the crew builds muscle memory and has stopped more than one lift from driving up a ramp with the platform still partially raised.
Ramp Selection, Slope Limits, And Loading Technique
This section explains how to load a scissor lift safely using the right ramp, slope, and driving or winching method so you avoid tipping, spinning wheels, or overloading the trailer or ramp structure.
Calculating ramp capacity and grade
Knowing ramp capacity and grade is the foundation of how to load a scissor platform lift without structural failure or loss of traction on the incline.
- Confirm total weight: Add scissor lift operating weight + fuel + any attachments – ensures the ramp and trailer are not overloaded.
- Check ramp rating: Use only ramps explicitly rated above that total weight – prevents ramp bending or collapse during loading.
- Verify trailer/truck capacity: Compare lift weight with vehicle payload rating – avoids suspension or axle overload.
- Use manufacturer guidance: Follow the lift and ramp manuals for maximum grade and loading method – keeps you within tested limits.
If the transport vehicle has no built-in ramp, you must use a portable ramp that is rated for the lift weight and securely attached before driving or winching the machine up it during loading. Proper grade calculation then tells you whether the slope is safe.
| Parameter | How to Calculate / Check | Typical Safe Range for Scissor Lift Loading | Operational Impact |
|---|---|---|---|
| Ramp grade (%) | (Vertical rise ÷ Horizontal run) × 100 grade formula | 5–10% for powered equipment in good conditions (rule-of-thumb if manufacturer data is absent) | Higher than this and traction, braking, and tipping risk increase sharply. |
| Ramp slope ratio | Run : Rise (e.g., 12:1) | Flatter than about 3:1 (≈33% grade, ≈18–20°) maximum industry guidance for heavy equipment ramps max slope | Use much flatter slopes in wet, icy, or dusty conditions. |
| Ramp capacity | Compare rated load to lift operating weight | Ramp rating ≥ 1.25 × lift weight (good practice margin) | Extra margin covers dynamic loads when starting, stopping, or winching. |
| Trailer / truck payload | Vehicle plate / manual vs lift weight | Do not exceed 80–90% of rated payload | Leaves margin for tie-down gear and helps keep axle loads legal. |
How to quickly estimate ramp length from dock height
1. Measure dock or bed height (rise) in mm. 2. Decide target grade (e.g., 10%). 3. Ramp length (mm) ≈ rise ÷ grade × 100. Example: 1,000 mm rise at 10% → 10,000 mm (10 m) ramp.
💡 Field Engineer’s Note: For indoor warehouses, I rarely allow aerial platforms on ramps steeper than 10% unless the manufacturer explicitly approves it; traction loss on smooth concrete happens much earlier than operators expect, especially with small, solid tyres.
Recommended ramp slopes for aerial platforms
Recommended ramp slopes for aerial platform are much gentler than the absolute structural maximums so that stability, traction, and braking remain under control during loading.
General dock ramp guidance suggests 1–2% for everyday traffic and up to about 10% for manual handling, with an upper bound equivalent to a 1:3 rise-to-run ratio (around 20°) for heavy equipment ramps in industrial use. Aerial platforms, with high centres of gravity, benefit from staying well below these extremes whenever possible.
| Use Case | Recommended Ramp Grade | Conditions / Notes | Operational Impact |
|---|---|---|---|
| Ideal scissor lift loading (dry, level approach) | 5–8% grade | Gentle slope, good traction, typical for purpose-built loading ramps. | Operator can drive slowly with good control and minimal tipping risk. |
| Maximum routine loading (short distance, good surface) | Up to ~10% grade | Aligns with common guidance for heavier equipment handling where traction is adequate. | Acceptable if manufacturer’s max grade is not exceeded and surface is non-slip. |
| Wet, dusty, or outdoor yard ramps | ≤ 6–8% grade | Reduced friction requires flatter slopes and non-slip surfaces for safety. | Reduces wheel spin and uncontrolled sliding when loading or unloading. |
| Absolute structural limit for heavy ramps | Not steeper than 1:3 (≈20°) | Industry guidance for maximum slope ratio on dock ramps. | Too steep for safe scissor lift loading in most cases; treat as a hard upper bound, not a target. |
- Non-slip surface: Choose ramps with serrated steel, grating, or textured coating – mitigates sliding in rain or when tyres are dusty.
- Side protection: Use ramps with curbs or guardrails – prevents wheels from dropping off the edge during alignment.
- Smooth transitions: Minimise “break-over” angles at top and bottom – avoids grounding the chassis or jarring the platform.
Why aerial platforms need flatter ramps than forklifts
Forklifts carry loads low and between the axles, so they tolerate steeper grades when travelling on ramps under OSHA guidance. Scissor lifts have tall, narrow bases and higher centres of gravity, so they become unstable sooner on the same slope.
💡 Field Engineer’s Note: When a site forces you to use a short, steep ramp, switch from driving under power to controlled winching; this keeps the platform low, speed minimal, and removes the “jerk” that often starts a tip on marginal slopes.
Driving, winching, and spotter best practices
Driving, winching, and spotter coordination are the practical behaviours that turn correct ramp maths into a safe, repeatable method for how to load a scissor lift.
- Step 1: Prepare the lift – Lower the platform fully, retract and lock the scissor stack, and shut down or isolate power for electric units to stabilise the centre of gravity and prevent accidental movement before loading.
- Step 2: Secure the ramp to the vehicle – Pin or chain the ramp to the trailer or truck so it cannot kick out or slide as the lift climbs.
- Step 3: Assign a trained spotter – Place them to the side, clear of the line of travel, with full view of wheels and ramp edges for hand-signal guidance.
- Step 4: Align straight-on to the ramp – Keep the lift square to the ramp; side loading increases the chance of a wheel slipping off or the machine twisting.
- Step 5: Choose drive vs winch method – Drive only if the slope and surface are within the lift’s rated grade and traction is good; otherwise winch for controlled, low-speed loading as recommended.
- Step 6: Drive slowly and smoothly – No sudden throttle, braking, or steering inputs; these shift the centre of gravity and can break traction on the incline.
- Step 7: Stop fully on the deck – Once the lift is on the trailer, stop with wheels clear of the ramp, then chock and secure before anyone approaches the machine.
- Spotter duties: Watch wheel position, ramp edges, and overhead clearance – prevents side drop-offs and boom or guardrail strikes.
- Communication: Use clear, pre-agreed hand signals or radios – avoids confusion when engine noise or distance makes shouting useless.
- Personnel exclusion zone: Keep everyone except operator and spotter clear – reduces crush and run-over risks if the machine slips.
If the lift is not self-propelled, use enough personnel to push in a controlled way, or better, use a winch for both loading and unloading so that the machine never free-rolls on the ramp during transport operations.
💡 Field Engineer’s Note: On steep or marginal ramps I always position the winch vehicle so the cable pulls slightly “up and in” toward the trailer centreline; this counteracts any side-drift and keeps the lift tracking straight even if one ramp is a few millimetres higher than the other.
Tie-Down Design, Securement Points, And In-Transit Checks
Safe tie-down design for scissor lifts relies on rated chains/straps, correct anchor points, and periodic in-transit checks so the machine cannot shift, tip, or roll while you focus on how to load a scissor platform correctly.
Selecting chains, straps, and anchor hardware
Choosing the correct chains, straps, and anchor hardware ensures the tie-down system can actually resist the lift’s mass and dynamic forces during emergency braking or evasive maneuvers.
- Use rated equipment only: Select chains or ratchet straps with a clearly marked working load limit (WLL) higher than the lift’s operating weight – prevents overload and sudden failure under braking or cornering.
- Match quantity to weight: Use multiple tie-downs so the total WLL comfortably exceeds the scissor lift weight – shares load and gives redundancy if one lashing loosens.
- Prefer ratchet straps for wheels/base: High-strength ratchet straps are ideal for clamping tires and the base frame down to the deck – adds friction and stops bouncing on uneven roads.
- Use chains for rigid frame locking: Chains with binders work well on heavy units when attached to solid frame points – minimizes elastic stretch and keeps geometry fixed.
- Avoid weak or moving parts: Never hook to guardrails, control boxes, scissor arms, or platform rails – these can bend or break, releasing the machine.
- Use compatible anchor points: Attach only to certified D-rings, stake pockets, or lashing points on the truck/trailer – prevents deck damage and anchor tear-out.
- Protect edges: Add corner protectors where straps pass over sharp frame edges – reduces abrasion and sudden strap failure mid-route.
Once the lift is loaded, it must be secured with high-strength chains or ratchet straps attached to designated tie-down points on both the lift and the transport vehicle, avoiding weak or movable parts. Fasten the straps to sturdy points such as the base frame and tighten them securely, but not so much that components are damaged. After securing, stability should be checked by gently pushing the lift to confirm it does not move, and straps or chains should be re-tightened if any slack is detected. This guidance reinforces the need for solid frame attachment and post-tension checks.
| Component Type | Typical Use on Scissor Lift | Key Spec to Check | Operational Impact |
|---|---|---|---|
| Ratchet strap (polyester) | Over tires and base frame | WLL vs. total lift mass | Controls vertical bounce and side shift on rough roads. |
| Grade-rated chain | Locking frame corners to deck | Chain grade and WLL | Resists high dynamic forces during emergency braking. |
| Load binder | Tensioning chains | Compatibility with chain size | Achieves tight, repeatable chain tension without over-stressing links. |
| Deck D-rings | Main anchor points | Anchor rating and weld integrity | Prevents anchor pull-out when the lift surges forward. |
| Edge protectors | Under straps at sharp edges | Material toughness | Extends strap life and avoids sudden strap cuts. |
💡 Field Engineer’s Note: On older trailers, never assume the lashing rings are sound. I have seen corroded D-rings tear out under a single heavy brake—visually inspect welds and deck plates before you trust them with a 3,000–5,000 kg lift.
How many tie-downs do I actually need?
As a practical rule, use at least four independent tie-downs (one near each corner of the chassis) for compact scissor lifts, and add more for long or heavy units. Distribute them so you control forward, rearward, and sideways movement.
Positioning, tensioning, and cross-tying methods
Correct positioning and cross-tying lock the scissor lift in all directions so it cannot creep forward, backward, or sideways even if the driver must brake hard or swerve.
- Center the lift on the deck: Park the scissor lift centrally, with equal space to both sides and axles aligned to deck length – improves stability and keeps weight over the strongest deck area.
- Lower and secure the platform: Always transport with arms fully retracted and platform fully lowered and locked – reduces height and lowers the center of gravity.
- Chock the wheels: Fit wheel chocks front and rear on at least two wheels – provides a mechanical stop before relying on straps.
- Apply parking brake: Engage the lift’s parking brake after final positioning – adds another layer against rolling during tensioning.
- Use cross-tying: Run front straps or chains from each side of the chassis down to the opposite side anchors – creates an “X” that resists both lateral and longitudinal movement.
- Balance front and rear restraint: Apply similar numbers of tie-downs front and rear – prevents the machine from “hinging” around one tight end and one loose end.
- Tension progressively: Snug each strap lightly, then cycle around and ratchet them to final tension – keeps the lift square and avoids pulling it sideways.
- Avoid over-tensioning: Stop ratcheting when the strap is firm and the tire compresses slightly – prevents frame distortion, cracked welds, or blown seals.
- Re-check after first movement: After rolling a few meters, stop and re-check tension – settling can create slack that must be removed.
Securement must start only after the scissor lift is fully prepared: the manufacturer’s guidelines should be reviewed, the hydraulic components, platform, and wheels must be checked, and the lift arms retracted and locked in their lowest position with the platform fully lowered. For electric units, power should be turned off and the battery disconnected to prevent accidental activation before tie-down. These preparation steps are part of safe loading and securing.
Simple cross-tying pattern for a compact scissor lift
Front: Two straps from left and right chassis points forward to opposite side deck anchors, making an “X”.
Rear: Repeat the pattern to form a second “X”. This arrangement resists surge, sway, and twist with minimal hardware.
💡 Field Engineer’s Note: If the deck is wet or dusty, friction under the tires drops sharply. In those cases I always increase strap count and tension slightly, because the tie-downs must now do more work that the tire friction used to handle.
Height, route planning, and periodic inspections
Managing loaded height, choosing a suitable route, and performing periodic inspections prevents collisions with overhead structures and catches loosening tie-downs before they become a serious incident.
- Measure total transport height: After loading and securing, measure from ground to highest point of the lift – confirms clearance under bridges, tunnels, and power lines.
- Check width and overhang: Verify that the platform or guardrails do not exceed legal width limits – avoids permit violations and side-swipe risks.
- Plan a conservative route: Prefer roads with fewer low bridges, tight turns, and rough surfaces – reduces dynamic loading on tie-downs.
- Drive at moderate speed: Maintain lower speeds, especially on curves and rough terrain – limits weight transfer that can stretch or shock-load straps.
- Schedule inspection stops: On longer journeys, stop after the first 5–10 km, then at regular intervals – allows you to catch strap stretch or chain settling early.
- Inspect all lashings: At each stop, check every strap, chain, and anchor for slack, damage, or movement – prevents small issues from growing into a load shift.
- Check machine condition: Look for new leaks, tire deflation, or component movement – indicates whether the lift has been stressed in transit.
- Respect local regulations: Confirm any permits, time-of-day restrictions, and warning devices for wide or high loads – avoids roadside delays and fines.
During transport, the driver should move slowly and cautiously, particularly on curves, turns, or rough terrain, to avoid shifting the lift’s weight and destabilizing it. Height restrictions such as bridges, overpasses, and tunnels must be considered by measuring the height of the loaded vehicle, and for extended trips the driver should stop periodically to inspect the straps, chains, and overall stability of the lift, tightening or adjusting as necessary. This aligns with best practice for in-transit checks.
To prevent transport delays, it is also advisable to use certified tie-down equipment and plan routes around permit requirements and site conditions, especially when moving large aerial platforms. Experienced logistics providers can further reduce risk and downtime.
💡 Field Engineer’s Note: Any time I cross a rough rail crossing or heavily potholed section, I plan a stop within 1–2 km. Those shock loads are exactly when straps settle and hooks can rotate out of position, so an immediate inspection is cheap insurance.
Where this fits in the overall loading process
When planning how to load a scissor lift, think of three stages: 1) choose the right vehicle and ramp, 2) load and position the lift, and 3) apply a robust tie-down system with in-transit checks. Skipping any stage increases risk significantly.

Final Recommendations For Risk-Free Scissor Lift Transport
Safe scissor lift transport depends on treating the machine, ramp, and vehicle as one engineered system. You must control weight, geometry, and restraint from the first inspection to final unloading. Pre‑transport checks turn the lift into a compact, low‑centre‑of‑gravity block. This reduces tipping risk before it ever touches a ramp. Correct ramp selection then keeps the centre of gravity inside the wheelbase while traction and braking stay within tested limits. Gentle slopes, secure ramp attachment, and disciplined driving or winching stop roll‑backs and side slips.
Once on deck, tie‑down design takes over. Chains, straps, and anchors must provide restraint capacity that clearly exceeds the lift mass in every direction. Cross‑tying, wheel chocks, and balanced front‑rear tension lock the lift to the vehicle so road shocks cannot build dangerous movement. Height and route planning then protect against bridge strikes and overload of the restraint system.
For operations and engineering teams, the best practice is simple: write a site procedure that combines the operator’s manual, legal transport rules, and the ramp and tie‑down principles in this guide. Train crews to follow it step‑by‑step, and audit it in the field. This turns safe scissor lift loading into a repeatable, low‑risk process for every Atomoving unit you move.
Frequently Asked Questions
How do you load a scissor lift onto a trailer?
Loading a scissor lift requires proper equipment and safety precautions. The best option is to use a specialized scissor lift trailer, as standard trailers like hydraulic tipping or tradesman models are not suitable. Ensure the trailer is rated for the weight of the scissor lift and securely fasten the equipment using straps or chains to prevent movement during transport. Always follow manufacturer guidelines for loading and consult local regulations for transporting heavy equipment. Trailer Transport Guide.
What factors determine the allowable load a scissor lift can carry?
The allowable load a scissor lift can carry depends on its design and engineering specifications. Key factors include the platform’s structural strength, hydraulic system capacity, and stability under load. To calculate the load, engineers use formulas such as W = Load to be lifted and S= a² + L² – 2aL*cos α, where W represents the weight and S accounts for mechanical forces. Always refer to the manufacturer’s load rating and avoid exceeding it to ensure safe operation. Scissor Lift Load Calculation.

