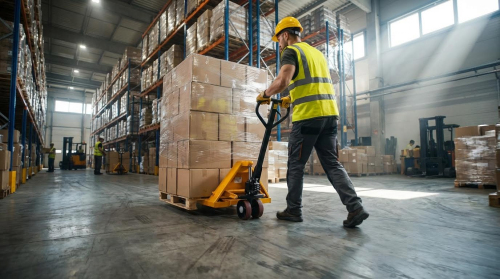
This guide explains how to fix a pallet jack that won’t lift by combining hydraulic theory with practical shop procedures. You will learn how to diagnose no‑lift, slow‑lift, and sinking forks, carry out safe seal and valve repairs, and decide when replacement is more economical than rebuilding. Throughout, the focus stays on real-world safety, load ratings in kilograms, and simple checks you can apply on any manual pallet truck in day‑to‑day operations.
Understanding Why A Pallet Jack Won’t Lift
Understanding the hydraulic circuit and load path is the fastest way to decide how to fix a pallet jack that won’t lift safely and economically. Once you can read the symptoms, you can separate simple oil or air issues from serious structural or seal failures.
Hydraulic circuit and load path basics
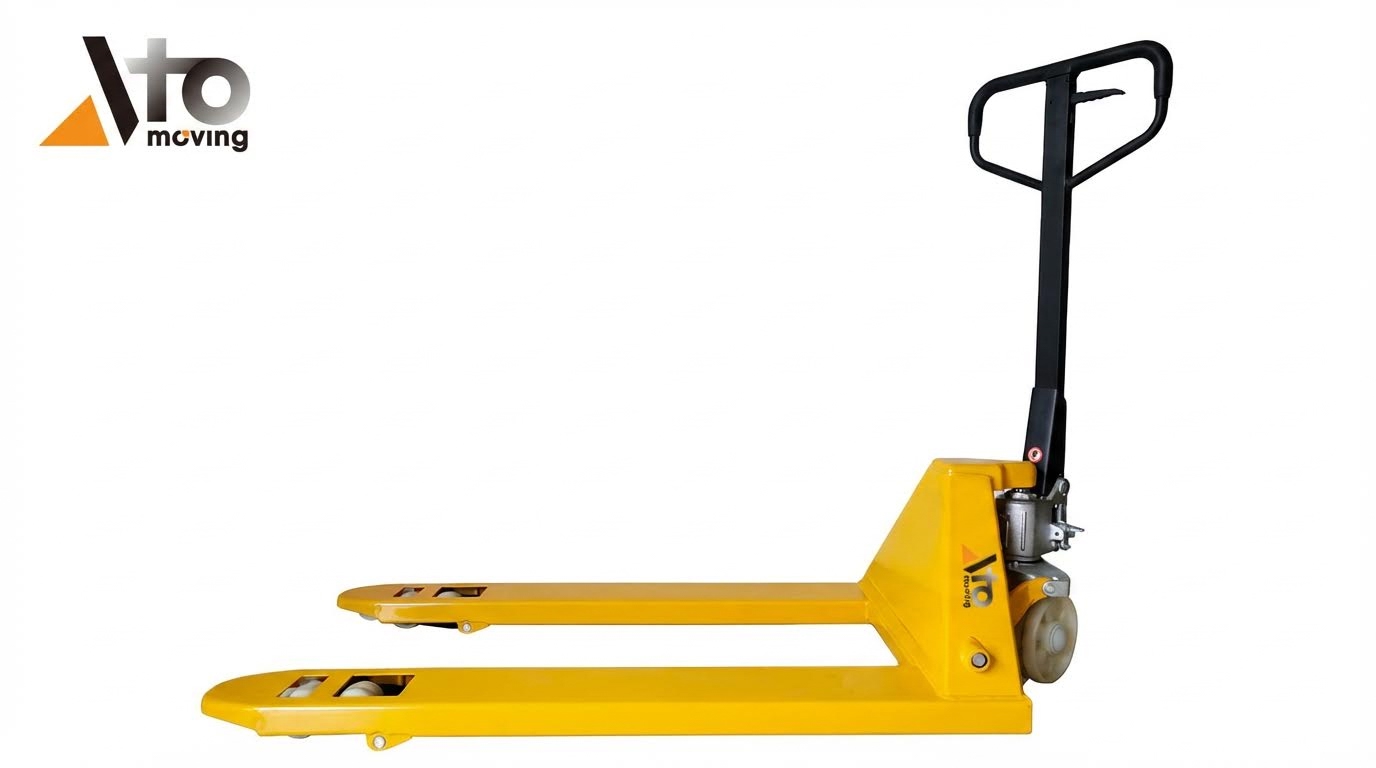
The pallet jack lifts because a simple single-acting hydraulic pump pushes oil into a cylinder, which then drives a mechanical linkage to raise the forks. When you lower, a valve opens a controlled path back to the reservoir and gravity brings the forks down. Source
- Pump and reservoir: A hand pump draws hydraulic oil from the reservoir and sends it to the lift cylinder through a check valve – this converts your handle strokes into pressure.
- Check valves: One-way valves hold pressure in the cylinder once the oil is pumped in – they stop the forks from dropping back down.
- Lift cylinder and piston: Pressurised oil pushes the piston up, which drives the fork linkage – this is where hydraulic pressure becomes vertical lift.
- Lowering valve: A small valve opens a restricted path back to the reservoir when you pull the release – this controls descent speed and prevents free-fall.
- Mechanical linkage: Pins, levers, and arms connect the cylinder to the forks – if these bend or wear, lift travel and height are reduced even with good hydraulics.
The load path runs from the pallet into the forks, then into the frame, axles, and wheels, and finally into the floor. If any of these components deform under loads typically between 2,000–3,000 kg, the jack may stop lifting long before the hydraulics are actually at fault. Source
| Component | Main Function | Typical Failure Effect | Operational Impact |
|---|---|---|---|
| Pump & reservoir | Generate and store hydraulic pressure | No lift or very slow lift | Handle pumps freely but forks stay on floor |
| Check valves | Hold pressure in cylinder | Lifts then sinks or will not hold load | Forks creep down under a pallet |
| Lift cylinder & piston | Convert pressure to fork movement | Reduced lift height or sinking | Cannot clear 120–150 mm pallet entry height |
| Lowering valve | Control descent and release pressure | Won’t lift (if stuck open) or won’t lower | Forks either stay down or stay up unexpectedly |
| Linkage and pins | Transfer cylinder force to forks | Short stroke, uneven lifting | One fork higher than the other, poor pallet entry |
| Forks, frame, wheels | Carry load to floor | Bent or dragging under load | Jack moves poorly or scrapes floor at rated load |
💡 Field Engineer’s Note: When diagnosing how to fix a pallet jack that won’t lift, always check fork and frame straightness before tearing into hydraulics. A slightly bent frame can steal 10–20 mm of lift, which is enough to miss pallet clearance.
How the hydraulic circuit behaves during each handle stroke
On the up-stroke, the pump draws oil from the reservoir through a suction check valve. On the down-stroke, that suction valve closes and a discharge check valve opens, sending oil into the cylinder. Repeated strokes increase cylinder volume and lift height until either the forks reach full travel or a pressure relief valve opens at the rated load. During lowering, the lowering valve bypasses both check valves and meters flow back to the reservoir so the forks descend at a controlled speed.
Typical no‑lift, slow‑lift, and sinking symptoms
No-lift, slow-lift, and sinking forks each point to different faults inside the hydraulic circuit or load path, which is why reading symptoms correctly is the core of how to fix a pallet jack that won’t lift. Matching what the handle and forks do to these patterns prevents guesswork and unnecessary part changes.
| Observed Symptom | Likely Root Causes | What You Feel at the Handle | Best Initial Check |
|---|---|---|---|
| No lift at all, forks stay on floor | Very low oil level, major air ingress, failed pump, or lowering valve stuck open | Handle moves very freely, almost no resistance | Check oil level ~20–30 mm below reservoir top and look for visible leaks |
| No lift, but handle feels “spongy” | Air trapped in hydraulic circuit | Soft, bouncy feel; pressure builds slowly | Bleed air by pumping 10–20 strokes with lever in release position |
| Slow lift under normal load | Marginal oil level, worn pump elements, partial blockage, or minor air ingress | Noticeable resistance but many strokes per 10 mm of lift | Inspect oil condition (dark, milky, dirty) and recheck for seepage at seals |
| Lifts empty but not under load | Internal leakage across seals or relief valve opening too early | Normal feel when empty, stalls with load | Compare load to nameplate rating (around 2,000–3,000 kg) and watch for fork movement |
| Lifts, then slowly sinks with load | Bypass at piston seals, check valves, or lowering valve seat | Handle may stay still while forks creep down | Observe forks over 2–5 minutes with static test load |
| Reduced maximum lift height | Low oil, bent linkage or forks, internal stop damage | Handle reaches hard stop early | Measure fork tip height and compare with a known good jack |
Loss of hydraulic pressure often starts with air ingress or fluid loss from leaking seals, hoses, or fittings; trapped air introduces compressible volume so the pump strokes go into “squeezing air” instead of lifting. Overloading beyond roughly 2,000–2,500 kg can also deform forks, crack seals, or damage valves, which then show up later as chronic slow-lift or sinking problems even on lighter loads. Source
- No-lift focus: Think oil quantity, trapped air, or valves stuck open – these stop pressure from building at all.
- Slow-lift focus: Think marginal oil, contamination, or worn pump parts – these reduce flow per stroke.
- Sinking focus: Think sealing surfaces and valve seats – these let pressure leak away after you have lifted.
💡 Field Engineer’s Note: Before assuming the pump is “dead,” bleed air properly by cycling 15–20 strokes with the lever in the release position, then re-test with an empty jack and a mid-range load. Many “dead” jacks come back once trapped air and low oil are corrected.
Quick symptom-to-action cheat sheet
If the jack will not lift at all and the handle feels loose, start with oil level and air bleeding. If it lifts but will not hold, prioritise seal and valve inspection. If it only struggles on heavy pallets, verify the load is within the 2,000–3,000 kg rating and inspect forks and frame for bending before opening the hydraulic unit.
Step‑By‑Step Troubleshooting And Repair
This section gives a structured, workshop-ready process for how to fix a pallet jack that won’t lift by moving from simple external checks to full hydraulic repair. Follow the steps in order and stop once performance returns to spec.
Safety, isolation, and overload checks
Safe troubleshooting starts by eliminating overload, instability, and residual hydraulic pressure before you touch any components. This prevents crush injuries and avoids misdiagnosing a simple overload as a hydraulic failure.
- Confirm capacity: Read the nameplate, usually 2,000–3,000 kg for manual jacks – rules out overload as the reason it won’t lift.
- Unload the forks: Remove all pallets and set the jack on a flat, level floor – gives a clean baseline for diagnosis.
- Check control lever: Move the handle/lever through lower, neutral, and lift positions – verifies the lowering and check valves are at least moving.
- Look for obvious leaks: Inspect pump body, cylinder, and hoses for wet oil or puddles – quickly flags low‑oil and air‑ingress risks.
- Secure and isolate: Chock wheels, use blocks under the frame, and ensure the forks are fully lowered – prevents unexpected rolling or dropping during repair.
Industry guidance stresses that maintenance staff must depressurize the hydraulic circuit and support the jack before opening any components to avoid crush hazards and comply with inspection norms. Reference
- Step 1: Verify the test load is below the rated capacity – overload can mimic hydraulic failure.
- Step 2: Park on a smooth, level floor and apply wheel chocks – prevents unintended movement.
- Step 3: Lower forks fully to the floor and cycle the lever through all positions – confirms basic valve actuation.
- Step 4: Wipe dirt from the pump and cylinder area – makes leaks and cracks easier to see.
💡 Field Engineer’s Note: If a “no‑lift” jack sits on a sloped or rough floor, operators often blame hydraulics when the real issue is wheel drag or the load trying to roll away. Always test lift on a flat, low-friction surface before tearing into the pump.
Checking fluid level, leaks, and contamination
Most no‑lift or slow‑lift pallet jacks simply run with low, wrong, or dirty hydraulic oil, so you always verify fluid level and condition before deeper repairs.
- Locate the reservoir plug: Typically on the pump housing – this is your primary access to check oil level.
- Forks fully lowered: Always drop forks before opening the fill port – ensures you measure maximum reservoir volume.
- Correct level band: Oil should sit about 20–30 mm below the reservoir top – enough headspace for thermal expansion and air separation.
- Oil appearance: Clear, uniform color is normal; dark, milky, or gritty oil signals contamination – points to water ingress or wear debris.
- External leak check: Inspect ram seal, pump joints, hose fittings, and valve block for wetness or rust streaks – identifies the source of low oil and air ingress.
Technical guides specify that low oil prevents the pump from building pressure and that the correct level is roughly 20–25 mm below the top of the fill port, using only manufacturer-approved hydraulic oil such as ISO VG 32 or 46. Reference Contaminated or milky oil requires full drain, flush, and refill to prevent accelerated seal and valve wear. Reference
- Step 1: With forks down, clean around the fill plug to avoid dirt ingress – protects precision valve and seal surfaces.
- Step 2: Remove the plug and visually check level 20–30 mm below the opening – confirms adequate oil volume.
- Step 3: Inspect oil color and clarity; if dark or milky, plan a full drain and refill – restores fluid properties and protects components.
- Step 4: Top up slowly with specified hydraulic oil using a clean funnel – avoids aeration and new contamination.
- Step 5: Refit the plug, wipe spills, and recheck around seals and fittings for fresh leaks – verifies system integrity under test pumping.
💡 Field Engineer’s Note: When you find the oil level far below the 20–25 mm band, assume air has been pulled into the pump for some time. Even after topping up, always bleed the system and then monitor for fresh oil weeping at the cylinder gland or valve block that reveals the root leak.
How to recognize contaminated hydraulic oil
Contaminated oil often looks darker than new fluid, with visible particles or a cloudy, “coffee with milk” appearance when water is present. Gritty feel between fingers suggests wear debris. Any of these signs justify draining, flushing, and refilling with fresh, specified oil.
Bleeding air from the hydraulic circuit
Air trapped in the hydraulic circuit makes the handle feel spongy and prevents the jack from building pressure, so systematic bleeding is the next step when fluid level is correct.
- Spongy feel: Handle moves easily with little resistance – strong indicator of air in the oil.
- No‑load first: Always bleed with the jack unloaded – reduces pressure and improves air migration to the reservoir.
- Lever in release: Set the control to the lower/release position before pumping – opens a path for air-laden fluid to return to the tank.
- Stroke count: Expect to pump 10–20 times – enough cycles to purge most trapped air.
Service instructions recommend cycling the handle 10–20 strokes with the lever in the release position on an unloaded jack to bleed air; some manuals specify 15–20 strokes for persistent no‑lift conditions. Reference Reference
- Step 1: Confirm correct oil level and reinstall the fill plug – prevents drawing more air during bleeding.
- Step 2: Place the jack unloaded with forks fully lowered – minimizes static pressure in the circuit.
- Step 3: Move the control lever to the lower/release position – opens the return path to the reservoir.
- Step 4: Pump the handle 15–20 full strokes – circulates oil and forces air back to the reservoir.
- Step 5: Switch lever to lift, test-lift with no load, then with a moderate load – confirms that pressure builds and the jack holds.
If the pallet jack still will not lift or sinks after bleeding, trapped air is no longer the primary issue and you must look for internal leakage or valve faults. Persistent aeration after correct bleeding often points to suction-side seal damage or cavitation at the pump inlet. Reference
💡 Field Engineer’s Note: If you hear a faint “whine” or see foamy oil at the fill port after bleeding, suspect air being sucked past the suction O‑ring or a loose fitting. Fix suction leaks first; otherwise any new oil and seal work will be undermined by ongoing aeration.
Isolating linkage faults from pump faults
To avoid unnecessary hydraulic teardown, you next separate mechanical linkage problems in the handle and rods from true pump or valve failures by testing the pump directly.
- Linkage complexity: Multiple pins, rods, and springs connect the handle to the pump control lever – wear here can prevent full valve actuation.
- Free play symptoms: Excessive slack, delayed response, or incomplete lever return – suggest mechanical, not hydraulic, causes.
- Direct pump test: Manually position the pump’s control lever and pump the handle – shows whether the hydraulic unit itself can lift.
Engineering guides recommend disconnecting the lifting link between the operating handle and pump control lever, then manually setting the lever to lift and stroking the handle. If the forks lift normally under light load in this configuration, the handle linkage or control head is at fault; if not, the issue lies within the pump, valve block, or cylinder. Reference Reference
- Step 1: With the jack unloaded and secured, inspect handle base hardware for loose bolts and worn pins – quick win if the problem is obvious slack.
- Step 2: Disconnect the linkage rod from the pump control lever (note original position) – allows independent motion of the pump lever.
- Step 3: Manually rotate the pump lever to the lift position and secure it – simulates a perfect linkage.
- Step 4: Pump the handle and observe fork movement under a light test load – directly tests pump and valves.
- Step 5: If lift is normal, rebuild or adjust the linkage; if lift still fails, plan internal pump/valve or cylinder repair – targets your effort where it’s needed.
- If forks lift with lever isolated: Fault lies in rods, pins, springs, or handle casting – repair is mainly mechanical.
- If forks do not lift: Internal pump pistons, check valves, or seals are suspect – hydraulic unit needs disassembly or replacement.
💡 Field Engineer’s Note: Many “dead” pallet jacks only suffer from a misadjusted lowering rod that holds the valve slightly open. After isolating the pump, small turn-by-turn adjustments to the rod length often restore full lift without touching a single seal.
Signs pointing to linkage issues vs pump issues
Linkage issues: Handle moves a long way before any resistance, lever does not clearly click into lift/neutral/lower, or forks sometimes lift if you jerk the handle. Pump issues: Solid handle feel but no lift, visible external leaks, or forks that lift then slowly sink under static load.
Seal, O‑ring, and valve service procedures
When bleeding, oil checks, and linkage isolation still leave you with a pallet jack that won’t lift or that sinks, the final step is to service internal seals, O‑rings, and valve cartridges in the hydraulic unit.
- Common failure points: O‑rings in lowering and check valves, cylinder rod seals, and base seals – internal bypass or external leaks kill lift capacity.
- Secure support: Raise the drive end on stands and fully depressurize – prevents movement during disassembly.
- Drain before opening: Remove reservoir cover and pump the handle to empty – reduces mess and contamination risk.
- Clean working area: Dirt in open hydraulic bores quickly damages new seals – housekeeping is critical.
Repair procedures describe raising the drive wheels on stands, depressurizing, and draining the reservoir before disassembly. Technicians then remove valve cartridges, extract worn O‑rings, clean grooves, and install new seals that match the model specification, followed by refill with specified hydraulic oil and bleeding. Reference Engineering guides add that worn rod seals, base seals, or O‑rings typically cause external leakage or sinking forks under load, and that a complete seal kit reduces compatibility problems. Reference Reference
- Step 1: Block and secure the jack, ensure forks are down, and depressurize – eliminates stored energy before opening the system.
- Step 2: Loosen or remove the reservoir cover screw and pump the handle until no more oil exits
Maintenance Practices To Prevent No‑Lift Failures
Preventive maintenance keeps the hydraulic system, linkage, and rolling gear healthy so you rarely face how to fix a pallet jack that won’t lift under production pressure. The focus is simple: clean oil, tight hardware, smooth wheels, and documented intervals.
Routine inspection and lubrication schedule
Routine inspections and targeted lubrication stop most no‑lift, slow‑lift, and sinking issues long before they become breakdowns. Think in terms of daily visual checks, weekly function checks, and quarterly deep service.
Interval Key Task Technical Focus Operational Impact Before each shift (daily) Walk‑around inspection Check for oil on floor, straight forks, free handle movement, obvious wheel damage (daily checks) Catches leaks and overload damage before a no‑lift event on the floor. Weekly Function and fastener check Test lift/hold/lower, spin wheels, tighten accessible bolts and nuts (weekly checks) Prevents linkage misadjustment and wheel drag that feel like hydraulic failure. Every 3 months Lubrication of joints Oil pivot pins and rotary joints, grease high‑load pivots (lubrication) Reduces friction so full pump stroke converts to lift, not lost motion. 6–12 months Wheel bearing replacement Inspect and replace worn bearings as needed (wheel bearings) Prevents high push forces that operators misinterpret as “jack won’t lift.” Annually Hydraulic oil change Drain and refill with 250–300 mL of specified hydraulic oil; keep level 20–25 mm below fill port (oil volume) Maintains pressure capability and prevents air ingress that causes no‑lift and sinking forks. - Daily leak and damage scan: Walk the length of the jack – Any oil on the floor, bent forks, or twisted handle is a red flag for future lift failure.
- Handle and control movement: Cycle lift/neutral/lower positions unloaded – Sticky or vague response usually points to linkage or valve issues that can be corrected before a breakdown.
- Scheduled lubrication: Apply light oil to linkage pins and joints, grease only where specified – Reduces wear that creates play and incomplete valve actuation.
- Hydraulic oil condition check: Inspect color and clarity during annual change – Dark, milky, or gritty oil indicates contamination that will attack seals and valves.
- Record each action: Log date, tasks, and findings by serial number – Supports predictive planning instead of repeated emergency “how to fix a pallet jack that won’t lift” searches.
How to verify correct hydraulic oil level
With forks fully lowered, remove the reservoir plug on the pump housing. The correct level is typically 20–25 mm below the top of the fill port, using only manufacturer‑specified ISO‑grade hydraulic oil. Top up slowly with clean, filtered oil and then bleed air by pumping 10–20 strokes in the lower position to restore full lift performance. (fluid level and bleeding)
💡 Field Engineer’s Note: In cold rooms near 0°C, thick oil and dry pivots make operators think the jack “won’t lift.” Warming the unit and using the correct ISO VG oil grade often restores normal lift without any parts replaced.
Wheel, handle, and lowering control upkeep
Keeping wheels, handle hardware, and the lowering control in good condition prevents false “no‑lift” complaints caused by drag, lost motion, or stuck valves instead of real hydraulic failure. Many shops recover jacks cheaply just by fixing these basics.
Component What to Inspect Service Action Operational Impact Steer and load wheels Flat spots, cracks, embedded debris, wobble, hard rolling (wheel inspection) Remove debris, replace damaged wheels, renew bearings every 6–12 months Reduces push force and prevents the feeling that the jack “won’t move or lift” under load. Wheel bearings Noise, roughness, side play, heat after use Press out worn bearings, install new units, apply correct lubricant (wheel care) Ensures smooth travel so hydraulic force is not wasted overcoming friction. Handle and pump connection Loose bolts, worn pins, excessive free play, misaligned linkage (handle looseness) Tighten hardware, replace worn pins/bushings, lubricate joints Restores full pump stroke and precise valve actuation, avoiding partial or no‑lift symptoms. Lowering control lever Sticking, delayed response, failure to lower or hold (lowering mechanism) Clean and lubricate linkage, check return spring, replace damaged valve parts Prevents uncontrolled descent or inability to lower, both of which trigger unnecessary hydraulic tear‑downs. Corrosion‑prone areas Rust at wheel axles, pump housing, under forks (corrosion control) Monthly cleaning and application of corrosion inhibitor Prevents seized wheels and frozen linkages that masquerade as hydraulic failure. - Wheel cleaning routine: Pick out string, wrap, and debris from around axles and forks – Debris can lock a wheel solid, making a healthy jack feel overloaded and unable to lift.
- Handle free‑play limit: If the handle moves more than a few degrees before you feel pump resistance, inspect pins and bushings – Lost motion means the pump and valves never see full travel.
- Lowering valve health check: With a safe test load, verify that the lever lowers smoothly and stops when released – Sticking valves that don’t close fully can cause slow sinking, misdiagnosed as cylinder failure.
- Avoid pressure‑washing: High‑pressure water drives moisture and grit into bearings and seals – This accelerates rust and contamination, undoing your maintenance work.
- Document non‑hydraulic fixes: Log wheel swaps, handle repairs, and valve cleanings – This helps distinguish real hydraulic design issues from floor‑condition or abuse problems.
Quick check: Is it really a hydraulic no‑lift problem?
Before opening the hydraulic unit, roll the unloaded jack 5–10 m and steer side‑to‑side. If wheels drag, wobble, or grind, fix those first. Then tighten the handle hardware and confirm full pump strokes. Only when travel and linkage are smooth should you move on to fluid level, air bleeding, and seal inspection as described in hydraulic troubleshooting guides. This sequence avoids unnecessary hydraulic repairs when the root cause is mechanical resistance or lost motion.
💡 Field Engineer’s Note: In many warehouses, 30–40% of “jack won’t lift” callouts ended up being seized load rollers or a sloppy handle linkage. A 20‑minute wheel and hardware service often put the truck back in service with zero hydraulic parts replaced.

Final Engineering And Cost Decisions
A pallet jack that will not lift is rarely a mystery once you link symptoms to the hydraulic circuit, load path, and mechanical linkage. Correct oil level, clean fluid, and proper bleeding restore pressure. Straight forks, sound frames, and low rolling resistance make sure that pressure turns into real lift. Solid linkage and a healthy lowering valve ensure the pump strokes are not wasted by lost motion or bypass.
From an engineering view, you should treat no‑lift events as evidence of stress on the whole system, not just the pump. Overloads near or above the 2,000–3,000 kg rating bend steel, crush seals, and shorten service life. If you see repeated seal failures, heavy corrosion, bent forks, or a cracked frame, replacement usually beats a full rebuild on cost, reliability, and safety.
The best practice is clear. Use a structured troubleshooting sequence, keep oil and linkage in control with a written maintenance plan, and retire units with major structural damage. This approach cuts downtime, keeps operators safe, and lets you reserve full hydraulic overhauls for jacks that still have a sound chassis and duty profile that justifies the repair investment with Atomoving pallet trucks in your fleet.
Frequently Asked Questions
Why is my pallet jack not lifting?
If your pallet jack isn’t lifting, it could be due to low hydraulic fluid levels, air trapped in the system, or worn seals and valves. Check the hydraulic oil level and refill if necessary. Hydraulic Jack Troubleshooting.
- Inspect for leaks in the hydraulic system.
- Bleed the system to remove trapped air.
- Replace any damaged seals or valves.
How do I reset my pallet jack?
To reset an electric pallet jack, turn it off and unplug it. Press the emergency stop button to release hydraulic pressure, wait 30 seconds, then press the button again to reset. Plug it back in and turn it on. Reset Guide for Pallet Jacks.