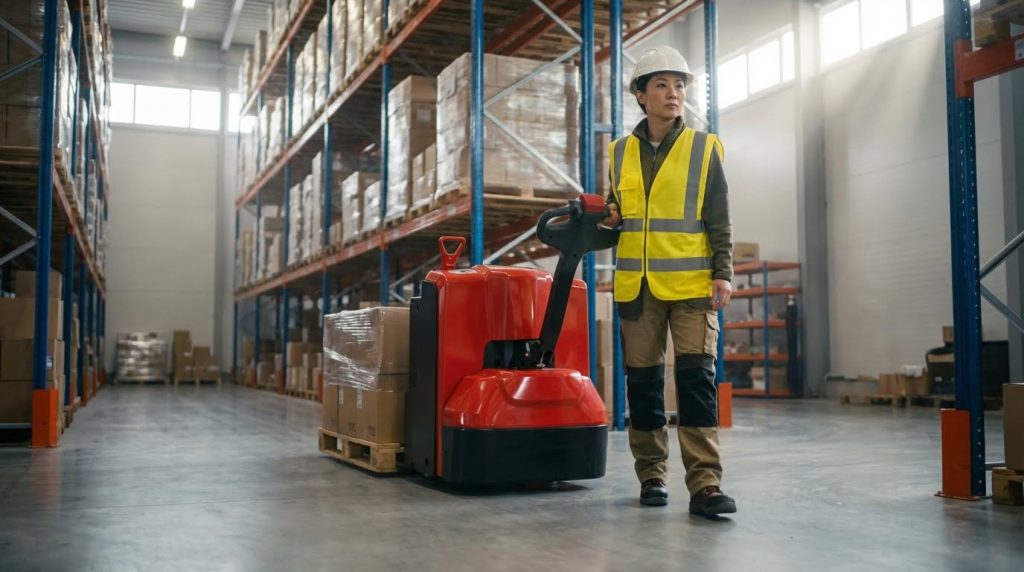
Safe electric pallet jack operation starts with understanding controls, operating modes, and daily checks so every move protects people, pallets, and floors. This guide explains how to operate a battery pallet lift step by step, from controls and driving modes to inspections, batteries, and maintenance. You will see how each safety feature, checklist item, and control input directly affects stability, stopping distance, and uptime in real warehouses. Use this as a practical field reference to train operators and standardize safe, efficient pallet handling.
Fundamentals Of Battery Pallet Lifts And Controls
Fundamentals of battery pallet lifts and controls explain how the machine’s components, handle layout, and safety systems work together so operators know exactly how to operate a manual pallet jack safely and efficiently.
At this level you are learning what each part does, how the controls behave in your hands, and which built‑in protections you can and cannot rely on every day.
Core components and control layout
Core components and control layout define how force flows from the battery and drive unit through the forks and wheels, and how the operator commands that motion from a single tiller handle.
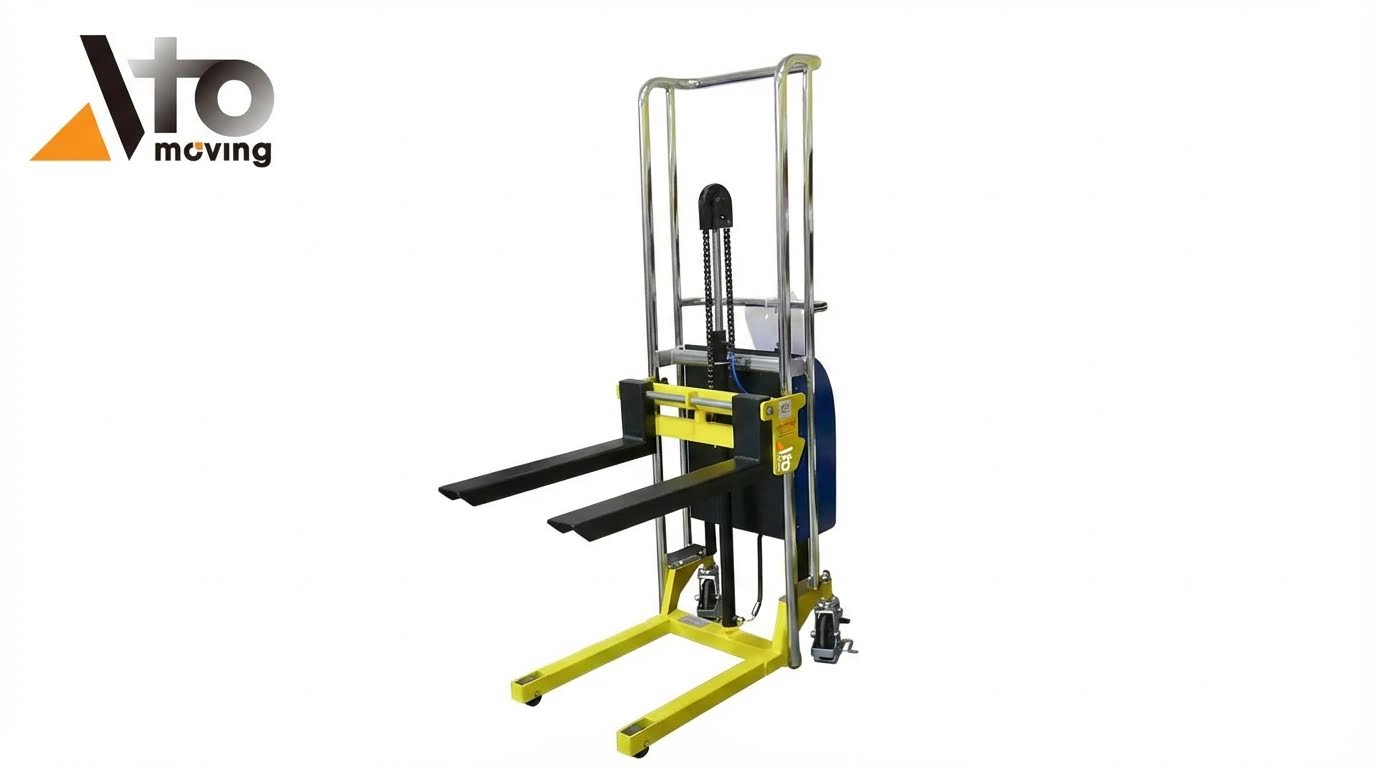
A modern battery pallet lift is a compact system that turns electrical energy into controlled traction and lifting, using a small number of highly loaded mechanical parts.
Component
Main Function
Typical Details
Operational Impact
Forks and fork heels
Support and carry the pallet load
Heavy steel blades sliding under pallets Reference
Correct fork entry prevents pallet breakage and keeps the load stable during turns.
Main frame / chassis
Houses battery, hydraulics, and drive unit
Rigid welded structure around drive wheel and mast base Reference
Stiff frame keeps the truck tracking straight and resists twisting on uneven floors.
Tiller / control handle
Steering and all drive / lift commands
Pivoting arm with throttle, rocker, lift / lower, brake, and horn controls Control handle details
One-handed control allows precise positioning in aisles as narrow as 2.0–2.5 m.
Drive unit and drive wheel
Provide traction and steering pivot
Electric motor, gearbox, and single steerable wheel Layout
Determines acceleration, ramp performance, and turning radius around the drive wheel.
Smooth, clean rollers reduce push forces and protect floor coatings.
Battery pack
Supplies electrical power
Lead-acid or lithium-ion, sized for 2–8 hours typical runtime Battery types
Battery capacity limits shift length and how aggressively you can accelerate and lift.
Electric-hydraulic pump
Raises and lowers forks
Motor-driven pump feeding lift cylinder Lift system
Controls lift speed and smoothness, critical for fragile loads.
On the control handle, most battery pallet lifts combine several functions under your fingers so you can steer, drive, and lift without changing grip.
Direction rocker: Selects forward or reverse – Prevents confusion about travel direction before you pull the trigger.Control functions
Variable speed trigger / butterfly: Commands travel speed – Lets you creep at a few cm/s or move quickly on long hauls.Speed control
Lift and lower buttons: Run the electric-hydraulic pump – Enable one-handed lifting only enough to clear the floor, usually 30–50 mm.Lift functions
Brake / reverse or belly switch: Triggers braking or reverse – Stops the truck or backs it away if it contacts your body.Safety features
Horn and emergency stop: Warn others and cut power – Provide last-resort control in crowded aisles.
How this layout affects how to operate a battery pallet lift
Because steering, traction, and lift all sit on the tiller, operators must learn fine thumb and finger control instead of “body steering.” Training should include slow figure‑eight driving, feathering the trigger, and lifting while steering in narrow aisles.
💡 Field Engineer’s Note: In cold rooms below about 0°C, hydraulic oil thickens and response at the lift / lower buttons slows. Plan longer lift times and avoid “tapping” the buttons, or you will overshoot and bounce fragile loads.
Walk-behind vs ride-on operating modes
Walk-behind vs ride-on operating modes change how far and how fast you can move, how you position your body, and what clearances and stopping distances you must respect.
Both use the same basic tiller and fork geometry, but they behave very differently in tight aisles and long-haul runs, so choosing the right mode is part of learning how to operate a drum dolly correctly for each job.
Mode
Typical Configuration
Main Advantages
Main Limitations
Best For…
Walk-behind
Operator walks behind or beside truck, holding tiller
Tight turning radius and high placement precision Control modes
Operator fatigue over long distances; slower average speed.
Short shuttles, trucks, containers, and aisles around 2.0–2.4 m wide.
Ride-on (platform or stand-in)
Operator rides on fold-down platform or inside compartment
Higher speed and less fatigue on long hauls Control modes
Larger turning radius and stricter training for clearances and stopping distances.
Long runs of 30–100 m or more, dock to storage runs, high-throughput areas.
Walk-behind focus: The priority is maneuverability – Operators can pivot the truck almost on its own axis around the drive wheel in narrow aisles.
Ride-on focus: The priority is productivity – Higher speeds demand better visibility discipline and earlier braking.
Creep / turtle mode: Low-speed mode on many units – Lets you walk beside the truck with the tiller nearly vertical for docking into very tight pallet slots.Creep speed
Choosing the right mode for your warehouse layout
Engineers typically compare aisle width, average haul distance, and traffic density when deciding between walk-behind and ride-on fleets. Dense, short-aisle storage often favors walk-behind units, while cross-dock and long transfer runs justify ride-on platforms for reduced fatigue and higher pallet-per-hour throughput.
💡 Field Engineer’s Note: In mixed-traffic aisles with pedestrians and ride-on units, specify geo-fenced slow zones so ride-on pallet lifts automatically reduce speed near doors and crossings. This compensates for the longer stopping distance and reduced peripheral vision at ride-on speeds.
Safety systems and compliance basics
Safety systems and compliance basics ensure that if the operator makes a mistake, the pallet lift’s brakes, switches, and electronic limits help prevent a serious incident and keep the truck aligned with safety standards and site rules.
Understanding these protections is a core part of how to operate a hydraulic pallet truck because you must know what the truck will do automatically when you release the handle, hit an obstacle, or enter a restricted area.
Automatic braking: Traction stops when the tiller is released or moved fully up or down – Prevents runaways if the operator loses grip.Dead-man featureAutomatic brakes
Belly / emergency reverse switch: Reverses or stops the truck if the switch contacts the operator – Reduces crush risk between truck and obstacles.Belly switch
Overload protection: Limits lift or travel when loads exceed rating – Helps prevent structural damage and tip-over from excessive mass.Overload systems
Regenerative and service braking: Electric braking slows the truck before friction brakes finish the stop – Shortens stopping distance and reduces brake wear on ramps.Braking and traction
Anti-rollback on slopes: Holds the truck when the tiller is neutral on ramps – Prevents it from rolling downhill when starting on a gradient.Anti-rollback
Pedestrian detection and proximity systems: Wearables, vehicle modules, and beacons create warning zones – Alert operators and pedestrians before close calls in busy areas.Pedestrian protection
Speed governance and geo-fenced slow zones: Auto-slowdown in doorways and congested areas – Enforces safe speeds without relying only on operator judgment.Speed governance
Access control / badge start: Only trained operators can power up the truck – Supports compliance with powered industrial truck training rules.Access control
Compliance and operator responsibility
Most safety regulations require operators to perform a pre-operation inspection, verify capacity on the data plate, and use controls as intended before driving. Features like belly switches and auto-braking are backups, not substitutes, for correct speed, clear visibility, and proper load handling technique.
💡 Field Engineer’s Note: In many incident reviews, the safety system worked exactly
Operating Sequences, Driving Modes, And Load Handling
This section explains how to operate a manual pallet jack step by step, from start-up to braking and load handling, so operators stay within safety limits while maximizing throughput and minimizing damage.
Pre-start and power-on checks step by step
Safe operation starts with a repeatable pre-start sequence that finds faults before they become incidents or breakdowns.
Step 1: Secure area and park condition: Confirm forks fully lowered, truck stable, and no one is under or between pallets – Prevents crush hazards at first power-on.
Step 2: Power-off visual inspection: Check forks for cracks, bends, or misalignment, and confirm heels are not deformed. Protects against fork failure under load.OSHA checklist – forks
Step 3: Wheels and rollers: Inspect load and drive wheels for debris, flat spots, or chunking; clear string wrap and banding. Reduces vibration, steering drag, and floor damage.Wheel inspection
Step 4: Battery and cables: Check charge level, cable insulation, and connectors for damage or looseness; confirm battery is secure in the compartment. Prevents no-starts, arcing, and intermittent power loss.Battery maintenance
Step 5: Hydraulics and leaks: Look around pump, cylinders, and hoses for wet spots or drips; do not use if leaks are present. Oil on floors creates slip hazards and loss of lift capacity.Hydraulic checks
Step 6: Power-on and display check: Turn key or power switch to ON and confirm display or indicator lights behave normally, with no error codes. Catches electronic or control faults before moving.Power-on sequence
Step 7: Control handle test: In a clear area, move the tiller through its range; confirm the dead-man feature stops traction in full up/down positions. Verifies automatic braking and emergency stop logic.Dead-man feature
Step 8: Lift and lower test: Raise and lower empty forks through full stroke; motion must be smooth without jerks or abnormal noise. Confirms hydraulic health before lifting real loads.Lift/lower check
Step 9: Brake and horn test: At low speed, confirm service braking, regenerative braking, and automatic brake on tiller release; test horn. Ensures you can stop and warn others on demand.Braking functions
Step 10: Safety devices: Confirm belly switch, emergency stop, and any access control or speed governance function correctly. Protects operators and pedestrians in tight or shared spaces.Safety features
💡 Field Engineer’s Note: If you find repeated low battery or hydraulic issues during pre-start checks, log the truck ID and time. Patterns across shifts usually reveal charging discipline or overloading problems long before a breakdown.
Why strict pre-start checks matter for load ratings
Fork cracks, low oil, or weak batteries all reduce effective capacity. Even if the nameplate says 2,000 kg at 600 mm load center, defects can shift the real safety margin down sharply, especially on ramps or uneven floors.
Travel, braking, and creep / turtle speed use
Controlled travel and correct speed modes let operators move pallets quickly without losing stability or hitting pedestrians or racking.
Direction and throttle use: Set the direction rocker, then apply the variable-speed trigger smoothly. – Prevents wheel spin and shock loading of the drive train.Direction rocker & throttle
Tiller steering inputs: Use small steering corrections at higher speeds, larger inputs only at walking pace. – Reduces risk of sudden lateral load shift.Steering behavior
Normal travel speed: Keep speed at or below brisk walking pace with forks low (about 80–100 mm off floor). – Maintains stability and reaction time.Safe driving practices
Regenerative and service braking: Release the throttle early to let regenerative braking slow the truck, then use service brake as needed. – Reduces heat, wear, and stopping distance.Regen braking
Automatic braking with tiller: Allow the handle to move to neutral or full up/down for automatic brake engagement. – Provides an instant, predictable stop if you lose balance.Dead-man stop
Creep / turtle speed mode: Use creep or turtle speed when working in trailers, congested docks, or within 100–200 mm of racking. – Improves precision and reduces impact energy.Creep mode
Inclines and ramps: Travel with the load facing uphill, use low speed, and rely on anti-rollback and brakes, not motor torque. – Prevents uncontrolled roll-back and tip-over.Ramp behavior
Pedestrian interaction: Look in direction of travel, sound horn at blind corners, and maintain clear zones. – Reduces collision risk in mixed-traffic aisles.Pedestrian safety
Mode / Feature
Typical Use Case
Operational Impact
Normal travel speed
Clear, straight aisles ≥ 2.5 m wide
Maximizes throughput while keeping walking-pace control
Creep / turtle speed
Trailers, tight docks, near racking
Allows centimeter-level positioning with low impact energy
Regenerative braking
Routine deceleration on level floors
Extends brake life and reduces heat generation
Anti-rollback
Loading ramps and dock plates
Prevents roll-back when stopping on slopes
💡 Field Engineer’s Note: Train operators to enter creep mode before they feel “nervous” in tight spaces. If they wait until they are already close, sudden over-correction is what bends racking and damages pallets.
Walk-behind vs ride-on travel behavior
Walk-behind pallet lifts offer tighter turning and better visibility in short aisles, while ride-on versions favor longer runs. Both rely on the same principles: forks low, controlled speed, and early braking using regen plus service brakes.
Load engagement, ramps, and narrow aisle maneuvers
Correct load engagement and path choice keep the truck within its rated capacity and prevent tip-overs in narrow aisles and on ramps.
Approach to pallet: Approach slowly with forks fully lowered and aligned with pallet openings. – Prevents fork impact damage and mis-entry.Approach technique
Fork insertion depth: Insert forks completely under the pallet until the heels are just clear of the opposite stringer. – Ensures full support and avoids pallet break-through.Full fork entry
Lift height for travel: Raise the pallet just enough to clear the floor, typically 30–50 mm (about 1–2 inches). – Keeps the center of gravity low and stable.Lift height
Load capacity check: Compare estimated pallet mass to the data plate rating at 600 mm load center. – Prevents structural overload and mast or fork failure.Capacity rating
Load positioning on forks: Center the load laterally and pull it fully against the backrest or fork heel area. – Reduces risk of side-tip and pallet collapse.Load positioning
Ramps and slopes: Travel straight up or down with the load uphill; never turn across a slope. – Maintains the combined center of gravity inside the stability triangle.Ramp rules
Narrow aisle turning: Use creep speed and plan a smooth, single arc turn; avoid “sawing” the tiller. – Prevents side impacts with racking and pallets.Narrow aisle maneuvering
Daily checks, smart battery care, and planned maintenance are the backbone of how to operate a manual pallet jack safely, avoid breakdowns, and keep handling performance consistent across every shift.
Daily inspection and cleaning checklist
Daily inspection and cleaning give you a fast, repeatable way to catch failures early and keep controls, hydraulics, and wheels working smoothly before you move a single pallet.
Forks and frame: Inspect for cracks, bends, misalignment, or weld damage – Prevents sudden fork failure under load.Daily inspection checklist
Load and drive wheels: Check for embedded debris, flat spots, chunking, or excessive wear – Reduces vibration, floor damage, and steering effort.Wheel condition guidance
Hydraulic system: Look for oil on the floor, damp cylinder rods, or wet hose fittings – Flags leaks before you lose lift capacity or contaminate the floor.Hydraulic leak checks
Lift / lower operation: Raise and lower unloaded forks through full stroke; watch for jerks, stalls, or uneven motion – Confirms safe, controllable lifting before handling real loads.Smooth lift verification
Controls and safety features: Test horn, emergency stop, belly switch, key switch, and brake response – Ensures the truck can stop instantly in an emergency.Pre-operational inspection checklist
Battery and cables: Check charge level, cable insulation, and connectors for damage or looseness – Prevents no-starts, arcing, and heat build-up.Battery maintenance points
Housekeeping / cleaning: Wipe down handle, controls, and display; clear string wrap and banding from wheels and axles – Improves grip, hygiene, and rolling efficiency.Daily cleaning routine
Daily Check Item
What To Look For
Action If Fault Found
Operational Impact
Forks
Cracks, bends, uneven tips
Tag out truck; report for repair
Prevents fork snap under 1,000+ kg pallets
Wheels / rollers
Flat spots, debris, cracks
Remove debris; schedule wheel change
Reduces push force and steering effort in tight aisles
Hydraulics
Oil leaks, noisy pump
Stop use; maintenance to check seals and fluid
Avoids sudden loss of lift under load
Controls & brakes
Slow response, no horn, dead-man not working
Do not operate; call maintenance
Maintains stopping distance in crowded zones
Battery & cables
Low charge, hot or damaged cables
Charge correctly; repair or replace cables
Prevents mid-aisle shutdowns and electrical faults
💡 Field Engineer’s Note: In cold rooms, fine dust mixes with condensation and forms a gritty paste on wheels and axles. If you do not clear it daily, rolling resistance rises sharply and operators start “riding” the traction, which hides early wheel and bearing damage.
How daily checks link to safe driving and load handling
When operators know this checklist, they better understand how to operate a hydraulic pallet truck as a complete system: forks carry the load, hydraulics lift it, wheels and brakes control it, and the battery powers everything. A 2-minute walk-around often prevents a 2-hour breakdown in the middle of a busy dock.
Battery types, charging windows, and safety
Battery type, charge window discipline, and charging safety practices determine whether your pallet lift delivers full-shift runtime or suffers from short life, heat, and nuisance shutdowns.
Identify battery type: Confirm if the truck uses flooded lead-acid or lithium-ion – Each chemistry has different charging and maintenance rules.Battery types and runtime
Respect charge windows: Start charging around 20–30% remaining capacity to avoid deep discharge – Extends cycle life and keeps voltage stable under load.Battery management practices
Use approved chargers: Match charger voltage and type to the battery; check leads and plugs – Prevents overcharge, undercharge, and connector burn.Battery charger checks
Ventilation and compartment open: Charge in a ventilated area with the battery compartment open – Disperses gases and limits heat build-up.Charging area guidance
Lead-acid watering: For flooded lead-acid, check electrolyte level after full charge and top up with demineralized water – Prevents plate exposure and capacity loss.Lead-acid maintenance
Terminal cleanliness: Keep terminals clean and tight; remove corrosion – Reduces resistance, heat, and voltage drop under heavy lifting.Terminal inspection
Lithium-ion habits: Avoid full depletion; partial charges during breaks are acceptable – Supports opportunity charging and high cycle life.Battery care practices
Battery Type
Key Maintenance
Typical Charge Window
Best For…
Flooded lead-acid
Watering, equalization charges, terminal cleaning
Charge at ~20–30% remaining
Standard 1-shift operations with fixed charging breaks
Lithium-ion
Visual checks, connector and BMS monitoring
Frequent partial charges; avoid 0%
Multi-shift or high-throughput sites needing fast turnaround
💡 Field Engineer’s Note: If operators regularly “run it to empty,” you will see voltage sag and nuisance cut-outs first on ramps and during lift. Train them that plugging in at 20–30% is part of how to operate a drum dolly correctly, not a sign of weakness.
Troubleshooting common battery-related issues
No start or short runtime: Check state of charge, cable terminations, and connector integrity; verify charger output voltage before blaming the truck. Battery and motor faults
Hot cables or plugs: Usually indicate loose connections or mismatched charger settings; remove from service and correct before further use.
Hydraulic, wheels, and predictive maintenance
Hydraulic health, wheel condition, and predictive maintenance tools together decide how smoothly the truck lifts, how easily it rolls, and how reliably it stays in service over months and years.
Hydraulic oil level: Check and top up to the lower edge of the filler opening with the forks lowered – Prevents slow or noisy lifting and cavitation.Hydraulic system inspection
Leak and seal checks: Inspect cylinder rods, hose joints, and dust seals for oil or contamination – Stops gradual performance loss and keeps floors dry.Hydraulic servicing
Bleeding air from system: If lift is spongy or jerky, cycle the pump unloaded through full stroke several times – Removes trapped air and restores smooth motion.Bleeding procedures
Wheel lubrication: Apply lubricants to wheel axles, pivot joints, and handle hinges weekly – Reduces steering force and wear.Weekly maintenance tasks
Wheel and roller replacement: Replace units with cracks, severe flat spots, or chunking; maintain correct spacers and washers – Prevents vibration, floor damage, and overload on the drive motor.Wheel replacement procedure
Fork straightness checks: Use a straightedge or gauge monthly to confirm forks are not sagging – Maintains correct load center and capacity.Monthly fork inspections
Predictive maintenance via telematics: Use usage hours, travel distance, impacts, and charging patterns to drive service intervals – Catches issues before operators notice symptoms.Predictive maintenance tools
Component Group
Typical Task
Suggested Interval
Operational Impact
Hydraulics
Check fluid level, inspect for leaks
Daily visual; detailed monthly
Ensures full lift height for 1
Final Thoughts On Safe, Efficient Pallet Jack Use
Safe, efficient pallet jack use depends on how well operators link controls, load limits, and maintenance into one routine. The tiller, brakes, forks, and battery form a single system. When operators understand this, they choose the right mode, speed, and path for each pallet and aisle. Correct fork entry, low travel height, and smooth steering keep the center of gravity inside the stability zone, even on ramps and in tight aisles. Safety systems then act as a backup, not the first line of defense.
Daily checks and battery care turn that safe technique into reliable uptime. Walk-around inspections catch cracks, leaks, and weak braking before a shift starts. Good charging discipline keeps voltage stable, so braking and lifting stay predictable late in the day. Planned hydraulic and wheel service prevent the hidden drag that pushes operators to rush.
For operations and engineering teams, the best practice is clear. Standardize one written procedure that joins pre-start checks, driving rules, load handling, and charging habits. Train and observe against that standard, then use telematics and defect logs to refine it. This approach lets Atomoving pallet equipment run at full productivity while keeping incidents, damage, and unplanned downtime low.
Frequently Asked Questions
How to Operate a Powered Pallet Jack?
To operate a powered pallet jack, ensure it is turned off and disconnected from the power source before performing any maintenance. Locate the reset button near the battery compartment, press and hold it for 10-20 seconds, then reconnect the power source and test the equipment. Reset Guide.
Always check the battery charge level before operation.
Use the control handle to maneuver the pallet jack in pulling mode for better efficiency.
Do You Need Certification to Operate an Electric Pallet Jack?
Yes, according to OSHA standard 1910.178, workers must complete proper training and certification to operate an electric pallet jack safely. Certification involves formal instruction, practical training, and a performance evaluation. Online courses are available for completing the formal instruction portion at your own pace. Certification Details.