Drum handling safety best practices explain how to move drums safely by controlling weight, stability, and chemical hazards with engineered equipment, disciplined procedures, and clear stacking rules. This guide turns regulations and physics into practical steps for safer drum movement, storage, and in-plant transport.
You will learn how to move drums safely using purpose-built trucks, clamps, and hoists, how to design stable stacking layouts, and how to manage flammable and hazardous contents. Every recommendation links back to real-world risks like tip-over, leaks, and overloading floors so you can engineer out incidents instead of reacting to them.
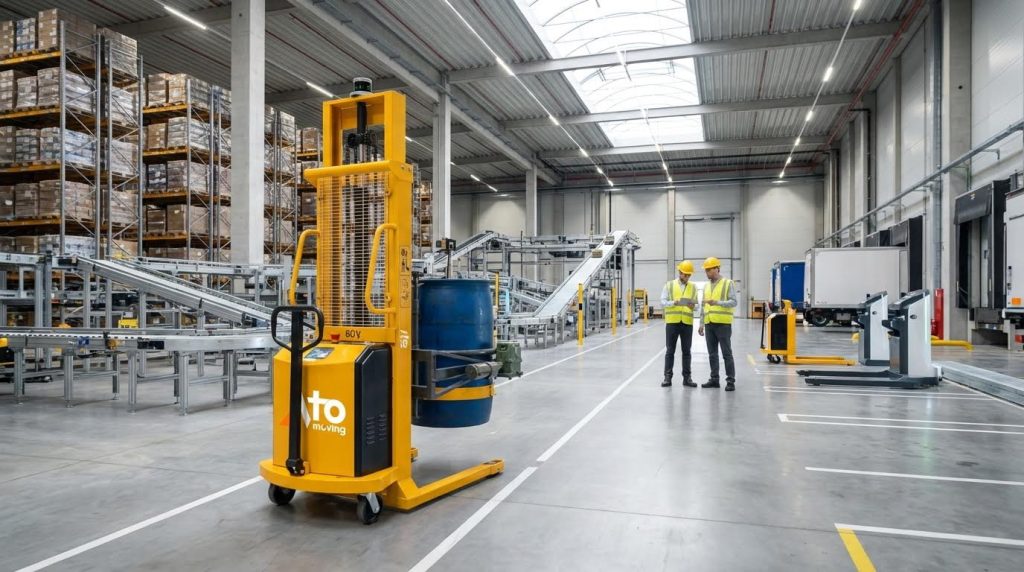
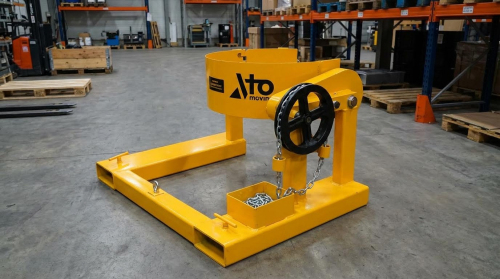
For instance, using a drum dolly or drum palletizer ensures better mobility and stacking precision. Additionally, solutions like the forklift drum grabber double grips or a electric drum stacker help streamline operations while minimizing risks.
Fundamentals Of Safe Drum Handling
Fundamentals of safe drum handling focus on understanding drum weight, stability, and chemical hazards so you can decide how to move drums safely using engineered aids instead of risky manual methods.
A full 200–208 litre drum can weigh 180–360 kg and behaves like a tall, narrow column with a high center of gravity, so small errors in handling can create large crush, impact, or leak events. Safe practice combines pre-handling checks, conservative stacking rules, and clear regulatory duties for hazardous contents.
Load characteristics and stability risks
Drum load characteristics and stability risks determine how to move drums safely without tip-overs, crush injuries, or progressive stack collapse.
The starting point is simple physics: you are dealing with several hundred kilograms concentrated in a slender cylinder, often stacked on timber or plastic pallets.
| Parameter | Typical Range / Fact | Risk Mechanism | Operational Impact |
|---|---|---|---|
| Full drum mass | 180–360 kg for a 55-gallon (200–208 L) drum reference | High kinetic energy if drum tips, rolls, or falls | Manual lifting is unacceptable; mechanical aids are mandatory above ~25–30 kg |
| Center of gravity (upright) | Above mid-height of drum shell reference | Small lateral forces create overturning moments | Even slight floor slopes or pallet damage can start a tip-over |
| Fill level | Partially filled vs. full | Liquid slosh shifts center of gravity dynamically | Extra care on ramps; avoid sudden starts/stops |
| Stack height | Best practice: ≤2 drums high in free-standing rows reference | Higher combined center of gravity and higher local shell stress | Limit stacks to two tiers to reduce collapse risk and aid inspection |
| Drum condition | Corrosion, dents, bulging, out-of-round | Weak “columns” and uneven contact points in stacks | Do not place damaged drums in load-bearing positions |
| Floor and pallet quality | Uneven, cracked slabs; warped or broken boards | Rocking, point loading, punctures, and sudden shifts | Use only sound pallets and level bases under stacks |
From a handling perspective, this means any uncontrolled rolling, sudden deceleration, or side impact can turn the drum into a moving battering ram. Unsecured drums on forklifts or pallet trucks can fall during tight turns or hard braking, while damaged pallets or nails can puncture shells and create leaks or sudden loss of support. Reference
- Recognize the load: Treat every 200–208 L drum as a several-hundred-kilogram object – assume it is too heavy for manual lifting.
- Control the base: Keep floors level, dry, and free of debris – reduces rocking and sudden rolling.
- Limit stack geometry: Follow “two high, two wide” for free-standing rows – keeps the combined center of gravity low and within the footprint.
- Inspect before stacking: Remove corroded, dented, or bulging drums from structural positions – prevents progressive collapse.
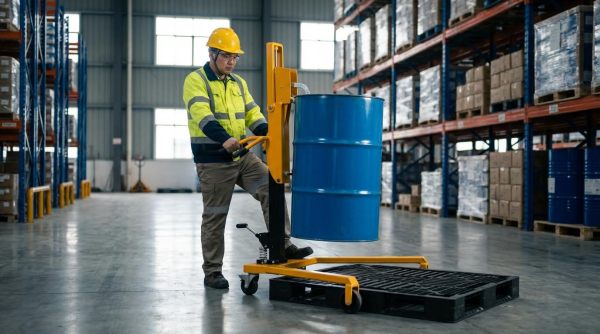
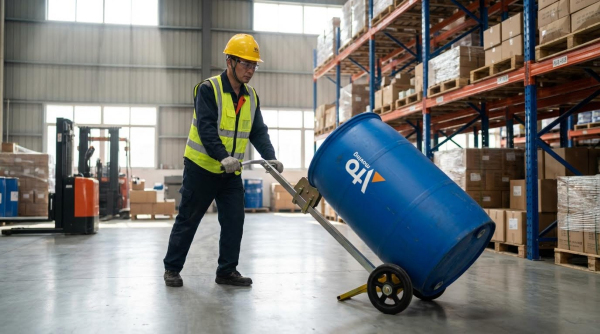
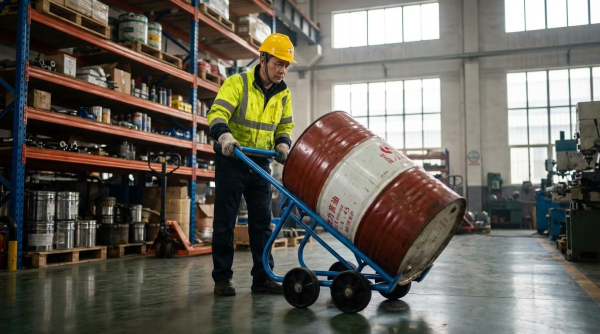
- Use mechanical aids: Drum trucks, dollies, and forklifts with attachments – are the default answer to how to move drums safely in modern facilities.
Why manual rolling and upending are high risk
Manual rolling and upending expose workers to back strain, pinched fingers, and crush injuries. Guidance stresses neutral spine posture, no crossed hands, and never using feet as stops, but also emphasizes that facilities should minimize manual handling and prioritize purpose-built drum trucks, carts, and forklifts wherever possible. Reference
💡 Field Engineer’s Note: If a floor has even a slight slope towards a drain, treat every upright drum as if it is on a ramp. One small nudge or pallet defect can start slow rolling that operators do not notice until the drum has gathered enough momentum to break chocks, crush toes, or punch through lightweight barriers. Design layouts so drums sit on level, contained pads rather than sloping slabs.
Regulatory context and compliance duties

Regulatory context and compliance duties for drum handling require you to control manual handling loads, chemical exposure, and storage conditions in line with occupational safety and hazardous materials rules.
In practice this means you must know what is inside each drum, keep containers sound and properly stacked, and apply specific rules for flammable or hazardous liquids.
- Identify contents: Labels, placards, and Safety Data Sheets (SDS) must be present and legible – unlabeled drums are treated as hazardous until identified. Reference
- Inspect before handling: Regulations and best practice require a visual inspection for corrosion, leaks, bulging, crystallization, and damaged chimes before any move – this is the first barrier against exposure and spills. Reference
- Control manual handling: Employer duties include assessing drum handling tasks, reducing high manual loads, and using mechanical aids wherever reasonably practicable – this directly addresses back and crush injuries. Reference
- Stacking and layout rules: Standards require materials in tiers to be stacked, blocked, and height-limited to prevent sliding or collapse, and aisles and exits must remain clear – this is why “two high, two wide” and marked aisles are widely adopted. Reference
- Flammable liquids handling: For flammable and combustible liquids in drums, regulations require approved pumps or self-closing valves for transfer, prohibit using air or gas pressure unless the drum is certified as a pressure vessel, and keep ignition sources at least about 15 m from storage areas – reduces fire and explosion risk. Reference
- Grounding and bonding: Where flammable liquids are transferred, grounding drums to earth and bonding them to receiving containers is mandatory good practice – prevents static discharge ignition. Reference
- Secondary containment: Environmental guidelines call for containment capacity of at least 10–25% of total stored volume or the largest drum, whichever is greater – so a single leak does not leave the bund. Reference
- Shock-sensitive wastes: Crystallization or powder around bungs must be treated as potentially explosive; only specially trained personnel may handle such drums – this is a non-negotiable specialist task. Reference
- PPE and exclusion zones: PPE must match the hazard class (toe protection, chemical gloves, eye/face, respiratory where needed), and exclusion zones should keep non-essential staff clear of crushing, splash, or vapor – turns individual PPE choices into a system. Reference
Linking duties to everyday handling decisions
These regulatory themes translate directly into daily choices about how to move drums safely. For example, if a drum holds flammable solvent, the compliant method is to move it with a rated drum truck or forklift attachment, keep it closed during transport, ground and bond during transfer, and keep it inside a bunded area with adequate secondary containment and clear egress routes.
💡 Field Engineer’s Note: When you map regulations into site procedures, write them as simple “if–then” rules at the point of use. For example: “If the drum label shows a flame pictogram, then only move it with bonded, rated equipment, keep bungs closed, and park it inside the designated bund.” This closes the gap between legal text and what an operator actually does with a pallet truck on a busy shift.
Engineering Controls For Moving And Stacking Drums
Engineering controls for moving and stacking drums mean choosing, sizing, and arranging mechanical equipment so drums stay stable, contained, and under control throughout every move. This is the core of how to move drums safely in real plants, not just on paper.
Because a full 200–208 L drum often weighs 180–360 kg, manual handling alone is never a safe primary strategy. Purpose-built trucks, grabs, lifters, and well-designed layouts convert that unstable tall cylinder into a controlled load path from floor to rack.
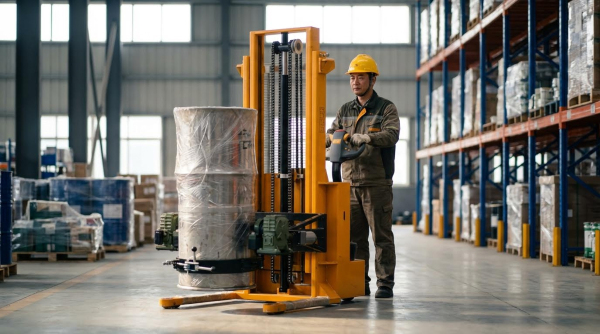
Selection criteria for drum trucks and attachments
Selection criteria for drum trucks and attachments start with drum mass, contents, and floor conditions, then add safety margin for dynamic effects and operator ergonomics.
A key part of how to move drums safely is matching the truck or attachment to the heaviest realistic drum and the actual route it will travel.
| Selection Factor | Typical Engineering Guideline | Operational Impact / Best For… |
|---|---|---|
| Drum capacity (volume) | Standard 200–208 L (55-gal) drums; verify diameter and height | Ensures jaws, cradles, and trucks fit both steel and plastic drums without slip or crushing |
| Drum mass range | Full drum ≈ 180–360 kg depending on density Reference | Defines minimum equipment rating; anything near 200 kg should be mechanically assisted, not manhandled |
| Equipment rated capacity | Truck/attachment rating should exceed heaviest drum; 450 kg rating gives robust margin for 360 kg drums Reference | Handles dynamic loads from starts, stops, and uneven floors without overstressing structure |
| Wheel type and width (manual trucks/carts) | Wide, resilient wheels to spread load and roll over joints and debris Reference | Reduces point load on slabs, improves steering on rough floors, and cuts push/pull force |
| Support points on drum | Support at both chimes or full cradle support rather than a single strap | Controls high center of gravity and prevents denting at thin shell sections |
| Forklift attachment capacity | Attachment + drum mass must be within truck’s residual capacity at required lift height | Prevents tip-over when lifting drums to mezzanines or high racks |
| Positive mechanical restraint | Grabs or clamps that lock under the chime; no reliance on friction alone | Prevents drums slipping during braking, mast tilt, or uneven ground |
| Compatibility with forks | Attachment pockets sized to fork section and spread; secure locking to carriage | Ensures repeatable, centered pick-up and avoids side loading the mast |
| Standardization | Limit to a small family of truck and attachment types across site Reference | Simplifies training, inspection, and spare parts; reduces misuse of “odd” devices |
- Capacity margin: Choose trucks and attachments with working load above the heaviest filled drum – this absorbs shock from potholes, ramp transitions, and emergency stops.
- Center-of-gravity control: Prefer designs that keep the drum close to the operator or mast – this shortens the overturning lever arm on slopes and turns.
- Route compatibility: Check door widths, ramp gradients, and thresholds – a well-chosen truck can clear 2.0–2.1 m doors and handle slight slopes without instability.
- Task fit: Differentiate between “move only” trucks and “move + pour/tilt” devices – using a tilt truck where only travel is needed can add unnecessary complexity and failure points.
- Ergonomics: Specify handle heights and geometries that keep wrists straight and backs neutral – this cuts musculoskeletal risk while still controlling a 200+ kg load.
How to check if an existing truck is adequate
Confirm the rating plate, then compare to your heaviest product (density × 200–208 L). Inspect welds, wheels, and restraints. If drums have shifted or slipped in the past, the truck or attachment is under-specified for that task or route.
💡 Field Engineer’s Note: When routes include even short ramps, treat a 2–3° slope as a design limit for manual drum trucks. Above that, the combination of high center of gravity and operator braking force can exceed wheel grip, causing runaways or sideways tipping on worn floors.
Design and capacity of grabs, clamps, and lifters
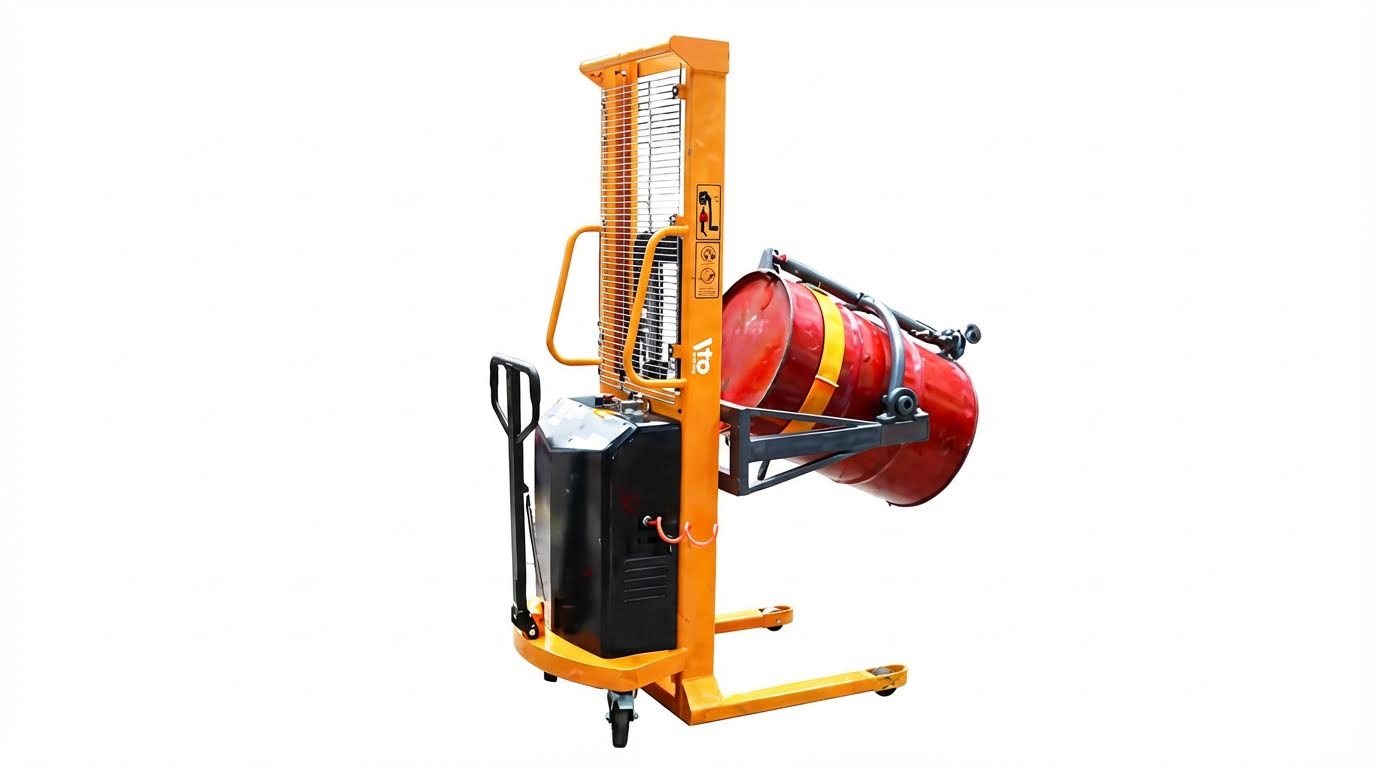
Grabs, clamps, and lifters must be designed with generous safety factors, drum-compatible geometry, and secure locking so the drum cannot slip or crush under static or dynamic loads.
These devices are the primary engineered answer to how to move drums safely with hoists, cranes, or forklifts, especially when lifting or tilting above floor level.
| Design Aspect | Good Engineering Practice | Operational Impact / Best For… |
|---|---|---|
| Working Load Limit (WLL) | Size for ≥ heaviest drum; apply ≥4:1 safety factor for lifting accessories Reference | Allows for shock from hoist starts/stops without yielding or fracture |
| Jaw / hook geometry | Profile matched to drum chime and diameter; generous radii at contact points | Prevents local shell crushing and maintains grip on slightly dented drums |
| Contact area | Spread load over enough area to keep local stress below drum shell yield | Reduces risk of buckling or permanent dents at grab points |
| Locking mechanism | Positive lock that cannot open under vibration; clear locked/unlocked indication | Stops accidental release when traversing uneven floors or using hoists |
| Material and corrosion resistance | Use stainless or coated carbon steel where chemicals or outdoor exposure exist | Maintains clamp function and strength over years of corrosive service |
| Balance and lifting point | Lift point aligned with drum center of gravity when full | Minimizes swing and rotation, improving placement into racks or process equipment |
| Compatibility with drum type | Specific models for steel vs plastic vs fiber drums | Ensures grip on flexible shells without crushing or slipping |
- Static vs dynamic loading: Rate clamps not just for “dead lift” but for snatch loads and side pulls – real hoist use rarely stays perfectly vertical.
- Visual status: Require clear visual cues (e.g., lock indicators) – operators should see at a glance that the grab is fully engaged before lifting.
- Pinch-point control: Design handles and levers outside the jaw travel – keeps fingers away from the chime-clamp interface during closure.
- Hoists and manipulators: Use hoists with pendant or two-hand controls for drum lifters – this keeps operators out of the drop zone while still allowing precise placement and tilting.
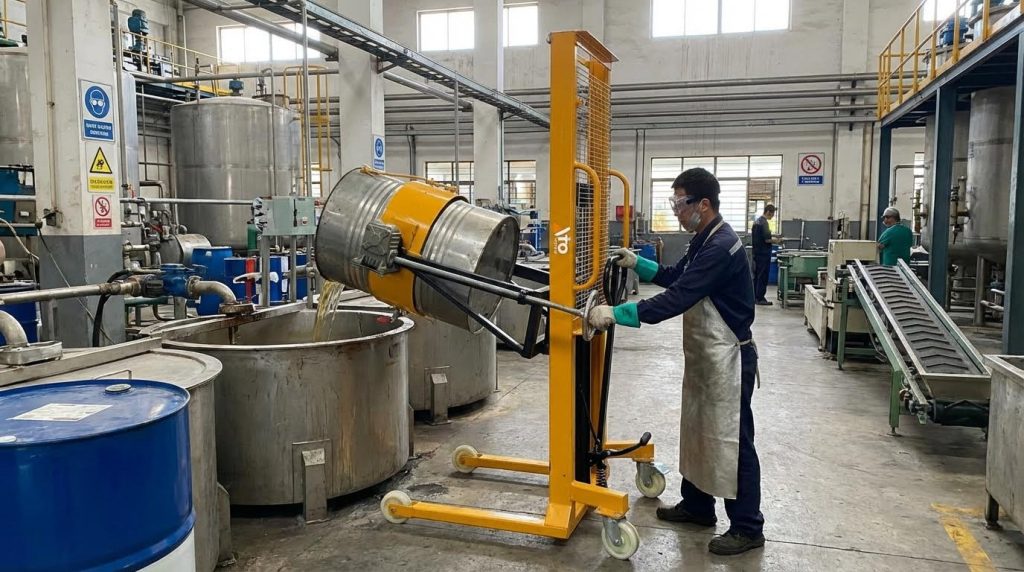
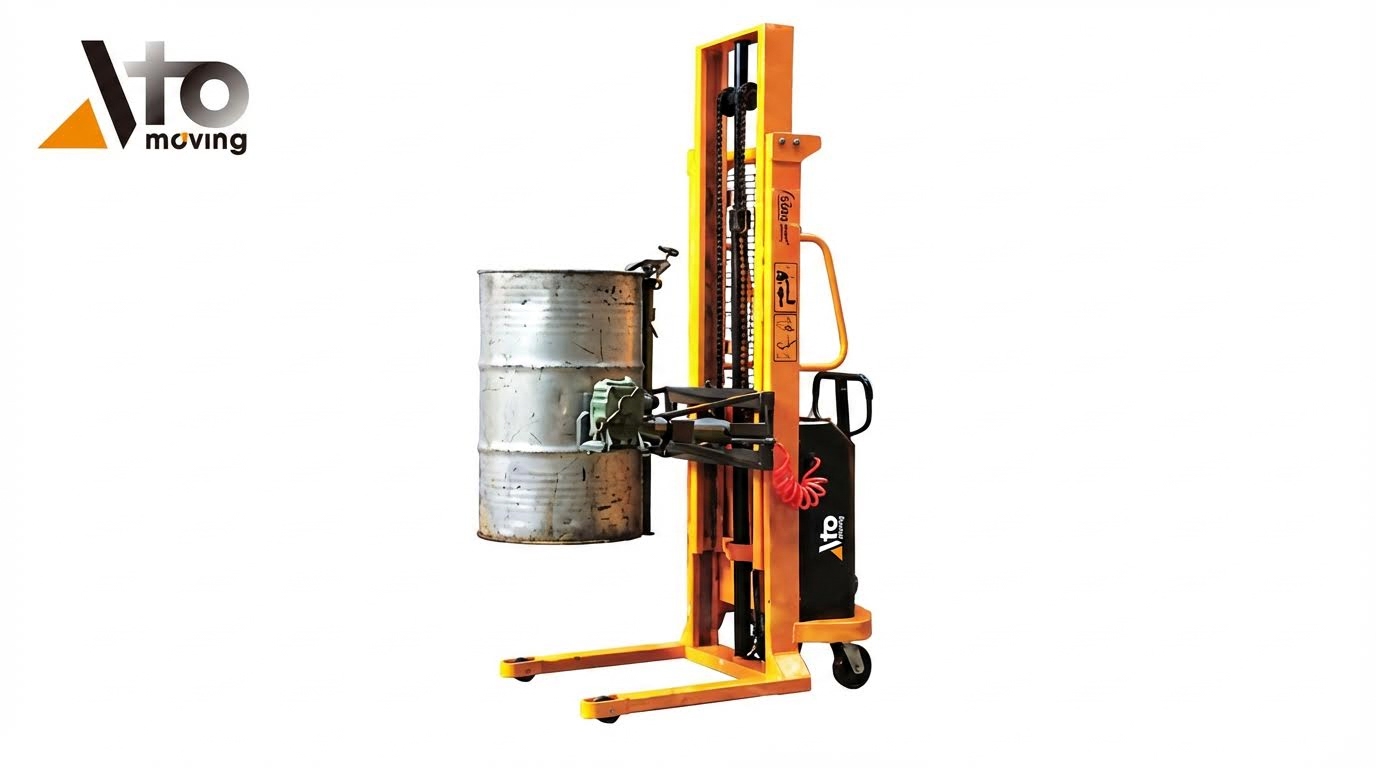
- Tilt and pour control: For decanting, specify tilt devices with mechanical stops and damped motion – avoids sudden center-of-gravity shifts that can topple stands or frames.
Using hoists, manipulators, and tilt devices safely
Pair the lifter WLL with the hoist rating and duty cycle. Check lifting speed so drums do not swing excessively. For manipulators feeding mixers or reactors, confirm that full rotation from vertical to horizontal keeps all clearances to guards, platforms, and other equipment.
💡 Field Engineer’s Note: In cold rooms or outdoor winter operation, oil in hoist gearboxes and dampers thickens, so tilting and rotation can become jerky. Always test motion with a dummy load at low temperature before lifting full drums of hazardous liquids near people or equipment.
Layout, stacking geometry, and floor capacity
Layout, stacking geometry, and floor capacity determine whether drums remain stable and inspectable over time, even when pallets age and contents vary.
Good layout is as important to how to move drums safely as the truck itself, because most incidents occur at stack edges, on weak floors, or where aisles are too tight.
| Design Element | Recommended Practice | Operational Impact / Best For… |
|---|---|---|
| Stack height (vertical tiers) | Common practice: limit 200–208 L drums to 2 tiers high in free-standing rows Reference | Controls combined center of gravity and allows inspection from floor level |
| Row width | Limit to 2 drums wide per row for 200–208 L drums Reference | Ensures labels, bungs, and seams remain visible without extra handling |
| Contact between tiers | Use pallets, planks, or plywood sheets between drum layers Reference | Spreads load from line contact at chimes into planar contact, reducing local stresses |
| End-up vs horizontal storage | End-up (vertical) preferred; horizontal only with robust chocks and stops | Vertical stacks are easier to inspect; horizontal stacks demand positive anti-roll measures |
| Horizontal stacking limit | Generally avoid more than 2 horizontal tiers Reference | Curved shell contact creates high local stresses; more tiers increase buckling risk |
| Floor load capacity | Verify slab/mezzanine rating vs total drum mass; one 200 L drum ≈ 180–360 kg Reference | Prevents cracking, settlement, or rack overload under dense drum arrays |
| Base condition | Use flat, undamaged pallets or plywood sheets; keep drums above standing water outdoors | Reduces rocking, puncture risk, and corrosion at drum bases |
| Aisle width and egress | Provide aisles wide enough for equipment turning and emergency exit clearance | Prevents side impacts from trucks and keeps evacuation paths open |
| Inspection access | Design rows so every drum face is visible from an aisle without ladders Reference | Enables quick leak, bulge, and corrosion checks during routine walk-throughs |
- Load paths in stacks: Remember that drum stacks carry load through narrow chime contact zones – over-height stacks amplify denting and buckling at these lines.
- Variability in drum condition: Never place visibly corroded or dented drums in lower tiers – treat them as weaker columns that can trigger progressive collapse.
- OSHA tiering rules: Follow requirements to stack, block, and interlock materials so they cannot slide or fall – this includes chocking horizontal drums and using dunnage between tiers.
- Marked zones and heights: Paint floor boxes and post maximum stack heights – this gives operators a visual check before adding another tier.
- Dynamic effects from trucks: Consider the extra load when forklifts brake or turn near stacks – impacts and vibrations can topple marginal stacks or shift drums on poor pallets.
Pr
Safe Transport, Storage, And Containment Of Drums
This section explains how to move drums safely during transport, design stable storage, and size containment so leaks or impacts do not turn into major incidents. The focus is on physics, layout, and regulatory expectations.
Blocking, bracing, and in-plant transport
Blocking and bracing keep heavy drums from shifting, tipping, or puncturing during in-plant moves or vehicle transport, which is central to how to move drums safely in real facilities.
A full 200–208 L drum typically weighs 180–360 kg, so even a small gap or sharp stop can generate high impact forces if drums slide or topple. Blocking, bracing, and correct pallet handling convert those forces into controlled load paths instead of random impacts.
| Control | Key Practice | Operational Impact |
|---|---|---|
| Pre-load pallet check | Inspect for broken boards, protruding nails, or warped decks before loading drums. | Prevents chime punctures and sidewall cuts that lead to leaks during transport. |
| Drum arrangement | Pack drums tightly on pallets; eliminate gaps using dunnage or spacers. | Reduces internal movement and tipping when forklifts brake or turn. |
| Blocking & bracing in trailers | Use chocks, load bars, wedges, and friction mats to lock pallets in place. Reference | Resists longitudinal and lateral accelerations during braking, cornering, or impacts. |
| Forklift approach | Control fork spacing, enter square to the pallet, avoid striking chimes or shells. | Prevents denting, leaks, and sudden loss of stack stability. |
| Stack geometry on pallets | Typically limit to two drums high and two wide per row. Reference | Keeps center of gravity low and within pallet footprint for better stability in motion. |
| In-plant equipment choice | Use drum trucks, dollies, or forklift attachments rated above 360 kg. drum cart | Maintains control over heavy drums and avoids overload on wheels and frames. |
- Inspect pallets and drums before loading: Look for leaks, bulging, corrosion, and damaged chimes – weak containers fail first under transport vibration.
- Eliminate free movement: Fill voids with dunnage, timber, or inflatable bags – prevents drums from gaining momentum inside trailers.
- Lock base tiers: Use chocks or blocks for any horizontal storage or mixed loads – stops bottom drums rolling out under upper tiers.
- Control forklift dynamics: Keep loads low, avoid sharp steering near stacks, and brake smoothly – limits overturning moments on tall, heavy drums.
- Verify securement before departure: Try to move pallets by hand or truck; they should not shift – simple functional test of blocking and bracing design.
How blocking and bracing relate to manual handling rules
Good blocking and bracing reduce the need for rework moves, double-handling, and emergency interventions, which are where many manual handling injuries occur. Fewer unplanned moves mean lower cumulative push, pull, and lift loads on operators.
💡 Field Engineer’s Note: When trailers arrive with “loose” drums, do not rush to unload. First, create a temporary blocking plan inside the trailer using dunnage and straps so drums cannot roll or cascade as the first pallet is removed.
Flammable liquids, grounding, venting, and PPE
Grounding, bonding, correct venting, and fit-for-purpose PPE are essential controls when drums contain flammable or hazardous liquids, and they are non-negotiable if you care about how to move drums safely without ignition or exposure.
Regulations for flammable and combustible liquids require approved transfer hardware, closed containers, and separation from ignition sources, while engineering practice adds static control and properly sized vents to avoid overpressure or vacuum collapse.
| Control Area | Key Requirement | Operational Impact |
|---|---|---|
| Regulatory storage & transfer | Use approved pumps, self-closing valves, or faucets; never use air pressure unless the drum is a certified pressure vessel. Keep ignition sources at least 15 m from flammable drum storage. Reference | Reduces explosion and flash fire risk during routine transfers. |
| Grounding | Connect drums to earth using dedicated antistatic cables and robust clamps on clean, unpainted metal. Verify continuity during inspections. Reference | Dissipates static charge build-up from filling or pumping. |
| Bonding | Bond source drum, receiving container, and metallic transfer equipment together so they share the same potential. Reference | Prevents spark discharge between containers during liquid transfer. |
| Venting | Fit pressure-vacuum vents to appropriate bung openings; typical set pressures are about 0.35 bar. Size vents to match liquid properties and flow rates. Reference | Prevents drum deformation, rupture, or vacuum collapse during filling and emptying. |
| PPE for flammable / hazardous contents | Safety footwear with toe protection, chemical-resistant gloves, eye/face protection, and respiratory PPE as indicated by SDS. Reference | Limits injury from splash, vapors, and crush hazards during handling. |
- Confirm contents before connection: Check label and SDS, then match transfer method, venting, and PPE to the actual hazard – prevents incompatible hose or tool use.
- Apply grounding and bonding before flow: Connect all clamps, then verify, then start pumps – removes static as a potential ignition source.
- Keep drums closed when not in use: Ensure bungs and lids are tight between transfers – minimizes vapor release and contamination.
- Use defined exclusion zones: Mark and enforce zones around transfer, crushing, or dispensing points – keeps non-essential personnel away from splash and vapor.
- Escalate suspect drums: If you see bulging, crystallization, or powder deposits at bungs, treat as shock-sensitive waste – only trained specialists should touch these drums.
How venting and grounding affect storage layout
Rows that handle flammable transfers need fixed grounding points, space for bonding cables, and headroom for vent fittings. This often drives slightly wider aisles and clear overhead space compared with inert product storage.
💡 Field Engineer’s Note: In real plants, static issues often show up first as “mystery” pinhole leaks or scorched paint near bungs. If you see this, stop transfers, check your grounding and bonding scheme, and verify that flexible hoses are rated as conductive or antistatic and properly bonded.
“”
Final Thoughts On Drum Handling Risk Reduction
Effective drum handling risk reduction comes from treating every drum as a heavy, unstable, and potentially hazardous pressure vessel on legs. Geometry, layout, and equipment choice must all work together so the drum never has a chance to tip, roll, or leak in an uncontrolled way. When you limit stack height, keep the center of gravity inside the pallet footprint, and verify floor capacity, you turn random forces into predictable load paths the structure can carry.
Engineering controls do the heavy lifting. Rated trucks, grabs, and clamps convert hundreds of kilograms in a tall cylinder into a secure, guided load. Blocking, bracing, and conservative pallet practices then keep that load stable through braking, cornering, and vibration. Grounding, bonding, and correct venting close the loop for flammable and reactive contents, while PPE and exclusion zones protect the people in the area.
The best practice for operations and engineering teams is clear. Standardize on purpose-built Atomoving equipment sized above your heaviest drum. Enforce “two high, two wide” stack rules on sound floors with marked aisles and bunds. Write simple, visible “if–then” procedures that tie contents, equipment, and controls together. When you do this, safe drum handling becomes the normal outcome, not a lucky one.
Frequently Asked Questions
How to move drums safely?
Moving drums safely requires proper technique to avoid injury and ensure stability. Start by keeping your shoulders low and close to the drum. Place your hands near the chime at shoulder width and slowly push forward with your legs until the drum reaches its balance point. When using the drag or pull method, brace the drum with your foot to prevent sliding and shift your weight to your rear foot for better control. USDA Drum Moving Guide.
What equipment can assist in moving heavy drums?
For moving heavy drums, specialized material handling equipment is recommended. Drum handlers or drum dollies can provide better control and reduce manual strain. If lifting is required, a forklift attachment designed for drum handling ensures safety and efficiency. Always inspect the equipment before use and follow the manufacturer’s guidelines. For more details on safe drum handling practices, refer to industry standards like OSHA regulations.