This guide explains how to transport 55 gallon drums safely on trucks by combining engineering-grade securement with DOT, OSHA, EPA, and NFPA compliance. You will learn how to size tie-downs, design pallet loads, prevent leaks, and pass inspections while protecting workers and the environment.
Regulatory Framework And Hazard Classification
This section explains how to transport 55 gallon drums legally by aligning federal, state, and local rules with correct hazard classification and labeling. You will see how regulations translate into day-to-day loading, paperwork, and securement decisions.
Key DOT, OSHA, EPA, And NFPA Requirements
Key DOT, OSHA, EPA, and NFPA requirements define the legal minimum for how to transport 55 gallon drums on public roads and at your facility. Understanding who controls what prevents gaps between transport, worker safety, and environmental protection.
| Regulator / Code | Primary Focus | Typical Requirements For 55-gallon (≈200 L) Drums | Operational Impact |
|---|---|---|---|
| DOT / PHMSA – 49 CFR | Off-site transport of hazardous materials | UN/DOT packaging, closure instructions, hazard classification, shipping papers, placards, cargo securement | Controls drum type, markings, labels, placards, and how drums are secured on trucks |
| FMCSA – Cargo Securement Rules | Preventing load loss in transit | Drums must not leak, shift, roll, or fall; tie-downs and anchor points must meet working load limit (WLL) rules | Determines number and strength of straps, blocking, and bracing needed for highway loads |
| OSHA – 29 CFR 1910 | Worker protection during handling and storage | Labeling, hazard communication, PPE, safe drum handling, storage and transfer practices | Governs how workers fill, move, and load drums safely at the plant or warehouse |
| EPA – Hazardous Waste / Spill Control | Environmental protection and secondary containment | Secondary containment sized for ≥10% of total volume or largest drum; prompt cleanup of spills | Drives design of drum storage areas and spill pallets before and after transport |
| NFPA Codes | Fire and explosion risk for flammable/combustible liquids | Storage separation distances, maximum quantities, ignition control, fire protection features | Influences where and how flammable drums are staged, loaded, and parked |
| State / Local Codes | Additional local transport and storage controls | Permits, flash point thresholds, special rules for gasoline and low-flash liquids | May restrict routes, container types, or quantities in specific cities or states |
U.S. road transport of 55-gallon drums falls under Title 49 of the Code of Federal Regulations, where the hazardous materials agency defines packaging performance, closure, and hazard communication rules for commerce for steel and plastic drums. FMCSA cargo securement rules then require that drums do not leak, shift, roll, or fall from the vehicle under normal or emergency driving, and that tie-down devices and anchor points meet working load limit criteria sized to braking and cornering forces during highway transport.
OSHA standards focus on the people loading and unloading drums, requiring correct labeling, hazard communication, and PPE when workers fill, handle, or store drums on site under sections such as 29 CFR 1910.106 and 1910.1200 for fuel and chemical drums. EPA rules add environmental protection, especially for hazardous waste drums, by requiring secondary containment systems that can hold at least 10% of the total stored volume or the largest single container, with spills and rainwater removed promptly to maintain capacity in drum storage areas.
NFPA codes overlay fire-protection guidance for flammable and combustible liquids, including maximum quantities, separation distances, and ignition control measures for drum storage and transfer zones around truck loading points. On top of this, state and local codes can tighten controls: for example, New York City requires permits to transport, store, or deliver many petroleum products, while Oregon limits gasoline on worker-transport vehicles to small UL-approved safety containers of at most 19 L placed outside passenger areas under state-level rules.
- DOT / PHMSA scope: Off-site transport in commerce – Defines how to transport 55 gallon drums legally on public roads.
- FMCSA securement: Prevent rolling, shifting, and loss – Translates into strap counts, WLL checks, and blocking layouts.
- OSHA worker safety: Labeling, PPE, procedures – Protects loaders, drivers, and warehouse staff.
- EPA containment: Spill and runoff control – Prevents a single leaking drum from becoming an environmental incident.
- NFPA fire codes: Flash point, ignition, fire load – Reduces fire severity if a drum fails during loading or parking.
- State/local rules: Permits and special limits – Can change what is allowed in cities or specific corridors.
💡 Field Engineer’s Note: When route-planning bulk drum moves, I always review both federal hazmat rules and local fire codes along the corridor; a load that is legal on the highway can still violate a city’s petroleum permit or tunnel restriction.
How this framework shapes day-to-day drum loading
In practice, supervisors must confirm that every 200 L drum carries compliant UN/DOT markings, that workers follow OSHA labeling and PPE rules at the dock, that EPA containment is in place where drums are staged, and that truck securement meets FMCSA WLL and blocking requirements before dispatch.
Hazard Classes, UN Codes, And Labeling Rules
Hazard classes, UN codes, and labeling rules determine which 55-gallon drums qualify as hazardous materials and how they must be marked, documented, and placarded in transport. Getting this classification right is the first step in deciding how to transport 55 gallon drums safely and legally.
| Item | What It Is | Key Elements For 55-gallon Drums | Operational Impact |
|---|---|---|---|
| Hazard Class | DOT risk category | Flammable liquid, corrosive, oxidizer, etc., based on properties such as flash point | Drives label type, placards, and many packaging and segregation rules |
| UN Number | Four-digit code for substance | Printed on drum near hazard label, e.g., UN1993 for some flammable liquids | Links drum contents to shipping papers and emergency response guides |
| Packing Group | Severity level within class | PG I (high), II (medium), III (low) based on test data | Influences performance level required in UN packaging code |
| UN Packaging Code | Marking for drum design | Shows drum type, material, performance level, specific gravity or test pressure, and manufacture data | Confirms that the drum design passed required performance tests for the product |
| Hazard Labels | Pictograms on drum body | Primary and subsidiary risk labels such as flammable liquid or corrosive | Provide quick visual risk identification for drivers and responders |
| Vehicle Placards | Large hazard signs on truck | Selected based on total quantity and class per 49 CFR tables | Alert enforcement and emergency services to load-level hazards |
Correct hazard class assignment is the starting point for any compliant shipment of 55-gallon drums that contain hazardous materials, because it dictates the UN number, packing group, and allowed fill ratio for each product. Under DOT rules, flammable liquids typically have flash points below about 60 °C, while combustible liquids have higher flash points and often face less stringent transport requirements for road movement. Local codes can then carve out exceptions: one city code, for example, treated certain petroleum liquids with flash points above about 150 °C as not requiring a local permit if they already complied with federal transport rules, while low-flash liquids like gasoline triggered stricter local controls due to higher fire risk.
Each compliant drum carries durable UN markings that encode the packaging type, material, performance level, specific gravity or hydrostatic test pressure, and year and country of manufacture under UN/DOT standards. Hazard labels on the drum body must match the primary and any subsidiary risks, and open truck beds must treat any drum containing hazardous material, or even one that previously contained it but has not been cleaned, as hazardous for labeling and documentation purposes during transport. Vehicle placards are then selected based on the total quantity and hazard class on the vehicle using 49 CFR tables, which means that even a few full 200 L drums of high-hazard material can trigger placarding requirements for the truck.
- Assign hazard class first: Use flash point, toxicity, and other properties – This sets the baseline for every other decision.
- Verify UN drum code: Match performance level and material compatibility – Prevents corrosion, softening, or permeation failures in transit.
- Apply correct labels: Primary and subsidiary risks on the drum body – Guides safe handling and emergency response.
- Match placards to load: Use 49 CFR quantity thresholds – Ensures the truck signals its hazards correctly on the road.
- Treat uncleaned empties as hazardous: Until cleaned and certified – Avoids under-classifying residual risks.
💡 Field Engineer’s Note: Most enforcement issues I have seen were not about exotic chemicals but about “routine” products in 200 L drums shipped with missing UN codes, wrong hazard labels, or no placards after a last-minute load change—classification discipline prevents these problems.
Quick field check for drum markings
Before loading, confirm that each drum shows a legible UN packaging code, a matching hazard label, and a UN number aligned with the shipping papers. Any drum with damaged, painted-over, or missing markings should be quarantined until relabeled or reconditioned.
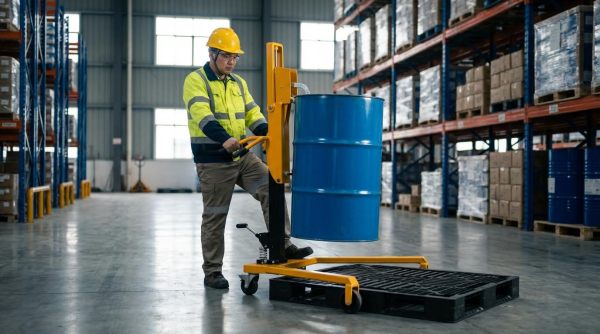
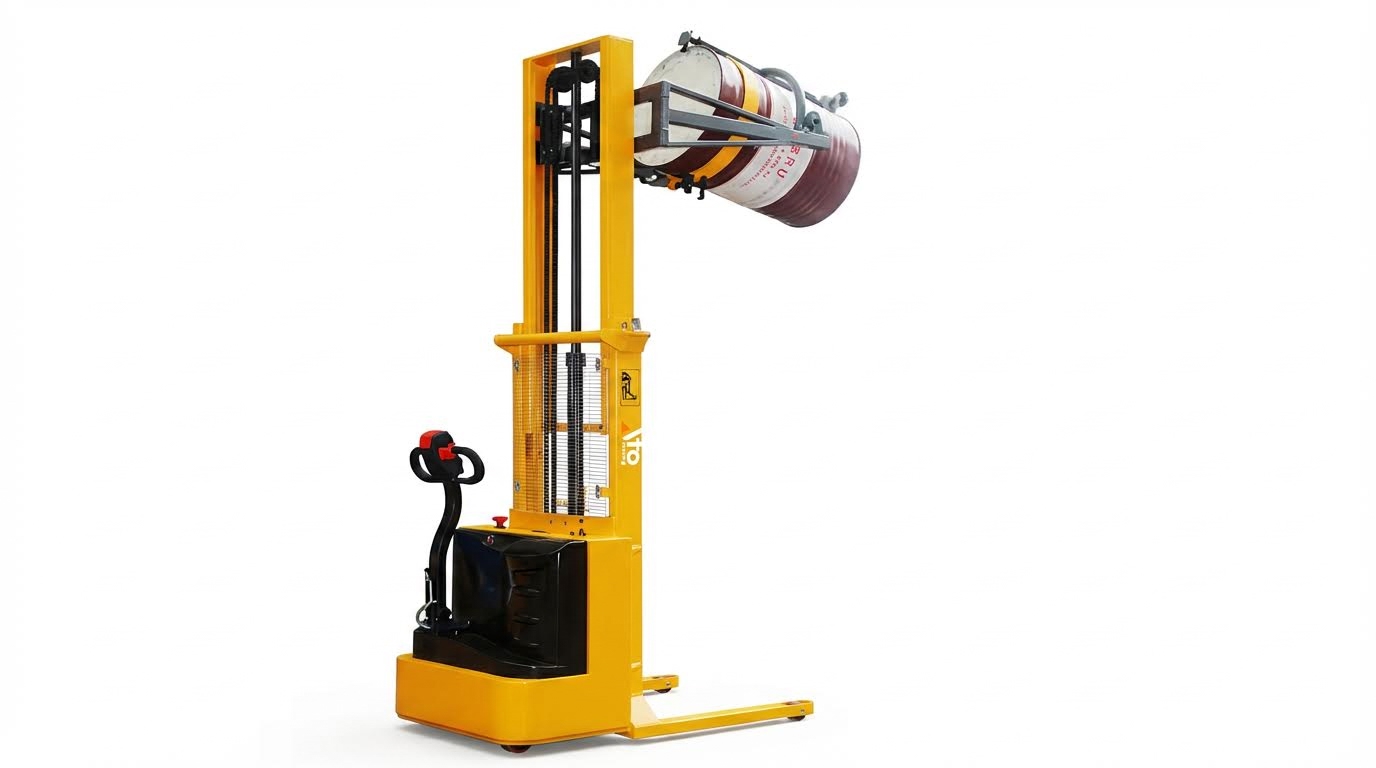
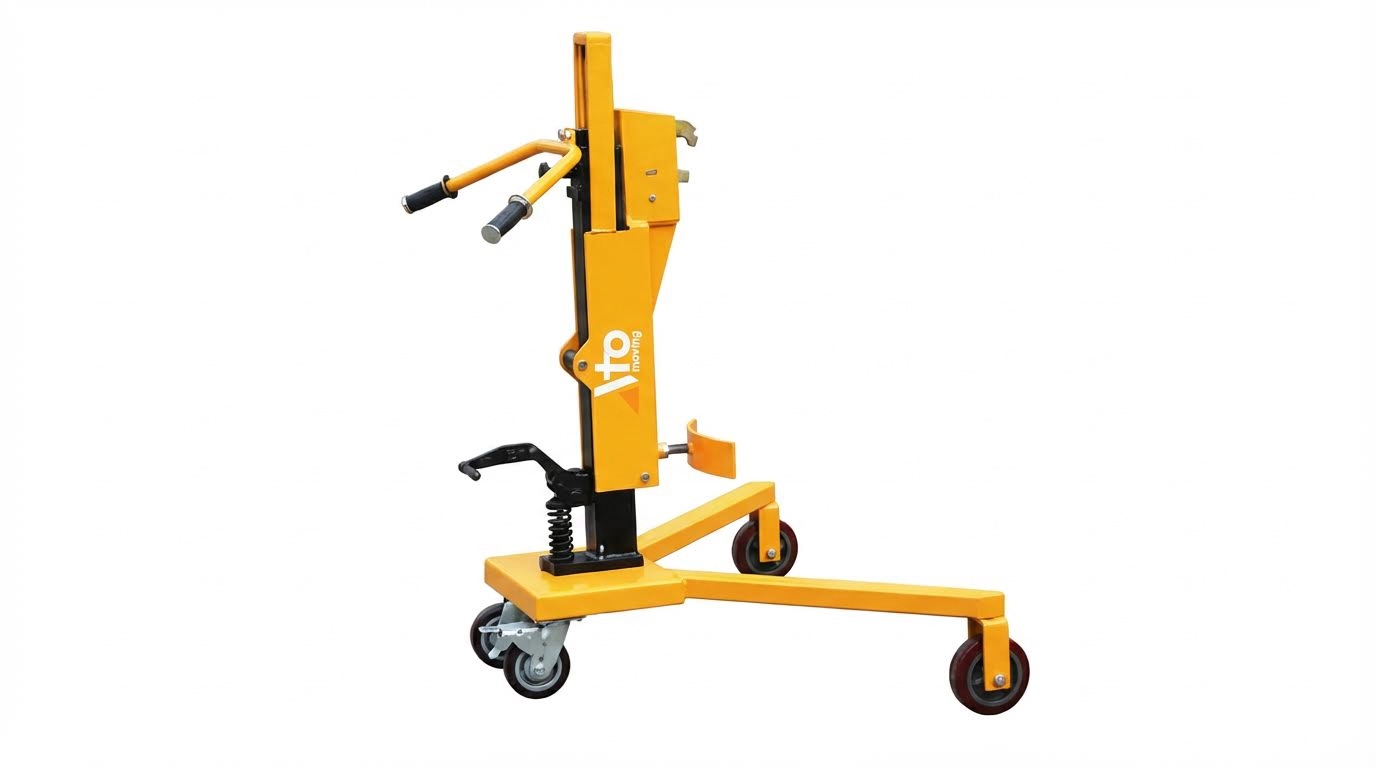
When handling drums, equipment such as a drum cart or barrel lifter can improve efficiency and safety. Additionally, tools like a hydraulic pallet truck or manual pallet jack are essential for moving heavy loads securely.
Engineering Drum Securement For Highway Loads
Engineering drum securement for highway loads means sizing tie-downs, friction, blocking, and bracing so 55-gallon (200 L) drums cannot slide, tip, or roll under real braking and cornering forces. This is the core of how to transport 55 gallon drums safely and compliantly on public roads.
For road transport, you design securement around realistic accelerations, drum mass, and layout, then match that to rated hardware and blocking. The goal is to keep every drum fixed to the vehicle structure for all normal and emergency maneuvers.
Load Cases, Inertial Forces, And Tie-Down Sizing
Load cases, inertial forces, and tie-down sizing define the minimum restraint forces needed so each drum stays put during hard braking, cornering, and impacts. You start from g-loads, convert them to kN, then select enough tie-down capacity with margin.
Engineers designing securement for 55-gallon drums use typical road accelerations of about 0.8 g forward, 0.5 g sideways, and 0.5 g rearward for design calculations. A full 55-gallon drum often weighs more than 170 kg, so inertial forces easily exceed 1.3 kN per drum in hard braking conditions. Engineers must ensure each drum is fixed under braking, cornering, and impact loads.
| Design Parameter | Typical Value / Range | What It Means For 55-Gallon Drums | Operational Impact |
|---|---|---|---|
| Drum volume | ≈ 200 L (55 gal) | Often >170 kg filled | Each drum is a 0.17–0.25 tonne load unit |
| Forward acceleration | ≈ 0.8 g | Hard braking case | Securement must resist ≈ 0.8 × drum weight per drum |
| Lateral acceleration | ≈ 0.5 g | Cornering / lane change | Controls sliding and tipping in curves |
| Rearward acceleration | ≈ 0.5 g | Acceleration / reverse impact | Prevents rearward shift into doors or bulkheads |
| Primary restraint | Straps, chains, clips | Take most of the inertial load | Must be sized and routed to keep drums fixed |
| Secondary restraint | Friction (deck, pallet) | Reduces net sliding force | Never relied on alone due to moisture/contamination |
Typical design practice is:
- Step 1 – Define drum mass: Use the heaviest plausible fill – covers density variation and overfill.
- Step 2 – Apply g-factors: 0.8 g forward, 0.5 g lateral and rearward for road transport – represents emergency maneuvers.
- Step 3 – Subtract friction conservatively: Only if surfaces are dry, clean, and known – avoids overestimating restraint from dirty decks.
- Step 4 – Convert to tie-down requirement: Divide required restraint by the number and orientation of tie-downs – ensures each strap has enough capacity.
Friction between the drum and pallet deck, and between the pallet and vehicle bed, provides initial resistance to movement. But it is treated as secondary because contamination, moisture, and vibration can reduce it sharply. Primary restraint must come from mechanical securing methods such as straps and reusable clips. Friction is therefore not a stand‑alone safety measure.
How to roughly estimate tie-down force per drum
1) Assume 200 kg per drum. 2) Forward design case = 0.8 g ⇒ 0.8 × 200 ≈ 160 kg equivalent force. 3) Convert to force ≈ 1.6 kN. 4) If you use two straps effectively sharing that load, each strap must provide at least 0.8 kN of reliable restraint in the forward direction, before any safety factor or regulatory multiplier is applied.
💡 Field Engineer’s Note: When trailers run mixed routes with steep grades, I treat downhill braking on a 5–6% slope as effectively higher than 0.8 g. I then add extra tie-downs or reduce drum count per pallet so securement still works when the road profile amplifies braking forces.
Ratchet Straps, WLL, And Strapping Standards
Ratchet straps, working load limits (WLL), and strapping standards translate your calculated restraint forces into real hardware choices that inspectors can verify on the road. You match the WLL of straps, anchors, and seals to the design loads with a safety margin.
Ratchet straps are widely used to secure 55-gallon drums on flatbeds and in dry vans because they are light, quick to tension, and easy to inspect. Selection starts with verifying strap WLL and anchor capacity against the calculated inertial forces. Operators typically use webbing widths around 25–50 mm for road use and must ensure every device has a visible WLL mark.
| Strapping Aspect | Key Requirement | Why It Matters For Drums | Best For… |
|---|---|---|---|
| Ratchet strap WLL | Must exceed design load per strap with safety factor | Prevents strap overload during hard braking | Highway loads with repeated use and inspections |
| Strap width | ≈ 25–50 mm webbing common | Wider straps distribute pressure on drum chimes | Over-the-top lashing of upright drums |
| Hardware WLL | Hooks, winches, anchor points equal or higher WLL | Weakest-link principle governs actual capacity | Ensuring compliance during roadside checks |
| Condition | No cuts, burns, severe abrasion, or chemical attack | Damage sharply reduces tensile strength | High-turnaround lanes where straps see rough use |
| Steel strapping | Must meet ASTM D3953 minimum strength and elongation | Provides rigid clamping of drums to pallets | Export loads and long-duration storage |
| Nonmetallic strapping | Must follow ASTM D3950 for polyester/PP | Higher elongation and energy absorption | Loads subject to vibration but limited sharp edges |
Steel strapping standards such as ASTM D3953 specify classes, widths, thicknesses, and minimum mechanical properties for steel straps and seals, including tensile strength and elongation. Nonmetallic strapping standards such as ASTM D3950 cover polyester and polypropylene systems, noting their temperature sensitivity and long-term relaxation. These standards ensure straps and seals maintain strength under vibration and handling.
- Over-the-top routing: Straps should pass over the drum top to control tipping – this clamps the high center of gravity down to the deck.
- Avoid sharp edges: Contact with steel edges or bolt heads can cut webbing – use corner protectors or change routing.
- Visible markings: Each tie-down device must show its WLL – this supports enforcement and internal audits.
- Verify anchors: Anchor points must have at least the same WLL as the strap – otherwise the anchor is the failure point.
Using pallet straps vs vehicle tie-downs
Pallet straps (steel or polyester) clamp drums to the pallet, creating a single rigid unit. Vehicle tie-downs then secure that unit to the truck. This two-level approach is often more stable than trying to lash individual loose drums directly to the vehicle, especially when you move pallets with forklifts between trailers or modes.
💡 Field Engineer’s Note: On high-vibration routes, I prefer polyester straps over PP because they hold tension better over time. But I always derate them near heat sources like exhaust paths, since temperature accelerates creep and relaxation in nonmetallic webbing.
Blocking, Bracing, Friction, And Anti-Roll Devices
Blocking, bracing, friction, and anti-roll devices stop drums from sliding or rolling into gaps that straps alone cannot control. You use the vehicle structure, timber, void fillers, and dedicated cradles to eliminate free space and rolling paths.
Drums tend to roll and wedge under impact unless the layout and blocking specifically prevent this. Effective blocking uses bulkheads, sidewalls, timber blocks, wedges, cross-boards, void fillers, dunnage bags, and side boards to remove free space. Securement plans must also allow safe unloading so drums do not surge forward when restraints are released.
| Control Method | Main Function | Typical Use With 55-Gallon Drums | Operational Impact |
|---|---|---|---|
| Blocking (timber, boards) | Stop sliding | Boards against pallet edges or drum rows | Prevents forward shift under 0.8 g braking |
| Bracing to vehicle structure | Transfer load into walls/bulkheads | Cross-boards between sidewalls, against headboard | Uses trailer frame as structural stop |
| Anti-roll devices | Stop rolling | Chocks, drum cradles, molded pallet recesses | Critical when drums are on their sides or in mixed loads |
| Void fillers / dunnage bags | Eliminate gaps | Inflatable bags between pallet stacks | Prevents drums gaining momentum in impacts |
| Friction surfaces | Increase μ between units | Anti-slip mats under pallets/drums | Reduces strap load but not a primary restraint |
Incident data show that many failures in how to transport 55 gallon drums safely came from weak blocking and bracing rather than drum design. Common problems included drums shifting because blocking allowed sliding under hard braking, lack of anti-roll devices when drums were shipped on their sides, and poor pallet quality leading to deck board failure and tipping. Stable pallet design and verified strap tension prevented many of these incidents.
- Eliminate free space: Any gap lets a drum accelerate before impact – this multiplies forces on straps and boards.
- Use anti-roll features: Molded drum pallets or cradles locate the chime – this resists both sliding and rolling.
- Focus on pallet edges: For palletized drums, block at pallet corners – this transfers load through the pallet, not the drum shell.
- Plan for unloading: Sequence blocking so removing one element does not release the whole load suddenly – reduces risk to workers when doors open.
Friction vs mechanical restraint in real operations
Anti-slip mats and clean decks can significantly cut the sliding forces that straps and blocks must carry. But in real operations, spilled product, rain, ice, or dust can drop the friction coefficient well below design assumptions. That is why regulations and engineering practice treat friction as a bonus, not the main securement method, especially for hazardous materials in 55-gallon drums.
💡 Field Engineer’s Note: In mixed loads where only a few drum pallets sit near the rear doors, I always add an extra timber cross-board or load bar just ahead of the doors. If a strap loosens in transit, that last mechanical barrier is often what prevents drums from blowing out when the doors are opened at the dock.
Palletizing, Equipment, And Operational Controls
This section explains how to transport 55 gallon drums safely by engineering stable pallets, choosing the right handling equipment, and enforcing operational controls that prevent tipping, punctures, and leaks in real highway conditions.
Pallet Design, Drum Layout, And Stability
Correct pallet design and drum layout create a stable unit load so drums resist tipping, sliding, and puncture during truck transport, even under 0.8 g braking and 0.5 g cornering loads.
Pallet choice is the foundation of unit load stability when planning how to transport 55 gallon drums. Operators typically use plastic or hardwood pallets with tight deck gaps, generally limited to about 20 mm so the drum chime cannot drop through and create point loading that leads to tipping or puncture according to drum transport guidance. Dedicated drum pallets may include molded recesses or stabilizing disc systems that positively locate each drum and resist sliding under lateral accelerations, with typical sizes around 1,219 mm × 1,219 mm and static capacities near 40 kN for four 200 L drums as described in palletization engineering methods.
Drum layout must control the high center of gravity of a 200 L (55-gallon) drum, which increases tipping risk during stacking and transport. Engineers favor tight patterns such as four 200 L drums on a 1,200 mm × 1,000–1,200 mm pallet in a square layout because this provides symmetry, closes gaps, and reduces eccentric loading that amplifies rocking during cornering based on center-of-gravity control practices. Mixed layouts or overhang create larger voids and leverage arms, which allow drums to gain momentum under 0.8 g forward braking and overload straps or pallet deck boards. For road transport, many operators therefore restrict palletized drum stacks to a single pallet high to keep the center of gravity low and minimize toppling risk as highlighted in incident analyses.
| Design Element | Typical Specification / Practice | Engineering Purpose | Operational Impact For Drum Transport |
|---|---|---|---|
| Pallet material | Hardwood or recycled plastic pallet | Provide stiffness and damage resistance under concentrated drum loads | Reduces deck board failure and drum tipping during handling |
| Deck gap | ≤ 20 mm between boards | Prevent drum chime from dropping between boards | Avoids point loading and puncture when forklifts bounce or tilt |
| Pallet size for 4 drums | ≈ 1,200 mm × 1,000–1,219 mm | Accommodate four 200 L drums in square pattern | Creates tight, symmetric load that resists shifting at 0.5 g lateral |
| Dedicated drum pallet features | Molded recesses or stabilizing discs | Positively locate drums and increase friction | Improves stability on trailers and in containers |
| Stacking practice | Often limited to one pallet high for road | Lower overall center of gravity | Mitigates toppling on uneven roads or emergency maneuvers |
| Unitization | At least two metal or high‑strength plastic straps plus overpack slipcover | Clamp drums into a single unit load | Prevents individual drum movement and reduces puncture incidents |
- Use tight drum patterns: Four‑drum square layouts – Reduce internal voids and lateral rocking under cornering.
- Avoid overhang: Keep all drum chimes fully supported on the pallet – Prevents edge crushing and tipping when forklifts brake.
- Control deck gaps: Maintain gaps under about 20 mm – Stops chime drop‑through and local overstress of the shell.
- Unitize properly: Apply at least two straps and a full-height slipcover – Turns four loose drums into one stable module.
- Limit stack height on trucks: Prefer single‑pallet stacks for road – Cuts overturning moment in sudden maneuvers.
How pallet design ties into regulatory compliance
Cargo securement rules require that drums do not leak, shift, roll, or fall from the vehicle under normal and emergency conditions. Stable pallet design with proper unitization helps loaders meet these requirements by controlling drum motion within the working load limits of tie‑downs and blocking systems.
💡 Field Engineer’s Note: In real fleets, many “mystery leaks” traced back to weak or broken pallets, not the drums themselves. Upgrading to stiffer plastic drum pallets with molded recesses almost eliminated punctures when forklifts hit dock plates at speed.
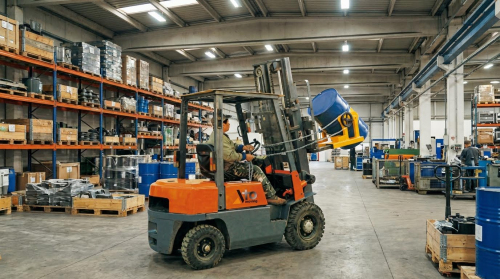
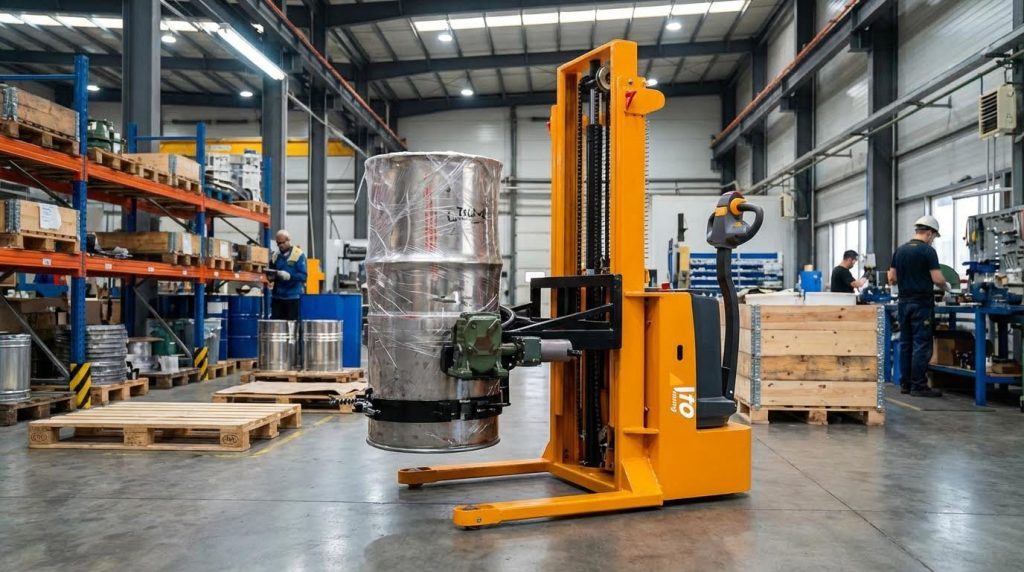
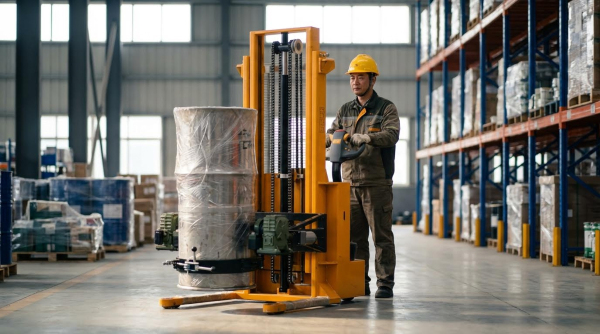
Handling Equipment, Automation, And Incident Prevention
Appropriate handling equipment and automation reduce impact loads, punctures, and drops, while operational controls such as inspections and training close the loop on how to transport 55 gallon drums safely and compliantly.
Incident data show that many drum failures during transport came from handling events such as forklift punctures, dropped pallets, and drums shifting because of weak blocking and bracing rather than from drum design limitations according to PHMSA incident reviews. Automated palletizers and integrated securing stations address these issues by placing drums onto pallets with repeatable, low‑impact motions and immediately applying straps or reusable drum clips once the pattern is complete as highlighted in palletization system design. This reduces musculoskeletal injury risk for workers and lowers the probability of dropping or denting drums during manual stacking.
Engineers increasingly use reusable drum clip systems that create a standardized interface between drum chimes and pallets or lashing systems. Certified clip systems have been tested under standards such as ISTA 3E and EUMOS 40509 to resist defined longitudinal and lateral accelerations representative of 0.8 g braking and 0.5 g cornering based on securement testing data. Field data indicated operator time reductions of 50–90% compared with traditional strapping alone, which makes it easier to maintain consistent securement quality across shifts and sites. To optimize layouts and flows before investing in hardware, some facilities deploy digital twins and discrete‑event simulations to model conveyor accumulation, palletizer capacity, and AGV routing, while multibody dynamics models assess how palletized drum stacks respond to braking, cornering, and impact events during transport as described in digital twin applications.
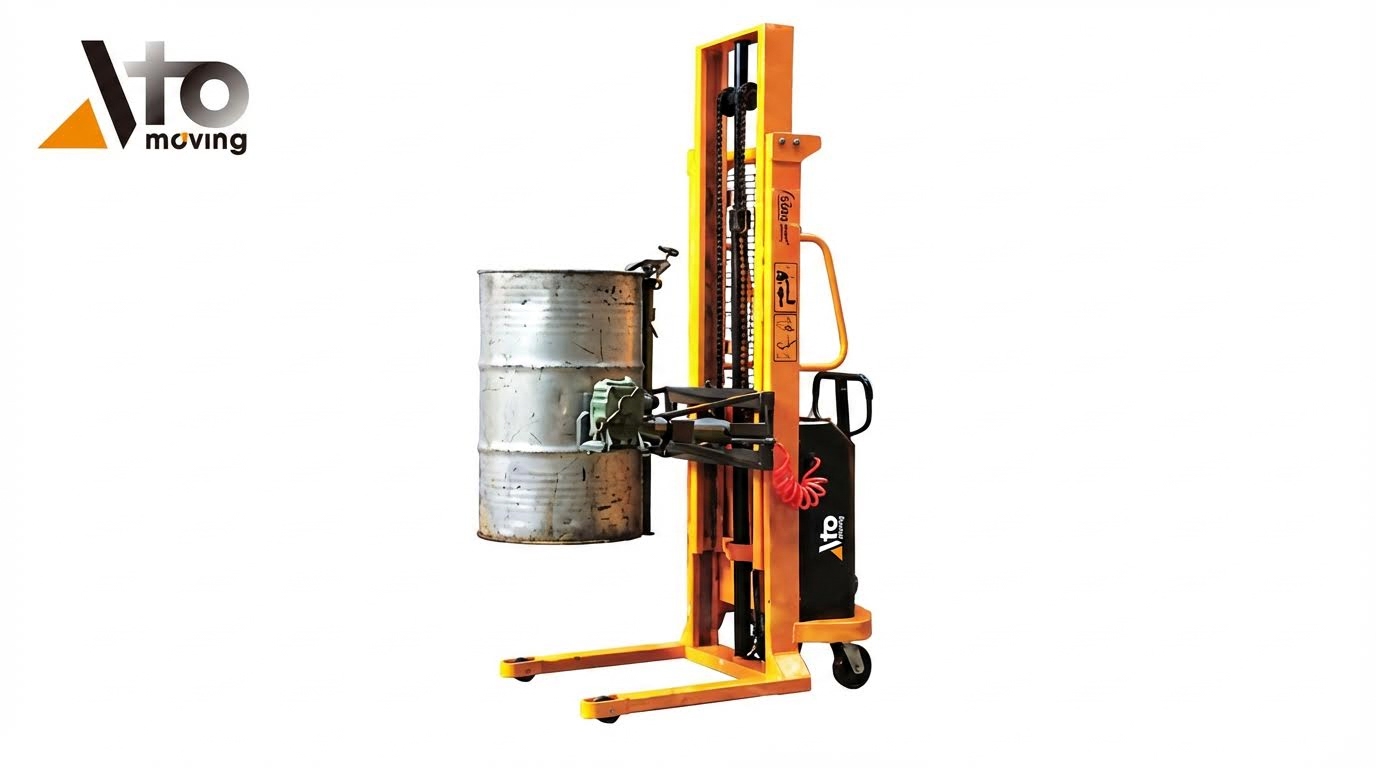
- Forklifts and drum handlers: Use dedicated drum clamps or cradles – Prevent shell puncture compared with bare forks.
- Automated palletizers: Place drums with controlled trajectories – Reduce impact damage and pattern variability.
- Reusable drum clips: Lock chimes together and to the pallet – Improve lateral restraint without over‑reliance on straps.
- Integrated strapping stations: Strap or clip immediately after pattern completion – Eliminate unrestrained pallets waiting in queues.
- Digital twins: Simulate flows and load responses – Reveal bottlenecks and instability before physical deployment.
- Step 1: Inspect pallets and drums before loading – Removes damaged components that are prone to failure in transit.
- Step 2: Use engineered patterns and dedicated pallets – Controls center of gravity and contact conditions.
- Step 3: Apply clips or straps with verified tension – Ensures calculated restraint forces are actually available.
- Step 4: Block and brace palletized loads in the vehicle – Prevents pallets from sliding or rotating under 0.8 g braking.
- Step 5: Conduct pre‑trip checks and driver briefings – Confirms closures, labels, and securement before departure.
Operational controls that cut incident rates
Pre‑trip inspections of brakes, tires, lights, and cargo areas, combined with verification of drum closures, leak checks, and securement, significantly reduced mechanical failures and loss of containment events in fleets transporting palletized drums. Route planning that avoids tunnels, dense populations, and sensitive environments when possible further mitigated transport risk.
💡 Field Engineer’s Note: When automating, do not just copy a manual pattern into a robot. Use simulation to tune drum spacing and pallet type, then validate with on‑truck braking tests; we often found that a 10–20 mm change in gap or clip position made the difference between a stable and a rocking load at 0.5 g lateral.

Final Considerations For Safe, Compliant Drum Transport
Safe truck transport of 55-gallon drums depends on three linked pillars: correct classification, engineered securement, and disciplined operations. Hazard class, UN codes, and labeling set the regulatory baseline. If classification is wrong, every later decision on packaging, palletizing, and placarding starts from a false assumption and risk rises sharply.
Engineering securement turns that classification into physics-based control of drum motion. You size tie-downs to real g-loads, use pallets that support the chime, and combine straps, blocking, and anti-roll devices so drums cannot slide, tip, or wedge under 0.8 g braking or 0.5 g cornering. Friction helps but never replaces mechanical restraint.
Operational controls then keep this design working on busy docks and highways. Purpose-built equipment from Atomoving reduces drops and punctures. Automation, reusable clips, and integrated strapping stations cut human error and improve repeatability. Inspections, training, and route planning close the loop and keep loads compliant from plant to consignee.
The best practice is simple: classify first, design the unit load, then engineer vehicle securement and handling methods as one system. When engineering, safety, and operations teams follow this sequence, fleets cut leaks, injuries, and violations while moving 55-gallon drums efficiently and with a strong compliance record.
Frequently Asked Questions
How do you safely transport 55-gallon drums?
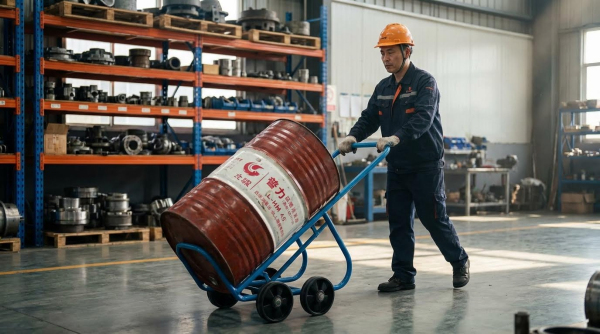
To transport 55-gallon drums safely, it’s important to use the right equipment. Forklifts, pallet jacks, and drum dollies are essential tools for moving these heavy containers without risking injury or damage. Attempting to roll or lift the drums manually increases the risk of accidents. Drum Handling Guide.
- Use a forklift for lifting and stacking drums.
- Employ a drum dolly to move drums across flat surfaces.
- Secure drums with straps during transit to prevent tipping.
What is the best way to move full 55-gallon drums?
Moving full 55-gallon drums requires careful handling to avoid spills or injuries. Brace the drum with your foot to prevent sliding, then shift your weight to drag it short distances. For longer moves, always use mechanical aids like forklifts or drum handlers. Never attempt to carry or push a full drum manually. USDA Drum Moving Tips.
- Use the push/pull method for short-distance movement.
- Avoid manual lifting by using proper machinery.
- Ensure the drum is sealed tightly before moving.