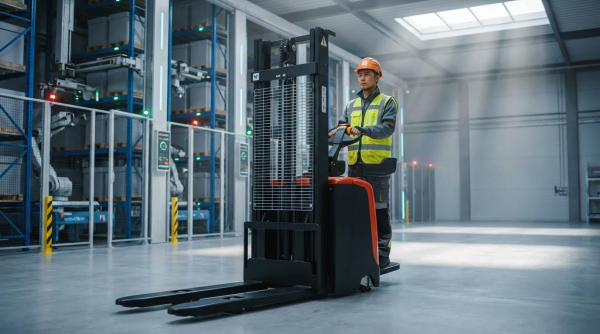
Safe, efficient travel with high‑lift walkies depends on three things: mast height, visibility, and tight control of the load. This guide explains how to manage each factor so that when traveling with a high lift pallet truck you stay within stability limits, protect pedestrians, and prevent product damage in real warehouses, not just on paper.

Core Principles Of Traveling With A High‑Lift Walkie
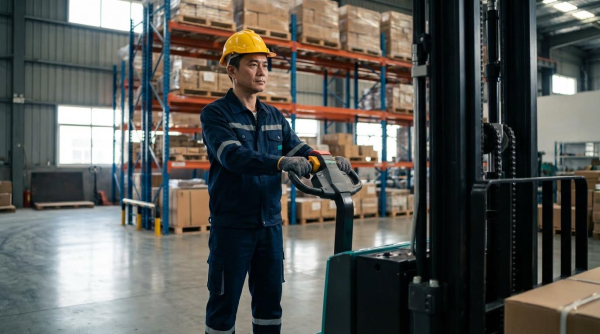
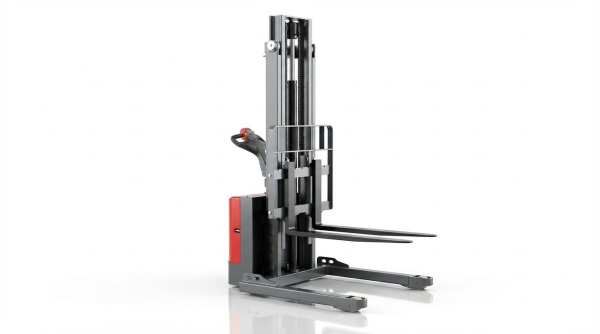
Core travel principles for high‑lift walkies focus on keeping the load low, the center of gravity inside the stability triangle, and travel speed matched to conditions when traveling with a high lift walkie. These controls directly reduce tipover, collision, and falling‑load risks.
Stability triangle, mast height, and load center
The core stability rule when traveling with a high lift walkie is to keep the combined center of gravity inside the three‑point stability triangle by controlling mast height, tilt, and load center distance. This is what actually prevents tipovers in real warehouses.
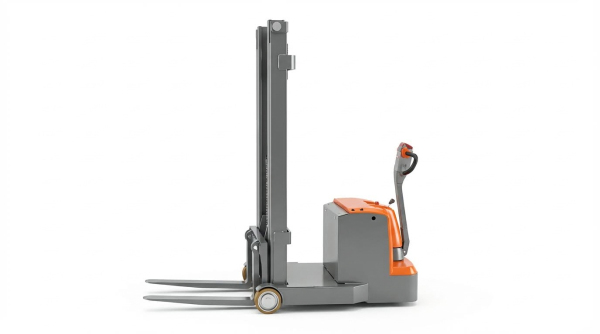
- Stability triangle: High‑lift walkies sit on a three‑point “stability triangle” between the load wheels and drive unit – tipover happens when the center of gravity moves outside this triangle.
- Rated load center (typically 500 mm): Capacity on the data plate assumes a 500 mm load center with an even, secured load and a uniform load distribution – any increase in load center reduces safe capacity.
- Low mast during travel: Standards and good practice prohibit traveling with elevated loads because raising the mast lifts the center of gravity – this shrinks your stability margin.
- Travel ground clearance 50–100 mm: Lift only enough to clear floor defects and dock plates, typically 50–100 mm above the floor – higher than this adds risk with no benefit.
- Slight back tilt only: Keep the mast slightly tilted back so the load rests on the backrest and the load distance is minimized during travel – this pulls the center of gravity closer to the truck.
- No forward tilt on the move: Forward tilt during travel pushes the center of gravity outward toward the tips of the forks – this is a common cause of forward tipover and falling loads.
- Centered, square loads: Off‑center, leaning, or top‑heavy loads shift the center of gravity sideways especially in turns or on uneven floors – this raises side‑tip risk sharply.
| Parameter | Typical / Rule | Stability Effect | Operational Impact When Traveling With A High Lift Walkie |
|---|---|---|---|
| Travel mast height | Lowest practical position | Keeps center of gravity low | Safe to pass through 2.1–2.4 m doorways and under mezzanines with margin |
| Fork ground clearance | 50–100 mm | Limits overturning moment | Clears dock plates and 10–20 mm floor irregularities without dragging |
| Rated load center | 500 mm (typical) | Defines nameplate capacity | Standard 1,000–1,500 kg pallets must sit fully on forks, not hanging out |
| Mast tilt for travel | Slight back tilt only | Pulls load toward truck | Improves stability when crossing joints and expansion gaps |
| Load position on forks | Centered, fully engaged | Prevents lateral CG shift | Reduces risk of side tip in 2.5–3.0 m wide aisles |
How to judge unsafe load center in the aisle
As a rule of thumb, if the pallet or load overhangs the fork tips by more than about 150–200 mm, or if heavy product sits far from the backrest, treat the load center as increased and reduce travel speed. If in doubt, re‑palletize or use equipment rated for longer loads.
💡 Field Engineer’s Note: Many tipovers I investigated started with “just a quick move” at full lift to save time between bays. The mast was raised 2–3 m, the truck hit a floor joint, and the elevated center of gravity amplified the shock. Make it a hard rule: never move in the aisle until the load is dropped back to 50–100 mm travel height with slight back tilt.
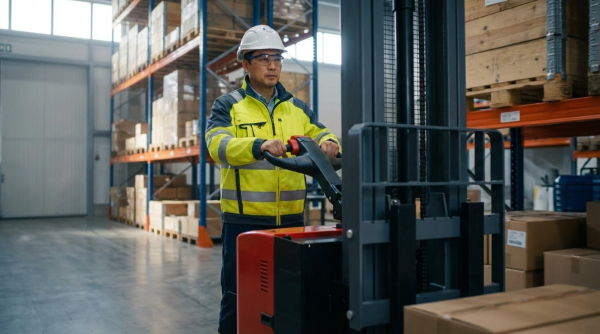
Travel posture: forks height, mast tilt, and speed
Correct travel posture when traveling with a high lift walkie means forks just clear of the floor, mast slightly back, operator offset from the truck, and speed low enough to stop within the visible path. This posture turns textbook stability into real‑world safety.
- Fork height for travel: Keep forks 50–100 mm above the floor to avoid striking joints and debris while keeping the load low – this balances clearance and stability.
- Mast tilt during travel: Use only slight back tilt so the load rests on the backrest; never travel with forward tilt because it throws weight outward – this keeps the load locked to the truck.
- Speed matched to conditions: Travel at a speed that allows a complete stop within the clear, visible path, taking surface friction and load mass into account especially in tight aisles and on wet floors – this is the real brake margin.
- Lowest speed in tight aisles: In narrow aisles, use the lowest travel speed setting and begin turns early, keeping the load low to limit rear‑end swing – this prevents rack and pedestrian strikes.
- Extra caution on wet or dirty floors: On wet or contaminated surfaces, friction drops and stopping distance grows, so you must reduce speed further and avoid sharp steering inputs to keep lateral stability – this is where many sideways slides start.
- Direction on ramps: Travel with the load upgrade when loaded (forward up, reverse down) and forks downgrade when unloaded to keep control and prevent roll‑away – never turn on a grade.
- Operator walking position: Stand slightly to the side of the truck, not directly in line with the forks or chassis – this avoids foot crush zones and gives a better view of the path.
| Condition | Recommended Travel Posture | Key Risk Controlled | Best For… |
|---|---|---|---|
| Level, dry floor | Forks 50–100 mm high, slight back tilt, moderate speed | General tipover and fork strike | Standard pallet moves between racks in 2.7–3.0 m aisles |
| Narrow aisle | Lowest speed setting, early turns, load low | Rack impact and rear swing | Order picking or put‑away next to racking |
| Wet or dusty floor | Reduced speed, very gentle steering and braking | Loss of traction and side slip | Loading docks, production areas with spills |
| Ramp – loaded | Load upgrade, no turning, low speed | Runaway load and overturn | Dock plates, truck loading, internal ramps |
| Ramp – unloaded | Forks downgrade, low speed, straight line | Loss of steering/braking control | Returning from trailer or upper level |
Quick pre‑move posture checklist
Before moving: 1) Load centered and within capacity. 2) Forks at 50–100 mm. 3) Mast slightly back, no forward tilt. 4) Path checked clear. 5) Speed selector on low in tight or busy areas. This 10‑second check prevents most incidents when traveling with a high lift walkie.
💡 Field Engineer’s Note: In real sites, the worst incidents often happened under time pressure at shift change or near truck departure cut‑offs. Operators bumped the speed up one notch “just this once” in wet dock areas. Build your rules so the default setting in tight aisles and near docks is the lowest speed, and supervisors periodically verify that travel posture (fork height, tilt, and walking position) matches your written standard, not the clock.
Engineering Controls For Safe Visibility And Load Handling
Engineering controls for high‑lift walkies use mast position, speed limits, visibility aids, and load rules to keep the center of gravity stable and pedestrians visible when traveling with a high lift walkie.
- Goal: Keep the combined center of gravity inside the stability triangle – Prevents forward, rear, and side tipovers during normal travel and emergency stops.
- Method: Control mast height, tilt, and fork clearance – Reduces overturning moment and pallet strike risk.
- Visibility: Design routes, lighting, and aids to remove blind spots – Cuts collision risk with racks, structures, and pedestrians.
- Speed: Limit truck speed to match stopping distance and friction – Prevents loss of control on wet floors and in tight aisles.
- Load rules: Enforce capacity, load center, and securing requirements – Stops falling product and structural damage in racking.
💡 Field Engineer’s Note: I treat every high‑lift walkie like it has “only half its stability” once the mast is raised. If you design procedures assuming low mast, slow speed, and clear sight lines as the default, near misses drop dramatically.
Visibility, direction of travel, and blind zones
Visibility controls define how the operator must travel, where they may go, and what aids the site provides so blind zones never hide pedestrians or obstacles when traveling with a high lift walkie.
- Unobstructed view rule: The operator must have a clear view in the direction of travel – If the load blocks forward vision, travel in reverse instead.
- Load upgrade on ramps: On grades, keep the load upgrade while maintaining visibility – Forward up, reverse down with the load uphill to keep the center of gravity toward the truck body.
- Low‑load travel: Travel with forks just 50–100 mm above the floor and mast slightly back – Reduces both visibility obstruction and tipover risk.
Standards require operators to maintain proper lookout and adjust speed to match sight distance and conditions. If the load blocks forward view, the operator must travel in reverse, keeping the load downgrade on ramps as required by industry practice and safety rules when traveling with a high lift walkie on grades. Before moving, operators verify the path is clear, ensure no pedestrians are in blind zones, and use spotters if visibility remains restricted in line with visibility management guidance.
Fixed engineering controls support this: adequate general lighting and truck‑mounted headlights where ambient light is low, plus convex mirrors at intersections, rear‑view mirrors, cameras, and warning beacons or reversing alarms to alert pedestrians in blind areas as recommended for visibility aids and lighting. Site‑specific blind spots are mitigated with mirrors, barriers, and revised routes so that the operator’s sight line always reaches at least their full stopping distance.
- Lighting: Maintain lux levels and add truck lights where needed – Prevents “black hole” rack ends and dark dock edges.
- Mirrors and cameras: Use convex mirrors at cross aisles and cameras on rear/low‑vision sides – Lets the operator see around racks and high loads.
- Warning devices: Ensure horns, beacons, and alarms work – Gives pedestrians an early cue before the truck appears.
How to identify blind zones in your warehouse
Walk each route at operator eye height, carrying a pallet at typical height. Mark any point where you cannot see at least 3–5 m ahead in the intended direction of travel. Add mirrors, change routes, or require spotters for those segments.
💡 Field Engineer’s Note: In narrow aisles, I assume pedestrians will “appear from nowhere” at cross aisles. Mirrors at 90° intersections plus a strict horn‑before‑entry rule reduce those near misses more than any poster or toolbox talk.
Load configuration, securing, and rated capacity
Load configuration controls keep the effective load center within rating, the combined center of gravity inside the stability triangle, and the product mechanically secured so it cannot shift or fall when traveling with a high lift walkie.
High‑lift walkies rely on a three‑point stability triangle; the combined center of gravity of truck and load must stay inside this triangle under static and dynamic conditions to avoid tipover. Rated capacity assumes a specific load center, typically 500 mm, with a uniformly distributed, properly secured load. If the actual load center increases due to long pallets or uneven stacking, effective capacity drops and tipover risk rises because the overturning moment increases.
| Load Factor | Safe Practice | Engineering Effect | Operational Impact |
|---|---|---|---|
| Load center distance | Keep within rated 500 mm where specified | Reduces forward overturning moment | Allows full rated capacity without derating |
| Stacking pattern | Even, compact, no leaning columns | Keeps center of gravity centered laterally | Reduces side tipover in turns and on uneven floors |
| Pallet condition | Reject broken or crushed pallets | Prevents sudden load shift or collapse | Avoids falling product and rack strikes |
| Fork engagement | Fully insert forks under the pallet | Shortens effective load distance | Improves steering and braking control |
| Mast tilt | Slight back tilt during travel | Moves load closer to truck body | Improves stability on bumps and dock plates |
- Capacity respect: Never exceed the data plate rating at the specified load center – Prevents hidden overloads that only show up as “mystery” tipovers.
- Centering: Keep loads centered on the forks and fully engaged – Stops lateral center‑of‑gravity shifts on turns.
- Securing: Wrap, band, or otherwise stabilize product before travel – Prevents layer shear and falling cartons in braking.
Safe operating practices require operators to travel at safe speeds, keep forks low, sound horns at blind corners, and maintain safe distances from pedestrians. Loads must be stable, secured, and within the forklift’s rated capacity; falling products cause many warehouse injuries, so operators must tilt and position loads properly before lifting or placing material on racks as part of safe operating practices. Broken pallets compromise whole stacks and must be removed from circulation immediately to avoid sudden load failure.
Quick checklist before moving a pallet
- Step 1: Inspect pallet and load – Reject broken pallets or leaning stacks to avoid collapse.
- Step 2: Center forks and fully insert – Shortens load distance and improves stability.
- Step 3: Lift 50–100 mm and tilt slightly back – Secures load to backrest and clears floor irregularities.
- Step 4: Confirm load within rated capacity – Prevents overload beyond the stability triangle.
💡 Field Engineer’s Note: Most “mystery” tipovers I investigated came from long or uneven loads that quietly pushed the load center beyond 500 mm. A simple rule—“If it overhangs more than one pallet deck, call a supervisor”—would have prevented nearly all of them.
Inclines, wet floors, and narrow aisle speed limits
Incline and surface controls set direction of travel and speed limits so the truck can always stop within the visible path without pushing the center of gravity outside the stability triangle when traveling with a high lift walkie.
On ramps and slopes, loaded trucks must travel with the load upgrade: drive forward up the ramp with the load uphill and reverse down with the load still uphill. This keeps the center of gravity toward the truck body and reduces the risk of the walkie or load rolling away in accordance with direction‑of‑travel rules on ramps. Unloaded units should travel forks downgrade to maintain steering and braking effectiveness. Turning on a grade is prohibited because lateral gravity components combined with turning forces can drive the center of gravity outside the stability triangle creating a high side‑tip risk.
Speed control is equally critical. The truck must operate at a speed that allows a complete stop within the visible, clear travel path, considering stopping distance, surface friction, and load mass as required for tight aisles and wet floors. In narrow aisles, operators should use the lowest travel speed setting and initiate turns early, keeping the load low to limit rear‑end swing. On wet or contaminated floors, reduced friction increases stopping distance and decreases lateral stability, so operators must reduce speed further and avoid sharp steering inputs to maintain traction.
| Condition | Direction / Speed Control | Engineering Reason | Best For… |
|---|---|---|---|
| Uphill, loaded | Travel forward, load uphill | Keeps center of gravity toward truck body | Preventing roll‑back and pallet slide |
| Downhill, loaded | Travel in reverse, load uphill | Uses drive end for control and braking | Maintaining traction and steering |
| Unloaded on slope | Forks downgrade | Improves steering/braking stability | Empty returns to dock or rack ends |
| Narrow aisle (<2.5 m) | Lowest speed setting, early turns | Limits rear swing and dynamic forces | Working between racking without rack strikes |
| Wet / dusty floors | Further reduced speed, gentle steering | Compensates for lower friction coefficient | Cold stores, loading docks, spill areas |
- Intersection rule: Reduce speed and sound horn at cross aisles and blind corners – Buys stopping distance if a pedestrian steps out.
- No‑turn zones: Mark “no turning” on ramps and dock plates – Prevents combined lateral and longitudinal instability.
- Site speed limits: Set and enforce posted limits by area – Aligns truck capability with floor condition and traffic density.
Setting practical site speed limits
Measure the narrowest aisles and typical sight distances. Choose a maximum speed that lets the truck stop comfortably within half that distance on the worst surface you expect (wet, dusty, or with minor debris). Then lock that value into the truck’s speed settings where possible.
💡 Field Engineer’s Note: I assume any wet floor has only half the friction of a dry one. If you would not be happy doing that maneuver at a given speed on ice, it is too fast for a wet loading dock with a high‑lift walkie.
Site Practices: Traffic Management, Training, And Inspections
Effective site practices create a controlled environment where engineering limits are respected every time someone is traveling with a high lift walkie, sharply reducing collision, tipover, and product-drop risks.
- Goal: Turn rules into predictable traffic patterns – so operators never have to “guess” who has right‑of‑way.
- Focus: Fixed routes, pedestrian separation, trained operators, and disciplined daily inspections – the backbone of a low‑incident warehouse.
💡 Field Engineer’s Note: Most serious walkie incidents I have investigated were not “driver errors” alone; they were predictable outcomes of missing traffic plans, unchecked blind spots, and walkies put into service without basic brake or horn checks.
Traffic plans, pedestrian separation, and signage
Traffic management plans, physical separation, and clear signage turn random warehouse movement into predictable, low‑risk flows when traveling with a high lift walkie.
- Map fixed routes: Draw standard travel paths for high‑lift walkies on a site plan – keeps heavy traffic away from ad‑hoc shortcuts through pedestrian areas.
- Designate one‑way aisles: Use one‑way systems where layout allows – eliminates head‑on conflicts and tight passing in 2.5–3.0 m aisles.
- Separate trucks and pedestrians: Install guardrails, curbs, or painted lines – creates a clear “no‑go” zone for walkies near doors, time clocks, and lunchrooms.
- Protect edges and drop‑offs: Mark “warning tracks” and add barriers at dock edges and pits – prevents walkies from rolling or being pushed off elevated areas near loading docks.
- Right‑of‑way rules: Require walkies to yield to pedestrians and emergency vehicles – removes ambiguity at crossings and doorways in shared zones.
- Speed and horn rules: Mandate reduced speed and horn use at cross aisles and blind corners – compensates for limited sight distance and pedestrian unpredictability per visibility guidance.
- Blind‑spot controls: Add convex mirrors, warning signs, and stop lines at intersections – forces operators to slow and visually clear the crossing before entering.
- Consult workforce: Develop plans with joint health and safety committees – captures real traffic patterns, near‑miss locations, and seasonal congestion for realistic controls.
Key elements of a written traffic management plan
A practical plan for when traveling with a high lift walkie usually includes:
- Scaled map: Showing all aisles, doors, docks, ramps, and pedestrian routes.
- Route coding: Colour‑coded walkie lanes versus walkways.
- Speed zones: Lower limits in 2.5–3.0 m aisles, near docks, and in staging areas.
- High‑risk areas: Special rules for docks, rail crossings, elevators, and cold rooms.
- Signage schedule: Where to place stop, yield, horn, and “no pedestrian” signs.
Operator training, competency, and refresher programs
Structured training, competency checks, and regular refreshers ensure operators consistently apply stability, visibility, and traffic rules whenever they are traveling with a high lift walkie.
- Formal training requirement: Only trained and authorized workers operate high‑lift walkies – meets powered industrial truck rules and reduces novice errors for walkies and manual pallet jack.
- Core theory topics: Load capacity, 500 mm load centers, stability triangle, and tipover dynamics – operators understand why low mast and slow speed matter for high‑lift units.
- Visibility and route use: Teach correct travel direction when loads block view, horn use, and adherence to traffic plans – aligns operator behavior with site design and ANSI/ITSDF expectations.
- Inclines and wet floors: Cover “load upgrade” rules on ramps and speed reduction on slippery floors – prevents roll‑aways and loss of control on low‑friction surfaces in real sites with grades.
- Daily pre‑use inspections: Train operators to check brakes, steering, hydraulics, forks, mast, horn, lights, and alarms before use – catches defects before the walkie enters traffic per OSHA checklists.
- Remove defective trucks: Any defect found during inspection triggers “out‑of‑service” until repaired – avoids relying on compromised brakes or steering in busy aisles as required for powered trucks.
- Practical skills evaluation: Assess turning, stacking, traveling with low forks, and emergency stopping – confirms that theory translates into safe maneuvering in 2.5–3.5 m aisles.
- Refresher training: Trigger refreshers after incidents, near misses, or observed unsafe acts – resets expectations and updates operators on any route or rule changes over the life of the facility.
- Supervision and enforcement: Line leaders and supervisors monitor compliance with speed, horn, and pedestrian‑separation rules – turns written procedures into daily habits.
Daily pre‑use inspection – quick operator checklist
Before traveling with a high lift walkie in any traffic area, operators should confirm:
- Step 1: Brakes and emergency stop work – you must be able to stop within visible distance.
- Step 2: Steering and tiller return smoothly – prevents loss of directional control in tight aisles.
- Step 3: Lift, lower, and tilt functions operate without leaks or jerks – avoids sudden load shifts.
- Step 4: Horn, lights, and any beacons/alarms function – critical for blind corners and shared zones.
- Step 5: Forks, backrest, and mast show no cracks, bends, or loose fasteners – prevents structural failures under load.
- Step 6: Wheels and tires are intact, with no flat spots or deep cuts – maintains predictable braking and steering on smooth concrete.

Final Thoughts On Safe High‑Lift Walkie Travel
Safe travel with high‑lift walkies depends on one integrated system: stable geometry, clear sight lines, controlled speed, and disciplined site rules. Mast height, fork clearance, and load center keep the combined center of gravity inside the stability triangle. This protects against forward, rear, and side tipovers, even when floors are uneven or ramps and dock plates are in play.
Visibility controls, traffic plans, and pedestrian separation turn that inherent stability into predictable, low‑risk movement. When operators always travel with low forks, slight back tilt, and a speed that allows stopping within their visible path, collisions and falling loads drop sharply. Clear routes, one‑way aisles, and marked no‑turn zones on ramps remove guesswork.
The most effective operations treat training and inspections as hard requirements, not paperwork. Trained operators understand why 50–100 mm fork height, 500 mm load centers, and “load upgrade on ramps” are non‑negotiable. Daily checks keep defective walkies out of traffic, whether they come from Atomoving or another source.
The best practice for engineering and operations teams is simple: design for low mast and low speed as the default, enforce capacity and route rules, and verify behavior in the aisle. When equipment limits, procedures, and supervision all point the same way, high‑lift walkies become reliable, low‑risk tools instead of hidden hazards.
Frequently Asked Questions
How high can a walkie stacker lift?
A walkie stacker can typically lift loads to heights of up to 6,100 mm. This makes it ideal for applications where loads need to be stored at significant heights. Crown Walkie Stackers.
Do you have to be certified to use a walkie stacker?
Yes, operators should be trained and certified to use a walkie stacker safely. Proper certification ensures that users understand safety protocols and operational standards, reducing the risk of accidents in the workplace.
What is the lifting capacity of a walkie stacker?
The lifting capacity of a walkie stacker generally ranges from 1,500 kg to 2,500 kg. This capacity allows the equipment to handle various load sizes commonly found in warehouse settings. United T-Series Stacker.