This buyer’s guide explains how to choose drum handling equipment that improves safety, cuts labor costs, and protects product in real-world warehouse and plant environments. You will learn how different drum systems work, which engineering specs matter, and how to match them to your floors, aisles, and workflows so a single operator can move 200 L (55-gallon) drums with control and minimal risk.
Core Types Of Drum Handling Systems Explained
Core drum handling systems fall into three groups: manual, hydraulic/semi-electric, and fully powered or AGV-ready. Understanding these types is the first step in how to choose drum handling equipment that fits your loads, layout, and safety goals.
Each family handles the same basic task—moving a 200 L (55-gallon) drum safely—but with very different effort levels, speeds, and risk profiles. The right choice depends on weight, frequency of handling, and how precisely you must lift, tilt, or pour.
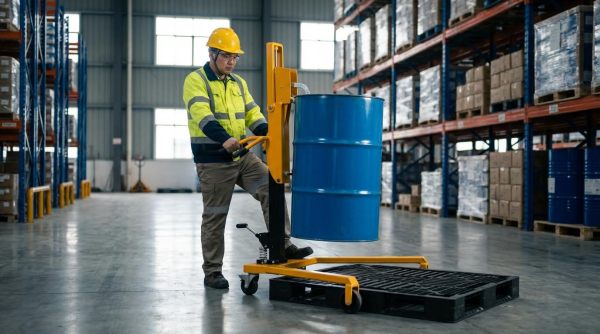
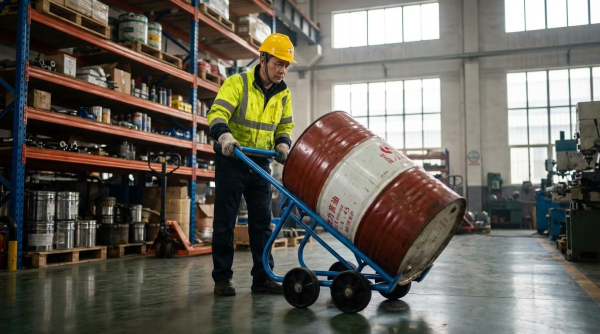
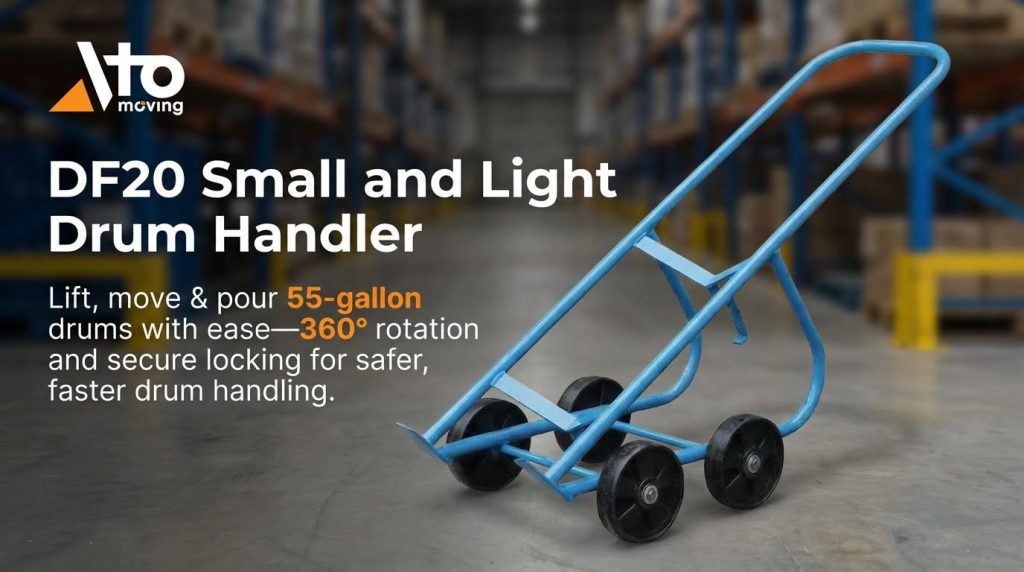
Manual lifters, tilters, and trolleys
Manual drum lifters, tilters, and trolleys rely on human force with simple mechanical advantage for low-to-medium volume drum handling. They suit lighter-duty operations where operators move a limited number of drums per shift and walking distances are short.
| Equipment Type | Typical Capacity | Key Functions | Typical Specs From Sources | Best For… / Operational Impact |
|---|---|---|---|---|
| Manual Drum Lifter Trolley | Up to 300 kg | Lift, transport, position | Lift height ≈ 800 mm; single drum; U-clamp; steel frame; castors (spec example) | Short moves between pallets, scales, or workstations within flat aisles. |
| Manual Drum Lifter Cum Tilter | ≈ 350 kg | Lift, transport, 360° tilt | Lift height ≈ 1,600 mm; 360° rotation; parrot beak clamp; steel frame (spec example) | Pouring into mixers, reactors, or hoppers up to ~1.6 m high with full rotation control. |
| Manual Drum Tilter | ≈ 350 kg | Tilt, rotate, pour | Lift height ≈ 400 mm; 180° tilt; swivel casters; locking mechanisms (spec example) | Low-level decanting from floor or pallet height into nearby vessels. |
| Industrial Drum Stand | ≈ 350 kg (2 drums total) | Static support, basic tilt (some models) | Approx. 800 mm × 1,200 mm footprint; spill tray; mild steel construction (spec example) | Safe static storage, spill control, and gravity dispensing with taps. |
- Manual lifter trolley: Operator pumps or levers to raise drum – cuts floor dragging and rolling, reducing back strain.
- Manual lifter-cum-tilter: Adds full 360° rotation – ideal when you must invert drums for complete emptying.
- Manual tilter: Focuses on controlled pouring at low lift – good for frequent decanting into small containers.
- Drum stand: Keeps drums off the floor with spill control – improves housekeeping and environmental compliance.
When to pick manual drum handling equipment
Manual systems are usually the right answer when you handle fewer than 10–20 drums per shift, walking distances are under 20–30 m per move, and drum weights stay around 200–300 kg. If operators already struggle with back or shoulder fatigue, or if your site has slopes or rough floors, you should move up to hydraulic or powered options when deciding how to choose drum handling equipment.
💡 Field Engineer’s Note: Manual drum lifters perform poorly on even mild slopes or damaged floors. A 300 kg drum on small castors can “run away” on gradients above about 2–3%, so always assess floor flatness and add wheel brakes or chocks near ramps.
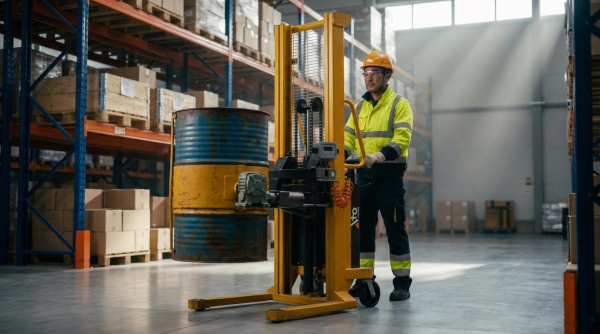
Hydraulic and semi-electric drum handlers
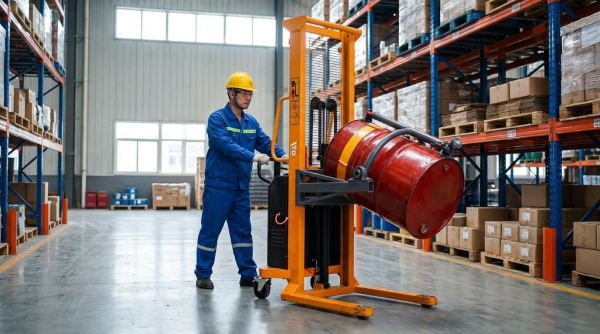
Hydraulic and semi-electric drum handlers use hydraulic cylinders, usually foot- or hand-pumped, with optional electric lift to reduce operator effort and increase capacity. They are the workhorse choice in most plants where drums move all day and must be lifted to racking or process equipment.
| Equipment Type | Typical Capacity | Power Source | Typical Specs From Sources | Best For… / Operational Impact |
|---|---|---|---|---|
| Hydraulic Drum Handler | > 500 kg | Manual hydraulic (foot pedal) | Lifts, transports, stacks, tilts; swivel castors; brakes; ergonomic handle (spec example) | Heavy drums, multi-level stacking, and frequent moves in warehouses and plants. |
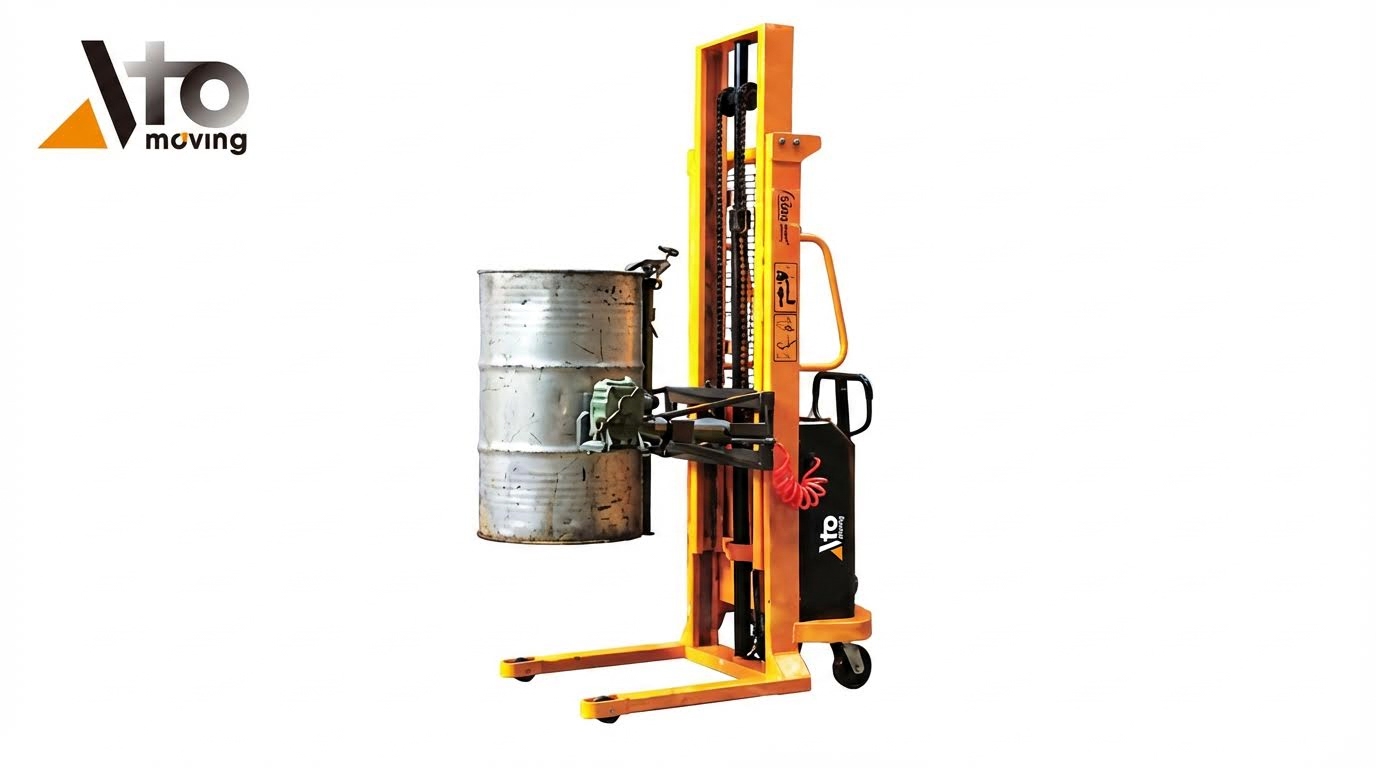
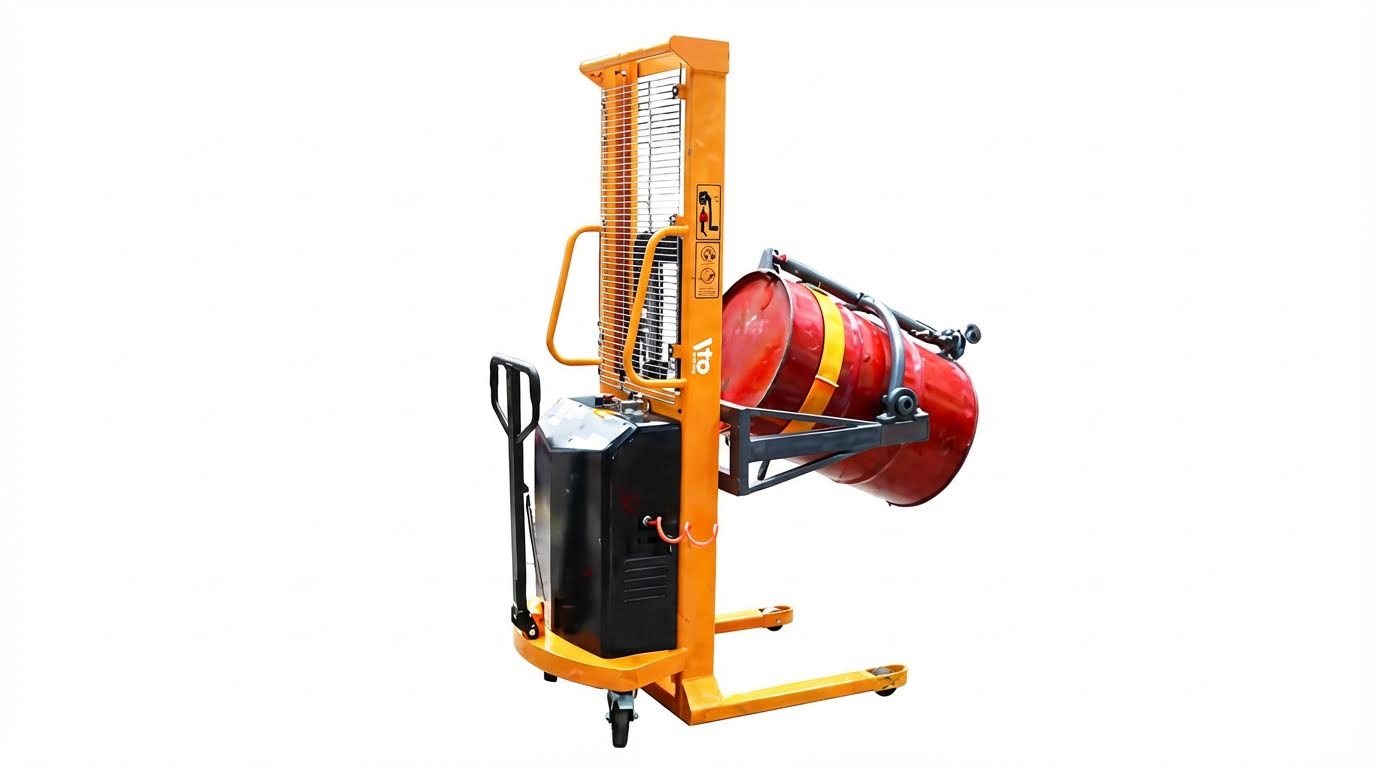
| Semi-Electric Drum Lifter (Double Mast) | Up to ≈ 500 kg | Electric lift, manual travel | Max lift height ≈ 2,000 mm; 12 V battery; dual mast for stability; secure grips (spec example) | Racking up to ~2 m, mezzanine feeding, or loading platforms with reduced operator fatigue. |
- Hydraulic handlers: Use a pump and cylinder to multiply human force – you can safely lift drums above 500 kg without excessive strain.
- Semi-electric lifters: Electric motor handles vertical lift – operator only steers and pushes, improving cycle time and consistency.
- Double mast design: Increases lateral stiffness – safer when lifting high or working near racking and machinery.
- Integrated tilting options: Allow controlled pouring from height – ideal for feeding mixers, reactors, or elevated funnels.
Hydraulic vs semi-electric: which to choose?
Hydraulic-only models suit smaller sites with moderate drum traffic where operators can accept foot-pump effort. Semi-electric lifters make sense when you lift drums above 1,500–2,000 mm regularly, or when operators perform many cycles per shift. In those cases, electric lift reduces fatigue, speeds up operations, and supports better safety, which is critical when you consider how to choose drum handling equipment that will remain safe over a 15–20 year life.
💡 Field Engineer’s Note: In cold rooms or outdoor yards, hydraulic oil thickens below 0 °C. This slows lift speed and can cause jerky motion. If you operate in chilled storage, specify cold-rated hydraulic oil and test lift speed at your lowest ambient temperature before full deployment.
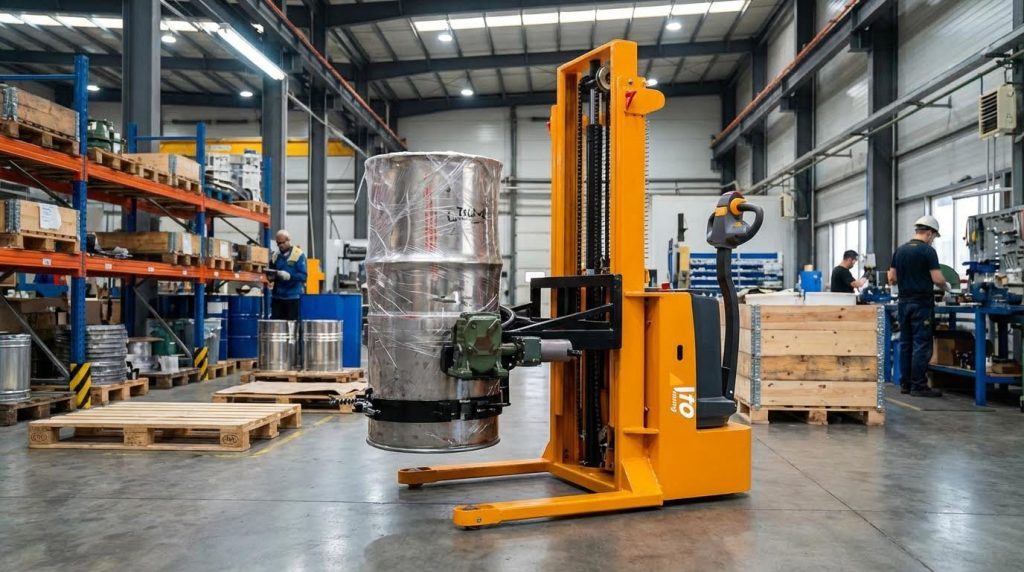
Battery-powered drum lifters and AGV interfaces
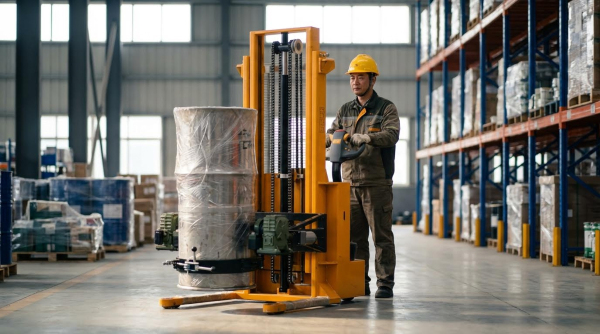
Battery-powered drum lifters and AGV-compatible attachments use electric drive and lift to automate drum handling, cutting manual effort to near zero. They are best for high-throughput facilities, long travel distances, or where safety and labor savings justify higher capital cost.
| Equipment Type | Typical Capacity | Power / Control | Typical Specs From Sources | Best For… / Operational Impact |
|---|---|---|---|---|
| Battery Drum Lifter Cum Tilter | ≈ 350 kg | Battery-powered lift and tilt | Lift height ≈ 1,500 mm; double mast; powered tilt for precise pouring (spec example) | Frequent decanting into vessels or lines with minimal spillage and low operator effort. |
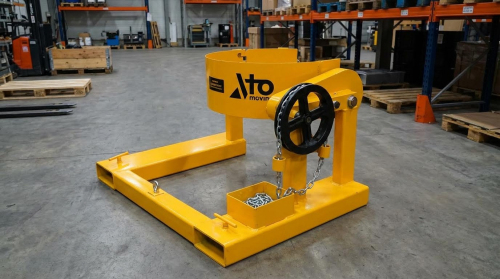
| Forklift Drum Grab (Double Parrot Beak) | ≈ 600 kg (2 drums) | Uses forklift hydraulics and motion | Dual “parrot beak” clamps; adjustable grip positions; mechanical lock (spec example) | Bulk movements in yards or warehouses using existing forklifts; doubles throughput per trip. |
- Battery lifter-tilters: Electric lift and powered tilting – enable one operator to pour accurately without muscle power, ideal for high-value liquids.
- Forklift drum grabs: Turn a standard forklift into a drum handler – great when drums share space with pallets in the same aisles.
- AGV interfaces: Use standardized fork pockets or clamps – allow future integration with automated guided vehicles for lights-out operations.
- Precision control: Smooth electric actuation – reduces splashing and product loss, which is critical where spills can cost thousands per incident.
Where powered and AGV-ready solutions pay off
Battery-powered drum equipment shines where each operator currently handles dozens of drums per shift, or where manual handling has already caused injuries. Studies showed that mechanical drum handling lets one person do the work of three, cutting daily labor from about $120 to $15 and saving over $27,000 per year in one documented case. These savings often recover the investment in powered systems within the first year, and continue for 15–20 years of service life.
💡 Field Engineer’s Note: When pairing drum attachments with forklifts or future AGVs, always check combined capacity and center-of-gravity. A 600 kg double-drum grab mounted too far forward can exceed the truck’s rated load center and compromise stability, especially when turning in 2.5–3.0 m aisles.
Key Engineering Criteria For Selecting Drum Equipment
When you plan how to choose drum handling equipment, you must match load, geometry, and floor conditions to your real workflows. The right engineering criteria prevent tip‑overs, back injuries, and chronic bottlenecks.
- Load & drum geometry: Capacity, drum size, and center of gravity – Prevents overload and tipping during lift or tilt.
- Lifting & tilting envelope: Height, reach, and tilt angle – Ensures you can actually pour, stack, or rack where needed.
- Mobility & floor interface: Wheel type, turning radius, and gradients – Makes sure one person can move a full drum safely.
💡 Field Engineer’s Note: In most plants the limiting factor is not capacity but stability: once you lift a 200 L drum above 1.5 m, tiny floor irregularities or sudden stops can create enough moment to twist frames or pull drums out of marginal clamps. Always design with a stability margin, not just a load margin.
Load rating, drum size, and center of gravity
Load rating, drum size, and center of gravity define whether a drum handler can safely lift a full drum without structural overload or tipping risk. This is the first filter in how to choose drum handling equipment.
| Equipment Type | Rated Capacity | Typical Drum Use | Key Stability Factor | Operational Impact |
|---|---|---|---|---|
| Manual drum lifter trolley | 300 kg | Single 200 L (55-gal) drum | U-clamp grip at drum mid-height | Safe for standard liquid drums up to ~300 kg; one-operator moves |
| Semi-electric drum lifter (double mast) | Up to 500 kg | Heavier drums or higher safety margin | Dual mast reduces sway at height | Suitable for dense products and higher lift points |
| Hydraulic drum handler | >500 kg | Heavy industrial drums; mixed duties | Wide base, manual hydraulic lift | Covers worst-case drum weights with reserve capacity |
| Manual drum lifter cum tilter | 350 kg | Lift + tilt of 200 L drums | Parrot beak clamp at rim | Safe rotation of full drums without manual heaving |
| Battery drum lifter cum tilter | 350 kg | Frequent powered lift + tilt | Double mast, powered lift | Reduces operator fatigue in high-throughput lines |
| Manual drum tilter | 350 kg | Low-lift tilting / decanting | Locking mechanism during pour | For short moves and low-height pouring |
| Double parrot beak drum grab | 600 kg (2 × 300 kg) | Forklift handling of 2 drums | Forklift stability + clamp engagement | Doubles throughput where forklifts are available |
| Industrial drum stand | 350 kg (2 drums) | Static storage / dispensing | Wide footprint + spill tray | Safe, fixed support under racking or filling points |
The manual drum lifter trolley with 300 kg capacity suits standard 200 L drums that usually fall between roughly 180–300 kg when full, depending on product density. It uses a U-clamp to secure a single drum, reducing manual strain during short transfers and positioning tasks. Manual drum lifter trolley data
A semi-electric double-mast lifter rated up to 500 kg provides a larger safety margin for dense liquids or heavier specialty drums, while the dual mast improves vertical stability at higher lift heights. It combines powered lifting with manual travel, which suits operations that need frequent vertical moves without investing in full electric drive. Semi-electric lifter specifications
How to match capacity to real drum weights
Start from the heaviest realistic drum: product density (kg/L) × drum volume (L) + drum tare. Add at least 20–30% safety margin on the equipment’s rated capacity to account for dynamic loads during starts, stops, and tilting.
- Check real drum weight: Ask for product density and drum tare – Prevents undersizing when liquids are heavier than water.
- Align with max capacity, not average: Size to the heaviest drum you ever handle – Avoids rare but catastrophic overloads.
- Consider dual-drum tools: Double parrot beak grab at 600 kg – Ensures the forklift + attachment can safely lift two full drums.
- Respect center of gravity: Tall, narrow drums shift COG higher – Increases tip risk when turning or braking.
- Use proper clamps: Parrot beak or U-clamp matched to rim – Minimizes slip when drums are dented or oily.
Hydraulic drum handlers and some manual tilters exceed 350–500 kg capacity, which helps when handling high-density chemicals or when you want extra structural margin for long-term durability. These units also integrate brakes and swivel castors to reduce back strain and overexertion injuries, which are a major portion of workplace incidents. Injury and strain statistics
Lifting height, reach, and tilting angle requirements
Lifting height, reach, and tilting angle determine whether your drum handler can actually place, pour, or stack drums where your process needs them. This is the geometry part of how to choose drum handling equipment.
| Equipment Type | Max Lifting Height | Tilting / Rotation Capability | Typical Use Case | Operational Impact |
|---|---|---|---|---|
| Manual drum lifter trolley | 800 mm | No or limited tilt | Floor-to-pallet moves, low platforms | Good for loading low pallets or stands only |
| Manual drum lifter cum tilter | 1600 mm | 360° rotation | Pouring into mixers, reactors, or IBCs | Full inversion for complete emptying |
| Battery drum lifter cum tilter | 1500 mm | Powered tilt (large angle) | Frequent controlled pouring | Reduces operator effort for high-cycle tasks |
| Manual drum tilter | 400 mm | 180° tilt | Decanting into floor-level containers | Ideal for low-height dispensing setups |
| Semi-electric drum lifter (double mast) | 2000 mm | Typically vertical lift, optional tilt | Racking, high platforms | Reaches 2.0 m decks or mezzanines |
| Industrial drum stand | Fixed height | Some models tilt | Static storage and gravity dispensing | Creates a safe, repeatable discharge height |
A manual drum lifter trolley with 800 mm lift works for raising drums onto low pallets or drum stands but will not reach the infeed of a tall mixer or a 1.5–2.0 m platform. For higher discharge points, a manual lifter cum tilter with 1600 mm lifting height and 360° rotation allows full inversion into hoppers or reactors. Lift and rotation data
Battery-powered drum lifter-cum-tilters with 1500 mm lift and powered tilt are better for high-frequency pouring tasks, because they remove most of the manual pumping and cranking. Semi-electric double-mast lifters with 2000 mm lift are ideal when you must store drums on second-level racking or feed elevated process equipment. 2.0 m lifting capability
- Measure target heights: From floor to platform lip or rack beam – Select lift height at least 150–200 mm higher for clearance.
- Check tilt angle vs. product: Viscous liquids need 180–360° rotation – Ensures near-complete emptying without manual rocking.
- Consider reach over obstacles: Allow for pallet thickness and guard rails – Prevents interference between mast and structure.
- Account for drum length: Long drums need more vertical space when tilted – Stops the rim from hitting frames or hoppers.
- Clarify duty cycle: Occasional vs. continuous pouring – Manual tilt is fine for low volumes, battery tilt for high throughput.
How to check if tilt geometry will work
Sketch a side view of your drum, handler clamp point, and target container. Mark the pivot center and drum radius. Ensure that, at full tilt, the drum outlet is at least 100 mm above the receiving vessel and that no part of the drum collides with frames or guard rails.
Mobility, aisle width, and floor condition constraints
Mobility, aisle width, and floor condition constraints determine whether one operator can realistically move drums where required without unsafe pushing forces or tip risk. Ignoring this is a common failure in how to choose drum handling equipment.
| Equipment Type | Typical Mobility | Floor / Aisle Requirements | Best For… | Operational Impact |
|---|---|---|---|---|
| Manual drum lifter trolley | Push by hand, swivel castors | Relatively smooth floors, moderate aisles | Short moves between pallets, stands, and workstations | One operator can reposition drums with reduced strain |
| Hydraulic drum handler | Manual push with brakes | Needs reasonably flat surface; wide base | Transport + stacking in open warehouse areas | Handles heavy drums but less suited to tight aisles |
| Manual drum tilter | Swivel casters, low lift | Good on smooth concrete | Short-range decanting tasks | Low center of gravity improves stability while moving |
| Semi-electric drum lifter | Manual travel, powered lift | Smooth, level floors; 1.5–2.0 m aisles | Vertical moves in racking or process areas | Operator effort is mostly horizontal pushing |
| Battery drum lifter cum tilter | Varies by model (often manual travel) | Prefers even floors to protect mast alignment | High-cycle process lines | Reduces fatigue from repeated lift/tilt cycles |
| Double parrot beak drum grab | Forklift driven | Aisles sized for forklift turning radius | Bulk moves across warehouse or yard | Moves two drums at once but needs trained drivers |
| Industrial drum stand | Static (no travel) | Installed on level floor | Fixed dispensing or storage points | Eliminates handling during storage period |
Manual drum lifters, tilters, and stands use swivel castors designed for smooth industrial floors; they struggle on broken concrete, steep ramps, or thresholds. Hydraulic drum handlers with heavier frames and wide bases are more stable but need more aisle width and pushing force, especially when carrying drums over 350–500 kg. Mobility-related specs
Forklift-mounted double parrot beak grabs shift mobility constraints to the forklift: aisle width, turning radius, and floor bearing capacity must all suit the combined load of truck plus two full drums (up to 600 kg on the attachment alone). Where aisles are narrow or slopes exceed a few percent, powered or AGV-based systems may be safer than manual push devices.
- Measure aisle clear width: Include pallet overhang and column intrusions – Prevents handlers from getting trapped or forcing unsafe angles.
- Check floor flatness: Identify ramps, drains, and cracks – Reduces risk of sudden caster stops and drum sway.
- Limit manual push forces: Choose wheel sizes and bearings that roll easily – Cuts overexertion injuries when moving 200 L drums.
- Consider traffic patterns: Forklifts, pedestrians, and drums in same aisles – May justify separating forklift grabs from pedestrian drum movers.
- Plan fixed vs. mobile points: Use drum stands where movement is repetitive – Minimizes travel and handling cycles.
When to move from manual to powered movement
If operators regularly move drums more than 20–30 m, across slopes, or more than a few times per hour, consider powered travel (tugs, AGVs, or ride-on trucks with drum attachments). This reduces overexertion injuries, which historically formed a large share of drum-related incidents and associated costs.
Matching Drum Equipment To Applications And Workflows
Matching drum equipment to applications and workflows means selecting lifters, tilters, grabs, and stands that fit your exact drum flow, distances, heights, and pouring tasks, not just the drum weight. If you want to know how to choose drum handling equipment correctly, start from the job steps (store, move, stack, pour) and then map each step to the right device and power level.
In practice, most plants need a small “fleet mix” of drum tools: one or two core movers, plus task‑specific tilters or stands for dispensing and mixing. The tables and lists below show which equipment type fits each workflow and why.
Warehouse storage, stacking, and transfer operations
For storage, stacking, and transfer, you choose drum handling equipment based on how far you move drums, how high you stack, and whether you use forklifts or only pedestrian gear. The goal is to reduce manual handling of 200 L (55‑gallon) drums that can weigh 180–360 kg when full, which otherwise drives back injuries and high compensation costs. Injury data shows overexertion accounts for 31% of serious workplace injuries, so engineering the right flow is not optional.
| Workflow Scenario | Recommended Equipment Type | Key Specs From Sources | Best For… |
|---|---|---|---|
| Short moves from receiving to nearby storage (flat floor, low stacking) | Manual drum lifter trolley | 300 kg capacity, 800 mm lift height, single drum, U‑clamp grip Source | One‑man moves over 10–20 m, placing drums onto low pallets or stands |
| Feeding drums into racks or onto high platforms | Semi‑electric drum lifter (double mast) | Up to 500 kg, 2000 mm lift, electric lift with manual travel, dual mast stability Source | Stacking into second tier of racking or feeding elevated process in tight aisles |
| Parking drums in fixed storage rows with spill control | Industrial drum stand with tray | Holds 2 drums, 350 kg total, 800 × 1200 mm footprint, spill tray Source | Static storage with integrated spill containment under 2 × 200 L drums |
| Multi‑purpose warehouse moves plus occasional stacking and tilting | Hydraulic drum stacker | Manual hydraulic foot pedal, >500 kg capacity, swivel castors, brakes Source | General warehouse use where one device must move, lift, and position drums |
| High‑throughput loading/unloading with existing forklifts | Double parrot beak drum grab (forklift attachment) | Handles 2 drums, 600 kg combined capacity, mechanical beak grip Source | Fast pallet or truck loading where a forklift already operates |
Once you map your warehouse routes, you can decide how to choose drum handling equipment that matches each path length and stacking height instead of buying a single “do‑everything” unit that underperforms everywhere.
- Short, flat, frequent moves: Manual drum lifter trolleys – Low cost, minimal maintenance, ideal for 10–30 m internal transfers.
- High stacking or mezzanine feeding: Semi‑electric lifters – Electric lift reduces strain when raising drums to 1.5–2.0 m regularly.
- Static storage with spill risk: Drum stands with trays – Contain leaks and keep drums secure against tipping.
- Forklift‑based operations: Parrot beak grabs – Use existing forklifts to double drum throughput per trip.
How to map your drum storage and transfer workflow
Walk the actual path of a drum from receiving to final storage. Measure: 1) Maximum lift height in mm. 2) Narrowest aisle in mm. 3) Longest push distance in m. 4) Typical batch size (drums/hour). These four numbers drive the correct equipment choice more than catalog photos.
💡 Field Engineer’s Note: In real warehouses, the limiting factor is often floor condition, not drum weight. Manual drum handlers with small hard wheels become exhausting on cracked floors or 2–3% slopes, even at 200–250 kg loads. If your floor is rough or sloped to drains, step up to larger‑diameter wheels, semi‑electric lift, or even powered traction, otherwise operators will quietly revert to unsafe rolling and tipping by hand.
Mixing, dispensing, and controlled pouring of liquids
For mixing, dispensing, and controlled pouring, you select drum equipment primarily by tilt control, rotation angle, and how close you must position the drum to the receiving vessel. Here, lift height and tilt precision matter more than long‑distance travel.
| Dispensing / Mixing Task | Recommended Equipment | Key Specs From Sources | Operational Impact |
|---|---|---|---|
| Occasional decanting from drum to small containers at low height | Manual drum tilter | 350 kg capacity, 400 mm lift, 180° tilt, swivel casters Source | Good for ground‑level taps into buckets or pails, low investment |
| Frequent pouring into elevated tanks, mixers, or reactors | Manual drum lifter‑cum‑tilter | 350 kg capacity, 1600 mm lift, 360° tilt, parrot beak clamp Source | Allows full inversion and precise positioning above hoppers or mixers |
| High‑frequency, heavy drums, or viscous / hazardous liquids | Battery drum lifter‑cum‑tilter | 350 kg capacity, 1500 mm lift, powered system, double mast Source | Reduces operator effort and improves control for repetitive, critical pours |
| Static dispensing from stored drums with spill control | Industrial drum stand with tray | 2‑drum capacity, 350 kg, built‑in spill tray, mild steel Source | Supports drum with a tap fitted, catches drips and leaks |
Controlled pouring is exactly where how to choose drum handling equipment becomes a pure safety and ROI question. Mechanical drum pourers let one operator do work that used to need three, cutting daily labour costs from about $120 to $15 and paying back equipment in under a year. At the same time, controlled tilting reduces spills that can otherwise cost $3,000–$10,000 per incident in cleanup and product loss.
- Need 360° rotation for full emptying: Choose lifter‑cum‑tilters – They allow full inversion to drain viscous or sticky products.
- Operators already near ergonomic limits: Choose battery‑powered tilters – They remove the heaviest manual effort from the cycle.
- Low‑volume, simple decanting: Manual tilters or stands – Acceptable where drums are handled a few times per week, not per hour.
- Hazardous or high‑value liquids: Prioritize secure clamps and spill trays – Reduces risk of drum drops and costly spills.
Checklist: Selecting pouring equipment for a specific process line
Before buying, capture: 1) Highest receiving point in mm (top of tank or hopper). 2) Clearance width and height of the approach path. 3) Typical drum mass in kg when full. 4) Viscosity / flow behavior of the liquid (thin solvent vs heavy resin). 5) Required pour rate (drums/shift). With these, you can quickly decide between manual, semi‑electric, and battery‑powered tilters.
💡 Field Engineer’s Note: The most common mistake in liquid dispensing is ignoring the center of gravity shift during tilting. As a 200 L drum tips, the effective load moves outward by 150–250 mm, increasing overturning moments. If your lifter or stand is too narrow or you pour sideways into offset inlets, you invite tipping. Always check that the base footprint and wheel track comfortably exceed the drum diameter plus this offset, especially on wet or epoxy‑coated floors with low friction.
Final Considerations, Safety, And Total Cost Of Ownership
Final selection of drum handling equipment should balance safety risk reduction, lifecycle cost, and workflow fit, not just purchase price. If you ask how to choose drum handling equipment, think in terms of injury prevention, spill control, and long-term ROI.
Safety And Injury Prevention As The Primary Selection Filter
Safety performance is the first and non‑negotiable filter when deciding how to choose drum handling equipment. Poor choices expose operators to high forces, awkward postures, and uncontrolled drum movement.
- Start with drum mass, not just volume: A 200 L (55‑gallon) drum can weigh 180–360 kg – well beyond safe manual handling limits for a single person. Injury statistics show overexertion is a leading cause of lost-time injuries.
- Prefer mechanical grip systems over straps alone: Parrot‑beak clamps, U‑clamps, and double‑beak grabs mechanically lock on the drum rim – they greatly reduce drop risk during travel and tilting. Examples include parrot beak clamps and double parrot beak drum grabs.
- Use powered lift where vertical travel is frequent or above 1,500 mm: Repeated manual pumping to 1,600–2,000 mm increases fatigue and error risk – semi‑electric or battery lift isolates the operator from heavy work. Semi‑electric lifters handle up to 500 kg to 2,000 mm.
- Control tilting and rotation: Drum tilters with 180°–360° controlled rotation allow slow, predictable pouring – this avoids sudden shifts in center of gravity that can topple the unit or strain the operator. Manual and battery tilters provide full‑rotation control for 350 kg drums.
- Minimize manual “catching” and stabilizing: If operators routinely steady swaying drums by hand, the equipment is under‑specified – this is where back, shoulder, and hand injuries occur.
💡 Field Engineer’s Note: In real plants, most serious drum incidents happen during that “last 100 mm” of positioning or when freeing a stuck drum. Choose handlers with precise, low‑speed lift/tilt control and good visibility so operators never feel forced to put hands or feet under a suspended drum.
Why injury statistics should drive your budget
Back injuries from manual drum handling alone have cost facilities tens of thousands per case. A single back surgery case can cost USD 70,000–100,000. Spending modestly more on powered or better‑engineered drum equipment usually pays back with just one prevented incident.
Spill Control, Product Protection, And Environmental Risk
Spill control and product protection are key when evaluating how to choose drum handling equipment for liquid or high‑value contents. The right stands, tilters, and clamps directly lower spill frequency and clean‑up cost.
- Use stable drum stands with spill trays for static operations: Industrial drum stands with integrated spill trays catch leaks and splashes – ideal for decanting or long‑term staging of 200 L drums. Typical stands handle 350 kg over 800 mm × 1,200 mm footprints.
- Choose full‑rotation tilters for precise pouring: 360° tilt capability lets the operator “feather” flow and drain completely – this minimizes residual product and reduces uncontrolled gushes that cause spills. Manual lifter‑cum‑tilters offer 350 kg capacity, 1,600 mm lift, 360° tilt.
- Protect high‑value product from handling damage: For chemicals or pharma ingredients worth hundreds of dollars per drum, even minor dents and leaks are expensive – mechanical handling with stable cradles and controlled motion pays back quickly. Annual product losses from poor manual handling can exceed USD 12,000.
- Factor in spill response and environmental penalties: A single spill of hazardous material can trigger clean‑up, disposal, and regulatory costs – controlled tilters and stands are cheaper than one major incident. Spill prevention can save USD 3,000–10,000 per incident.
When a simple drum stand is the best investment
If your drums mostly stay in one area for pumping or gravity dispensing, a robust drum stand with a spill tray may give more risk reduction per euro than a complex mobile handler. Double‑drum stands rated to 350 kg with integrated trays are a simple way to satisfy many safety and environmental requirements.
Compliance, Insurance, And Corporate Risk Exposure
Regulatory compliance and insurance impact are central to how to choose drum handling equipment for modern warehouses and plants. Safer, engineered solutions usually lower both penalties and premiums over time.
- Align handling methods with ergonomic and safety standards: Using suitable drum lifters and tilters demonstrates compliance with safety and ergonomic guidelines – this reduces exposure to citations for unsafe manual handling. Penalties for serious safety violations can exceed USD 16,000 per case.
- Leverage improved safety records to cut insurance costs: Fewer injuries mean better experience ratings – insurers often reward this with workers’ compensation premium reductions of 20% or more. Proper drum handling has been linked to significant premium savings.
- Standardize equipment types across sites: Using similar drum handlers in multiple plants simplifies training, inspections, and documentation – this supports corporate governance and audit readiness.
- Document risk assessments and equipment justifications: When you can show that lifters, stands, and tilters were chosen based on quantified risk and workload, you are better positioned in any post‑incident investigation.
How compliance ties back to your equipment spec
When you write your drum handling specification, explicitly link equipment features (mechanical grip, powered lift, spill containment) to the specific hazards they mitigate. This makes it easier to justify capital expenditure internally and to show regulators or auditors that you systematically controlled the risk rather than relying on PPE and “be careful” posters.
Lifecycle Cost, ROI, And Payback Calculations
Total cost of ownership (TCO) and ROI should finalize how to choose drum handling equipment once safety and compliance are satisfied. Drum handlers that look expensive upfront often become the cheapest option over a 10–20 year life.
| Cost / Benefit Element | Typical Range / Example | Operational Impact |
|---|---|---|
| Purchase price of quality drum handler | Approx. USD 10,000–15,000 | One‑time capital cost spread across 15–20 years of service |
| Annual savings from efficiency | USD 27,000+ per year | One operator with a drum pourer can replace a three‑person manual team, cutting daily labor from USD 120 to USD 15 |
| Annual combined savings (injuries, spills, efficiency) | ≈ USD 30,000 per year | Includes fewer injuries, reduced product loss, and lower clean‑up costs |
| Lifetime value over 15 years | ≈ USD 450,000 | High‑quality drum handler can return 30× the initial investment |
| Payback period | Often < 1 year | First‑year savings can exceed purchase price |
- Include maintenance and battery replacement in TCO: Semi‑electric and battery units need periodic charging and battery changes – still minor compared with labor and injury savings. Examples use 12 V batteries for lift functions.
- Quantify savings from reduced labor: Build a simple model: drums per day × minutes saved per drum × labor rate – this often justifies powered or higher‑capacity models. One documented case cut daily labor cost from USD 120 to USD 15.
- Value avoided injuries and claims: Even one prevented serious back injury can offset the full cost of a high‑end drum handler – include this explicitly in your ROI calculation. Single back injuries can cost USD 70,000–100,000.
💡 Field Engineer’s Note: When I build ROI cases for clients, I use very conservative numbers: cut the claimed labor savings in half and assume only one avoided injury every 5–10 years. Even with these pessimistic inputs, quality drum lifters and tilters usually pay back in under two years, which is excellent for industrial equipment.
Practical Checklist: How To Choose Drum Handling Equipment
A structured checklist helps convert all these considerations into a concrete purchasing decision for your warehouse or plant. Use it to compare manual, hydraulic, semi‑electric, and battery‑powered options side by side.
- 1. Define drum characteristics: Volume (e.g., 200 L), maximum filled mass (kg), material (steel/plastic), and rim type – this filters compatible clamps and stands.
- 2. Map handling tasks by location: Receiving, internal transfer, racking, mixing, dispensing – choose between trolleys, lifter‑cum‑tilters, and static stands based on where the drum moves.
- 3. Set minimum lift height and tilt needs: Do you need to reach 800 mm pallets or 1,600–2,000 mm platforms? Do you need 180° or 360° rotation? – this separates simple lifters from full tilters. Manual lifters typically reach 800 mm; tilters up to 1,600 mm; semi‑electric up to 2,000 mm.
- 4. Choose power level: For low volume and short lifts, manual hydraulic may be enough; for frequent or high lifts, move to semi‑electric or battery – this protects operators and speeds work. Manual handlers exceed 500 kg, semi‑electric up to 500 kg, battery tilters around 350 kg.
- 5. Check floor and aisle conditions: Confirm wheel type, turning radius, and stability on your actual floor – rough or sloped floors may demand larger wheels and more robust frames.
- 6. Integrate spill and product protection: Add drum stands with trays or specify tilters with fine control where liquids are dispensed – this cuts product loss and clean‑up. Industrial stands support double drums up to 350 kg

Final Considerations, Safety, And Total Cost Of Ownership
Choosing drum handling equipment is a design problem, not a catalog exercise. Load rating, drum geometry, lift height, tilt control, and floor conditions all interact to decide whether a single operator can move a 200 L drum safely and repeatably. If you oversimplify any of these, you push risk back onto the operator’s body and accept higher spill and injury rates.
The safest approach is to size equipment to your heaviest drum, highest lift point, and worst aisle or floor, then add a clear stability margin. Use mechanical clamps, wide footprints, and controlled lift/tilt so operators never “catch” or steady drums by hand. Where lifts exceed about 1.5–2.0 m or cycles are frequent, move to semi-electric or battery-powered solutions.
Once safety and compliance are met, total cost of ownership usually favors better-engineered equipment. Reduced labor, fewer injuries, and lower spill costs often repay the investment in under a year and continue for more than a decade. Operations and engineering teams should build a simple ROI model, walk actual drum routes, and then specify a small mix of manual, hydraulic, and powered units—potentially from Atomoving—that match real workflows instead of buying one generic device for every task.
Frequently Asked Questions
How do you select material handling equipment?
Selecting the right material handling equipment involves several key steps. First, identify your specific needs, such as the type of materials you’ll handle and the tasks required. Assess your work environment to ensure compatibility with the equipment. Focus on functionality and ease of use, ensuring that the equipment meets your operational demands. Safety features should also be a priority to protect workers and prevent accidents. For more detailed guidance, check this equipment selection guide.
What are the factors to consider in selecting the equipment?
Several factors should be considered when choosing material handling equipment. Match the production output with the value the equipment brings, such as reliability and efficiency. Evaluate the knowledge and training required for operation. Compare prices but don’t jump on the first offer; consider both new and used options. Assess lease versus purchase decisions and factor in running costs and availability of replacement parts. Learn more about these considerations from this equipment purchasing article.
What are you supposed to consider before purchasing equipment?
Before purchasing equipment, reflect on qualities like reliability, capacity, efficiency, and environmental impacts. Consider the quality of performance and maintenance requirements. These factors will influence long-term operational success. For additional insights, refer to this equipment buying guide.
What is a good way to determine your equipment needs?
To determine your equipment needs, evaluate the size and weight of the materials you’ll handle. Ensure the equipment is suitable for the job site and can be effectively used by your employees. Don’t hesitate to overestimate rental costs and seek expert advice if needed. For practical tips, visit this job equipment guide.