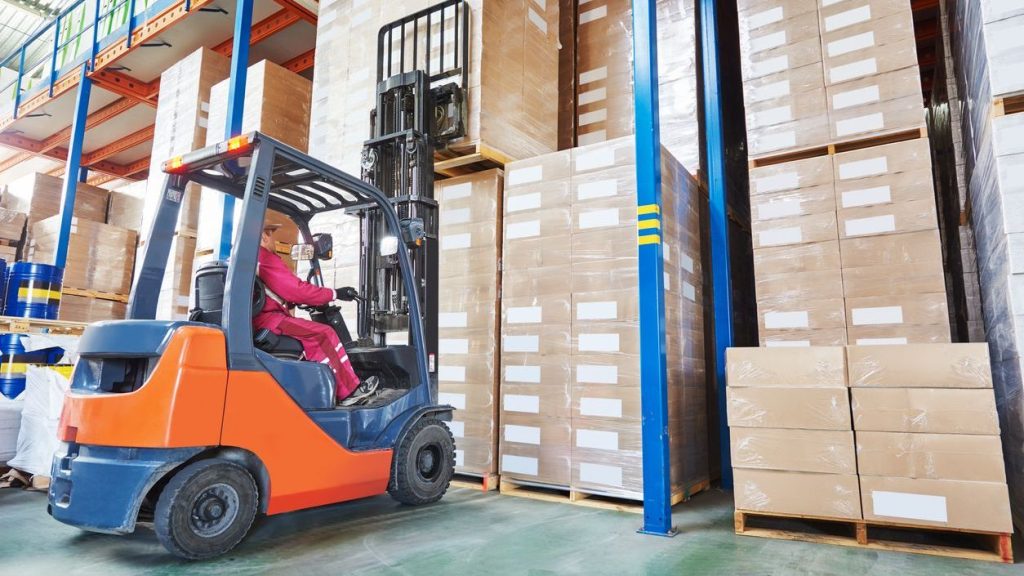
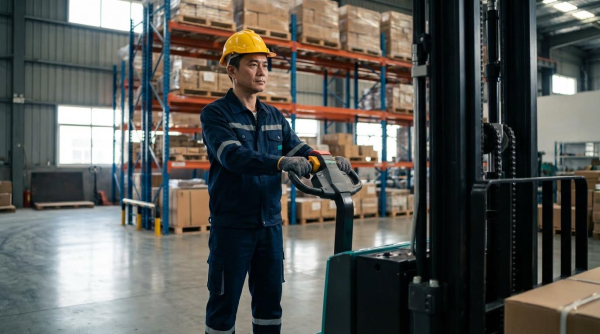
This guide explains how to operate a counterbalanced stacker safely, from pre‑shift checks to load handling and aisle driving. You will learn start‑up inspections, control functions, lockout rules, and practical warehouse techniques that reduce tip‑overs, collisions, and downtime.
Straddle Stacker Basics And Safety Fundamentals
Straddle stacker basics and safety fundamentals explain the machine’s core geometry, limits, and rules so operators know exactly how to operate a battery-powered stacker without tipping, overloading, or breaking site regulations.
Before touching the controls, operators must understand what the main components do, how stability really works, what “rated capacity” means, and which regulations control daily use and inspections. This foundation turns procedures into safe habits instead of guesswork.
Core components and stability triangle
The core components and stability triangle define how a straddle stacker carries weight and where it will tip if you get it wrong.
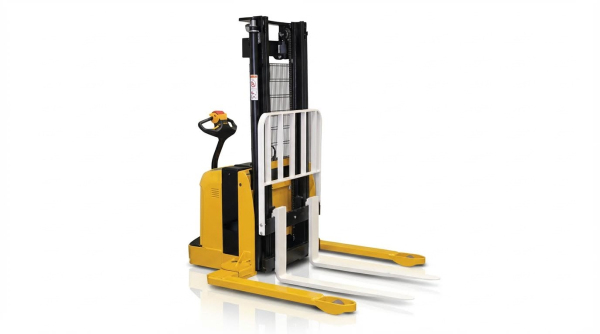
A straddle stacker is a walk‑behind powered industrial truck with outriggers that “straddle” the pallet, lifting it on forks between the legs rather than from the outside like a counterbalanced stacker. Knowing each main component helps you see how forces flow from the load into the floor.
- Chassis and straddle legs: The main frame and two low outriggers carry most of the load – They widen the footprint and resist side‑tip.
- Mast assembly: Fixed or telescopic rails, carriage, rollers, and lift chains – They guide the forks vertically and keep the load aligned.
- Forks and carriage: Adjustable blades locked to the carriage – They transfer load into mast rails and then into the legs.
- Drive unit and tiller: Drive wheel, brake, steering, and control head – They move and stop the combined truck‑plus‑load mass.
- Hydraulic system: Pump, cylinders, hoses, and tank – They generate the lifting force that raises the mast and forks.
- Battery and electrics: Traction battery, controllers, and wiring – They power drive and lift and add low‑mounted counterweight.
All these parts sit inside an invisible “stability triangle.” For straddle‑type and other powered industrial trucks, stability is taught using the Load Moment and Stability Triangle concept, where the truck will tip once the combined center of gravity moves outside this base area. Operators must understand the Load Moment and Stability Triangle to maintain balance and prevent tip-over.
How the stability triangle applies to straddle stackers
The “triangle” corners are roughly under the drive wheel and the two straddle legs. When you lift a 1,000 kg pallet and raise it to, say, 3.0 m, the combined center of gravity moves up and slightly forward. A sharp turn, slope, or impact can then push that center outside the triangle, causing side‑tip or forward‑tip. Keeping loads low, centered against the backrest, and within the rated capacity keeps the center of gravity safely inside the triangle envelope.
💡 Field Engineer’s Note: On polished warehouse floors, even a small slope or low‑spot near a drain can shrink your effective stability triangle. When training people in how to operate a battery-powered stacker, always demonstrate how the truck behaves with a test load on the worst floor section, not just in a perfect training bay.
Rated capacity, load center, and lift height limits
Rated capacity, load center, and lift height limits define the safe “box” of what the stacker can lift, how far from the heel of the forks, and how high.
Every unit carries a capacity plate that links three things: maximum load (kg), rated load center (mm), and maximum lift height (m). If you change any one of these, the safe working envelope shrinks.
| Parameter | Typical Value Range | What It Means In Practice |
|---|---|---|
| Rated capacity | 700–1,800 kg | Maximum pallet mass the truck may lift at its specified load center and base lift height. Typical ranges are 700–1,800 kg. |
| Rated load center | Commonly 400–600 mm | Horizontal distance from fork heel to load center; longer loads move the center forward and reduce safe capacity. |
| Maximum lift height | Up to about 5.0 m | Highest pallet position at or below which rated capacity applies; some models reach about 5 m. Higher lifts mean lower remaining capacity. |
| Stability factors | Capacity, load center, height, leg width | These four factors together decide how close you are to tipping when turning or braking with a raised load. Stability depends on all of them. |
- Always read the capacity plate: It shows the safe kg at a given mm load center and m height – This is your primary rulebook for how to operate a battery-powered stacker safely.
- Keep loads tight to the backrest: Avoid gaps between pallet and carriage – Every extra 50–100 mm forward increases overturning moment.
- Respect height‑dependent derating: As mast height increases, allowable kg reduces – High, heavy pallets are the most common cause of tip‑risk.
- Match pallet geometry to forks: Long or uneven loads shift the true load center – Even if mass is within rating, a longer load can overload the truck.
Quick rule of thumb for marginal loads
If a pallet mass is within the nameplate value but its center of gravity is clearly beyond the rated load‑center distance (for example, a long crate), treat it as unsafe at full height. Either reduce lift height, re‑palletize, or use equipment with a higher rated capacity at that load center.
💡 Field Engineer’s Note: When you train teams on how to operate a battery-powered stacker, put a tape measure on the forks and physically mark the rated load center distance. Once operators see that 600 mm point on the steel, they stop guessing and start judging awkward loads much more accurately.
Regulatory and site safety requirements
Regulatory and site safety requirements set the legal and local rules that govern daily inspections, training, and operating conditions for straddle stackers.
Straddle stackers fall under powered industrial truck rules, so employers must ensure daily inspections, documented maintenance, and trained operators. In many jurisdictions, powered industrial trucks must be inspected at least once per shift, with defects corrected before use. Regulations such as 29 CFR 1910.178(q)(7) require inspections at least daily.
- Daily pre‑use inspection: Check mast, forks, chains, hydraulics, tyres, brakes, steering, horn, lights, and battery – Prevents starting a shift with a known defect. Regulators list specific items like mast, chains, forks, tyres, gauges, and brakes.
- Lockout/tagout of unsafe trucks: Structural cracks, bent masts, damaged forks, severe chain wear, leaks, or failed brakes require immediate removal from service – Prevents catastrophic failure under load. Clear lockout criteria include structural, hydraulic, electrical, and brake defects.
- Operator training and authorization: Only trained, evaluated, and authorized staff may operate – Reduces collisions and tip‑overs in mixed‑traffic aisles.
- Pedestrian separation and markings: Mark walkways, crossings, and exclusion zones around stacking aisles – Minimizes run‑over and falling‑load incidents. Engineering‑based guidelines stress collision and falling‑load prevention.
- Documented maintenance and logs: Record hours, defects, corrective actions, and return‑to‑service checks – Supports compliance audits and predictive maintenance. Preventive schedules and logs are key to safe lifecycle operation.
Typical site rules that affect daily operation
Many warehouses add local rules on top of regulations: maximum travel speed (often below 4.0 km/h), one‑way traffic in narrow aisles, no travel with loads raised above 100–150 mm, and no use on slopes above a specified percentage. These site rules are part of how to operate a battery-powered stacker correctly in that facility and must appear in induction and refresher training.
💡 Field Engineer’s Note: When auditing facilities, the fastest way to spot gaps in how to operate a battery-powered stacker safely is to compare the written site rules, the capacity plates, and the actual floor markings. If those three don’t line up, operators will default to unsafe “tribal knowledge.”
Pre‑Operation Inspections And Lockout Criteria
Pre‑operation inspections are the first defence against tip‑overs, falling loads, and brake failures when learning how to operate a counterbalanced stacker. Any critical defect you find must trigger immediate lockout/tagout and maintenance.
Structural, mast, fork, and chain checks
Structural, mast, fork, and chain checks verify that the stacker can safely carry its rated load without cracking, bending, or chain failure during lifting and travel.
- Chassis and straddle legs: Do a 360° walk‑around on level, well‑lit ground to check chassis, straddle legs, and welds for cracks, deformation, corrosion, or impact damage – prevents sudden loss of stability if a leg or weld fails. Reference
- Guards and covers: Confirm all guards, covers, and fasteners are present and secure – stops hands, feet, and clothing from entering pinch points around mast and chains.
- Mast rails and rollers: Inspect mast rails for straightness, corrosion, scoring, and damaged welds; check that rollers travel freely without binding or flat spots – avoids jerky lifting and side‑loading that can twist the mast. OSHA mast guidance
- Oil traces on mast: Look for oil lines or wet areas on mast channels – early sign of leaking lift cylinders or contaminated chains that can fail under load. Reference
- Fork condition: Examine forks for cracks at the heel, bends in the blade, or twisted tips; check there is no excessive oil or water on the forks – prevents pallet slip and sudden fork fracture under load. OSHA forks checklist
- Fork alignment and locking: Confirm both forks sit at the same height, are not mismatched, and lock positively in their positions – keeps load level and reduces rack strike during stacking. Reference
- Fork wear measurement: Measure fork thickness at critical sections and compare with the manufacturer’s wear limit – ensures remaining steel section can still support the rated capacity, typically 700–1,800 kg. Capacity context
- Lift chains and anchors: Inspect chains and anchor points for rust, tight or frozen links, stretched sections, damaged pins, and missing guards; check equal tension on both sides – prevents uneven lifting, mast twist, and catastrophic chain break. OSHA chain points
How these checks support safe capacity and stability
These structural and mast inspections directly support rated capacity and stability limits. Any distortion shifts the combined centre of gravity closer to the edge of the stability triangle, especially at lift heights up to about 5 m, increasing tip‑over risk when you operate or turn with a raised load. Reference
💡 Field Engineer’s Note: When you see even a small fork heel crack or a slightly bent straddle leg, treat it as a red flag. Under a 1,000 kg pallet lifted to 3–4 m, minor damage can propagate fast, turning into a brittle fracture or mast twist exactly when the operator turns or brakes hard.
Hydraulics, electrics, brakes, and drive system tests

Hydraulic, electrical, brake, and drive tests confirm the stacker can lift, steer, and stop predictably before you move any load.
- Hydraulic hoses and cylinders: Before power‑on, inspect hoses, fittings, and cylinders for wet spots, drips, blistered covers, or chafing against the mast or frame – avoids sudden pressure loss and uncontrolled mast drop. Hydraulic checks
- Hydraulic fluid level and quality: Check reservoir level via sight glass or dipstick using the specified grade; milky or dark oil indicates contamination – contaminated oil accelerates pump and valve wear and can cause jerky lifting. OSHA fluid check
- No‑load lift test: After energizing, cycle lift and lower without a load; listen for cavitation, whining, or jerky motion and watch for mast creep – confirms the system can hold height and move smoothly before you raise 700–1,800 kg pallets. Reference
- Battery compartment and cables: Inspect for secure mounting, intact insulation, clean terminals, and no case damage; confirm state of charge is adequate for the shift – reduces risk of voltage drop, heat build‑up, and mid‑shift power loss. Electrical checks
- Charger lead and disconnects: Make sure the charger lead is fully disconnected and stowed; visually check emergency disconnects and fuses – prevents driving off while plugged in and ensures you can isolate power in a fault.
- Drive and load wheels: Examine wheels and tyres for flat spots, chunking, large cuts, or embedded debris; confirm axles and casters are tight and free from excessive play – keeps steering predictable and avoids vibration that can shake loads loose. OSHA tyre guidance
- Short test drive: Perform a slow test in a clear area to check smooth acceleration, deceleration, and steering response; watch for pulling to one side, grinding noises, or abnormal vibration – catches drive‑train or steering faults before you enter aisles. Reference
- Service brake test: At low speed, apply the service brake and confirm a straight, predictable stop within the site’s specified distance; if the pedal travels to the floor or feels spongy, treat it as a defect – assures stopping power in tight warehouse aisles. OSHA brake checks
- Parking brake test: With the truck on level ground, apply the parking brake and verify there is no creep in either direction – prevents unplanned movement during loading, unloading, or parking.
- Controls and alarms: Test travel controls in forward and reverse, horn, warning buzzer, travel and lift alarms, key‑on indicators, battery status lights, and fault lamps – ensures the stacker “communicates” clearly in noisy, narrow‑aisle environments. Control tests
- Safety devices: Check emergency stop, belly switch on walk‑behind tillers, and operator‑presence controls; each must instantly disable travel and lift when activated – these are last‑line protections against run‑over and crush injuries. OSHA safety devices
Daily inspection frequency and compliance
Regulations such as OSHA 29 CFR 1910.178(q)(7) require powered industrial trucks to be inspected at least daily when in use. Treat this pre‑shift checklist as mandatory whenever you plan how to operate a battery-powered stacker for a full shift. Inspection requirement
💡 Field Engineer’s Note: In cold storage or outdoor winter work, hydraulic oil thickens and batteries deliver less current. Expect slower lift, lazier steering, and longer stopping distances. In these conditions, any minor leak, low fluid level, or weak brake you “accept” at inspection can turn into a complete failure once the oil and seals contract.
Lockout/tagout triggers and maintenance documentation
Lockout/tagout criteria define when a stacker must be removed from service and documented so no one operates unsafe equipment.
- Structural and mast defects: Lock out the stacker for structural cracks, bent masts, deformed straddle legs, damaged forks, or broken mast welds and stops – these directly reduce capacity and can cause sudden collapse under load. Lockout criteria
- Chain and fork wear: Apply lockout for severely worn or elongated chains, missing chain anchors, failed guards, visible fork cracks, or permanent fork deformation – prevents chain snap or fork break during lifting at heights up to around 5 m.
- Hydraulic failures: Tag out for active oil leaks, rapid mast creep under load, erratic or jerky lift motion, or cylinders that will not hold position – these are critical defects, not “monitor later” items.
- Electrical hazards: Immediately isolate for smoking components, damaged cables, exposed conductors, repeated fault codes, or battery damage – reduces fire, arc, and shock risk in confined warehouse spaces.
- Brake and safety device failures: Lock out the unit if service or parking brakes fail any stopping/holding test, or if emergency stop, belly switch, or operator‑presence devices do not function correctly – without these, you cannot safely share aisles with pedestrians.
- Alarms and labels in critical areas: In high‑traffic or regulated environments, remove from service if horns, alarms, or capacity plates are inoperative or illegible – operators must see the rated capacity and others must hear the truck coming.
- Lockout procedure: When a defect is found, remove the key, apply a personal lock where procedures require it, and attach a clear tag describing the defect, date, and reporter – prevents another operator from using an unsafe truck. Lockout process
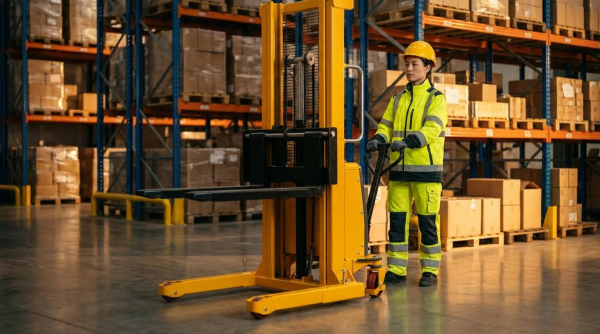
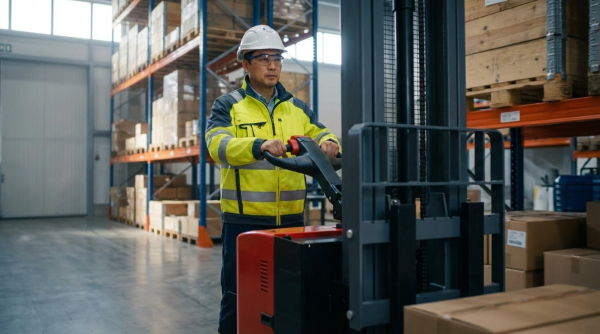
- Operating Controls, Load Handling, And Aisle Techniques
This section explains how to operate a straddle stacker safely in real warehouses: using the tiller controls, handling loads, and navigating narrow aisles without collisions or tip-overs.
If you are searching for how to operate a counterbalanced stacker, these control, load, and aisle techniques form the core of safe, efficient daily operation.
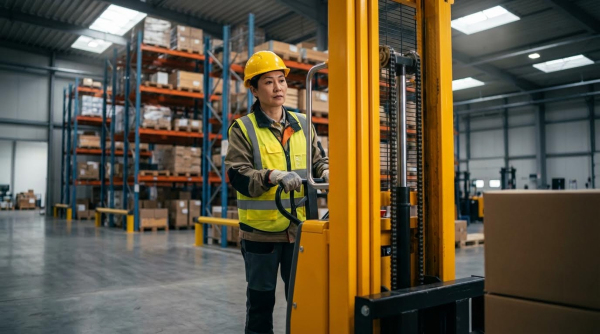
Tiller controls, speed modes, and operator position
Tiller-head discipline is the foundation of how to operate a battery-powered stacker without sudden, uncontrolled movements or crush hazards.
- Tiller position: Operate with the tiller roughly between waist and hip height – this gives good leverage and automatic braking if you release it.
- Travel direction control: Use the rocker or butterfly switch for forward/reverse – smooth inputs prevent abrupt weight transfer and skidding.
- Proportional throttle: Feather the travel control instead of “full on/full off” – reduces shock loading on drive wheels and pallets.
- Lift/lower buttons: Use short, controlled presses – fine control of mast movement protects racks, loads, and chains.
- Emergency reverse (belly) button: Keep clear space behind you so it can push the truck away – prevents crush injuries against walls or racks.
- Normal speed mode: Use for open areas with good visibility – efficient travel at around walking speed while staying controllable.
- Creep / turtle mode: Select for tight aisles, docking, or close pallet alignment – very low speed allows precise positioning with the tiller near vertical.
- Operator stance: Stand slightly to one side of the tiller, never directly in line – keeps an escape path if the truck moves unexpectedly.
- Travel direction choice: Move in the direction with best visibility – reduces collision risk with pedestrians and racking.
- Braking by tiller angle: Learn the “dead-man” function of your unit – raising the tiller too high or too low should slow and brake the truck.
Control / Mode Typical Use Case Operational Impact Normal travel mode Open aisles, transfer between zones Efficient movement around 3.5–4.0 km/h with stable handling when load is low Creep / turtle mode Narrow aisles, docking at racks, truck within 100–300 mm of obstacles Very low speed improves precision and reduces rack or pallet impacts Tiller mid-range Standard walking and steering position Comfortable control and automatic braking if released Tiller near vertical Working in tight spaces or on ramps (if permitted) Reduced speed and tighter turning radius, but requires extra attention to footing Emergency reverse button Operator trapped between truck and obstacle Instantly drives truck away to relieve crush pressure 💡 Field Engineer’s Note: In cold rooms or on smooth epoxy floors, even small throttle inputs can cause wheel spin. Train operators to use creep mode by default in these areas and verify floor friction before approving higher speed limits.
How to practice tiller control safely
Start with the stacker unloaded in an open, marked area. Set creep mode, then practice straight-line travel, gentle S-turns, and controlled stops using only small movements of the tiller and throttle. Add low, stable test loads only after operators can stop within a marked distance consistently.
Safe lifting, transport, stacking, and de-stacking
Controlled lifting and stacking keep the combined center of gravity inside the stability triangle so the electric platform stacker does not tip or drop the load.
- Read the capacity plate: Confirm load mass and load center are within rating – prevents overloading at height.
- Approach squarely: Align the truck and forks straight to the pallet – avoids side loading of forks and mast.
- Fork spacing: Adjust forks to support as close to the pallet stringers as possible – improves load stability and reduces pallet breakage.
- Full fork insertion: Drive until the pallet is fully on the forks, not hanging off the tips – keeps load center close to the carriage.
- Initial lift height: Raise only 50–100 mm above floor for travel – keeps the center of gravity low and more stable.
- Travel with mast lowered: Move with the load as low as practical – minimizes overturning moment in turns and on bumps.
- Avoid sudden steering and braking: Turn gradually and brake early – prevents load shift and side-tipping.
- Ramps and slopes: Avoid them; if allowed, keep the load upgrade and speed very low – reduces risk of runaway or loss of steering.
- Stacking approach: Stop clear of the rack, then lift – prevents mast or pallet striking beams during raising.
- Set-down control: Lower gently until the pallet is fully supported – prevents beam damage and pallet collapse.
- Horizontal fork withdrawal: Back out level, without lowering while pulling – avoids dragging or hooking the pallet and beams.
- De-stacking check: Slightly lift to take weight, then confirm clearance – prevents snagging on beams before reversing.
Task Stage Key Check Operational Impact Pre-lift Load mass and load center within nameplate rating Reduces risk of mast overload and forward tip-over at height Engaging pallet Forks fully inserted, load not overhanging tips Improves stability and prevents fork bending Transport Load 50–100 mm above floor, mast vertical Maintains low center of gravity and good visibility Cornering Speed reduced before turn, no sharp steering Prevents lateral instability and load shift Stacking Lift while clear of rack, then creep in Protects uprights, beams, and product from impact De-stacking Confirm pallet clear of beams before backing Avoids snagging beams and pulling racking out of alignment 💡 Field Engineer’s Note: Many incidents happened when operators “just moved it a few meters” with the load raised at 1.5–2.0 m. Enforce a simple rule: never travel more than one pallet length with the load above 200 mm unless you are in the actual stacking motion.
Quick checklist before every lift
1) Check capacity plate against load. 2) Inspect pallet condition. 3) Center the load on both forks. 4) Keep bystanders clear of the load and under the forks. 5) Plan your travel path and stacking position before lifting.
Narrow-aisle navigation and collision prevention
Disciplined speed, scanning, and space management are what make narrow-aisle operation safe instead of a constant near-miss zone.
- Use low speed by default: Select creep or the lowest speed setting in aisles – gives time to react to pedestrians and obstacles.
- Constant scanning: Scan 180° ahead and to both sides – catches protruding pallets, rack legs, and other trucks early.
- Horn at conflict points: Sound the horn at cross aisles, doors, and blind corners – warns pedestrians and other equipment.
- Clearance from racking: Maintain a lateral gap from uprights and end guards – prevents side impacts that can buckle racks.
- Respect turning radius: Avoid tight pivot turns within the straddle width – reduces stress on drive components and outrigger impacts.
- One-way systems: Follow site one-way aisle markings where provided – minimizes head-on encounters and congestion.
- Travel direction vs. visibility: When a high load blocks forward view, travel in reverse if safe – keeps the operator’s eyes in the direction of motion.
- Pedestrian separation: Keep people out of the aisle while operating – eliminates run-over and crush zones between truck and racks.
- No one under raised loads: Never allow anyone beneath forks or loads – prevents fatal injuries from falling loads.
- Use marked crossings: Stop at pedestrian crossings and confirm eye contact – ensures everyone understands who moves first.
Narrow-Aisle Factor Typical Control Best For… Aisle width Designed to include pallet length + truck length + safety clearance Allowing turns without striking racks or posts Speed limit Lower internal limit than open areas Reducing stopping distance on smooth warehouse floors Turning radius Planned against pallet overhang and outriggers Ensuring the truck can reverse and realign without impacts Traffic pattern One-way aisles with marked entry/exit Preventing head-on encounters between trucks Pedestrian routes Physically separated walkways and crossings Keeping people out of the truck’s swept path 💡 Field Engineer’s Note: Most “mystery” rack damage in audits came from outrigger strikes at low level, not from pallets at height. Train operators to watch the straddle legs, not just the forks, when turning or passing end-of-aisle guards.
Simple aisle driving drill for new operators
Set up a mock aisle with cones at racking positions. Have operators drive in creep mode, keeping a fixed gap from the cones, stopping at “intersections” to sound the horn, then reversing out without touching cones. Add a low test load once they can complete three clean laps.
“”

Final Thoughts On Safe Straddle Stacker Operation
Safe straddle stacker operation depends on three linked elements: sound engineering limits, disciplined inspections, and controlled driving technique. Geometry, capacity, and the stability triangle define what the truck can handle. If you respect the capacity plate, keep loads low and tight to the backrest, and match pallet shape to fork spacing, you keep the center of gravity inside a safe zone.
Daily structural, hydraulic, electrical, and brake checks turn that theory into real protection. When operators lock out trucks with cracks, leaks, worn forks, weak brakes, or failed safety devices, they break the chain that leads to tip‑overs and falling loads. Good records then help engineering teams plan repairs and upgrades, not just react to failures.
On the floor, tiller discipline, low travel height, and slow, planned movements in aisles keep forces predictable and give operators time to react. Clear site rules, marked walkways, and strong training programs align people, equipment, and layout.
The best practice for operations and engineering teams is simple: treat the capacity plate as law, treat the pre‑shift checklist as non‑negotiable, and treat narrow‑aisle driving as a precision task. Follow these rules, and Atomoving straddle stackers will deliver safe, reliable performance shift after shift.
Frequently Asked Questions
How to Use a Straddle Stacker?
A straddle stacker is designed to move pallets efficiently in tight spaces. To operate it, ensure you understand the controls, maintain a clear path, and follow safety guidelines like the “halo rule.” Warehouse Solutions.
- Inspect the equipment before use.
- Ensure the load is balanced and within the weight capacity.
- Move slowly and avoid sudden turns to prevent tipping.
What Should You Do Before Using a Straddle Stacker?
Before operating a straddle stacker, perform a preventive maintenance check. Inspect for any visible damage, ensure the battery is charged, and verify that all safety features are functional. Preventive Maintenance Guide.
- Check tire pressure and condition.
- Test the brakes and steering.
- Review the operator’s manual for specific instructions.