Knowing how to test scissor lift batteries is the fastest way to fix no-lift, slow, or intermittent faults before they become expensive downtime. This guide breaks down safe testing, voltage and load checks, and how to read battery data so you can separate battery, charger, and wiring issues with confidence.

Core Principles Of Scissor Lift Battery Testing
The core principles of how to test scissor lift batteries are: control the hazards first, follow ANSI/OSHA procedures, and match your test method to the actual battery type on the lift. Getting these basics right prevents accidents and bad diagnostics.
- Start with safety: Treat every battery as live – prevents arc flash, chemical burns, and crush incidents.
- Follow standards: Align with ANSI A92 and OSHA lockout expectations – keeps your testing defensible and repeatable.
- Know the battery type: Flooded, AGM, or gel need different checks – avoids wrong conclusions from “good” or “bad” readings.
- Test under real conditions: Combine voltage, load, and visual checks – predicts how the lift will behave under working loads.
💡 Field Engineer’s Note: Most “mystery” lift faults I saw were not electronics—they were weak batteries mis-tested or tested too soon after charging, giving false “good” readings. Always let batteries rest before serious testing.
Safety, lockout, and ANSI/OSHA compliance
Safe scissor lift battery testing starts by de‑energizing, securing the machine, and following ANSI/OSHA rules for lockout, PPE, and ventilation. This is non‑negotiable before you ever touch a test lead.
- Stabilize the lift: Lower the platform fully and chock wheels if on any slope – prevents unplanned movement while you’re over the battery tray.
- Key and controls: Turn key OFF, remove it, and hit all emergency stops – prevents someone from driving or lifting while you are connected to the pack.
- Lockout/Tagout (LOTO): Apply lock and tag per site procedure – meets OSHA expectations for controlling hazardous energy.
- PPE: Wear eye protection, acid‑resistant gloves, and suitable clothing – protects against electrolyte splash and arc flash from shorted tools.
- Ventilation: Work in a well‑ventilated area, especially with flooded lead‑acid – prevents hydrogen buildup and explosion risk during and after charging.
- Tool discipline: Use insulated tools and keep metal jewelry away – reduces chance of bridging battery terminals and creating a high‑current short.
Before any detailed test, you also perform a quick condition and maintenance check. This aligns with daily inspection guidance used for electric scissor lifts. Visual checks catch many issues before you even pick up a meter.
- Visual battery check: Look for cracks, leaks, bulging cases, and damaged cables – structural damage often means the battery is unsafe regardless of voltage.
- Terminal condition: Confirm posts and lugs are clean and tight, no heavy corrosion – high resistance joints cause voltage drop and heat under load.
- Surrounding systems: Scan for oil or hydraulic leaks around the tray – slippery surfaces and contamination increase slip and fire risk.
- General machine checks: Many service routines also verify fluid levels, steering, brakes, and emergency controls – ensures the lift is safe once you return it to service.
Why lockout/tagout matters when only “testing” batteries
Even if you are “just measuring voltage,” you are working inside the primary power circuit. A second person can unknowingly turn the key or press a control, energizing contactors and wiring you are touching. Proper lockout/tagout ensures only the technician in control can re‑energize the lift.
💡 Field Engineer’s Note: On tight jobsites, I always positioned the lift so the battery side was away from traffic. A bump from a forklift while the tray is open can twist cables or crack cases, turning a simple test into a spill and cleanup job.
Battery types in scissor lifts and test implications

Understanding which battery type is installed—flooded lead‑acid, AGM, or gel—determines how to test scissor lift batteries correctly and which readings actually mean “good” or “bad.” You cannot apply one procedure to all chemistries.
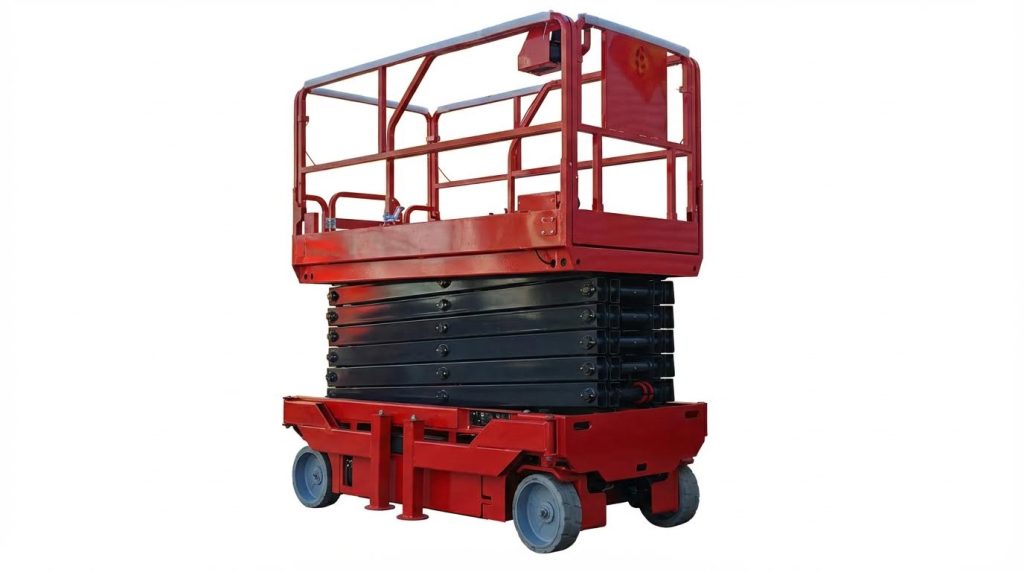
Most electric scissor lifts use lead‑acid batteries in series strings (commonly 6 V or 12 V units in a 24 V or 48 V pack). The chemistry and construction change how you inspect, service, and interpret test data.
| Battery Type | Key Features | Testing Focus | Service Considerations | Operational Impact |
|---|---|---|---|---|
| Flooded lead‑acid (wet) | Removable caps, liquid electrolyte visible | Voltage, load test, specific gravity, water level | Requires regular topping with distilled water | Best for indoor fleets with strong maintenance discipline |
| AGM (Absorbed Glass Mat) | Electrolyte absorbed in glass mat, sealed | Voltage and load; no routine SG check | No watering; sensitive to over‑voltage charging | Good where low maintenance and low spill risk are priorities |
| Gel lead‑acid | Silica‑gelled electrolyte, sealed | Voltage and load; must respect lower charge rates | Easily damaged by high charging current or voltage | Used where deep cycling and spill resistance matter |
- Flooded batteries: Allow specific gravity checks with a hydrometer – gives a very direct view of state of charge and cell balance.
- Sealed (AGM/gel): No caps to open, so you rely on voltage, load, and internal resistance – prevents tampering but demands better test discipline.
- Pack configuration: Multiple 6 V or 12 V units in series – one weak battery drags the whole pack down under lift or drive load.
Voltage expectations also shift slightly with chemistry and construction. For example, a fully charged 12 V AGM battery typically shows about 12.6–12.8 V at rest when properly charged and rested, and a healthy 24 V system will read roughly 25–26 V at full charge when checked with a multimeter after charging and stabilization. Significant deviation from these ranges, or more than about 0.5 V difference between series batteries in the same pack, flags a problem cell or unit that will limit lift performance under load.
How battery type changes your day‑to‑day testing routine
With flooded batteries, part of routine testing is checking water level above the plates and maintaining it with distilled water only, plus using specific gravity readings to confirm charge level and detect sulfation trends. With AGM or gel, you skip water and gravity checks but must be stricter about correct charger type and voltage profile, because over‑voltage charging can permanently dry out or gas sealed cells without any easy way to recover them.
💡 Field Engineer’s Note: When a mixed pack (old and new, or mixed brands) showed odd test results, replacing only the “worst” battery often came back to bite later. In real fleets, a mismatched battery string tends to fail early and makes troubleshooting voltage sag much harder.
Voltage, Load, And Capacity Tests In Practice

This section explains how to test scissor lift batteries in the real world using voltage, load, and capacity checks so you can link numbers on a meter to actual lift performance and runtime.
- Goal: Turn raw readings into clear “good/bad/replace” decisions – Less guesswork, fewer surprise no-lift calls.
- Method: Combine open‑circuit, loaded voltage, and capacity tests – Build a complete picture of battery health.
- Outcome: Confident diagnosis of weak cells vs wiring vs charger issues – Fix the right problem first time.
💡 Field Engineer’s Note: Never judge a scissor lift battery pack from open‑circuit voltage alone. Packs that look “full” at rest can collapse under pump load and trigger low‑voltage cutouts within seconds.
Open‑circuit and system voltage measurements
Open‑circuit and system voltage measurements tell you the basic state of charge of each battery and the whole pack, and they are always the first step in how to test scissor platform lift batteries.
Start with the lift locked out, key off, and batteries at rest. For meaningful open‑circuit voltage (OCV), the pack should sit disconnected or idle for at least 4 hours so surface charge stabilizes. A healthy, fully charged 12 V AGM battery typically reads about 12.6–12.8 V at rest in standard test procedures. Multi‑battery scissor lift packs are usually 24 V or 48 V systems. A fully charged 24 V system should read roughly 25–26 V across the main positive and negative with a multimeter according to field guidelines.
| Battery / Pack | Typical “Full” OCV | Warning Level (resting) | Operational Impact |
|---|---|---|---|
| Single 6 V lead‑acid | ≈ 6.3 V | ≤ 6.1 V | Early sign of undercharge; pack may lose torque under load. |
| Single 12 V AGM | 12.6–12.8 V | < 12.4 V suggests sulfation risk per battery training | Lift may still power up but will sag fast when lifting. |
| 24 V system (4×6 V or 2×12 V) | 25–26 V | < 24 V | Slow drive, slow lift, early low‑voltage cutout. |
- Measure each battery: Record voltage battery‑by‑battery – Find weak or reversed units inside a series string.
- Compare spread: A difference >0.5 V between similar batteries flags a problem per service practice – Likely sulfation or loss of capacity in the low unit.
- Check system voltage live: Turn key on and watch pack voltage – Instant drop of several volts with no motion indicates a very weak pack or bad connections.
How to take clean open‑circuit readings
Isolate the pack if possible, charge fully, then let it rest 4–12 hours with no charger or load connected. Measure at the posts, not on corroded lugs, to avoid reading through resistance films.
💡 Field Engineer’s Note: If OCV looks acceptable but the machine shows low‑voltage alarms as soon as you touch a function, go straight to loaded voltage tests at the pump contactor; OCV alone is hiding the real problem.
Load testing, internal resistance, and amp‑draw
Load testing, internal resistance checks, and amp‑draw measurements show how the battery behaves under real scissor‑lift loads, which is where most hidden failures appear.
A load test applies a known current for a short time and watches how far the voltage drops. A healthy battery holds a relatively stable voltage under a 15–30 second load per standard procedures. Significant drop means lost capacity or high internal resistance. Many workshops use a digital battery tester or carbon‑pile tester to do this quickly.
| Test | How It’s Done | What You Watch | Operational Impact |
|---|---|---|---|
| Bench load test | Connect load tester to individual battery for 15–30 s | Voltage drop vs rated load current | Identifies weak units before they drag down the whole pack. |
| On‑machine loaded voltage | Meter across pack while raising platform | Drop from rest voltage to lift‑under‑load | Large drop = pack or cables can’t support pump motor demand. |
| Amp‑draw test | Clamp meter on pump motor feed | Current vs manufacturer’s spec | High current with low performance suggests hydraulic or mechanical drag. |
- Use a battery load tester: Follow the tester’s rating and time limits – Prevents overheating and gives repeatable results.
- Watch pack sag: A 24 V pack collapsing toward 20–21 V during lift is a classic weak‑battery signature – Explains slow lift and nuisance cutouts.
- Check connections: Big voltage drop between a battery post and its cable lug under load points to corrosion or loose hardware – Cheap fix compared to a new pack.
Internal resistance (R) is another way to quantify battery health. A simple method is to apply a small known load, measure the change in voltage (ΔV), and use Ohm’s law R = ΔV / I as described in battery testing guides. High internal resistance means the battery converts more energy into heat instead of useful work and will show severe voltage sag under the scissor lift’s pump load.
Quick internal resistance check (concept)
Measure battery voltage at rest. Apply a known load current (for example from a tester), then measure loaded voltage. Subtract to get ΔV, then divide by load current. Compare between batteries; the one with much higher R is usually the problem.
💡 Field Engineer’s Note: When one battery in a series string shows much higher voltage drop or internal resistance than its neighbors, replace it as a set with the others; mixing a new unit into an old pack often shortens the new battery’s life.
Specific gravity, sulfation, and temperature effects
Specific gravity readings, sulfation checks, and temperature effects explain why some scissor lift batteries fail early even when voltage and charging seem normal.
On flooded lead‑acid batteries, a hydrometer reading of electrolyte specific gravity (SG) gives a direct state‑of‑charge indication. A fully charged 12 V battery typically shows around 1.265 SG, while a fully discharged one is closer to 1.12 per battery training materials. For scissor lifts, you should avoid discharging below roughly 10.5 V (about 1.75 V per cell), because deep discharge drastically shortens life.
| Indicator | Typical Value | What It Means | Operational Impact |
|---|---|---|---|
| Specific gravity “full” | ≈ 1.265 | Battery at or near 100% charge | Maximum runtime; normal lift and drive speeds. |
| Specific gravity “empty” | ≈ 1.12 | Battery fully discharged | Risk of permanent damage if operated or left in this state. |
| Sulfation threshold | SG < 1.225 or < 12.4 V on 12 V unit per training | Lead sulfate crystals harden on plates | Permanent capacity loss; lift runs noticeably shorter each charge. |
- Check SG by cell: Large differences between cells in the same battery point to internal damage – That battery is a replacement candidate.
- Watch water level: For flooded batteries, keep electrolyte above the plates with distilled water only, checking at least weekly per maintenance guidance – Prevents plate exposure and sulfate buildup.
- Avoid chronic partial charge: Regularly stopping at 80–90% charge accelerates sulfation – Always recharge to full after each shift when possible.
Temperature strongly affects test results and real‑world lift runtime. Heat speeds up degradation and internal self‑discharge, while cold can cut available capacity by up to about 50% at freezing temperatures according to field experience. Ideal charging temperatures are roughly 15–27 °C; outside this range, both voltage readings and SG should be temperature‑compensated for precise analysis.
Temperature corrections and test planning
At low temperatures, expect lower voltage under load and shorter runtime even from a good pack; plan more frequent recharging. At high temperatures, be more conservative with discharge depth and monitor water levels closely to avoid boil‑off and plate exposure.
💡 Field Engineer’s Note: Many “mystery winter faults” on outdoor scissor lifts came down to cold batteries: capacity halved overnight, so the same job that was fine at 20 °C suddenly stalled the lift by mid‑morning at 0 °C.
Troubleshooting Lift Performance From Battery Data
Troubleshooting lift performance from battery data means turning voltage, load, and specific gravity readings into clear decisions about batteries, chargers, or wiring faults so the scissor platform returns to full, safe duty quickly.
In practice, this is where knowing how to test scissor lift batteries becomes money in your pocket. You are no longer just “checking volts”; you are matching hard numbers to no‑lift, no‑drive, and slow‑operation complaints and deciding what to repair first.
- Goal: Use test data to pinpoint the weak link – so you stop guessing and stop swapping good parts.
- Inputs: Voltage, load test, specific gravity, and charger output – the same tests you already perform.
- Output: A clear call: “Battery”, “Charger”, or “Wiring/other electrical”. – Which drives your work order and parts list.
💡 Field Engineer’s Note: Always record readings under load with the platform raised or pump running. Many packs look “fine” open‑circuit but collapse the moment the hydraulic pump pulls full current.
Linking battery test results to no‑lift and slow faults
Linking battery test results to no‑lift and slow faults means mapping specific voltage and load‑test patterns to the classic scissor lift complaints operators report every day.
Most “the lift is dead” or “it’s painfully slow” calls trace back to the battery system. Your earlier tests on how to test scissor lift batteries now become a diagnostic map.
| Operator Complaint | Typical Test Findings | Likely Root Cause | Operational Impact |
|---|---|---|---|
| No lift, no drive, display dark | Pack voltage well below nominal (e.g. 24 V system reading under 22–23 V), some batteries under 12.4 V for 12 V units | Severely discharged or sulfated batteries; possible charger failure | Machine may not power up at all; E‑stop and control circuits starved of voltage. |
| No lift, but controls power up | OCV looks acceptable, but voltage sags heavily under pump load; load test fails after 15–30 s | Weak batteries with high internal resistance | Solenoids click but pump contactor drops out; lift refuses to raise. |
| Slow lift and slow drive | Pack reads slightly low (e.g. 24 V system at 23–24 V under load), specific gravity below about 1.225 on several cells | Undercharged batteries or early sulfation from chronic partial charging | Noticeable loss of pump speed and drive torque; reduced duty time per charge. |
| Runs briefly, then shuts down | OCV normal after rest, but rapid voltage drop and low reserve capacity during discharge test | End‑of‑life batteries with reduced amp‑hour capacity | Lift starts work but hits low‑voltage cutout long before expected shift length. |
| Intermittent slow operation | Battery tests mostly OK; occasional high voltage drop across specific cables or contactors during amp‑draw test | Corroded terminals, loose lugs, or damaged cables | Random sluggishness, especially under maximum lift or drive load. |
- Open‑circuit voltage (OCV): Use it to see state of charge after rest – but never rely on it alone for performance complaints.
- Loaded voltage: Watch the pack during pump start and steady lift – this is where weak batteries reveal themselves.
- Specific gravity (flooded cells): Compare cells – one low cell often explains a single “anchor” battery killing the string.
- Temperature: Consider cold‑weather loss of capacity up to about 50% at 0°C – a “weak” pack may be normal for the conditions.
Fast field workflow: from complaint to battery verdict
Step 1: Verify the complaint at the machine – replicate “no‑lift” or “slow” with the operator’s usual load and height.
Step 2: Measure pack voltage at rest – confirm it is in the expected band for a “charged” system (for example, about 25–26 V on a healthy 24 V pack).
Step 3: Command full lift while watching voltage – if it collapses sharply, move straight to battery load and internal‑resistance checks.
Step 4: If voltage holds but lift stays slow, shift your focus to hydraulics (filters, valves, pressure).
Differentiating battery, charger, and wiring problems
Differentiating battery, charger, and wiring problems means using the same test set to decide whether you replace the pack, repair the charger, or chase high‑resistance connections.
This is the real payoff of learning how to test scissor lift batteries properly: you stop blaming the pack for charger and cable faults, and you stop installing new batteries into a sick charging system.
| Test Pattern | Battery Health Indicators | Charger Indicators | Wiring / Connection Indicators | Most Probable Fault |
|---|---|---|---|---|
| Low OCV, low specific gravity, fails load test | All readings poor and consistent across tests | Charger output may be normal now, but history shows chronic undercharge | Connections mostly cool and tight | Battery pack at end of life or heavily sulfated. |
| Pack often low after “full” charge; SG below about 1.225; voltage rarely reaches normal full‑charge values | Batteries recover somewhat with extended external charge | On‑board charger never reaches proper absorption/float stages or cuts off early | Cables OK, no major hot spots | Charger mis‑matched to battery type or failing control board. |
| Good OCV and SG, but high voltage drop only across certain cables or contactors during amp‑draw test | Individual batteries pass load tests | Charger brings pack to normal full‑charge voltage | Localized heating, corrosion, or loose lugs at high‑drop points | High‑resistance wiring, terminals, or contactors. |
| Charger refuses to start on deeply discharged pack | Pack voltage extremely low (for example, around 11.5 V on a nominal 24 V system) | Charger needs minimum input voltage to detect battery and will not engage | Cables may be fine | Battery deeply discharged; may need external “boost” charge before judging charger. |
| Intermittent no‑lift/no‑drive with normal battery and charger readings | Pack and cells test within range | Charger logs and outputs normal | Wiggle test on harness affects operation; evidence of damaged insulation or loose plugs | Harness, interlocks, or control‑circuit wiring faults. |
- When it is the battery: Low OCV, poor load performance, and low specific gravity all agree – replace the pack after confirming charger settings.
- When it is the charger: Batteries test OK when charged externally, but never reach full charge on the machine – repair or replace the charger and verify compatibility.
- When it is wiring: Voltage is “lost” between pack and motor or controller – trace and repair the hot spots, not the batteries.
- Step 1: Test the pack thoroughly (OCV, load, SG where applicable). – Decide if the batteries are basically sound.
- Step 2: Measure charger output at its DC leads during a charge cycle. – Compare to its nameplate and expected three‑stage profile.
- Step 3: Under load, measure voltage at the pack, then at the pump motor or controller. – Any big drop in between points to wiring or contactors.
- Step 4: Only after these three checks decide what to replace. – This prevents installing new batteries into a bad charger or bad harness.
💡 Field Engineer’s Note: When you replace a failed pack, always print or write the charger’s correct voltage and battery‑type settings on the machine. Most “mystery” early battery deaths come from someone quietly changing those settings months later.

Final Thoughts On Reliable Scissor Lift Battery Testing
Reliable scissor lift battery testing depends on disciplined safety, correct methods, and clear decisions. Lockout, PPE, and good ventilation protect technicians while they work inches from high current and acid. Matching test methods to flooded, AGM, or gel batteries keeps readings honest and prevents early failures.
Voltage, load, and specific gravity checks work together, not alone. Open‑circuit voltage shows state of charge. Loaded voltage, internal resistance, and amp‑draw reveal hidden weakness under pump demand. Specific gravity and temperature corrections explain why packs fail early or lose runtime in heat or cold.
When you link these results to operator complaints, you turn “no‑lift” and “slow” into a clear verdict: battery, charger, or wiring. That avoids guesswork, part swapping, and repeat callouts. The best practice for any fleet, rental yard, or Atomoving user is simple: standardize a test routine, record readings, and act on trends before breakdowns.
Use safe procedures every time, test rested batteries with the right tools, and always check performance under real load. If you do that, your scissor lifts stay predictable, your batteries live closer to their full design life, and your crews spend more time in the air and less time waiting on repairs.
Frequently Asked Questions
How do you test scissor lift batteries?
To test scissor lift batteries, start by ensuring the lift is turned off and the key is removed for safety. Carefully access the battery compartment and check the voltage using a voltmeter. Connect the positive (red) terminal of the voltmeter to the positive terminal of the battery, then connect the negative (black) terminal of the voltmeter to the negative terminal of the battery. A healthy battery should show a voltage between 12.4V and 12.7V. If the reading is below this range, the battery may need charging or replacement. For more details, refer to Battery Health Guide.
Where do you charge a scissor lift battery?
The charging port for a scissor lift battery is often located on the right side of the lift’s base, though in some models it might be at the rear. To charge the battery, connect the lift’s charger to an AC extension cord and plug the cord into an electrical outlet. Always follow the manufacturer’s guidelines to ensure safe charging practices. For additional guidance, see Scissor Lift Charging Instructions.