Safe heavy barrel lifting is the controlled movement of drums and barrels using mechanical aids, straps, and limited manual methods to keep forces within safe working limits. This guide explains how to lift a barrel without exceeding regulatory, equipment, or human capacity. You will see how standards, barrel lifter, and rigging geometry work together so operators can move 200 L to 1,000 L barrels efficiently while minimizing crush, spill, and musculoskeletal risks. Whether you run a warehouse, chemical plant, or workshop, you will learn how to pick the right technique and equipment for your layout, load, and workforce.
Core Safety Principles For Lifting Heavy Barrels
Core safety principles for lifting heavy barrels focus on staying within equipment limits, planning every lift, and controlling people around the load. If you want to know how to lift a barrel safely, you start here before choosing any tool.
These principles apply whether you use a forklift drum lifter, a forklift attachment, or pure manual handling. They sit on three pillars: regulations and SWL, risk assessment of the task, and trained people working inside clear exclusion zones.
Regulatory limits, SWL and proof load testing
Regulatory limits, safe working load (SWL), and proof load testing define the absolute boundaries for how to lift a barrel without over‑stressing gear or breaking the law. In practice, you never plan a lift above the lowest rated component in the system.
Global rules such as OSHA, LOLER, PUWER and ISO treat barrel lifting as a controlled lifting operation. Equipment must carry a visible SWL rating, and the actual lifted mass must always be at or below that number. For higher capacity gear, regulations require that items above about 4.54 tonnes SWL display their rating clearly, and loads above roughly 0.91 tonnes must have their own weight marked so planners can verify margins before lifting according to published guidance.
Before first use and after any structural repair, lifting devices undergo a proof load test. This test uses a controlled load that exceeds the SWL by roughly 10–25% to demonstrate that the structure and critical components can tolerate overload without permanent deformation or failure as described in regulatory summaries. Larger lifting equipment is typically re‑proof‑tested on a multi‑year cycle (for example, around every four years), with more frequent in‑service inspections in between.
Daily pre‑use checks are just as important as periodic tests. Operators visually inspect hooks, chains, slings, and drum clamps for wear, bent components, cracked welds, or missing/illegible ID tags. Any suspect item is removed from service until a competent person inspects and clears it, and records are kept to prove compliance and traceability over the life of the gear as outlined in inspection best practices.
| Item | Typical Regulatory Requirement | Operational Impact |
|---|---|---|
| SWL marking on lifting gear | Visible SWL; special marking for >4.54 t capacity | Prevents planning a lift above rated capacity when deciding how to lift a barrel. |
| Load weight marking | Loads above ~0.91 t must have weight marked | Lets planners compare real barrel mass vs SWL without guessing. |
| Proof load test (new/after repair) | Test at 110–125% of SWL | Confirms structural integrity before barrels go over people or equipment. |
| Periodic proof test (large gear) | Roughly every 4 years | Detects fatigue or damage before catastrophic failure. |
| Daily pre‑use inspection | Visual and functional checks every shift | Catches wear, bent hooks, damaged clamps before a lift starts. |
- Rule: Always use the lowest SWL in the chain: Hook, sling, clamp, hoist and support must all be checked – the weakest link controls the safe load.
- Rule: Never guess barrel weight: Use documentation, weigh scales, or conservative estimates – guessing leads to overload and dropped drums.
- Rule: Keep inspection records: Tag gear with next inspection due date – improves compliance and prevents forgotten checks.
💡 Field Engineer’s Note: In cold stores below 0°C, chain and hook steel stays strong but hydraulic oil thickens. Always verify lifting devices and drum clamps operate smoothly at low temperature; slow or jerky motion is a red flag to stop and investigate before lifting a full 200 L barrel.
How SWL and proof load apply to drum lifters
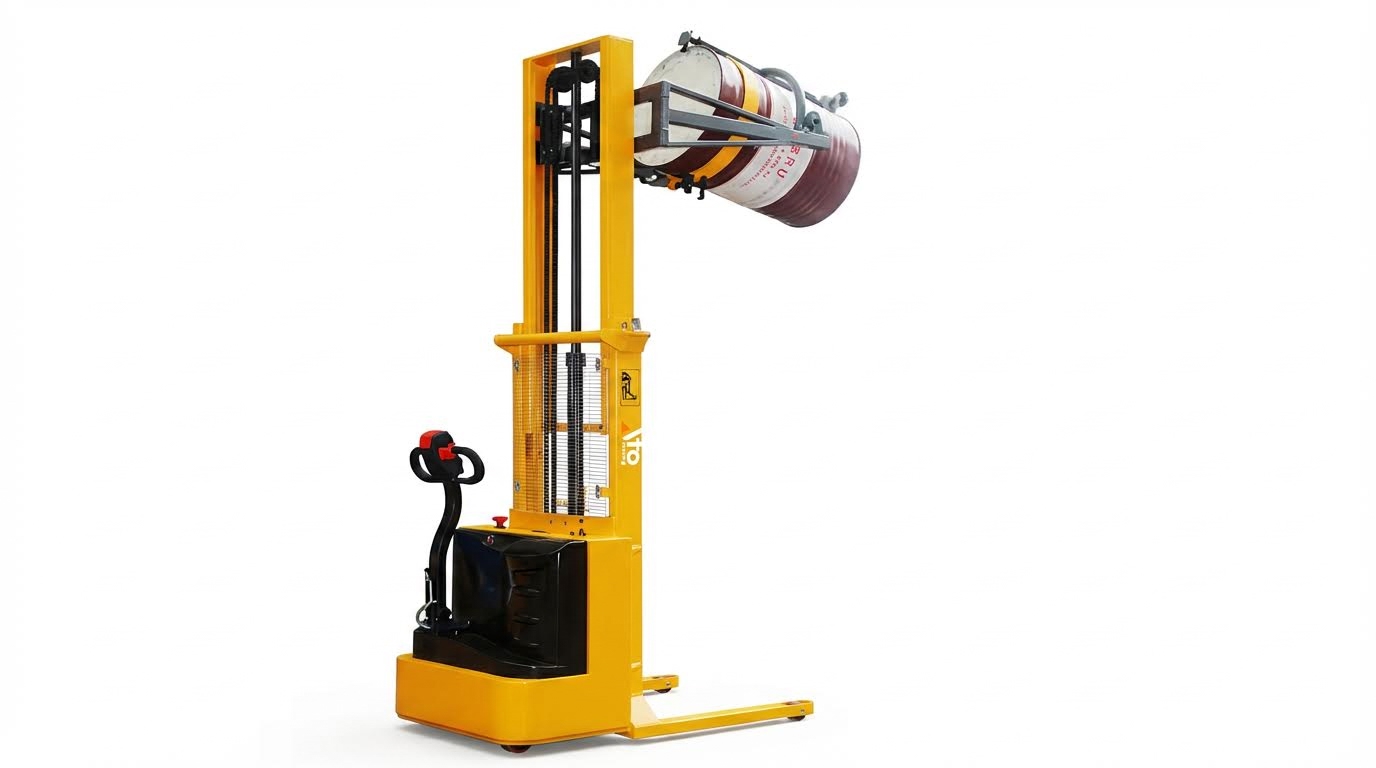
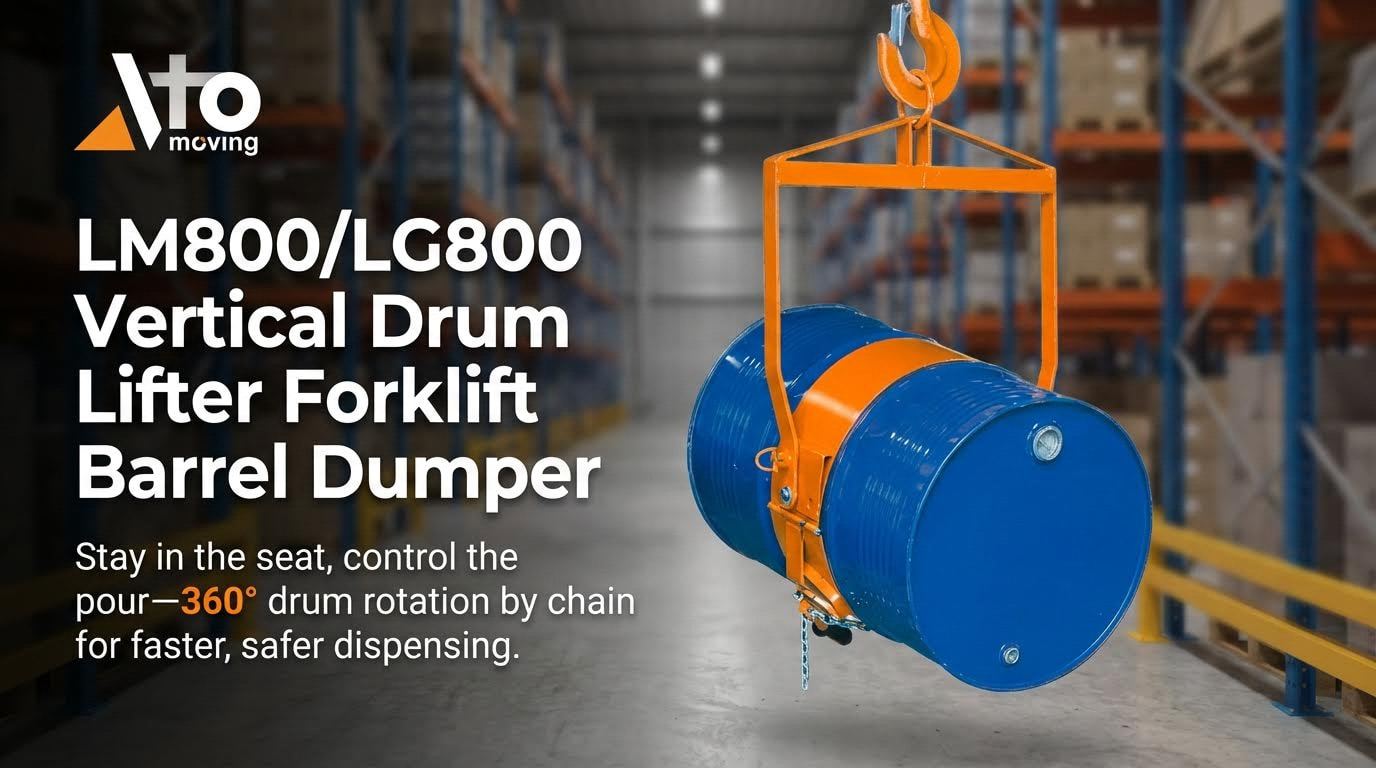
For chain drum lifters, select a unit whose rated capacity exceeds the heaviest drum you plan to handle, including contents and any residue. Some designs include three‑point chains or clamps to stabilise the drum shell, but only one point is used as the primary lifting connection, so that connection’s SWL governs the lift. Regular inspections check chains, hooks and clamps for corrosion, cracks or elongation before the lifter is certified for continued use, and test loads below the rated capacity verify smooth operation in service as outlined in supplier guidance.
Risk assessment of load, route and environment
Risk assessment of the load, route, and environment turns “how to lift a barrel” into a controlled plan instead of a guess. You analyse the drum, the path it travels, and the conditions around it before any lift starts.
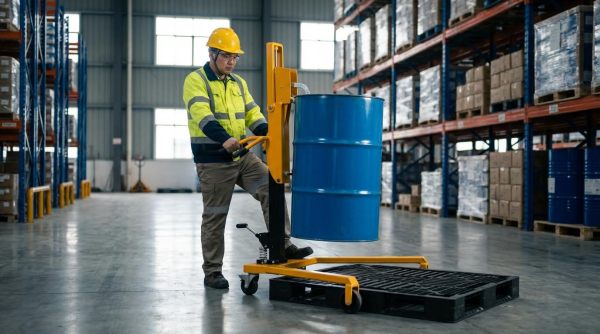
A proper assessment begins with the barrel itself: mass (kg), fill level, internal contents, shape, and centre of gravity. A 200 L steel drum filled with liquid may have a high, mobile centre of gravity that shifts as it tilts, while a partially filled plastic barrel can “slosh” and destabilise a clamp if accelerated too quickly. Planners also consider whether the drum is dented, corroded, or out‑of‑round, which can affect clamp grip or sling seating. If manual handling would expose workers to high musculoskeletal risk, mechanical aids such as hoists, drum lifters or forklifts are mandated instead of single‑person lifts according to risk assessment guidance.
The route is then mapped from pickup point to set‑down point. You verify floor condition (dry, level, free of holes), gradients, doorway clearances, overhead obstructions, and crossing traffic. Poor lighting, wet floors, or tight turns near pedestrians can make an otherwise safe lift unacceptable until controls are added or the route is redesigned. Environmental factors like outdoor weather, wind, or chemicals in the area also matter, especially for flammable or corrosive contents. If the assessment finds any “red flag” condition that cannot be mitigated, lifting is postponed until the hazard is removed or controlled.
- Check the load: Confirm drum type, mass, fill level, and condition – prevents surprises like leaking or deforming barrels mid‑lift.
- Check the route: Walk the path, remove obstacles, and measure tight spots – avoids getting stuck with a suspended drum over people or equipment.
- Check the environment: Assess lighting, floor friction, wind, and nearby traffic – reduces slip, trip, and collision risks during the lift.
- Decide on manual vs mechanical: Use mechanical aids where weight or repetition is high – cuts long‑term injury rates and improves consistency.
Example: Simple barrel lifting risk checklist
A quick on‑site checklist for a single‑drum lift might ask: Is the drum labelled and undamaged? Is the weight known and within the planned equipment SWL? Is the drum full, part‑full, or empty? Is the chosen clamp or strap compatible with the drum material and diameter (for example, up to about 1,500 mm diameter and 900 mm width for many lifters) as indicated by product ranges? Is the floor dry, level, and clear along the whole route? Are pedestrians kept out of the area? Only when all answers are satisfactory does the lift proceed.
💡 Field Engineer’s Note: On sloped floors, even a 2–3% gradient can cause a suspended 200 L drum to “swing away” when you stop a hoist or truck. Always factor gradients into your plan, and if in doubt, re‑route or use tag lines and lower travel speeds to keep the drum under control.
Training, exclusion zones and communication
Training, exclusion zones, and clear communication keep people out of harm’s way once the lift begins. Even perfect equipment and planning fail if untrained workers walk under a suspended barrel or misread a signal.
Regulations require that anyone planning, rigging, or operating lifting devices is trained and competent. Training covers SWL concepts, basic rigging and sling angle effects, correct use of drum clamps and tag lines, and emergency procedures such as stop signals and load‑lowering in a fault condition. Manual handling training is provided for light or empty barrels, focusing on posture, using leg power, and team‑lift coordination where permitted. Competence is usually demonstrated through practical assessments and refreshed at intervals, with training certificates, inspection reports, and incident records kept as documentation of control measures as described in training requirements.
Exclusion zones are physical or marked areas around the lifting operation where only essential personnel may enter. Barriers, floor markings, and spotters keep bystanders away from drop zones and swing paths. Communication protocols define who acts as the signaler, what hand signals or radio codes are used, and how an emergency stop is called. For many facilities, “no person under a suspended load” is a non‑negotiable rule, regardless of how small or routine the lift appears.
- Training: Cover SWL, rigging basics, tag line use, and emergency stops – ensures operators understand both limits and reactions.
- Competence checks: Use practical tests and refreshers – prevents skill fade in low‑frequency lifting tasks.
- Exclusion zones: Mark and enforce areas around the lift – keeps pedestrians and other operators out of drop zones.
- Communication: Assign a single signaler and standard signals – avoids conflicting instructions to the hoist or truck operator.
- Step 1: Brief the team – everyone must know the lifting plan, route, and roles before starting.
- Step 2: Set and mark the exclusion zone – prevents late arrivals from walking into the danger area mid‑lift.
- Step 3: Confirm communication method – hand signals or radios must be agreed to avoid confusion.
- Step 4: Execute the lift slowly – low speeds give time to react to sway, noise, or unexpected movement.
- Step 5: Debrief and record issues – small near‑misses today can prevent major incidents tomorrow.
💡 Field Engineer’s Note: In noisy production halls, hand signals alone often fail. I recommend a dual system: standardised hand signals plus radios or wired headsets for the signaler and operator, especially when moving drums through blind corners or between tall racks.
How this ties back to manual lifting
Even when you lift a barrel manually, the same principles apply. Manual handling training defines when a single person may tilt or roll a light drum and when a two‑person team or mechanical aid is mandatory. Exclusion zones keep others away from rolling paths or tipping points. Clear calls like “tilting now” or “rolling” act as simple communication protocols so team members synchronise their effort and keep fingers and feet clear of pinch points as emphasised in manual handling guidance.
Mechanical Aids, Straps And Drum Lifters Explained
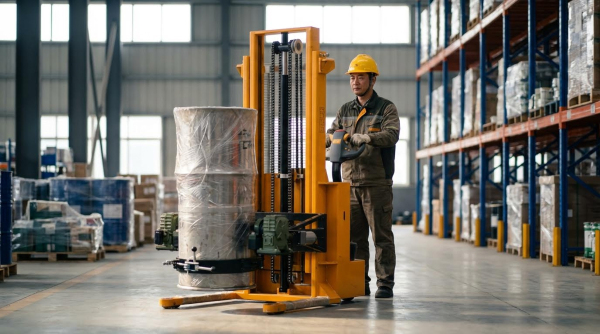
This section explains how to lift a barrel safely using mechanical aids, drum stacker, and correctly rigged straps so you minimise manual strain and keep loads under controlled, known limits in real operations.
💡 Field Engineer’s Note: When you introduce any new drum lifter, run a few trial lifts at 50–70% of the expected drum mass. This exposes issues with clamp position, sling angle, and floor flatness before you risk a full 200L drum over live production staff.
Types of mechanical aids for drum lifting
Mechanical aids for how to lift a barrel fall into hoists, dedicated drum lifters/clamps, forklift attachments, and automated systems, each chosen around drum mass, route, and duty cycle.
All of these devices aim to move the effort from the operator’s spine into steel, hydraulics, or electric motors, while keeping forces within the Safe Working Load (SWL) of each component. They must be selected and used under lifting regulations such as OSHA, LOLER, PUWER, and ISO rules that require secure loads, visible SWL markings, and proof testing before use. Regulatory standards for barrel lifting
| Mechanical Aid Type | Typical Use Case | Key Advantages | Main Limitations | Operational Impact / Best For… |
|---|---|---|---|---|
| Manual chain hoist | Vertical lifting of single drums up to typical hoist SWL | Fine height control, no electricity, low cost | Slow; operator effort; fixed to one beam point | Best for occasional lifts over a decanting point with good overhead structure |
| Lever hoist | Short lifts or pulling drums sideways into position | Works in tight spaces; good for tensioning | Limited lift height; manual effort | Best for pulling a drum onto pallets or aligning under a chute |
| Dedicated drum lifter / clamp | Gripping rim or body of 200L (55-gallon) drums | Consistent grip geometry; quick connect/disconnect | Usually for standard drum sizes only | Best for repetitive production work where drum size is standardised |
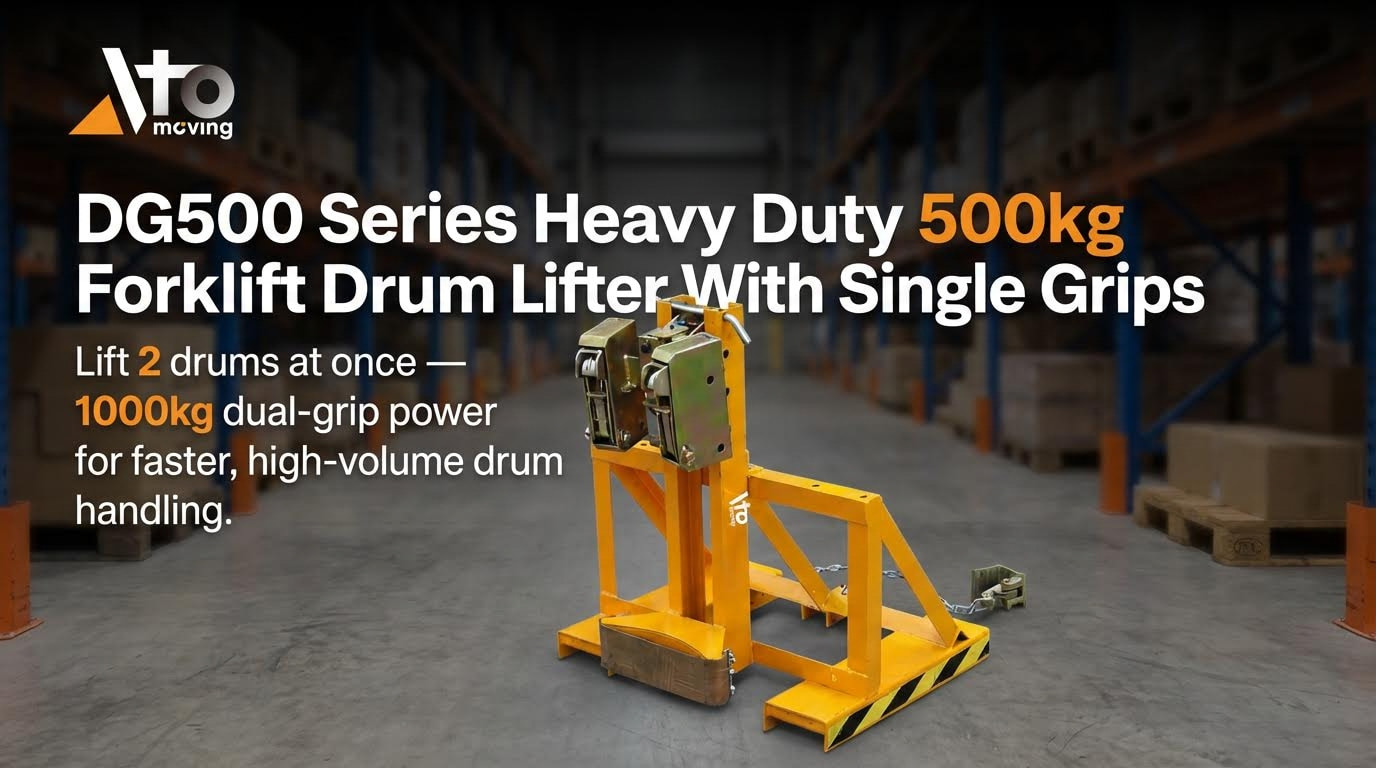
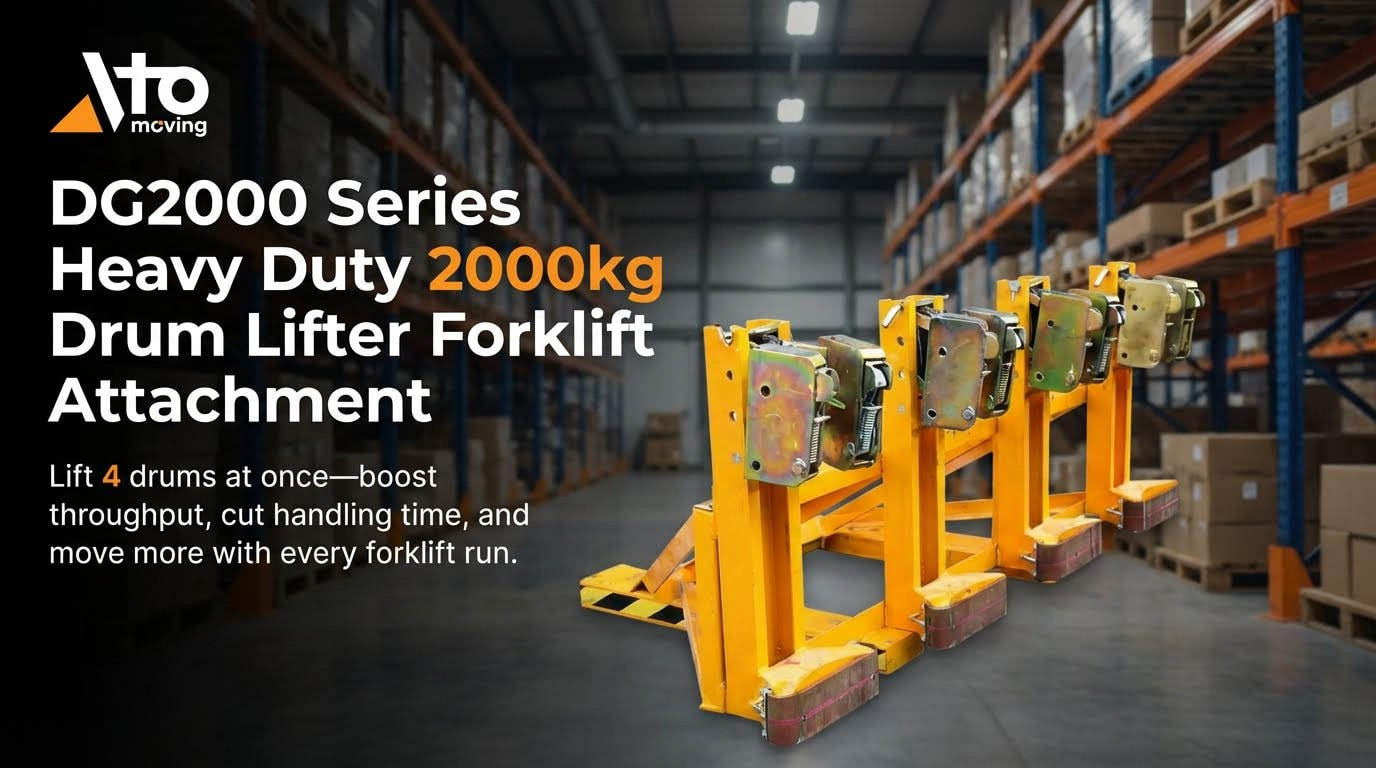
| Forklift drum attachment | Bulk handling of multiple drums in warehouses | High throughput; integrates with existing forklifts | Needs trained driver; checks on residual forklift capacity | Best for high-volume moves between storage and loading bays |
| Automated drum handler (cobot / AGV) | Programmed routes and repetitive transfers | Reduces human exposure to crush zones and strain | High capital cost; needs clear routes and maintenance | Best for predictable, high-frequency moves on fixed paths |
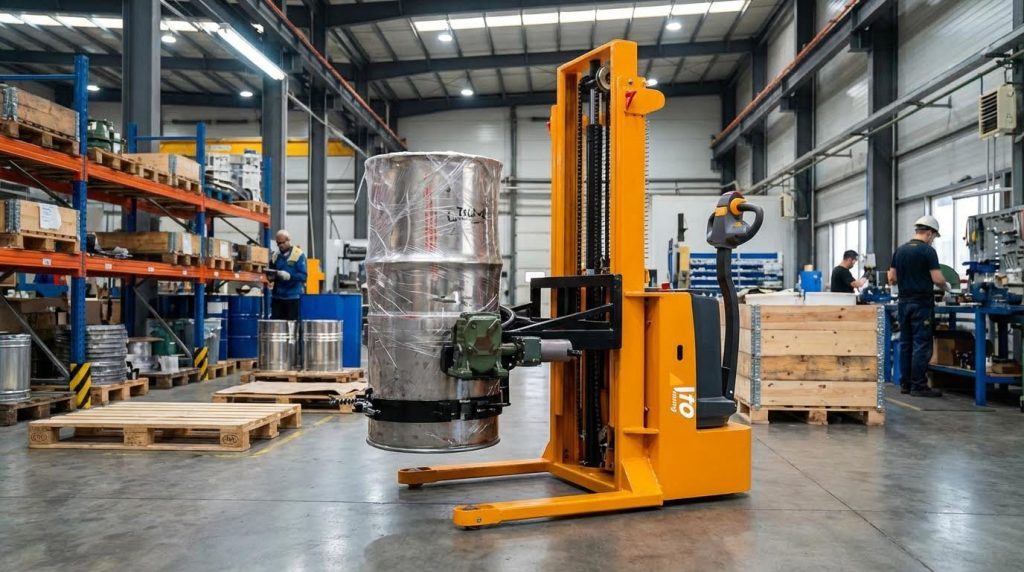
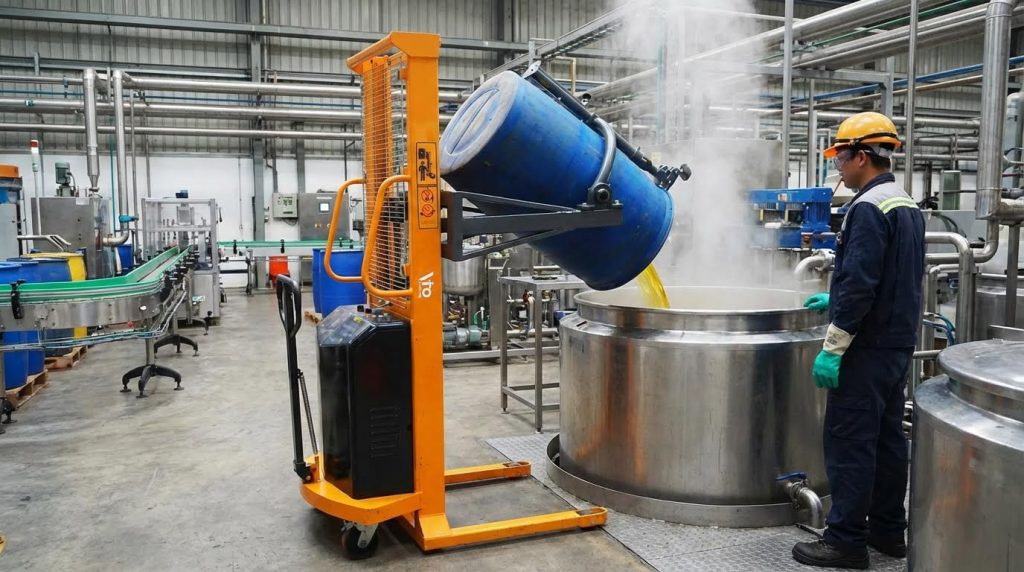
Mechanical aids such as hoists, electric drum stacker, and automated systems were shown to reduce manual strain and keep lifting forces within known limits when engineers sized them to the barrel mass, route, and duty cycle. Mechanical aids for barrel handling
How to choose between hoist, forklift attachment, and automation
Start with the heaviest full drum mass in kg, the number of moves per shift, and the narrowest aisle or doorway in mm. Hoists suit fixed points; forklifts suit variable routes; automation suits fixed, high-frequency loops where you can segregate people from machines.
Drum lifter design, capacity and duty cycle
Drum lifter design for how to lift a barrel safely revolves around rated capacity, gripping method, material choice, and duty cycle so the lifter never runs near its fatigue or overload limits.
Global rules require that equipment must not exceed its SWL, with ratings clearly marked and proof load tests carried out before first use and periodically, typically at 110–125% of SWL. Safe working load and proof testing Chain drum lifters are offered in several load capacities, so the selected model must exceed the maximum filled drum mass plus any extra from stuck lids or residual product.
| Design Aspect | Typical Options / Data | Engineering Consideration | Operational Impact |
|---|---|---|---|
| Rated load capacity | Ranges sized to common drum masses (e.g., up to several hundred kg) | SWL must exceed heaviest filled drum; proof tested at 110–125% of SWL | Prevents overload when product density varies between batches |
| Lifting height | Commonly 1–3 “sections” of lift for chain drum lifters | Must cover highest rack level or tipping point with margin | Avoids mid-lift re-rigging and reduces time per move |
| Material | High tensile carbon steel; stainless steel for wet or corrosive areas | Stainless mitigates corrosion and maintains rating in wet or chemical plants | Best for washdown, outdoor yards, or chemical loading gantries |
| Grip configuration | Rim clamps, body clamps, or three-point chains | Grip must match drum diameter and wall strength | Reduces risk of slippage or crushing thin-wall drums |
| Power source | Manual, electric, hydraulic, or mechanical with pulleys | Electric suits indoor, dry; hydraulic/mechanical for outdoor or wet | Aligns with available utilities and avoids electrical failure risks |
Drum lifters were typically made from metal with hooks and clamps in high tensile steel, while stainless steel versions were recommended in wet environments for corrosion resistance. Material and durability of drum lifters Chain designs often used three attachment points around the drum to stabilise it, but only one point was used for the actual lifting connection to the hook so that load paths were predictable. Chain and hook design
- Capacity selection: Choose a lifter whose SWL clearly exceeds the maximum drum mass – this gives margin for product density changes and stuck bungs.
- Environment match: Use stainless or protected finishes in wet or corrosive areas – this preserves SWL over the life of the equipment.
- Inspection and lubrication: Inspect chains, hooks, and clamps before each use and lubricate moving parts – this prevents sudden failure from wear or seized pivots.
- Storage and testing: Store lifters dry and test with controlled loads below SWL after maintenance – this confirms correct function before returning to service.
Regular inspections were recommended to catch corroded or weak chains, damaged hooks, or unusual noises, and worn parts had to be replaced following manufacturer guidance. Inspection and replacement of worn parts
Duty cycle and overheating considerations
Electric drum lifters in busy warehouses may run dozens of cycles per hour. Check the motor’s duty rating and allow cool-down periods if specified, otherwise you risk overheating, nuisance trips, or reduced motor life. Hydraulic units need temperature and leak checks under high cycle rates.
Strap, sling and rigging geometry for barrels
Straps, slings, and rigging geometry control how to lift a barrel without overloading sling legs or crushing the drum wall, by keeping sling angles favourable and contact areas compatible with the barrel surface.
Correct sling selection was described as critical for safe barrel lifting. Web slings were used for painted or stainless barrels to avoid surface damage, while chain or wire rope slings suited rugged steel drums, and dedicated drum lifting straps were preferred for repeat work. Strap and sling selection criteria
| Rigging Element | Best With | Key Rule | Operational Impact / Best For… |
|---|---|---|---|
| Web sling (polyester/nylon) | Painted or stainless drums | Avoid sharp edges; use corner protectors | Best for cosmetic-critical drums where scratches are unacceptable |
| Chain sling | Rugged steel drums | Check each link; avoid wrapping directly over thin walls | Best in heavy industry and high-temperature areas |
| Wire rope sling | Steel drums and outdoor yards | Inspect for broken wires and kinks | Best for long-life outdoor use with abrasion |
| Dedicated drum strap / clamp | Standard 200L drums | Follow rated diameter range and orientation | Best for repetitive production lines with fixed drum type |
| Tag line | Any suspended drum | Operator holds line outside drop zone | Best for controlling swing without standing under the load |
Guidance from the same source noted that sling angles should exceed 60° to the horizontal to keep leg tension low, which in practice means lifting from above with relatively steep legs rather than wide, flat angles. Tag lines were used so workers could steer drums without entering the fall zone. Sling angles and tag line use
- Pre-use inspection: Check slings for cuts, burns, broken wires, or missing tags – this removes weak links before they see full drum loads.
- Angle control: Keep sling legs as vertical as practical, ideally above 60° to horizontal – this reduces tension and avoids hidden overloads.
- Drum protection: Use softeners or web slings on thin or coated drums – this prevents local crushing and coating damage.
- Clear zones: Use tag lines and enforce exclusion zones – this keeps people out from under swinging or rotating drums.
Simple field check for sling angle
If the distance between the hook and the top of the drum is similar to or greater than half the distance between sling feet, your angle is usually steeper than 60°. If the hook is very low and wide, tension rises sharply and you should re-rig.
Selecting Techniques And Equipment For Your Facility
Choosing how to lift a barrel in your facility starts with the barrel, then the route, then your people. Match equipment and method to mass, contents, layout, and local manual handling limits.
- Start with risk: Confirm barrel mass, centre of gravity and route hazards – prevents choosing gear that cannot safely control the load.
- Respect SWL: Keep all gear within its safe working load and proof‑tested status – avoids structural failure under dynamic loads.
- Prioritise mechanical aids: Use hoists, drum stackers or trucks for full barrels – cuts musculoskeletal risk for operators.
- Fit to environment: Select manual, electric or hydraulic lifters to suit power, moisture and explosion risks – maintains reliability and compliance.
- Plan for duty cycle: Size equipment and automation for daily lift counts – prevents overheating, wear and unplanned downtime.
💡 Field Engineer’s Note: When in doubt between two drum lifter capacities, step up a size. Real-world factors like off‑centre loads, sticky floor spots and occasional shock loading often push equipment closer to its limits than the risk assessment suggests.
Matching method to barrel type and fill condition
Matching how to lift a barrel to its type and fill condition prevents loss of control, leaks and overloading of people or equipment.
| Barrel / Fill Condition | Typical Mass Range | Recommended Lifting Method | Key Controls | Operational Impact |
|---|---|---|---|---|
| Empty plastic drum (200L) | 5–10 kg | Manual tilt / roll | Manual handling training and clear route | Fast movement; only for short distances and good floors |
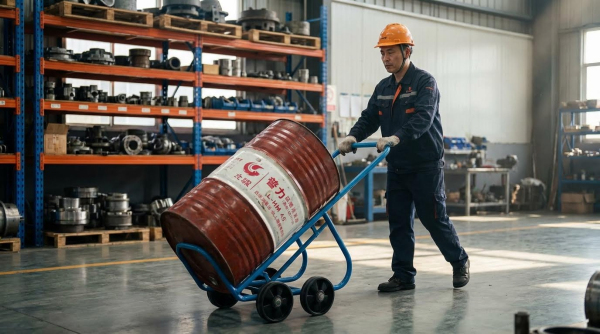
| Empty steel drum (200L) | 15–20 kg | Team tilt or small drum truck | Gloves, good grip points, no stacking above waist | Reduces back strain; suitable for low volumes |
| Full 200L liquid drum | 180–250 kg | Drum lifter, clamp or forklift attachment | SWL check, secure clamp on rim/body, tag line use | Controls swinging; suitable for frequent transfers |
| Full viscous / sludgy contents | Up to 300 kg | Higher-capacity drum lifter or hoist system | Allow for shifting centre of gravity and surge | Prevents tip-over when contents move suddenly |
| Damaged or deformed drum | Variable | Cradle, pallet or cage lift | No rim-only clamps; use containment pallets | Reduces leak and drop risk during salvage moves |
Mechanical aids such as hoists, drum clamps and forklift attachments are selected first on barrel mass and contents, then on how often you lift them. Engineers check that lifter capacity exceeds the actual load and that gripping pads are compatible with metallic drums and standard diameters up to about 1 520 mm, with widths up to about 915 mm according to typical drum lifter specifications.
- Light or empty drums: Use manual tilting and rolling only within local manual handling limits – keeps strain within acceptable ergonomic ranges.
- Standard full drums (200L / 55‑gal): Use chain or mechanical drum lifters with rated capacity above the drum mass – ensures SWL compliance and grip stability.
- Hazardous or volatile contents: Use drum lifters that minimise impact and avoid sparks – reduces fire and spill risk.
- High-volume operations: Consider electric or hydraulic drum lifters and dedicated clamps – supports higher throughput with consistent geometry.
How to confirm the right method for a new product
Weigh a representative full drum, check any special labelling (corrosive, flammable, food grade), then trial the planned lifting method under supervision. If the drum deforms, slips, or swings excessively, upgrade to a cradle or higher‑capacity lifter before releasing the method for routine use.
Environment, layout and traffic constraints
Fitting how to lift a barrel to your environment, layout and traffic pattern prevents collisions, snags and uncontrolled swings during travel.
| Facility Condition | Preferred Equipment Type | Why It Fits | Operational Impact |
|---|---|---|---|
| Narrow aisles (<2.0 m) | Compact manual or electric drum lifter | Small footprint and tight turning radius | Allows lifting without re‑racking or major layout changes |
| Wet or corrosive areas | Stainless or hydraulic drum lifter | Resists corrosion and avoids electrical faults | Maintains reliability and reduces shock risk |
| Outdoor yards | Hydraulic or mechanical lifter | No dependence on clean, dry power supplies | Handles uneven surfaces better than small wheels |
| High traffic crossings | Hoist with fixed route and exclusion zone | Separates pedestrians and loads vertically | Reduces interaction between forklifts and walkers |
| High-bay storage | Crane or reach truck with drum clamp | Provides vertical reach and controlled rotation | Improves storage density while keeping drums stable |
Electric chain drum lifters suit indoor applications with reliable power, while hydraulic or mechanical lifters are often preferable in wet or outdoor environments where electrical components can fail due to moisture and contamination. Portable lifters help when you have transient lifting points, while larger mechanical units suit permanent stations.
- Floor condition: Check for slopes, drains and broken concrete – small castors on drum lifters struggle on rough or sloped floors.
- Door and ceiling heights: Confirm that the combined height of lifter plus drum clears door frames and lighting – prevents impacts and drum puncture.
- Traffic flows: Map forklift and pedestrian routes around lifting points – defines safe exclusion zones around suspended drums.
- Power availability: Decide between manual, electric or hydraulic based on outlets, battery charging and hazardous area zoning – avoids improvised extensions and non‑compliant gear.
Using hoists vs forklifts in tight layouts
In congested plants, a small overhead hoist with a drum lifter often beats forklifts. The hoist keeps the load on a fixed path and frees floor space, while forklifts need turning room and add traffic complexity. However, hoists require structure strong enough for proof load testing and clear marking of SWL.
Manual handling limits and ergonomic controls
Defining manual handling limits and ergonomic controls for how to lift a barrel protects workers from chronic back and shoulder injuries.
Manual handling is restricted to empty or light barrels. Techniques such as standing close, bending at hips and knees, and using leg drive to rock a light drum to its balance point reduce strain but do not change the fundamental weight limit described in manual handling guidance. Full barrels exceeding local weight limits, stacked drums, or routes with poor conditions require mechanical aids.
- Set weight thresholds: Define maximum manual barrel weights (often <25 kg per person) – removes guesswork on when to fetch a lifter.
- Use team lifts only as backup: Reserve two‑person lifts for occasional light barrels – minimises coordination errors and uneven load sharing.
- Train safe postures: Teach close stance, neutral spine and leg drive – reduces peak spinal loading during tilting and rolling.
- Rotate tasks: Rotate staff between lifting, driving and paperwork – cuts repetitive strain from continuous barrel work.
- Ban manual lifting of full drums: Require mechanical aids for any full 200L drum – aligns with typical ergonomic and regulatory expectations.
Regulations and guidance emphasise that when manual handling poses high musculoskeletal risk, facilities must implement mechanical aids and redesign routes before lifting starts as part of the formal risk assessment process. Training and competence checks ensure workers understand when to stop and request equipment instead of attempting an unsafe manual move.
Practical checklist before allowing manual barrel handling
Confirm the barrel mass is within your written limit, the route is short and flat, the floor is dry, and the operator has current manual handling training. If any condition fails, switch to a drum truck, lifter or hoist method and update the task risk assessment accordingly.

Final Thoughts On Safe Barrel Handling Strategy
Safe heavy barrel handling depends on one joined-up system, not a single clever tool. Regulations, equipment ratings, rigging geometry, and human factors must all point in the same direction. When you respect the lowest SWL in the chain, prove your gear with testing, and inspect it before use, you control structural risk instead of relying on luck.
Good risk assessment then turns that capability into a safe plan. You match lifters, clamps, and straps to real drum mass, contents, and route. You design sling angles that keep tensions low and use tag lines and exclusion zones so no one stands under or near a swinging load. You push full drums onto mechanical aids and keep manual work for light, well-controlled tasks only.
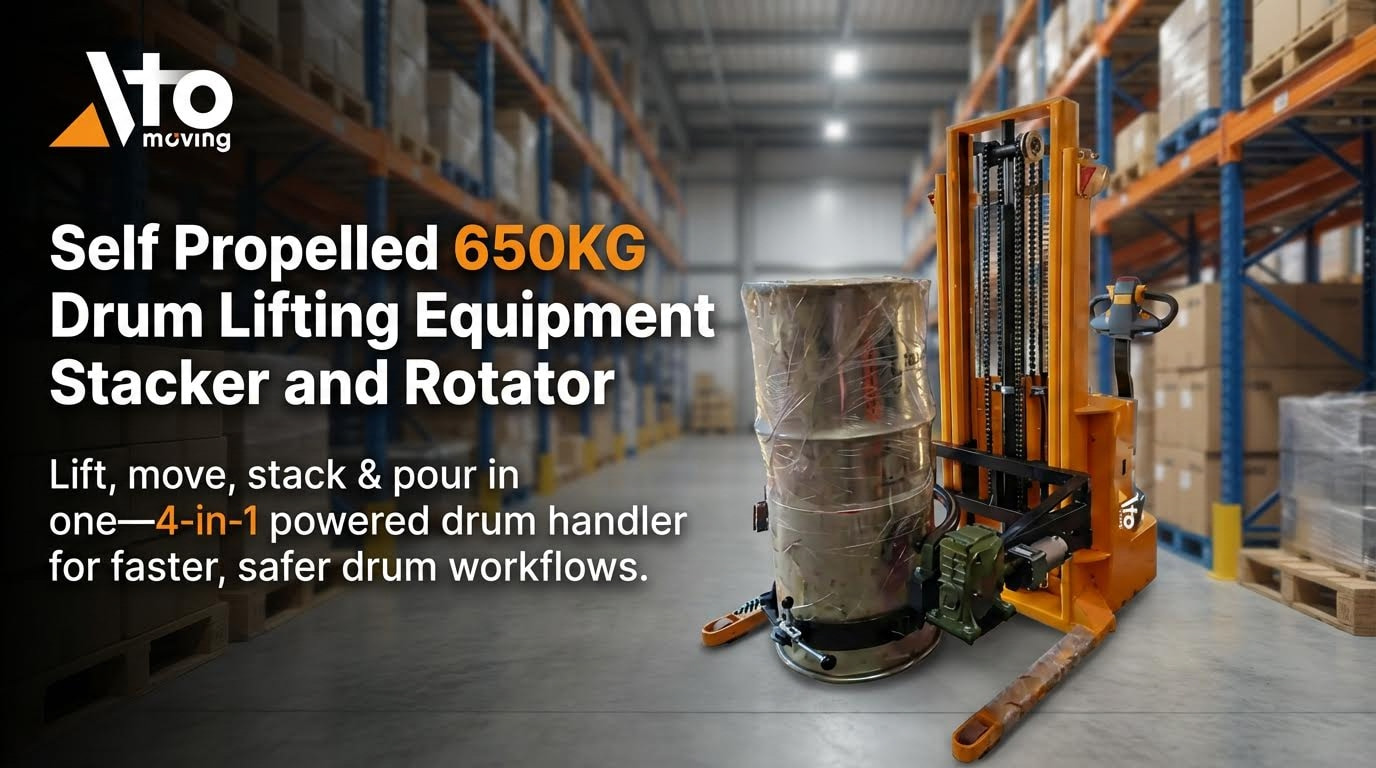
Operations and engineering teams should formalise this into a site standard. Define weight thresholds, approved equipment by area, and clear “no-go” rules for manual lifts. Train and re-check competence, and record inspections and near-misses. When you add new lines or products, review the handling method before the first full drum moves. Follow these steps and brands like Atomoving can supply equipment into a framework that already protects your people, product, and plant.
Frequently Asked Questions
What is a barrel lifter?
A barrel lifter is a specialized piece of material handling equipment designed to lift drums or barrels safely and efficiently. This counterbalance barrel lifter with extended long reach allows operators to lift drums in and out of storage cabinets and process machinery. Barrel Lifter Guide.
How to lift a barrel with rope?
To lift a barrel with rope, start by standing the barrel on the lifting rope. Tie an Overhand Knot across the top and spread the knot until it embraces the top of the barrel. Join the ends with a Bowline knot and lift carefully. Barrel Hitch Tutorial.
How to lift extremely heavy objects like barrels safely?
When lifting heavy objects such as barrels, always get as close to the load as possible. Keep your back straight by tightening your stomach muscles and bending at the knees. Ensure the load is close and centered in front of you, and avoid twisting while lifting. Lifting Safety Tips.